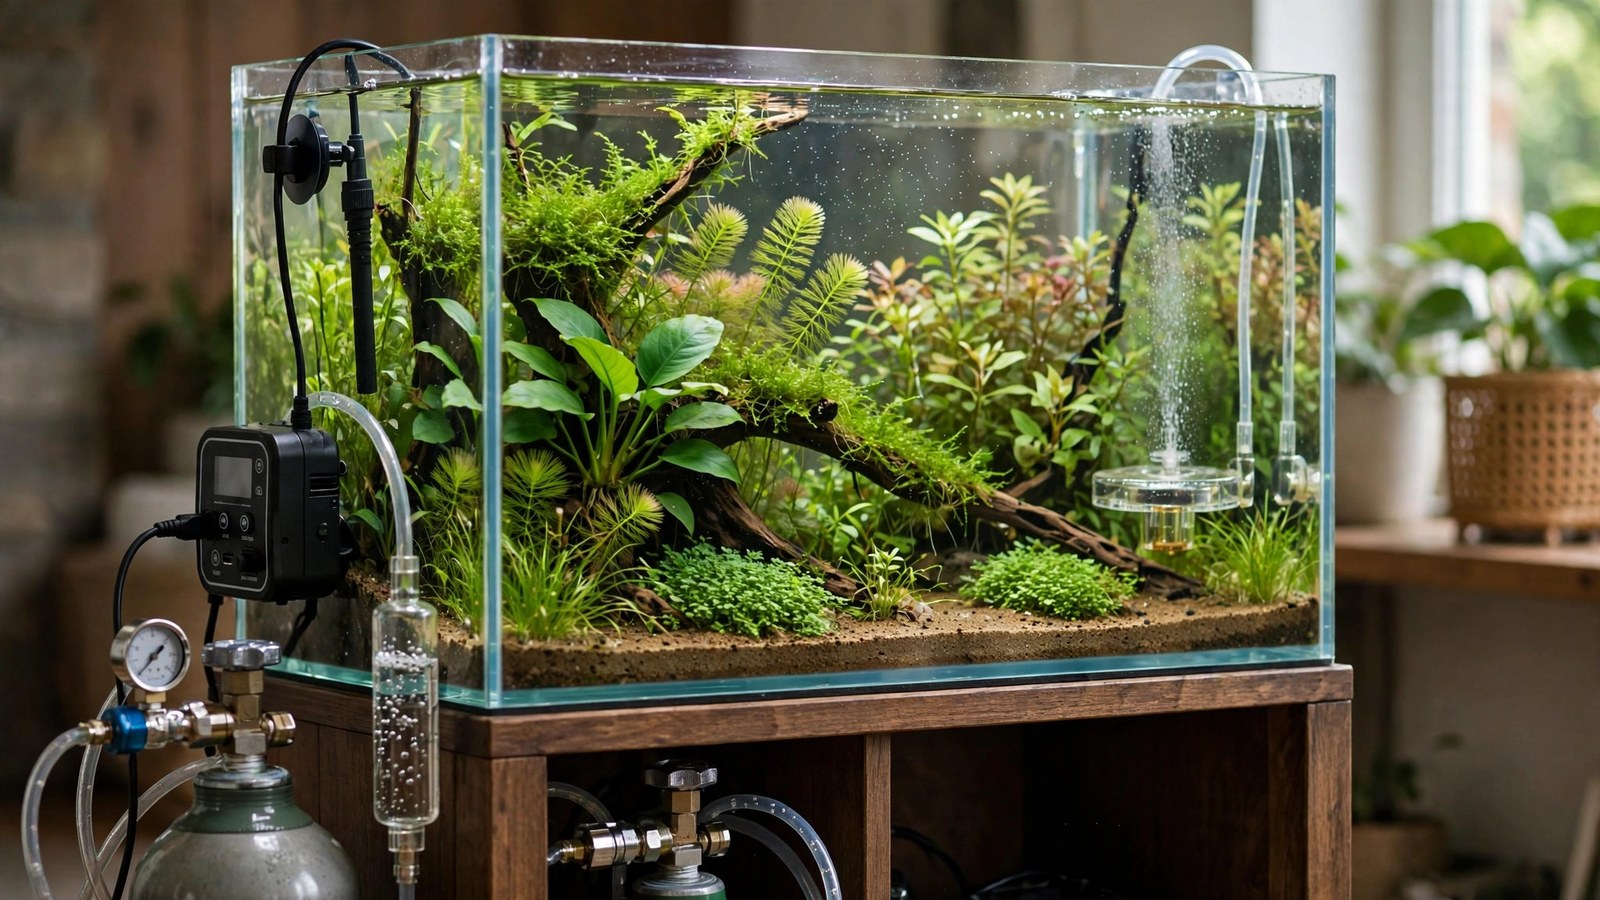
A pH controller is the autopilot of CO2 systems: a probe sits in your tank, and when pH rises above your setpoint, the controller opens the solenoid; when pH drops to target, it closes it. In theory, perfect CO2 forever with no manual tuning. In practice, it's a powerful tool with real failure modes you must understand before trusting your livestock to it. This is the complete pH controller setup guide for CO2 — what it does, how to set it up, and how to not kill your fish with it.
How a pH Controller Actually Works
Dissolved CO2 forms carbonic acid in water, lowering pH. The relationship is predictable: for a given carbonate hardness (KH), a specific pH corresponds to a specific CO2 concentration — this is the well-known pH/KH/CO2 chart. A pH controller exploits this: you set a target pH, and the controller switches your solenoid on and off to hold it.
Example: with KH 4, a pH of ~6.6 corresponds to roughly 30 ppm CO2. Set the controller to 6.6, and it will pulse the solenoid to maintain that pH — and therefore that CO2 level — regardless of temperature, plant mass changes, or surface agitation variations. That's the promise: set-and-forget CO2 concentration. Tropica publishes the same pH/KH/CO2 relationship in its fertiliser and CO2 guide, including recommended concentrations by plant difficulty — a good cross-reference when choosing your target.
What pH Controllers Are Good For
- Automatic compensation — as plant mass grows over months, CO2 demand rises; the controller increases injection automatically instead of you noticing pale growth and re-tuning.
- Protection against overdosing — if something pushes CO2 too high, the controller shuts the solenoid off. It's a safety net for the daytime window.
- Consistency — holds pH (and thus CO2) steadier than a fixed bubble rate through daily variations.
- Large or complex tanks — where manual tuning is slow and the stakes (expensive livestock, big plant investment) justify the equipment.
The Limitations Nobody Puts on the Box
It measures pH, not CO2
This is the fundamental caveat. The controller infers CO2 from pH, but anything else that affects pH corrupts the inference: driftwood tannins, peat, pH-altering substrates (aquasoils drop pH significantly), phosphate buffers, and even heavy biofilm on the probe. If your aquasoil pulls pH down to 6.2 on its own, the controller thinks CO2 is high and withholds gas your plants need — or conversely, alkaline rocks can mask real CO2 and cause overdosing.
Probe drift and failure
pH probes drift as they age and foul. A probe reading 0.3 pH units high makes the controller inject until the real pH is 0.3 lower than intended — potentially pushing CO2 from 30 ppm toward 60+. Probes need monthly calibration with buffer solutions and replacement every 12–24 months. A controller is only as honest as its probe.
It doesn't replace timing
The controller manages concentration, not schedule. Left powered 24/7, it will dutifully hold your pH target all night — injecting CO2 while nothing photosynthesizes. Always put the controller (or the solenoid circuit) on a timer so it only operates during the CO2 window (see CO2 timing). The timer defines when; the controller defines how much.
Oscillation and solenoid wear
Cheap controllers with tight hysteresis (the gap between on/off trigger points) can chatter the solenoid on and off every minute, wearing it out and creating pH micro-swings. Set a reasonable hysteresis (0.05–0.1 pH) and verify the solenoid isn't rapid-cycling.
Step-by-Step Setup
- Calibrate the probe first. Use fresh pH 7.0 and pH 4.0 (or 10.0) buffer solutions, following the controller's procedure. Rinse the probe in distilled water between buffers. Never calibrate with tank water or expired buffers.
- Measure your tank's KH accurately with a liquid test kit. The pH target depends entirely on KH — wrong KH, wrong target, wrong CO2.
- Determine the pH target from the pH/KH/CO2 chart for ~25–30 ppm CO2. Reference points: at KH 3, target ≈ pH 6.5; at KH 4, ≈ pH 6.6; at KH 5, ≈ pH 6.7; at KH 6, ≈ pH 6.8. (Roughly: target pH ≈ 6.1 + log10(KH) for 30 ppm — but use a published chart rather than mental math.)
- Adjust for your substrate. If you run aquasoil or other pH-lowering substrate, the chart overestimates CO2 — your real CO2 at a given pH is lower than the chart says. In this case, use a drop checker as the ground truth and set the controller's pH target to whatever pH corresponds to a green checker, rather than trusting the chart blindly.
- Set a conservative initial target — 0.1–0.2 pH higher (less CO2) than your calculated target. Run for 2–3 days, confirm with the drop checker, then creep toward the real target.
- Wire: wall → timer → controller → solenoid. The timer powers the controller only during the CO2 window; the controller switches the solenoid within that window.
- Set the bubble rate sensibly. The controller can only reduce injection by cycling off — it can't inject more than the needle valve allows. Set the bubble rate to roughly what you'd run without a controller, maybe slightly higher; the controller will trim from there. A wildly excessive bubble rate makes the controller slam on/off constantly.
- Set hysteresis to 0.05–0.1 pH and observe the solenoid's cycling rhythm — a few cycles per hour is fine; every minute is not.
Calibration and Maintenance Schedule
- Monthly: two-point probe calibration with fresh buffers. Log the readings — a probe that needs large corrections each month is dying.
- Monthly: gently clean the probe tip (soft toothbrush or probe-cleaning solution) to remove biofilm, which insulates the sensor and slows response.
- Quarterly: verify against an independent check — drop checker color and a liquid pH test kit. If the controller's displayed pH disagrees with the test kit by more than 0.1, recalibrate or replace the probe.
- Every 12–24 months: replace the probe. They have finite lifespans; an old probe is a liability, not a savings.
- Storage: never let the probe dry out — store in probe storage solution (not distilled water, which damages the reference junction over time).
Failure Modes and How to Survive Them
| Failure | What happens | Protection |
|---|---|---|
| Probe drifts high (reads pH too high) | Controller over-injects; CO2 climbs | Monthly calibration; drop checker as independent check; fish behavior as final alarm |
| Probe dries out / fails | Erratic readings; uncontrolled injection | Never let it dry; replace on schedule; timer still limits injection to daytime |
| Probe knocked out of water | Reads air (~pH 7+); controller injects continuously | Secure probe mounting; suction-cup it below the waterline where maintenance won't dislodge it |
| KH changes (water change with different KH) | pH target now means different CO2 | Keep water change water consistent; re-verify target after any source-water change |
| Solenoid sticks open | Continuous injection regardless of controller | Quality solenoid; the drop checker + fish are your backup alarms |
The through-line: a pH controller is one layer of control, not a substitute for observation. The drop checker and your fish are independent verification that the controller is telling the truth. If the checker is yellow while the controller insists everything is fine, believe the checker and investigate.
Do You Actually Need One?
Honest assessment:
- Skip it if: your tank is under 40 gallons, your bubble rate has been stable for months, and you check the drop checker regularly. A well-tuned manual system with a timer is simple, reliable, and has fewer failure modes.
- Consider it if: you run a large tank, travel frequently, have CO2 demand that shifts with heavy plant growth, or keep sensitive/expensive livestock where the overdose protection justifies the cost and maintenance.
- Don't buy it as a beginner shortcut: learning manual CO2 tuning first teaches you what the numbers mean. A beginner who doesn't understand the pH/KH relationship can't tell when the controller is lying.
Frequently Asked Questions
Will a pH controller prevent CO2 from harming my fish?
It helps during the day by capping injection at your pH target, but it's not a guarantee — probe drift, KH changes, or a stuck solenoid can all defeat it. It also does nothing about nighttime accumulation unless paired with a timer. Treat it as one safety layer among several: timer, drop checker, observation, and fish-safety practices.
My aquasoil lowers pH — can I still use a pH controller?
Yes, but don't trust the pH/KH chart for your target. Aquasoil's pH depression isn't from CO2, so the chart overestimates your CO2 at any given pH. Instead, tune manually to a green drop checker first, note the pH at that point, and set the controller to hold that pH. Recheck whenever you change substrate or do large water changes.
How often do pH probes really need replacing?
Plan on 12–18 months for continuous submersion in an aquarium. Signs of death: slow response (takes minutes to settle in buffer), large calibration corrections, or readings that wander. A probe past its life doesn't just read wrong — it reads confidently wrong, which is worse.
Can the controller run CO2 at night if I leave it on?
Yes, and that's the danger — it will hold your daytime pH target all night, injecting gas while plants respire instead of photosynthesizing. Always power the controller through a timer limited to the CO2 window. The timer is not optional with a pH controller; it's the night-shift safety.
What's a good hysteresis setting?
0.05–0.1 pH units. Tighter than 0.05 causes solenoid chatter (rapid on/off cycling that wears the valve); wider than 0.1 lets CO2 swing noticeably. Watch the solenoid for an hour after setup — a calm click every 15–30 minutes is healthy; buzzing every minute is not.
Is a pH controller better than just a timer and drop checker?
It's more automated, not necessarily better. Timer + drop checker + manual bubble-rate tuning is simpler, cheaper, has fewer failure modes, and teaches you the system. The controller earns its keep on large, complex, or frequently-unattended tanks where automatic compensation for changing demand matters. Most tanks under 50 gallons don't need one.
Autopilot With a Pilot Still in the Seat
A pH controller is excellent cruise control: it holds your CO2 steady through changing conditions and guards against daytime overdosing. But cruise control doesn't watch the road — monthly calibration, a timer for nights, a drop checker for truth, and your own eyes on the fish are the rest of the safety system. Set it up right, maintain the probe, and it's a genuine upgrade; set it and forget it entirely, and it's a liability with a display.
Tissue-culture plants are the exception — they’re grown in sterile gel and adapt with minimal melting, which is part of what you’re paying for. Plants bought submersed from another hobbyist’s tank also transition with little melt, since they’re already in the right form.
Which Plants Melt Most (and Least)
Heavy melters (expect significant leaf loss)
- Cryptocorynes — infamous for “crypt melt,” sometimes dropping every leaf after any disturbance. They almost always recover from the roots within weeks.
- Stem plants grown emersed — rotala, ludwigia, and hygrophila often shed lower emersed leaves while the growing tips transition.
- Amazon swords — emersed-grown swords typically lose their broad oval aerial leaves and replace them with longer submersed ribbon leaves.
Light melters
- Anubias, java fern, bucephalandra — slow-growing rhizome plants transition gradually; occasional old-leaf melt but rarely dramatic.
- Vallisneria — usually transitions well, though it dislikes the move itself and may sulk for a week.
- Floating plants — minimal melt since their leaves were already at the air-water interface.
The Acclimation Protocol
Step 1: Quarantine or dip first
Before acclimating to your tank’s conditions, make sure you’re not acclimating pests along with the plant. Run new arrivals through our quarantine and dip protocol — it adds days upfront but prevents months of regret.
Step 2: Float to temperature-match (30 minutes)
Float the bag or container in your tank for 20–30 minutes to equalize temperature. Plants are less temperature-sensitive than fish, but a 10°F shock on top of transplant stress is an avoidable insult.
Step 3: Trim before planting
Remove any leaves that are already damaged, yellowing, or heavily algae-covered — they won’t recover and they’ll rot in your tank, feeding algae. For stem plants, trim off the bottom inch and any emersed leaves that look unlikely to adapt; the plant wastes energy maintaining leaves it’s going to shed anyway. Keep the healthy growing tips — that’s where recovery starts.
Step 4: Plant correctly the first time
Follow our planting guide — right depth, crown exposed on rosettes, rhizomes unburied on epiphytes. Every uprooting and replanting restarts the acclimation clock, so get placement right on the first attempt. Decide where each plant goes before it goes in the water.
Step 5: Run a gentle first week
For the first 7 days after planting:
- Moderate light — run your normal photoperiod but consider dropping intensity 20–30% if your light is dimmable. Blast-level light on a melting plant grows algae on the dying leaves, not recovery.
- Stable CO2 — if you inject CO2, keep it consistent. Fluctuating CO2 during acclimation is a melt accelerator. If you’re low-tech, this doesn’t apply — see growing without CO2.
- Half-strength fertilizer — new plants with damaged leaves can’t use full dosing, and the excess feeds algae. Ramp to full strength over 2–3 weeks per our fertilizer schedule.
- No disturbance — don’t move, trim, or “check on” new plants for at least two weeks. Every touch resets root establishment. This is especially critical for crypts.
Step 6: Remove melt, keep the base
As emersed leaves melt, remove the mushy material promptly — decaying leaves release ammonia and grow fungus that can spread to healthy tissue. But never discard the plant while the crown, rhizome, or roots are firm and alive. A crypt that’s lost every leaf but has firm roots is a plant that’s about to recover, not a dead plant. Give it 3–4 weeks before judging.
Telling Normal Melt From Real Problems
Normal transition melt:
- Affects oldest/emersed leaves first, newest growth last
- New submersed leaves emerge even as old ones dissolve
- Roots and crown stay firm and white/green
- Timeline: 1–4 weeks, then obvious new growth
Concerning melt (see our full melting diagnosis guide):
- New growth also melts or emerges deformed
- Rhizome or crown turns mushy and brown — this is rot, not transition
- Entire plant dissolves within days with no new growth after 4+ weeks
- Melting spreads to established plants that weren’t recently moved
Buying Tips to Minimize Melt
- Buy submersed-grown when available — hobbyist-grown cuttings transition with almost no melt.
- Choose tissue culture for sensitive species — crypts and delicate stems establish far more reliably from sterile cups.
- Avoid plants already melting in the store tank — some melt is normal, but a plant that’s mostly mush at purchase has less energy for recovery.
- Transport carefully — keep plants damp and out of direct sun/heat. A plant that dries out or cooks in a hot car melts far worse than one transported properly.
The First-Month Timeline: What to Expect Week by Week
Knowing what’s normal when removes most acclimation anxiety. Here’s the typical timeline for a healthy plant adapting to a new tank:
Week 1: The quiet week
Almost nothing visible happens. The plant is growing roots you can’t see and assessing its new environment. Some species (vallisneria, stem plants) may start shedding their lowest leaves. This is normal. Resist the urge to “help” — no moving, no extra fertilizer, no light changes. The most common beginner mistake is intervening during a week when the correct action is nothing.
Week 2: Melt peaks
This is when emersed leaves give up in earnest. Crypts may drop everything; swords shed their broad aerial leaves; stem plants lose lower foliage. It looks catastrophic and it’s usually fine. Keep removing mushy material, keep conditions stable, and watch the crown and growing tips — if those are firm and green, recovery is already underway.
Week 3: The turn
New submersed-adapted leaves emerge — smaller, thinner, often a slightly different shade of green than the emersed foliage. Stem plant tips start growing visibly; crypts push tiny curled leaves from the crown; swords unfurl narrow ribbon leaves. This is the moment most beginners exhale for the first time.
Week 4+: Established
New growth outpaces melt, and the plant is functionally yours. You can resume full-strength fertilizer, normal trimming, and stop treating it as fragile. Some slow growers (anubias, bucephalandra) take 6–8 weeks to show obvious progress — that’s their normal speed, not a problem.
Acclimating Different Plant Formats
Tissue-culture cups
Sterile, pest-free, and already adapted to high-humidity (not emersed) growth — tissue cultures melt the least of any format. Rinse the agar gel off gently (leftover gel rots and feeds fungus), split the portion into small plantlets, and plant per our planting guide. They establish slowly for the first two weeks, then accelerate. No dip needed, minimal acclimation stress — this is the premium experience you’re paying for.
Potted plants
Remove the pot and strip away the rockwool completely — leftover rockwool traps debris and rots. Tease the root mass apart gently; if it’s a dense mat, splitting it into 2–3 smaller portions actually establishes faster than planting one big clump (more growing points, better water flow around roots). Potted plants are usually emersed-grown, so expect the standard 2–4 week melt cycle.
Bare-root / bunched stems
Typically sold as weighted bunches. Remove any bands, foam, or weights, strip the lower leaves, and plant stems individually or in small groups. Bunched stems from the store are often already transitioning — check for new submersed growth at the tips, which tells you the plant is mid-adaptation and will settle quickly.
Hobbyist cuttings
Already submersed-grown and the fastest to establish — often showing new growth within days. The main acclimation factor is water-parameter difference between the two tanks. Float to temperature-match, plant promptly, and they’ll usually take off with minimal melt. This is why experienced hobbyists prefer trading cuttings over buying potted plants.
Frequently Asked Questions
Should I use a “plant starter” or transplant fertilizer?
Products marketed for transplant shock are mostly B-vitamins and mild hormones. They don’t hurt, but there’s no strong evidence they help aquarium plants specifically. Stable conditions and patience outperform any bottle. Save the money for more plants.
My new plant melted completely — bare crown, no leaves. Is it dead?
Probably not, if the crown or rhizome is firm. Crypts and swords routinely lose 100% of their leaves and regrow from the base within a month. The test is firmness: firm and pale/green means alive; mushy and brown/black means rot. Give firm-but-leafless plants a full 4 weeks before declaring them dead.
Can I speed up acclimation with extra light or CO2?
No — and trying usually backfires. A melting plant can’t use extra light; the excess just grows algae on its dying leaves. Keep light moderate and CO2 stable (not boosted) during acclimation. Growth speed comes from the plant’s own adaptation timeline, which you can’t rush, only avoid delaying.
Should new plants go straight into my main display tank?
After quarantine/dipping, yes — there’s no benefit to a separate “growing-in” tank for most plants. They acclimate to your water fastest in the tank they’ll live in. The exception is very delicate species going into a tank with boisterous fish; give those a few weeks in a calm corner or breeder box first.
The Patience Rule
The single most important acclimation skill is restraint: plant it right, set gentle conditions, remove decay, and then leave it alone for a month. The hobbyists with the best plant growth aren’t doing something clever in week one — they’re simply not interfering in weeks two through four while the plants do what they’ve evolved to do. Melt looks like failure and feels like failure, but in most cases it’s the visible part of a plant successfully becoming yours.