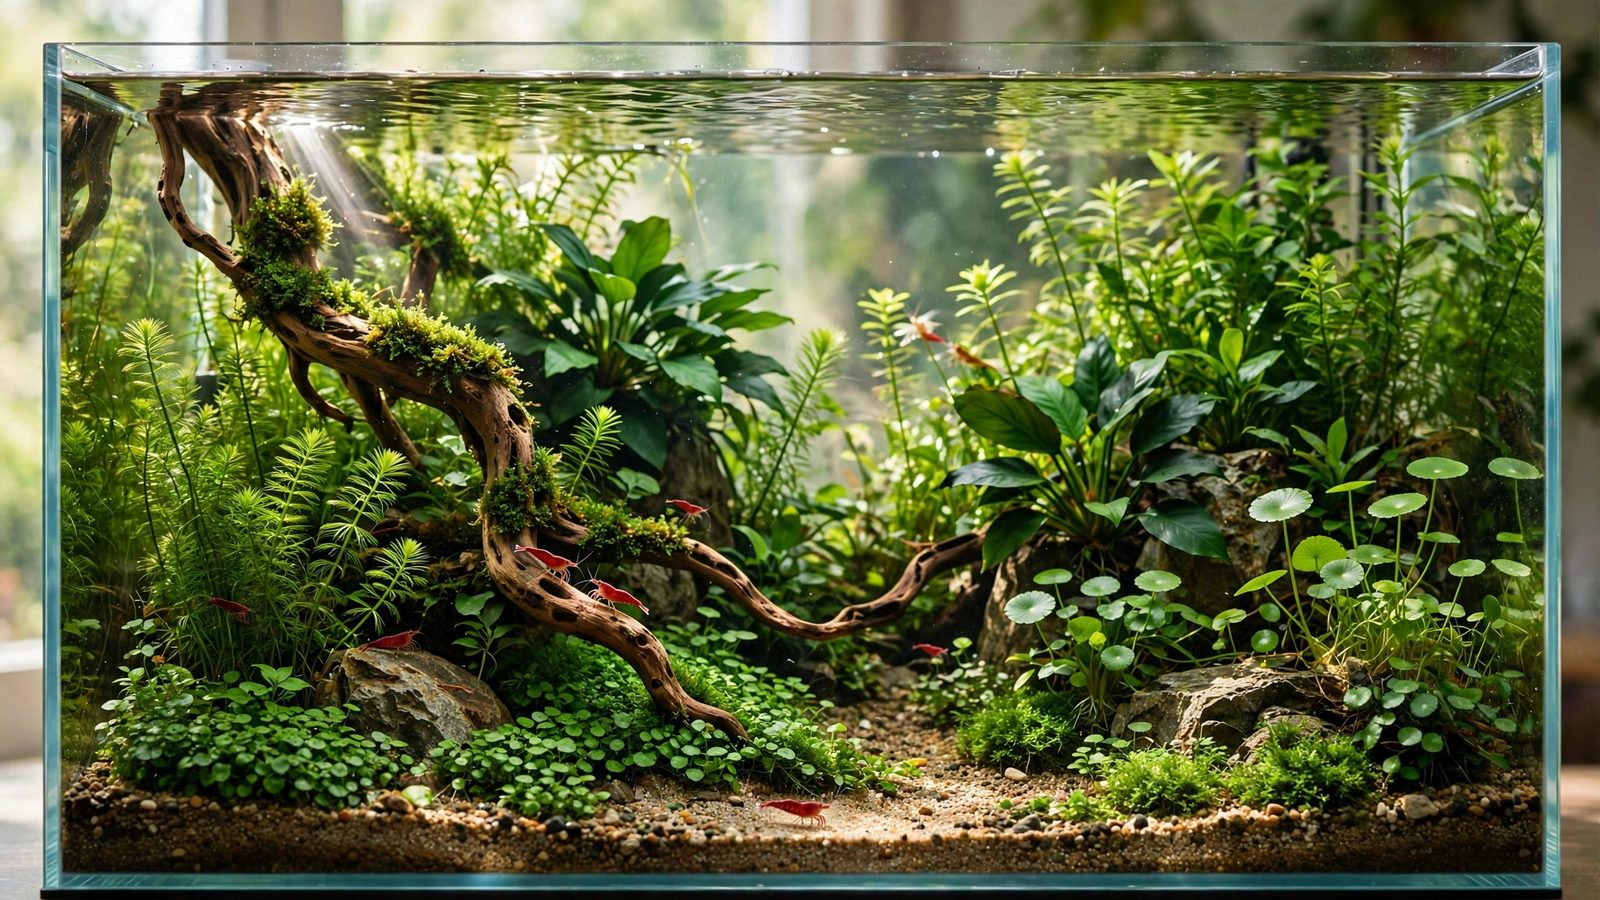
Learning how to photograph an aquascape well is the difference between a layout that wins contests and one that only ever looks good in your living room. You can spend months perfecting a design and weeks growing in the carpet — but if your photo has glare on the glass, murky water, or soft focus, judges and online voters will scroll right past it. This guide covers the full process: cleaning prep, light control, the camera basics that actually matter for tanks, contest framing standards, and the common mistakes that sink otherwise great entries.
Prep Your Tank Before You Touch the Camera
A contest photo is won or lost long before you press the shutter. Judges zoom into every corner of your image, so everything in the frame has to be as clean as the aquascape itself. Give yourself at least an hour of prep on shooting day and treat it like final-submission maintenance.
Clean the glass inside and out
Scrape the inside of the front panel with an algae blade, working top to bottom, then check the glass from an angle — spot algae that is invisible head-on will glow under tank lights in a photograph. Wipe the outside of the panel with a lint-free cloth; fingerprints and dust show up as hazy streaks when bright light hits them. That spotless-panel look is part of what made the 2026 contest-winning aquascapes read so crisply in their final photos.
Skim the surface and settle the water
Dust, protein film, and floating debris create an oily sheen across the top of the frame that no editing can convincingly fix. Drag a fine net or a paper towel laid flat across the surface to lift the film off. Then do a 30–40% water change a few hours before the shoot and let the filter run to polish the water — crystal-clear water is the single biggest upgrade to tank photography.
Trim, tidy, and pause the filter flow
Trim stray stems, remove dead or melting leaves, and pull out everything that doesn't belong in the composition: thermometers, suction cups, feeding rings, algae magnets. About 10–15 minutes before shooting, turn the filter and powerheads off. Flowing water blurs fine foreground detail and sets leaves trembling, which smears long exposures; still water also lets remaining particles settle. If fish are part of the shot, feed them lightly so they calm down — a relaxed school reads beautifully, while a stressed one darts and blurs.
Control the Light: Tank Lights Only
Aquascape photography is photography of a glowing box inside a dark room. Your tank lights are the sun; everything else is a problem. Shoot after dark or black out the room — close blinds, kill every lamp, TV, and overhead light. The only illumination should come from the fixture over the tank.
- Run the tank light at full intensity. Your camera needs every photon, and full output renders colors at the spectrum the layout was designed under.
- Kill ambient reflections. Stand in the dark and look at the front glass — if you see a window, a lamp, or yourself reflected, cover or move it. A black bedsheet draped behind you works wonders.
- Warm up the fixture first. Give LEDs 10–15 minutes at full power so color output stabilizes before your first frame.
- Clean the splash guard. Condensation or dust on the lid panel dims the light and scatters it unevenly across the scape.
- Keep the spectrum honest. If you shift the tank's color for the photo, you're misrepresenting the scape — shoot the plants as they actually look.
Camera Basics That Actually Matter for Tanks
You don't need expensive gear, but you do need to stop letting the camera make decisions. Auto mode guesses wrong on aquariums almost every time — it exposes for the dark room and blows out the glowing water, or hunts for focus on moving fish and settles on the glass. Take these controls back.
White balance: set it manually
Tank LEDs confuse auto white balance, pushing photos toward sickly green or icy blue. If your camera or phone allows it, set a custom balance under the tank light using a gray card — or dial in a Kelvin value manually, starting around 6500–7500K for typical freshwater LEDs. Shoot in RAW if you can; RAW lets you fix white balance in editing without quality loss, a lifesaver under mixed-color fixtures.
Exposure: protect the highlights
Your tank is a bright rectangle in a black room, so the meter will overexpose the water trying to lift the shadows. Switch to manual or exposure-compensation mode and dial down until the brightest substrate and hardscape areas hold detail. Check the histogram — you want highlights just shy of clipping, with the room fading to pure black. Slight underexposure lifted later beats blown-out white patches every time.
Focus: manual, aimed at the midground
Autofocus loves the front glass, the nearest leaf, or a passing fish — rarely the composition's heart. Switch to manual focus and aim roughly one-third into the layout's depth. Use focus peaking or magnification to confirm sharpness on the main hardscape element, and take several frames refocused at slightly different depths. Judges absolutely notice soft focal points.
Tripod: non-negotiable for final shots
Handheld shooting at slow shutter speeds is the top cause of motion blur in tank photography. A tripod lets you shoot at ISO 100 with a long exposure and get pixel-level sharpness across the frame. Center the lens on the tank at the height of its midpoint, and use a two-second self-timer or remote release so your finger doesn't shake the camera. No tripod? Brace the camera on a stack of books at the same height — the principle is the same: the camera must not move.
Phone vs Dedicated Camera: Settings Quick Reference
Modern phones take genuinely contest-capable tank photos when given the same discipline as a mirrorless camera. The differences are mostly in how you reach the manual controls.
| Setting | Phone | Dedicated camera |
|---|---|---|
| Focus | Tap-hold to lock AF on the midground; use a manual-focus app if available | Manual focus with magnification/peaking, aimed at the midground |
| Exposure | Drag exposure down (−0.7 to −1.5 EV) until highlights hold detail | Manual mode; expose for the highlights, check the histogram |
| White balance | Lock WB on the tank light with a pro/manual camera app | Custom Kelvin (~6500K start) or gray-card preset; shoot RAW |
| ISO | Keep at base ISO; never let auto-ISO climb in a dark room | ISO 100–200 for tripod long exposures |
| Shutter | Long-exposure mode only with the phone braced or tripod-mounted | 1/60s or longer on a tripod; self-timer to avoid shake |
| Stabilization | Phone tripod mount or brace against a solid object | Tripod at tank mid-height, remote shutter release |
| File format | RAW (ProRAW/DNG) if supported | RAW always; JPEG only as backup |
Two phone-specific warnings: clean the lens before every session — a smudged lens turns each bright tank light into a flaring starburst — and disable the flash entirely. A flash fired at aquarium glass bounces straight back and obliterates the image.
Contest Framing Standards: How Judges Want to See Your Tank
Most major aquascaping contests share a visual language for the official full-tank shot, and following it signals you take the competition seriously. Contest season is when these queries spike, so get this right before submitting. Our aquascape contest submission prep guide covers the paperwork and rules side; here is the photography side.
- Straight-on, full-tank, dead center. Shoot perpendicular to the front glass, showing the entire tank edge to edge, from the tank's vertical midpoint so perspective doesn't tilt.
- No reflections, hands, or equipment visible. The most failed standard. Check the frame corners for heater cords, filter intakes, your silhouette, or room reflections — judges should see the aquascape and nothing else.
- Fill the frame. Crop in-camera, not in editing, leaving only a small margin around the tank edges. A tiny tank floating in black room wastes resolution and looks tentative.
- Keep the waterline clean or out. If the frame includes it, the waterline must be razor-straight and free of meniscus grime; many winners crop just below it.
- Level the horizon. A tilted tank is an instant amateur signal — use the camera's electronic level or align to the tank's top edge.
- One hero shot, then detail shots. Contests allowing multiple images reward a flawless wide shot plus close-ups of plant health and hardscape detail. Shoot the wide first while the water is stillest.
Study how recent winners present their tanks — the 2026 contest-winning aquascapes are a masterclass in disciplined framing, several using exactly the dark-room, tripod, straight-on formula above. And if your entry is a nature-style layout finished with the dry start method, photograph the carpet at an angle too — dense foreground growth is hard to appreciate in a single flat wide shot.
Common Mistakes That Ruin Tank Photos
Nearly every disappointing tank photo traces back to one of these errors. Run through this list before declaring the shoot finished — fixing them on the day beats discovering them at submission time.
- Glare and reflections. The camera sees reflections your eyes tune out. Review each shot zoomed into a dark area; if you spot ghosting, darken the room further or press a rubber lens hood to the glass.
- Dirty glass. Even a faint algae film softens the whole image. If sharpness is mysteriously low, clean the inside panel again — it's the usual culprit.
- Motion blur from flow. Smeared leaves or fish tails mean the filter is still running, the shutter is too slow, or both. Pause flow and re-shoot.
- Skewed perspective. Shooting from above or below the tank's centerline distorts the layout. Get the lens on the midline and keep it level.
- Blown-out highlights. White sand paths and bright hardscape clip to pure white when exposure runs hot. Check the histogram after every lighting change.
- Wrong white balance. Radioactive greens or swimming-pool-blue water mean the WB is off. Fix it before shooting more frames instead of planning to rescue fifty images in post.
- Visible clutter. Scan the final frame at 100% zoom: intake tubes, cords, suction cups, and your own reflection all count against you.
- Submitting the first decent frame. Take dozens — bracket exposure and focus, vary the timing. The gap between your tenth and fortieth frame is often the winning shot.
Editing: Polish, Don't Fabricate
Light editing is expected and accepted; manipulation is not. Contest rules generally allow global adjustments — exposure, white balance, contrast, cropping — while forbidding cloning, compositing, or adding and removing elements. Stay on the right side of that line: the photo should show what a visitor would actually see.
A sensible order: straighten and crop first, set white balance against a neutral reference, adjust exposure and contrast gently, finish with light sharpening. Resist heavy saturation boosts — over-saturated reds and greens are the most obvious tell of an over-edited entry, and experienced judges discount them. With a biotope aquascape, restraint matters doubly: the whole point is naturalism, and neon color grading undermines it. Emergent-growth styles like a wabi-kusa need sharp focus on the above-waterline plants too, so stop the aperture down and re-check focus on the emergent growth. Save the final as a high-quality JPEG at the contest's required resolution, keep the RAW originals archived, and name files clearly — some contests request unedited originals, and having them ready shows confidence.
Frequently Asked Questions
What is the best time of day to photograph an aquascape?
After dark, with the room fully blacked out and only the tank lights on. Night shooting eliminates window reflections and gives total control over contrast. If you must shoot in daylight, cover windows with blackout material. Run the tank light at full intensity for 10–15 minutes beforehand so its color output stabilizes before your first frame.
Do I need an expensive camera for contest-worthy tank photos?
No. A modern phone with a manual camera app, a clean lens, and a tripod mount can produce images that hold up at contest resolution. What matters far more than gear is technique: a dark room, clean glass, settled water, locked midground focus, and correct exposure. Invest in a small tripod and a rubber lens hood before you invest in a new camera.
Why do my tank photos have a blue or green color cast?
Auto white balance misreads aquarium LEDs, especially fixtures heavy in blue or green channels. Switch to manual white balance — a custom preset under the tank light or a fixed value around 6500–7500K — and the cast disappears. Shooting in RAW gives a safety net, since WB can be corrected losslessly afterward. Don't try to rescue a bad cast with heavy saturation edits; judges spot that instantly.
How do I stop fish from blurring in my aquascape photos?
Use a faster shutter speed (1/125s or quicker), raise ISO moderately to compensate, and shoot in burst mode to catch moments when fish hold still. Pause the filter flow so fish aren't fighting current, feed lightly beforehand so they calm down, and time shots for when schooling fish align in open water. Take many frames and pick the sharp ones rather than chasing one perfect click.
Should the filter be on or off when photographing a planted tank?
Off, for the final hero shots. Running flow sets fine leaves trembling and keeps micro-particles suspended, both of which smear long exposures. Turn the filter and powerheads off 10–15 minutes before shooting so the water settles completely. Turn everything back on immediately after the session — a few hours without filtration is fine for a healthy tank, but don't forget.
How much editing is allowed on contest photos?
Global adjustments — exposure, white balance, contrast, cropping, light sharpening — are widely accepted. Cloning out algae, compositing shots, or adding and removing elements is not, and getting caught means disqualification. Always read the specific contest's rules, since tolerances differ. When in doubt, edit less: a clean, honest photo of a great scape beats a heavily processed one every time.
Putting It Together: How to Photograph an Aquascape on Shooting Day
Black out the room, clean the glass inside and out, skim the surface, do a water change a few hours early, trim and de-clutter, pause the flow, let the tank lights stabilize, mount the camera on a tripod at mid-tank height, set white balance and exposure manually, focus on the midground, and shoot dozens of frames — wide hero shots first, detail shots after. Review at 100% zoom for reflections, equipment, and softness before you call it done. Great aquascape photography isn't about the best camera; it's about controlling everything the camera sees. Master that, and your layouts will finally photograph the way they look in person — which is exactly how judges want to see them.