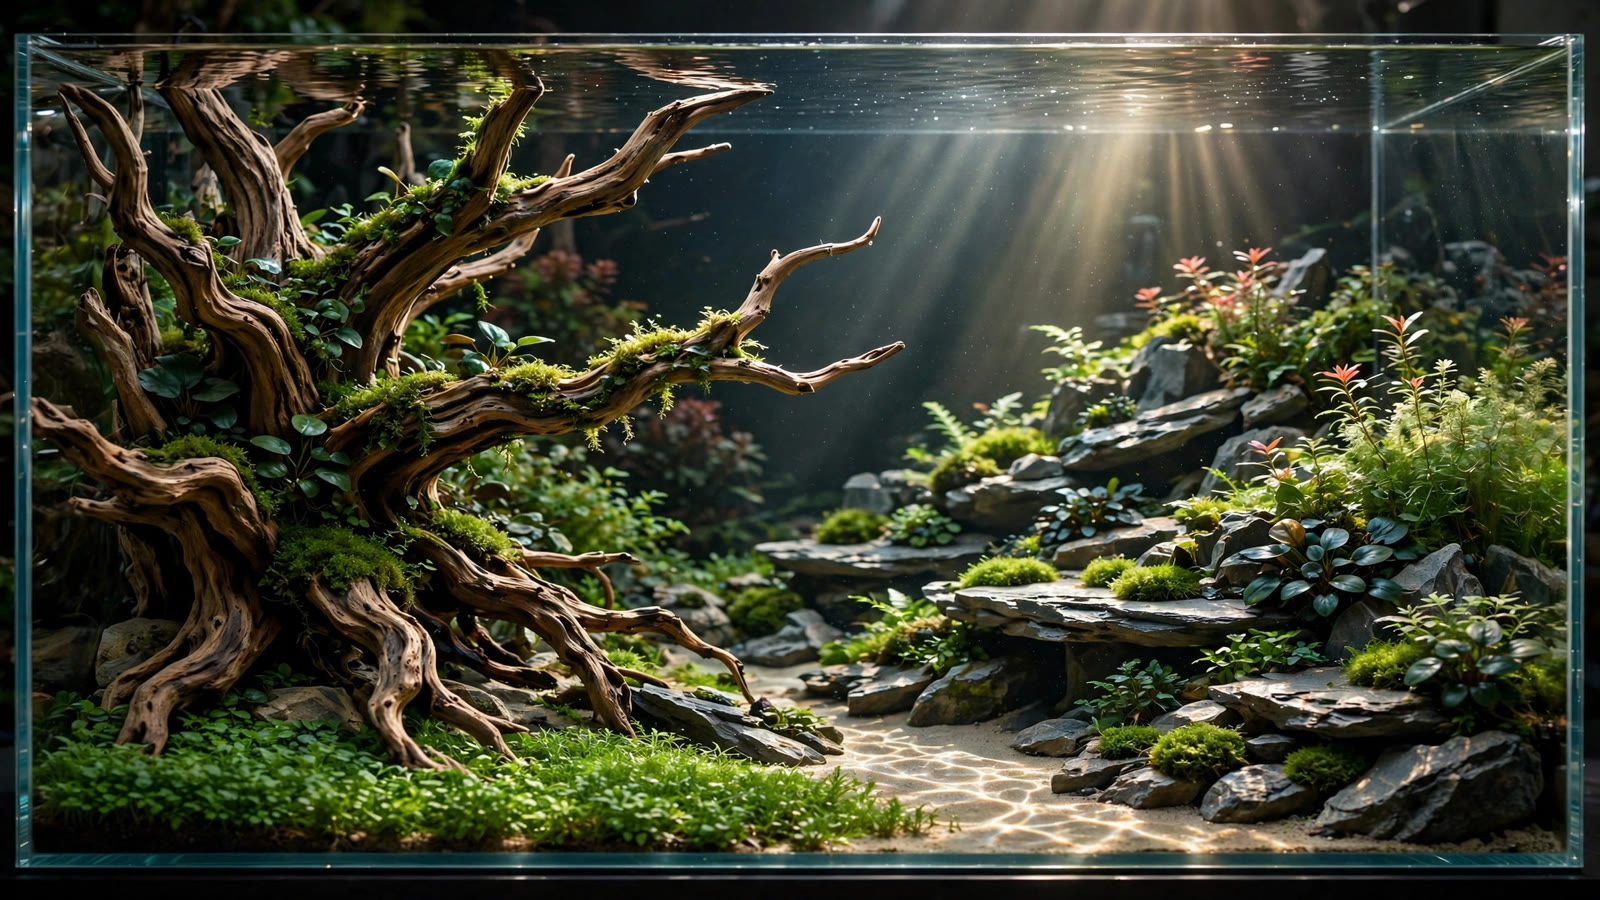
Studying aquascaping contest winners 2026 is the fastest design education in the hobby. With 2026's contest season producing fresh champions across the IAPLC, the Aquascaping Championship, regional events like TGIAA, and live competitions such as Aquashella — plus the new AquaRank database putting 46,000+ historical results from editions of the IAPLC, AGA, IIAC, KIAC, CIAC, and ITAC at our fingertips — we can now spot patterns across winners instead of guessing. This article distills what the 2026 champions keep doing: the composition moves, planting structures, and hardscape grammar that separate a podium tank from a pretty one.
The point is not to copy any single winning layout. Contest judges reward originality, and a clone of last year's grand prize is a guaranteed mid-pack finish. The point is to learn the grammar behind the winners — the repeatable design decisions that show up season after season — and apply them to your own idea.
Lesson 1: Hardscape Comes First, and It Reads From Across the Room
Shrink the winning tanks of 2026 to thumbnail size and you can still read every one of them. That is not an accident. Champions build their layouts around hardscape arrangements that hold up at any distance: a single sweeping wood structure, a ridge of stone with a clear direction, one dominant mass flanked by deliberate negative space. The planting supports the skeleton; it never replaces it.
In amateur tanks, the hardscape is often an afterthought — a few rocks scattered after the plants go in, chosen to fill gaps rather than to say anything. Winners reverse the order entirely. They collect, test, and refine their stone and wood before a single stem is planted, sometimes spending weeks on the dry layout. The result is a structure with a clear silhouette: triangular, valley-shaped, diagonal, or asymmetric — a shape you can describe in one sentence.
Practice this by dry-laying your hardscape in the empty tank and photographing it from the front. If the composition is boring as a black-and-white skeleton, no amount of planting will fix it. Our hardscape-first method walks through the full workflow, from selecting characterful stone to wet-testing the arrangement before planting day.
Lesson 2: One Idea Per Tank — Restraint Is the Hardest Technique
Across 2026's champions, almost every winner can be summarized in one breath: a drowned forest rising from mist, a mountain valley between twin ridges, a single tree on an open plain. One idea, executed completely. The tanks that place mid-pack are often the ones with three ideas fighting for attention: a mountain and a river and a bonsai tree, each one halving the impact of the others.
This restraint shows up most clearly in how winners treat negative space. Empty water and bare sand are not laziness — they are the frame that makes the planted area look deliberate and vast. Many 2026 winners left a third or more of the tank floor visually quiet, and the layouts look bigger for it. Beginners fear empty space and fill every corner; champions curate it.
A practical test: describe your layout's concept in a single sentence. If you need a paragraph, simplify. Remove the weakest element — the extra stone, the secondary wood piece, the competing focal cluster — and see whether the tank gets stronger. It almost always does.
Lesson 3: Plant Health Is the Composition
Judges can spot plant health at a glance, and nothing sinks an entry faster than deficiency: pale stems, pinholes, melting tips, algae on old leaves. The 2026 winners share an unglamorous trait — their plants look conditioned. Leaves are uniform, colors are saturated, growth is dense from base to tip. This is a maintenance achievement as much as a design one, and it is why serious competitors follow a strict trimming and maintenance schedule for months before photo day.
Beyond health, winners use plants as design tools with intent. Two moves recur constantly:
- Texture separation. Each zone of the layout gets a distinct leaf texture — fine feathery stems against broad anubias leaves, needle-like moss against bold crypts — so the eye can parse the composition's structure. See our guide to texture contrast in aquascaping for the classic pairings.
- Clean gradient boundaries. Champion plant masses have sharp, deliberate edges where one species transitions to another. Ragged, intermingled zones read as neglect. Winners trim boundary lines weekly so the layout's geometry stays crisp right up to the photograph.
The takeaway: plant choice matters less than plant condition. A tank of common, easy species in peak health will beat a tank of rare species limping along. Health is visible at thumbnail scale; rarity is not.
Lesson 4: Color Discipline — the 80/15/5 Rule
Look at the palette of a 2026 champion and you will almost always find the same ratio: roughly 80 percent green, 15 percent a secondary tone (warm browns of wood, neutral stone grays), and 5 percent a genuine accent — a patch of red stems, a drift of orange buce, a small stand of pink rotala. The accent works because it is scarce. Our color theory guide breaks down this rule in full.
Amateur tanks fail in two opposite directions: either everything is the same mid-green, which looks flat, or red is sprinkled everywhere, which looks frantic. Winners do neither. They place their warm accent where it earns the most — near the focal point, along a diagonal leading line, or at the vanishing point of a valley — and keep the rest of the palette calm. The eye is pulled exactly where the designer wants it.
A second color habit: champions choose accents that belong. A tropical valley reads naturally with warm wood and a hint of red; an alpine ridge reads cold with gray stone and no warm accents at all. Match your accent to the world your hardscape is trying to be.
Lesson 5: Depth Is Engineered, Never Wished For
Winners' tanks look deep because depth is constructed with specific techniques, not because the tank is big. Study any 2026 finalist and you will find several of these working at once:
- Sloped substrate. Nearly every champion runs a dramatic front-to-back substrate slope — sometimes 5–8 inches of rise in a standard tank — so background planting sits higher and the floor plane tilts toward the viewer.
- Shrinking scale. Hardscape pieces and plant leaf sizes get smaller toward the back, mimicking atmospheric perspective. A pebble at the back reads as a boulder at a distance.
- A forced focal corridor. Twin hardscape walls, converging planting lines, or a valley floor guide the eye to a vanishing point that the designer placed deliberately.
- Layered planting heights. Foreground, midground, and background zones are clearly separated, with each layer fully opaque before the next begins.
Flat substrate with random planting is the single most common amateur mistake, and it is entirely fixable. Our depth techniques guide covers all nine methods in detail, including forced perspective setups for small tanks.
Lesson 6: The Photograph Is the Product
Here is the uncomfortable truth of photo-based contests: the judges never see your tank. They see one photograph of it, usually at modest resolution. The 2026 winners treat photo day as a separate craft from aquascaping — and it shows. Their entries are shot in darkened rooms, with clean glass, hidden equipment, no visible cords or heaters, calm fish placed for the shot, and lighting balanced so nothing blows out.
The recurring habits are straightforward: shoot after a water change when the water is clearest, wipe every glass panel minutes before the shot, remove filter pipes and thermometers (or hide them behind plants), use a black or very dark background, and take dozens of frames so you can choose the one where the fish sit in the right places. Many competitors also practice months ahead — photographing their aquascape under contest conditions so photo day holds no surprises.
Apply this even if you never enter a contest. A disciplined photo session is the best design review you will ever do: the camera flattens your tank and exposes every weak corner, every ragged edge, every visible cable. Fix what the photo shows and the real tank improves too.
Steal the Workflow, Not the Layout
The final pattern across the 2026 champions is not visual at all — it is procedural. Winners run a long, deliberate timeline: months of hardscape refinement, a planned planting schedule timed so every species peaks together, weekly trimming logs, and a photo-day countdown with a checklist. The design is the last step of a system, not a lucky accident.
A competition-grade timeline you can adapt to any tank:
| Phase | Timing | What champions do |
|---|---|---|
| Concept & hardscape | 3–6 months out | Dry-layout, sketch, test skeletons, refine until readable as a silhouette |
| Planting & grow-out | 2–4 months out | Plant in zones, track species growth rates, cull weak growers early |
| Conditioning | 4–6 weeks out | Strict trimming schedule, edge definition, algae eradication, fish conditioning |
| Photo week | Final 7 days | Water changes, glass cleaning, equipment hiding, background, practice shots |
| Submission | Deadline | Select the single best frame, check contest rules twice, submit early |
If you want to enter a competition yourself, our contest submission prep guide covers judging criteria, entry timelines, and disqualifiers to avoid. You can browse past winning works in the official IAPLC results gallery and study category rules in the AGA contest guidelines — both are excellent free study material for understanding what judges actually score.
Frequently Asked Questions
Do I need expensive plants and equipment to win an aquascaping contest?
No. Across recent contest seasons, plenty of high-placing tanks use common, inexpensive species. Judges score layout balance, plant health, and photographic quality — not price tags. A well-conditioned tank of easy stems and mosses in a strong composition will consistently outplace a struggling tank of rare, high-demand species. Spend your budget on good hardscape and reliable lighting instead.
Which contest should a beginner enter first?
Start with a national or regional contest rather than the IAPLC. Smaller competitions have friendlier fields, faster feedback, and judging criteria you can actually learn from. The AGA contest is beginner-friendly with multiple categories including biotope and nano, while regional events like TGIAA give you live feedback. Enter the big international contests after you have placed well somewhere smaller.
How long does it take to grow a contest-ready tank?
Most champions run their contest tanks for four to eight months before the entry photograph. The first weeks are about hardscape and planting; the middle months grow everything in; the final month is pure conditioning — trimming, edge definition, algae removal. Rushing this timeline is the most common reason good layouts underperform. Plan backward from the submission deadline and give the plants the time they need.
Can I enter the same layout style as a past winner?
You can, but judges reward originality, and entries that echo a recent grand prize tend to score lower on creativity criteria. The smart move is to study what made a winner work — its composition geometry, its color discipline, its depth construction — and apply those principles to your own concept. Borrow the grammar, not the sentence. Your entry should be recognizable as yours at a glance.
Does the fish choice matter in contest judging?
Yes, though less than layout and plant health. Judges notice schooling fish that fit the scale — a big school of small tetras can amplify a layout's sense of depth, while a single oversized fish can wreck the scale illusion. Fish should be healthy, well-colored, and positioned naturally in the frame. Many competitors hold their fish out of the tank until photo day, then release calm, conditioned schools for the shoot.
Put the Aquascaping Contest Winners 2026 Lessons to Work
The 2026 contest season tells one clear story: champions win with decisions, not with luck. Hardscape first, one idea per tank, plants in peak condition, disciplined color, engineered depth, and a photograph treated as its own craft. None of these requires a bigger tank or a bigger budget — they require patience and a willingness to remove what does not serve the composition.
Pick one lesson and apply it to your current tank this week. Photograph your hardscape as a silhouette. Delete the weakest third of your planting. Hide one visible piece of equipment. Small, deliberate moves compound, and they are exactly what separates the tanks that make judges stop scrolling from the ones that blur past.
Tissue-culture plants are the exception — they’re grown in sterile gel and adapt with minimal melting, which is part of what you’re paying for. Plants bought submersed from another hobbyist’s tank also transition with little melt, since they’re already in the right form.
Which Plants Melt Most (and Least)
Heavy melters (expect significant leaf loss)
- Cryptocorynes — infamous for “crypt melt,” sometimes dropping every leaf after any disturbance. They almost always recover from the roots within weeks.
- Stem plants grown emersed — rotala, ludwigia, and hygrophila often shed lower emersed leaves while the growing tips transition.
- Amazon swords — emersed-grown swords typically lose their broad oval aerial leaves and replace them with longer submersed ribbon leaves.
Light melters
- Anubias, java fern, bucephalandra — slow-growing rhizome plants transition gradually; occasional old-leaf melt but rarely dramatic.
- Vallisneria — usually transitions well, though it dislikes the move itself and may sulk for a week.
- Floating plants — minimal melt since their leaves were already at the air-water interface.
The Acclimation Protocol
Step 1: Quarantine or dip first
Before acclimating to your tank’s conditions, make sure you’re not acclimating pests along with the plant. Run new arrivals through our quarantine and dip protocol — it adds days upfront but prevents months of regret.
Step 2: Float to temperature-match (30 minutes)
Float the bag or container in your tank for 20–30 minutes to equalize temperature. Plants are less temperature-sensitive than fish, but a 10°F shock on top of transplant stress is an avoidable insult.
Step 3: Trim before planting
Remove any leaves that are already damaged, yellowing, or heavily algae-covered — they won’t recover and they’ll rot in your tank, feeding algae. For stem plants, trim off the bottom inch and any emersed leaves that look unlikely to adapt; the plant wastes energy maintaining leaves it’s going to shed anyway. Keep the healthy growing tips — that’s where recovery starts.
Step 4: Plant correctly the first time
Follow our planting guide — right depth, crown exposed on rosettes, rhizomes unburied on epiphytes. Every uprooting and replanting restarts the acclimation clock, so get placement right on the first attempt. Decide where each plant goes before it goes in the water.
Step 5: Run a gentle first week
For the first 7 days after planting:
- Moderate light — run your normal photoperiod but consider dropping intensity 20–30% if your light is dimmable. Blast-level light on a melting plant grows algae on the dying leaves, not recovery.
- Stable CO2 — if you inject CO2, keep it consistent. Fluctuating CO2 during acclimation is a melt accelerator. If you’re low-tech, this doesn’t apply — see growing without CO2.
- Half-strength fertilizer — new plants with damaged leaves can’t use full dosing, and the excess feeds algae. Ramp to full strength over 2–3 weeks per our fertilizer schedule.
- No disturbance — don’t move, trim, or “check on” new plants for at least two weeks. Every touch resets root establishment. This is especially critical for crypts.
Step 6: Remove melt, keep the base
As emersed leaves melt, remove the mushy material promptly — decaying leaves release ammonia and grow fungus that can spread to healthy tissue. But never discard the plant while the crown, rhizome, or roots are firm and alive. A crypt that’s lost every leaf but has firm roots is a plant that’s about to recover, not a dead plant. Give it 3–4 weeks before judging.
Telling Normal Melt From Real Problems
Normal transition melt:
- Affects oldest/emersed leaves first, newest growth last
- New submersed leaves emerge even as old ones dissolve
- Roots and crown stay firm and white/green
- Timeline: 1–4 weeks, then obvious new growth
Concerning melt (see our full melting diagnosis guide):
- New growth also melts or emerges deformed
- Rhizome or crown turns mushy and brown — this is rot, not transition
- Entire plant dissolves within days with no new growth after 4+ weeks
- Melting spreads to established plants that weren’t recently moved
Buying Tips to Minimize Melt
- Buy submersed-grown when available — hobbyist-grown cuttings transition with almost no melt.
- Choose tissue culture for sensitive species — crypts and delicate stems establish far more reliably from sterile cups.
- Avoid plants already melting in the store tank — some melt is normal, but a plant that’s mostly mush at purchase has less energy for recovery.
- Transport carefully — keep plants damp and out of direct sun/heat. A plant that dries out or cooks in a hot car melts far worse than one transported properly.
The First-Month Timeline: What to Expect Week by Week
Knowing what’s normal when removes most acclimation anxiety. Here’s the typical timeline for a healthy plant adapting to a new tank:
Week 1: The quiet week
Almost nothing visible happens. The plant is growing roots you can’t see and assessing its new environment. Some species (vallisneria, stem plants) may start shedding their lowest leaves. This is normal. Resist the urge to “help” — no moving, no extra fertilizer, no light changes. The most common beginner mistake is intervening during a week when the correct action is nothing.
Week 2: Melt peaks
This is when emersed leaves give up in earnest. Crypts may drop everything; swords shed their broad aerial leaves; stem plants lose lower foliage. It looks catastrophic and it’s usually fine. Keep removing mushy material, keep conditions stable, and watch the crown and growing tips — if those are firm and green, recovery is already underway.
Week 3: The turn
New submersed-adapted leaves emerge — smaller, thinner, often a slightly different shade of green than the emersed foliage. Stem plant tips start growing visibly; crypts push tiny curled leaves from the crown; swords unfurl narrow ribbon leaves. This is the moment most beginners exhale for the first time.
Week 4+: Established
New growth outpaces melt, and the plant is functionally yours. You can resume full-strength fertilizer, normal trimming, and stop treating it as fragile. Some slow growers (anubias, bucephalandra) take 6–8 weeks to show obvious progress — that’s their normal speed, not a problem.
Acclimating Different Plant Formats
Tissue-culture cups
Sterile, pest-free, and already adapted to high-humidity (not emersed) growth — tissue cultures melt the least of any format. Rinse the agar gel off gently (leftover gel rots and feeds fungus), split the portion into small plantlets, and plant per our planting guide. They establish slowly for the first two weeks, then accelerate. No dip needed, minimal acclimation stress — this is the premium experience you’re paying for.
Potted plants
Remove the pot and strip away the rockwool completely — leftover rockwool traps debris and rots. Tease the root mass apart gently; if it’s a dense mat, splitting it into 2–3 smaller portions actually establishes faster than planting one big clump (more growing points, better water flow around roots). Potted plants are usually emersed-grown, so expect the standard 2–4 week melt cycle.
Bare-root / bunched stems
Typically sold as weighted bunches. Remove any bands, foam, or weights, strip the lower leaves, and plant stems individually or in small groups. Bunched stems from the store are often already transitioning — check for new submersed growth at the tips, which tells you the plant is mid-adaptation and will settle quickly.
Hobbyist cuttings
Already submersed-grown and the fastest to establish — often showing new growth within days. The main acclimation factor is water-parameter difference between the two tanks. Float to temperature-match, plant promptly, and they’ll usually take off with minimal melt. This is why experienced hobbyists prefer trading cuttings over buying potted plants.
Frequently Asked Questions
Should I use a “plant starter” or transplant fertilizer?
Products marketed for transplant shock are mostly B-vitamins and mild hormones. They don’t hurt, but there’s no strong evidence they help aquarium plants specifically. Stable conditions and patience outperform any bottle. Save the money for more plants.
My new plant melted completely — bare crown, no leaves. Is it dead?
Probably not, if the crown or rhizome is firm. Crypts and swords routinely lose 100% of their leaves and regrow from the base within a month. The test is firmness: firm and pale/green means alive; mushy and brown/black means rot. Give firm-but-leafless plants a full 4 weeks before declaring them dead.
Can I speed up acclimation with extra light or CO2?
No — and trying usually backfires. A melting plant can’t use extra light; the excess just grows algae on its dying leaves. Keep light moderate and CO2 stable (not boosted) during acclimation. Growth speed comes from the plant’s own adaptation timeline, which you can’t rush, only avoid delaying.
Should new plants go straight into my main display tank?
After quarantine/dipping, yes — there’s no benefit to a separate “growing-in” tank for most plants. They acclimate to your water fastest in the tank they’ll live in. The exception is very delicate species going into a tank with boisterous fish; give those a few weeks in a calm corner or breeder box first.
The Patience Rule
The single most important acclimation skill is restraint: plant it right, set gentle conditions, remove decay, and then leave it alone for a month. The hobbyists with the best plant growth aren’t doing something clever in week one — they’re simply not interfering in weeks two through four while the plants do what they’ve evolved to do. Melt looks like failure and feels like failure, but in most cases it’s the visible part of a plant successfully becoming yours.