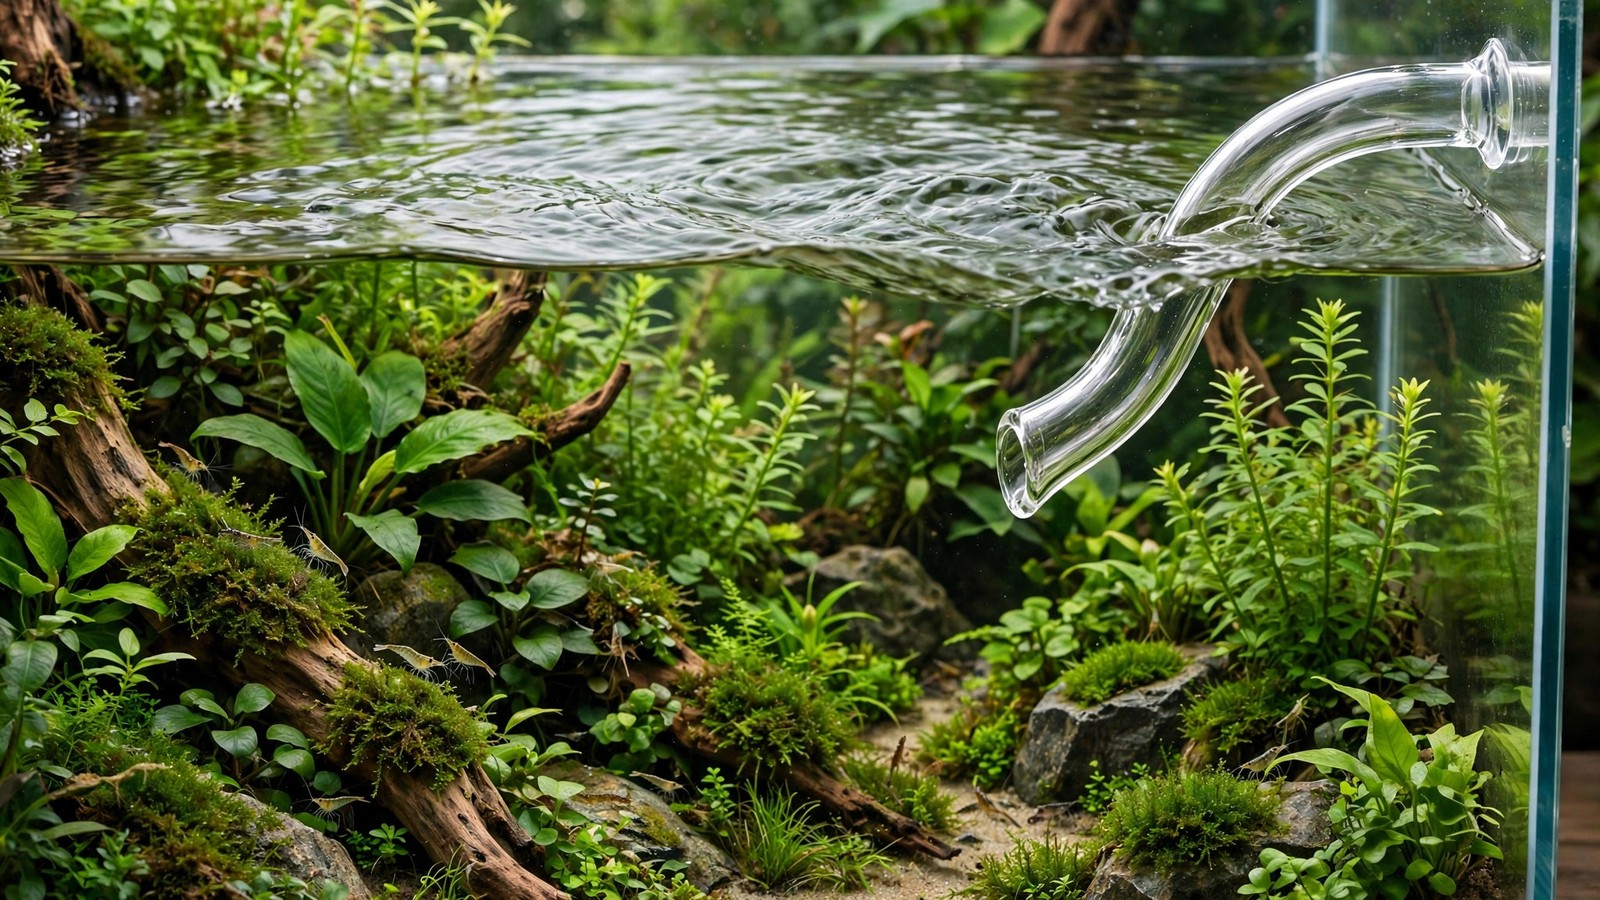
Few upgrades change a planted tank as completely as swapping chunky plastic filter fittings for hand-blown glass. In a lily pipes aquarium, the intake and outflow hardware all but disappears: water seems to enter and leave the tank on its own. But lily pipes are not just jewelry. The flared outflow was designed to slow the filter's current into a broad, gentle swirl that reaches every corner, delivering CO2 and nutrients to leaves while breaking up the oily surface film that blocks oxygen exchange. This guide covers the four main types, sizing, installation and positioning, and the cleaning routine that keeps glass pipes invisible.
What Are Lily Pipes?
Lily pipes are glass intake and outflow pipes that connect a canister filter to the aquarium, replacing the plastic fittings that ship with most filters. Popularized by Aqua Design Amano (ADA), they take their name from the outflow's flared mouth, shaped like a lily flower. Each piece is hand-blown from borosilicate glass, so no two are exactly identical.
The shape is functional. Water leaving the filter hits the outflow's wide bell and slows, spreading into soft, broad circulation instead of a harsh jet. That gentle movement carries dissolved CO2 and fertilizer to every leaf, prevents stagnant pockets where algae take hold, and ripples the surface so oxygen dissolves. The inflow pipe is a straight tube with suction slits near its base, drawing water in without catching stray leaves or curious shrimp.
Takashi Amano refined the outflow's neck angle after remembering how water swirled from a pipe near his childhood home — read the story behind the Lily Pipe's design on ADA's site. The result is equipment that works with the scape: clear glass that catches almost no light and fades into the background.
The Four Main Lily Pipe Types
Every setup needs two pieces — an outflow returning filtered water and an inflow drawing it in. But there are four distinct styles to choose from, each with its own flow character.
Classic Outflow (P-type)
The original: a curved neck ending in a flared lily-flower mouth. It produces a broad, gentle swirl and doubles as a surface skimmer — at the waterline, its lip breaks up protein film and adds oxygen. The default choice for most planted tanks from 45 cm upward.
Inflow (V-type)
The outflow's partner: a straight glass tube hanging toward the substrate, with horizontal slits near the bottom for intake. The slits block leaves and debris while the intake stays nearly invisible. Sizes pair with their outflow partners (V-3 with P-2, V-5 with P-4, V-7 with P-6).
Spin
A loop-shaped outflow that coils return water through a ring, bleeding off most of the current's energy. The exceptionally soft flow hangs over the tank rim on its own, with no suction cups — made for small, shallow tanks where a standard outflow would blast plants flat.
Poppy
A wide, bowl-shaped outflow (popularized by third-party glassblowers) that diffuses the return current across a broad mouth. Flow leaves so softly it barely moves stem tips — the go-to for nano tanks, betta tank scapes, and shrimp breeding where even a Spin pipe feels too strong.
| Type | Shape and flow character | Best for | Things to know |
|---|---|---|---|
| Classic outflow (P) | Trumpet mouth; broad, gentle swirl with surface ripple | Most planted tanks, 45 cm and up | Doubles as an aerator when raised to the waterline |
| Inflow (V) | Straight tube with intake slits near the base | Every setup using a P-type outflow | Slits need regular clearing of trapped leaves |
| Spin | Loop coil that bleeds off current energy | Small or shallow tanks, delicate plants | Hangs on the rim — no suction cups needed |
| Poppy | Wide bowl mouth; extremely diffuse, soft flow | Nano tanks, bettas, shrimp breeding | Mostly made by third-party glassblowers, not ADA |
Lily Pipes Aquarium Sizing Guide
Size matters more than style. A pipe too small for the filter creates backpressure and noise; one too large turns the outflow into a leaf-flattening jet. ADA's official pairing of each pipe to tank length and filter flow rate is the most reliable starting point — see ADA's official Lily Pipe lineup and sizing chart for the full table:
- P-1 / V-1: tanks around 45 cm, small canisters (~6 L/min)
- P-2 / V-3: 45–60 cm tanks, the most popular pairing for standard 60 cm planted tanks (~6 L/min)
- P-4 / V-5: 90 cm tanks (~10 L/min)
- P-6 / V-7: 120–180 cm tanks, with larger pipe diameters (13–20 mm) for high-flow filters (10–30 L/min)
Match the pipe diameter to your filter's hose: Ø13 mm pipes suit standard 16/22 mm canister hoses, Ø10 mm fits slim 12/16 mm hoses on nano canisters, and Ø17/Ø20 mm fit the big hoses on large filters. Check your filter's stated hose size before ordering — forcing a hose over the wrong diameter is the fastest way to crack hand-blown glass. Always buy inflow and outflow as a matched pair; mixing sizes chokes flow and looks lopsided.
Installing Lily Pipes: Step by Step
Installation is straightforward, but glass rewards patience. Rushing a stiff hose onto a cold pipe is how most breakages happen, so give yourself twenty unhurried minutes.
- Switch off the filter and close the hose taps if it has them, so water stays in the hoses while you work.
- Soften the tubing by soaking the hose ends in warm (not hot) water for a few minutes — soft hose slides over glass with far less force.
- Connect the outflow (P) pipe to the filter's outlet hose and the inflow (V) pipe to the inlet hose. Label hoses with tape first if you are unsure which is which.
- Mount with suction cups on the rear or side glass: outflow mouth 2–5 cm below the surface, inflow slits a few centimeters above the substrate.
- Prime the canister and restart, then watch every joint for ten minutes — a slow drip at a hose-to-glass junction usually means pushing the hose on a centimeter further.
- Fine-tune the waterline: slide the outflow up so its lip kisses the surface for maximum film-breaking and oxygenation, or lower it for a calmer surface that retains CO2.
If you are setting up a brand-new tank, fit the pipes before the first fill — during a dark start method cycle, for example — so you never have to wrestle glassware around fresh hardscape and unsettled substrate.
Positioning for Flow, CO2, and Plant Health
Pipe placement matters as much as pipe choice. The classic arrangement puts both pipes on the same short side: inflow low in one back corner, outflow high in the other. Water exits the outflow, travels the tank's length, sinks, and returns along the substrate — one big, lazy gyre with no dead spots.
Aim the outflow mouth slightly upward and across the tank, not down at the plants. You want a visible surface ripple — that is gas exchange happening — but not a churning rapid, which drives injected CO2 out as fast as it dissolves. In a high-tech tank, tuck the CO2 diffuser directly beneath the outflow so the current carries the microbubble mist around the whole tank. Dense Dutch-style plant arrangements depend on this trick; without it, back rows starve while front rows pearl.
Treat the pipes as part of the composition. In a concave aquascape layout, tuck both pipes behind the low valley's edges so the eye travels to the plants, not the hardware. Protect your negative space — a glass tube crossing an open sand foreground ruins the illusion of depth. And follow the rule of thirds: pipes near the rear third-lines feel intentional; dead-center pipes feel like equipment.
Cleaning and Maintaining Glass Pipes
The irony of lily pipes is that equipment chosen for invisibility gets dirty fast. Biofilm — a slick bacterial coating — hazes the glass within weeks, and green dust algae follows in bright, CO2-injected tanks. Hard tap water adds a white limescale crust at the waterline. Harmless to the tank, but a brown-green pipe defeats the aesthetic point.
Build cleaning into your routine rather than waiting until the pipes look embarrassing:
- Weekly: check the inflow slits during your water change and flick off trapped leaves with tweezers. A clogged intake is the top cause of mysteriously reduced filter flow.
- Monthly: wipe the outflow's waterline band with a soft sponge while the level is low. Never use abrasive pads — micro-scratches haze glass permanently.
- Every 6–10 weeks (deep clean): remove both pipes and soak for an hour in diluted bleach (1:10) or white vinegar for limescale, then scrub the insides with a flexible pipe brush. Rinse thoroughly and soak once more in dechlorinated water before reconnecting.
Two warnings: never pour boiling water into the pipes — thermal shock cracks hand-blown glass — and never force an oversized brush. With this routine, a good set stays crystal clear for years, and the contrasting textures of your scape stay the visual star instead of the hardware.
Troubleshooting Common Lily Pipe Problems
Most complaints trace back to positioning or maintenance rather than faulty glass. Here are the usual suspects:
- Flow has dropped off. Nine times out of ten, the inflow slits are clogged with leaves, mulm, or a snail. Clear them first; check the canister prefilter second.
- Rattling or humming. The pipe is touching the tank glass or a suction cup lost grip. Re-seat the cups — a thin smear of petroleum jelly helps them hold — and eliminate hard contact points.
- Surface film won't clear. The outflow mouth is too deep. Raise it until the lip disturbs the surface — even a few millimeters of ripple breaks up protein film.
- Plants are being blasted flat. The pipe is oversized or aimed badly. Angle the mouth upward, or step down to a Spin or Poppy outflow for a gentler return.
- Shrimp or fry disappearing into the filter. Fit a fine prefilter sponge over the inflow slits, or switch to a Spin/Poppy setup whose diffuse flow is far less likely to trap tiny livestock.
- A crack appears at the hose joint. Usually caused by forcing a cold, stiff hose onto the pipe or overtightening a clamp. Warm the hose first, and let friction — not clamps — do the holding.
Frequently Asked Questions
Are lily pipes better than spray bars for a planted tank?
For most aquascapes, yes. A spray bar spreads flow evenly but looks like a plastic rail across the back glass, while a lily pipe outflow creates the broad, gentle swirl plants prefer and stays nearly invisible. Spray bars still win in very long tanks where one outflow cannot reach the far end. But for the classic 60–120 cm planted tank, glass outflow pipes give better circulation with far less visual clutter.
What size lily pipe does my tank need?
Follow the manufacturer's tank-length pairing: P-2/V-3 for 45–60 cm tanks, P-4/V-5 for 90 cm, and P-6/V-7 for 120 cm and up. Just as important, match the pipe diameter to your filter's hose — Ø13 mm pipes suit standard 16/22 mm canister hoses, Ø10 mm fits slim 12/16 mm hoses. An undersized pipe on a strong filter creates backpressure and noise, so check the official sizing chart before ordering.
Can I use lily pipes with a hang-on-back or internal filter?
No — lily pipes are designed for canister filters with flexible inlet and outlet hoses, the only way to connect them. Hang-on-back and internal filters have fixed plastic housings that cannot accept glass pipework. If you love the glass look but run a nano tank with a small HOB, consider switching to a nano canister filter, which opens the door to Spin and Poppy pipes sized for gentle flow.
How do I keep lily pipes clean without removing them every week?
You cannot avoid removal entirely, but you can stretch the interval. Clear the inflow slits during each water change, wipe the waterline band of the outflow with a soft sponge while the level is low, and keep lighting and nutrients balanced so algae grows slowly. Most aquascapers do a full removal-and-soak deep clean every 6–10 weeks with diluted bleach or vinegar plus a flexible pipe brush.
Are glass lily pipes safe for shrimp and small fish?
Yes, with one precaution: the inflow slits can trap baby shrimp or tiny fry against strong suction. Fit a fine prefilter sponge over the intake, or choose a Spin or Poppy outflow whose diffuse return flow is too gentle to pin livestock. The smooth glass itself is harmless — there are no sharp edges on a properly finished pipe — and many shrimp keepers prefer glass because algae wipes off it so easily.
Final Thoughts
Lily pipes earn their place twice over: in how the tank looks, with hardware dissolving into the scape, and in how it grows, with circulation that feeds every leaf and keeps the surface breathing. Choose the right type and size, mount both pipes on one side for a clean circular flow, and keep a simple cleaning rhythm. Do that, and the most technical glass in your tank becomes the piece you notice least — which is exactly the point.
Tissue-culture plants are the exception — they’re grown in sterile gel and adapt with minimal melting, which is part of what you’re paying for. Plants bought submersed from another hobbyist’s tank also transition with little melt, since they’re already in the right form.
Which Plants Melt Most (and Least)
Heavy melters (expect significant leaf loss)
- Cryptocorynes — infamous for “crypt melt,” sometimes dropping every leaf after any disturbance. They almost always recover from the roots within weeks.
- Stem plants grown emersed — rotala, ludwigia, and hygrophila often shed lower emersed leaves while the growing tips transition.
- Amazon swords — emersed-grown swords typically lose their broad oval aerial leaves and replace them with longer submersed ribbon leaves.
Light melters
- Anubias, java fern, bucephalandra — slow-growing rhizome plants transition gradually; occasional old-leaf melt but rarely dramatic.
- Vallisneria — usually transitions well, though it dislikes the move itself and may sulk for a week.
- Floating plants — minimal melt since their leaves were already at the air-water interface.
The Acclimation Protocol
Step 1: Quarantine or dip first
Before acclimating to your tank’s conditions, make sure you’re not acclimating pests along with the plant. Run new arrivals through our quarantine and dip protocol — it adds days upfront but prevents months of regret.
Step 2: Float to temperature-match (30 minutes)
Float the bag or container in your tank for 20–30 minutes to equalize temperature. Plants are less temperature-sensitive than fish, but a 10°F shock on top of transplant stress is an avoidable insult.
Step 3: Trim before planting
Remove any leaves that are already damaged, yellowing, or heavily algae-covered — they won’t recover and they’ll rot in your tank, feeding algae. For stem plants, trim off the bottom inch and any emersed leaves that look unlikely to adapt; the plant wastes energy maintaining leaves it’s going to shed anyway. Keep the healthy growing tips — that’s where recovery starts.
Step 4: Plant correctly the first time
Follow our planting guide — right depth, crown exposed on rosettes, rhizomes unburied on epiphytes. Every uprooting and replanting restarts the acclimation clock, so get placement right on the first attempt. Decide where each plant goes before it goes in the water.
Step 5: Run a gentle first week
For the first 7 days after planting:
- Moderate light — run your normal photoperiod but consider dropping intensity 20–30% if your light is dimmable. Blast-level light on a melting plant grows algae on the dying leaves, not recovery.
- Stable CO2 — if you inject CO2, keep it consistent. Fluctuating CO2 during acclimation is a melt accelerator. If you’re low-tech, this doesn’t apply — see growing without CO2.
- Half-strength fertilizer — new plants with damaged leaves can’t use full dosing, and the excess feeds algae. Ramp to full strength over 2–3 weeks per our fertilizer schedule.
- No disturbance — don’t move, trim, or “check on” new plants for at least two weeks. Every touch resets root establishment. This is especially critical for crypts.
Step 6: Remove melt, keep the base
As emersed leaves melt, remove the mushy material promptly — decaying leaves release ammonia and grow fungus that can spread to healthy tissue. But never discard the plant while the crown, rhizome, or roots are firm and alive. A crypt that’s lost every leaf but has firm roots is a plant that’s about to recover, not a dead plant. Give it 3–4 weeks before judging.
Telling Normal Melt From Real Problems
Normal transition melt:
- Affects oldest/emersed leaves first, newest growth last
- New submersed leaves emerge even as old ones dissolve
- Roots and crown stay firm and white/green
- Timeline: 1–4 weeks, then obvious new growth
Concerning melt (see our full melting diagnosis guide):
- New growth also melts or emerges deformed
- Rhizome or crown turns mushy and brown — this is rot, not transition
- Entire plant dissolves within days with no new growth after 4+ weeks
- Melting spreads to established plants that weren’t recently moved
Buying Tips to Minimize Melt
- Buy submersed-grown when available — hobbyist-grown cuttings transition with almost no melt.
- Choose tissue culture for sensitive species — crypts and delicate stems establish far more reliably from sterile cups.
- Avoid plants already melting in the store tank — some melt is normal, but a plant that’s mostly mush at purchase has less energy for recovery.
- Transport carefully — keep plants damp and out of direct sun/heat. A plant that dries out or cooks in a hot car melts far worse than one transported properly.
The First-Month Timeline: What to Expect Week by Week
Knowing what’s normal when removes most acclimation anxiety. Here’s the typical timeline for a healthy plant adapting to a new tank:
Week 1: The quiet week
Almost nothing visible happens. The plant is growing roots you can’t see and assessing its new environment. Some species (vallisneria, stem plants) may start shedding their lowest leaves. This is normal. Resist the urge to “help” — no moving, no extra fertilizer, no light changes. The most common beginner mistake is intervening during a week when the correct action is nothing.
Week 2: Melt peaks
This is when emersed leaves give up in earnest. Crypts may drop everything; swords shed their broad aerial leaves; stem plants lose lower foliage. It looks catastrophic and it’s usually fine. Keep removing mushy material, keep conditions stable, and watch the crown and growing tips — if those are firm and green, recovery is already underway.
Week 3: The turn
New submersed-adapted leaves emerge — smaller, thinner, often a slightly different shade of green than the emersed foliage. Stem plant tips start growing visibly; crypts push tiny curled leaves from the crown; swords unfurl narrow ribbon leaves. This is the moment most beginners exhale for the first time.
Week 4+: Established
New growth outpaces melt, and the plant is functionally yours. You can resume full-strength fertilizer, normal trimming, and stop treating it as fragile. Some slow growers (anubias, bucephalandra) take 6–8 weeks to show obvious progress — that’s their normal speed, not a problem.
Acclimating Different Plant Formats
Tissue-culture cups
Sterile, pest-free, and already adapted to high-humidity (not emersed) growth — tissue cultures melt the least of any format. Rinse the agar gel off gently (leftover gel rots and feeds fungus), split the portion into small plantlets, and plant per our planting guide. They establish slowly for the first two weeks, then accelerate. No dip needed, minimal acclimation stress — this is the premium experience you’re paying for.
Potted plants
Remove the pot and strip away the rockwool completely — leftover rockwool traps debris and rots. Tease the root mass apart gently; if it’s a dense mat, splitting it into 2–3 smaller portions actually establishes faster than planting one big clump (more growing points, better water flow around roots). Potted plants are usually emersed-grown, so expect the standard 2–4 week melt cycle.
Bare-root / bunched stems
Typically sold as weighted bunches. Remove any bands, foam, or weights, strip the lower leaves, and plant stems individually or in small groups. Bunched stems from the store are often already transitioning — check for new submersed growth at the tips, which tells you the plant is mid-adaptation and will settle quickly.
Hobbyist cuttings
Already submersed-grown and the fastest to establish — often showing new growth within days. The main acclimation factor is water-parameter difference between the two tanks. Float to temperature-match, plant promptly, and they’ll usually take off with minimal melt. This is why experienced hobbyists prefer trading cuttings over buying potted plants.
Frequently Asked Questions
Should I use a “plant starter” or transplant fertilizer?
Products marketed for transplant shock are mostly B-vitamins and mild hormones. They don’t hurt, but there’s no strong evidence they help aquarium plants specifically. Stable conditions and patience outperform any bottle. Save the money for more plants.
My new plant melted completely — bare crown, no leaves. Is it dead?
Probably not, if the crown or rhizome is firm. Crypts and swords routinely lose 100% of their leaves and regrow from the base within a month. The test is firmness: firm and pale/green means alive; mushy and brown/black means rot. Give firm-but-leafless plants a full 4 weeks before declaring them dead.
Can I speed up acclimation with extra light or CO2?
No — and trying usually backfires. A melting plant can’t use extra light; the excess just grows algae on its dying leaves. Keep light moderate and CO2 stable (not boosted) during acclimation. Growth speed comes from the plant’s own adaptation timeline, which you can’t rush, only avoid delaying.
Should new plants go straight into my main display tank?
After quarantine/dipping, yes — there’s no benefit to a separate “growing-in” tank for most plants. They acclimate to your water fastest in the tank they’ll live in. The exception is very delicate species going into a tank with boisterous fish; give those a few weeks in a calm corner or breeder box first.
The Patience Rule
The single most important acclimation skill is restraint: plant it right, set gentle conditions, remove decay, and then leave it alone for a month. The hobbyists with the best plant growth aren’t doing something clever in week one — they’re simply not interfering in weeks two through four while the plants do what they’ve evolved to do. Melt looks like failure and feels like failure, but in most cases it’s the visible part of a plant successfully becoming yours.