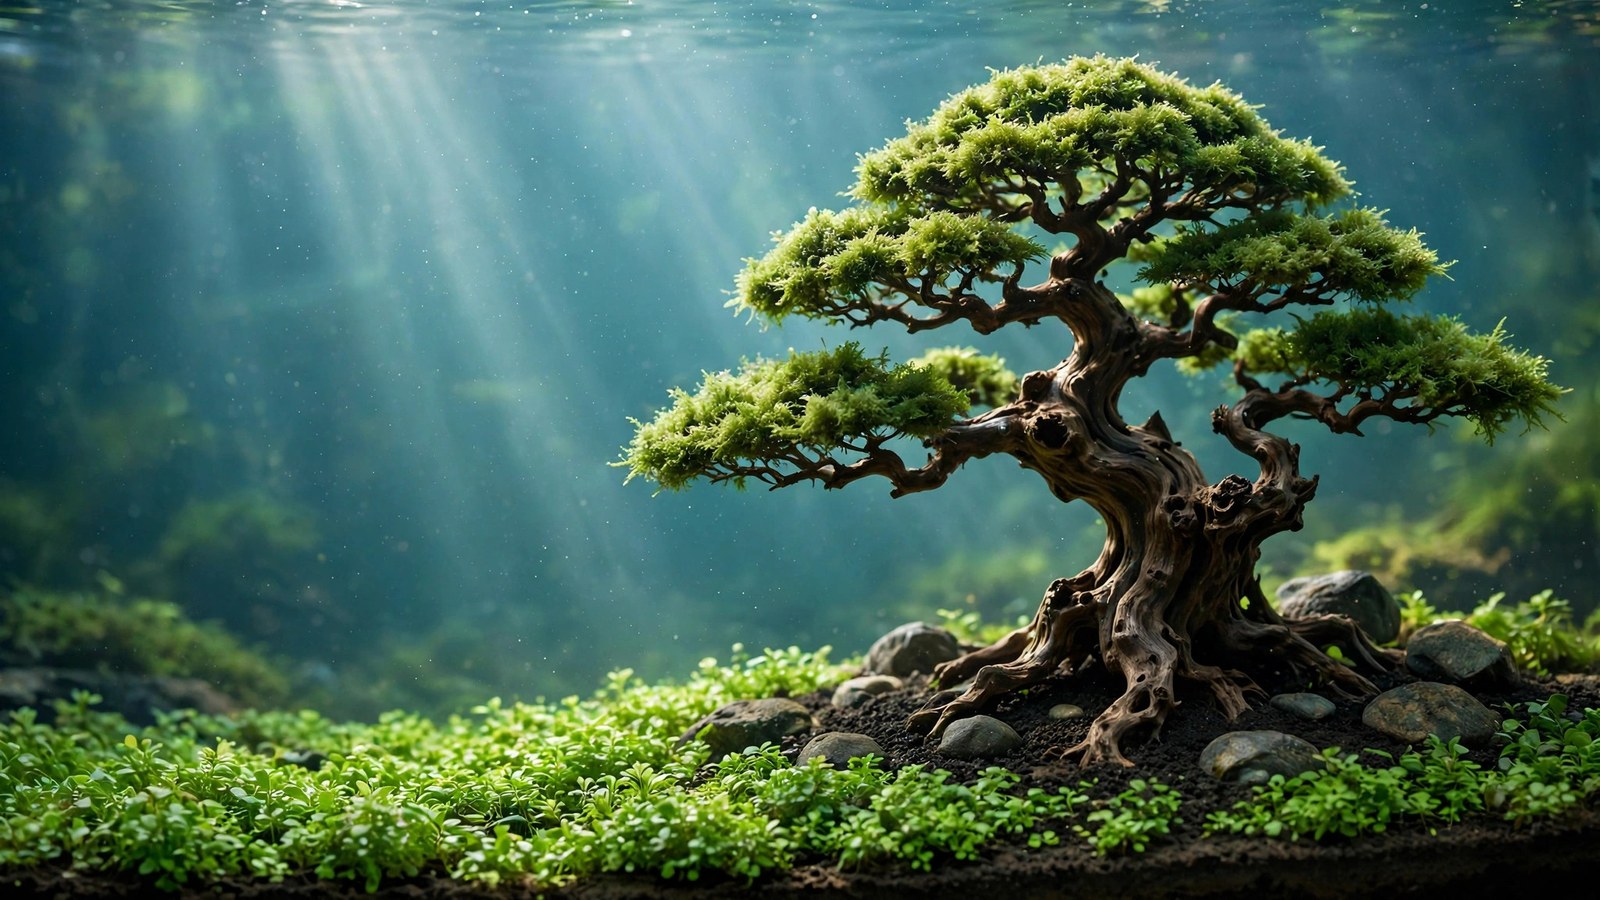
A bonsai driftwood tree aquascape captures something most layouts never manage: the feeling of standing under a full-sized tree, compressed into a glass box. A gnarled piece of driftwood becomes the trunk, moss becomes the foliage, and a carpet of low plants at the base turns wood and stone into a landscape. It's one of the most photographed styles in the hobby, and far more achievable than it looks — the trick is a good tree skeleton, proper waterlogging, and moss placed so it grows into a canopy rather than a blob.
This guide covers the full build: sourcing a bonsai driftwood piece (or building one yourself), waterlogging it so it stays put, anchoring it with the cotton-and-glue method, choosing and placing moss, planting the trunk and base, composing the tree per the rule of thirds, trimming the canopy into a bonsai silhouette, and long-term care.
What Makes the Tree Illusion Work
A convincing bonsai tree rests on three elements. First, the skeleton: a trunk with believable taper and branches that fork and thin toward the tips. Second, the canopy: moss clustered on the upper surfaces of branches, kept lean enough that the branch structure stays visible. Third, the setting: rocks and a foreground carpet around the base that sell the scale — a moss canopy reads as a tree only when the ground beneath it reads as a meadow. If any of the three is missing, the eye sees "wood with moss" instead of "tree."
Choosing Your Tree Skeleton
Buying a ready-made bonsai piece
Aquarium suppliers now sell driftwood shaped specifically into bonsai trees, in small through large sizes. This is the fastest route to a believable tree. When shopping, look for trunk taper (thick at the base, narrowing upward), branches that spread in multiple directions rather than one flat plane, and tips thin enough that moss can soften them without hiding them. Check proportions against your tank: a canopy reaching two-thirds of the tank height will dominate the layout exactly like a real tree dominating a clearing. A complete walkthrough of placing one appears in Buce Plant's bonsai tree guide for aquascapes.
DIY: bundling branches into a tree
If ready-made pieces aren't available, bundle thin manzanita, spider wood, or other branchy driftwood into a tree form. Choose one thicker piece as the trunk and finer branches as limbs. Dab cyanoacrylate gel on each contact point and hold 30–60 seconds, or bind with cotton thread while the glue cures. Plan the silhouette before gluing — sight down the trunk the way you'd judge a real tree. Asymmetric, slightly windswept shapes read as natural; a perfectly symmetrical crown reads as artificial. For the mechanics of attaching plants to wood, see how to attach aquarium plants to driftwood.
Prepping and Waterlogging Driftwood
Driftwood floats because it holds trapped air. New wood must be waterlogged before it can anchor a layout. The reliable rule: soak the driftwood until it sinks by itself — when it stays down on its own, it's done.
The soak takes days to a few weeks depending on density and thickness. Submerge the piece fully in a bucket or tub, weighing it down with a stone, and change the water every few days — this also leaches tannins that would otherwise tint your tank tea-brown. Scrub the surface with a stiff brush before the soak and again at the end to remove loose fibers and biofilm. One caveat: some very resinous woods never fully waterlog, or take months. If a piece still pops to the surface after several weeks, anchor it mechanically to stone instead of waiting indefinitely — the method below covers exactly that.
Anchoring the Tree to Stone
A tree that wobbles will never look rooted. The standard aquascaper's method uses cotton and liquid cyanoacrylate — the same superglue family that is 100% aquarium-safe and inert when wet. Here's the procedure:
- Choose a foundation stone. Pick a flat-bottomed, heavy stone slightly wider than the trunk base. Test that the tree balances on it dry.
- Build cotton bridges. Pack small tufts of plain white cotton (cosmetic cotton balls, not perfumed or dyed) into the contact points where trunk meets stone. The cotton acts as a gap-filler the glue can wick through.
- Saturate with liquid cyanoacrylate. Drizzle thin liquid super glue over the cotton until it hardens into a rigid bond. Add more tufts and repeat for strength, then give it an hour to cure fully.
- Conceal the joint. While the last layer is still tacky, press crushed aquasoil granules or fine substrate into the glue so the bond disappears. Moss tufts over the base later will finish the camouflage.
- Fill-test, then drain. Set the anchored tree in the empty tank, fill with water to confirm nothing floats or shifts, then drain back out. Now you can set your hardscape first and plant with total confidence the tree won't move.
This approach doubles as insurance for wood that never fully waterlogged — the stone base keeps it planted permanently.
Building the Canopy: Moss Selection
Moss is the foliage of your miniature tree, and the species you choose controls the canopy's texture, speed, and maintenance. Almost all common aquarium mosses attach the same way — small clusters pressed onto the wood with dabs of cyanoacrylate gel — so pick by growth habit and look, not difficulty.
How to attach moss to the tree
Tear moss into small portions (pea- to grape-sized tufts), not long strands. Dab a pinhead of cyanoacrylate gel — gel, not liquid, so it stays where you put it — onto the branch, press the tuft in, and hold 20–30 seconds. Work in layers: sparse beats dense at this stage, because moss that starts crowded becomes a suffocating mat. Place clusters on the upper and outer surfaces of branches where light hits, leaving undersides and inner structure bare so the branching stays visible. Glued moss anchors within a week or two.
| Moss | Growth habit | Speed | Canopy look |
|---|---|---|---|
| Christmas moss | Triangular fronds on branching stems | Medium | Classic conifer-like foliage; the go-to bonsai canopy |
| Mini Christmas moss | Same structure, noticeably smaller | Medium | Finer, denser foliage for small tanks and trees |
| Java moss | Irregular, stringy, fast-spreading | Fast | Wild, shaggy canopy; needs frequent trimming |
| Weeping moss | Fronds arch downward like a willow | Slow–medium | Elegant draping canopy on upward-reaching branches |
| Peacock / spiky moss | Compact rosettes, layered texture | Medium | Tight, sculpted pads that hold a pruned shape |
| Flame moss | Stems twist upward in spirals | Slow | Vertical accents; best as highlights, not the full canopy |
| Fissidens fontanus (phoenix moss) | Tiny feathered fronds in neat tufts | Slow | Velvety, refined canopy for close-up detail |
For a first tree, Christmas moss (or its mini form in nano tanks) is the safest choice — predictable, tree-like growth that forgives beginners. Weeping moss is the premium pick for elegance; Java moss is the fastest route to a full canopy but demands the most trimming. You can mix two or three species on one tree, but more than that and the canopy reads as confused.
Trunk and Base Planting
Bare trunk bases are the biggest giveaway that a "tree" is glued wood. Fix it with low, clinging plants at the trunk and stones around the root zone:
- Anubias and Bucephalandra at the trunk. Glue or tie Anubias nana petite and small Bucephalandra varieties to the trunk base, root flare, and hollows in the bark. Their broad leaves at small scale read as undergrowth and hide every glue joint. They grow slowly, so one careful placement lasts.
- Rock collars. Surround the base with a ring of stones stepping down in size — largest nearest the trunk, smallest outward. This visual anchor tells the viewer the tree is rooted in a place, not floating.
- Foreground carpet. Plant a low carpet around and between the rocks. The carpet-to-canopy contrast is what sells the miniature-tree illusion — a field beneath branches. In a low-tech build, see carpeting plants that grow without CO2, and the sibling article Glossostigma elatinoides care for a fast, dense option.
Composition: Rule of Thirds and Placement
Place the tree off-center, at roughly one-third of the tank's length from either end — the classic rule of thirds. Centered trees look staged; off-center trees look discovered. Let the branch direction guide the eye: if the main branches reach right, position the tree left of center so the canopy leans into the open space, pulling the gaze across the layout. Trim any branch that points hard at the front glass — it breaks the illusion of depth.
Depth comes from layering: the tree in the midground, rocks and carpet in the foreground, and the background kept open or lightly planted so the canopy silhouette reads cleanly. For the broader principles, creating depth in an aquascape and the nature aquarium style guide translate directly — this is a nature-style scape built around a single wooden protagonist. Compare the Iwagumi layout guide to feel how differently a centered stone arrangement reads next to an off-center tree, and one-driftwood layouts for minimalism with a single wood element.
Trimming the Canopy Into a Bonsai Shape
Moss doesn't grow into a bonsai silhouette by itself — you prune it into one, exactly like real bonsai. Start trimming about a month after planting, once the moss has anchored, and work in small passes:
- Define the silhouette first. Choose the canopy's outer shape — a soft dome, a layered pagoda, an asymmetric windswept crown — then cut everything outside it. Curved aquascaping scissors make this far easier than straight ones.
- Thin from underneath. After shaping the outside, reach under the canopy and remove dense inner growth. This keeps light and flow reaching the attachment points and prevents the mat from rotting at its core.
- Leave branch tips visible. A canopy where every tip disappears into moss looks like a shrub, not a tree. Let the finest twigs poke through the foliage.
- Work little and often. Moss responds better to light monthly trims than rare heavy cuts. A heavy cut shocks the moss and leaves brown scars that take weeks to green over.
Trimming also serves a practical purpose: moss canopies trap detritus. After each trim, gently siphon or wave loose fragments off the branches so they don't settle and rot.
Long-Term Care
Moss trim cycles
Expect a trim every 3–6 weeks — fast Java moss needs it most, slow Fissidens least. Each cycle, repeat the silhouette-first routine: reshape the outside, thin the inside, remove debris. If the canopy ever grows into an unshaped blob, cut it back hard to the branch structure and regrow; moss recovers from brutal cuts within weeks. Our aquascape trimming and maintenance guide covers the full routine for keeping a layout crisp between sessions.
Glue rebonding
Over months, some moss tufts detach as they outgrow their glue points, and trunk anchors can loosen if the wood shifts during substrate maintenance. Inspect joints every few months. Re-glue lifted tufts during a water change with the water level lowered, and press fresh substrate into any exposed anchor points. Cyanoacrylate bonds stay inert underwater, so re-gluing in-tank is safe.
Algae on the wood
Bare trunk sections are algae magnets in high light. Keep light intensity moderate, maintain consistent CO2 if you run it, and add an algae crew (Otocinclus, Amano shrimp, nerite snails) that grazes wood surfaces. Brush the trunk lightly during water changes if film algae appears — it comes off wood far more easily than off leaves. Avoid scrubbing near freshly glued moss until it's firmly attached.
Frequently Asked Questions
How long do I need to soak driftwood before it stays sunk?
Anywhere from a few days to several weeks, depending on density, thickness, and resin content. The only reliable test is to stop weighing it down and see whether it sinks on its own. Change the soak water regularly to leach tannins, and scrub the surface at the start and end. If a piece still floats after a month of soaking, anchor it to a stone base with the cotton-and-glue method instead of waiting longer.
Is super glue really safe in an aquarium?
Yes. Cyanoacrylate super glue is 100% aquarium-safe once cured and chemically inert when wet — it leaches nothing into the water. Aquascapers have used it for decades to attach moss, anubias, bucephalandra, and to bond wood to stone. Use the gel form for plants (it stays where you put it) and thin liquid form for wicking into cotton anchors. Let bonds cure fully before submersion.
Which moss makes the most realistic tree canopy?
Christmas moss is the classic choice — its triangular fronds genuinely resemble tiny conifer branches, and it grows in a controllable, tree-like habit. Mini Christmas moss does the same job at a finer scale in nano tanks. Weeping moss gives an elegant draped look, while peacock and spiky mosses form tight pads that hold a pruned shape beautifully. Java moss is cheapest and fastest but grows shaggy and needs the most trimming.
Why does my bonsai tree look like "driftwood with moss" instead of a tree?
Usually one of three things: moss planted on the undersides of branches instead of the light-facing tops, hiding the branch structure instead of crowning it; a bare trunk base, so no undergrowth hides the glue joints; or a dead-center position, which reads as a prop rather than a living thing. Move moss to upper surfaces, plant anubias or buce at the root flare, ring the base with rocks and carpet, and shift the tree to a rule-of-thirds position.
How often should I trim the moss canopy?
Every 3–6 weeks for most species — faster for Java moss, slower for Fissidens. Trim the outer silhouette first, thin the inner density second, and always clear loose debris afterward so it doesn't rot on the branches. Small frequent trims beat rare heavy cuts: they keep the canopy dense and the shape crisp without shocking the moss into brown patches.
Will the tree shift or float after it's planted?
Not if it was waterlogged until it sank on its own and anchored to a stone base with cotton and cyanoacrylate. The fill-test-then-drain step before planting catches buoyancy problems while they're still easy to fix. After planting, avoid jamming gravel vacuums under the base rock, and check the anchor joints every few months — a quick re-glue keeps everything solid.
Start With the Skeleton
Every great bonsai driftwood tree aquascape starts before a single drop of water goes in: a skeleton with real trunk taper and believable branching, soaked until it sinks, and anchored so firmly it could never move. Get that right and the rest — moss canopy, trunk planting, rule-of-thirds placement, patient trimming — becomes the enjoyable part. A year from now, when the moss has settled into its canopy and the carpet has crept up to the root flare, you'll have the thing this layout promises: a miniature tree that looks like it was always growing there.
Tissue-culture plants are the exception — they’re grown in sterile gel and adapt with minimal melting, which is part of what you’re paying for. Plants bought submersed from another hobbyist’s tank also transition with little melt, since they’re already in the right form.
Which Plants Melt Most (and Least)
Heavy melters (expect significant leaf loss)
- Cryptocorynes — infamous for “crypt melt,” sometimes dropping every leaf after any disturbance. They almost always recover from the roots within weeks.
- Stem plants grown emersed — rotala, ludwigia, and hygrophila often shed lower emersed leaves while the growing tips transition.
- Amazon swords — emersed-grown swords typically lose their broad oval aerial leaves and replace them with longer submersed ribbon leaves.
Light melters
- Anubias, java fern, bucephalandra — slow-growing rhizome plants transition gradually; occasional old-leaf melt but rarely dramatic.
- Vallisneria — usually transitions well, though it dislikes the move itself and may sulk for a week.
- Floating plants — minimal melt since their leaves were already at the air-water interface.
The Acclimation Protocol
Step 1: Quarantine or dip first
Before acclimating to your tank’s conditions, make sure you’re not acclimating pests along with the plant. Run new arrivals through our quarantine and dip protocol — it adds days upfront but prevents months of regret.
Step 2: Float to temperature-match (30 minutes)
Float the bag or container in your tank for 20–30 minutes to equalize temperature. Plants are less temperature-sensitive than fish, but a 10°F shock on top of transplant stress is an avoidable insult.
Step 3: Trim before planting
Remove any leaves that are already damaged, yellowing, or heavily algae-covered — they won’t recover and they’ll rot in your tank, feeding algae. For stem plants, trim off the bottom inch and any emersed leaves that look unlikely to adapt; the plant wastes energy maintaining leaves it’s going to shed anyway. Keep the healthy growing tips — that’s where recovery starts.
Step 4: Plant correctly the first time
Follow our planting guide — right depth, crown exposed on rosettes, rhizomes unburied on epiphytes. Every uprooting and replanting restarts the acclimation clock, so get placement right on the first attempt. Decide where each plant goes before it goes in the water.
Step 5: Run a gentle first week
For the first 7 days after planting:
- Moderate light — run your normal photoperiod but consider dropping intensity 20–30% if your light is dimmable. Blast-level light on a melting plant grows algae on the dying leaves, not recovery.
- Stable CO2 — if you inject CO2, keep it consistent. Fluctuating CO2 during acclimation is a melt accelerator. If you’re low-tech, this doesn’t apply — see growing without CO2.
- Half-strength fertilizer — new plants with damaged leaves can’t use full dosing, and the excess feeds algae. Ramp to full strength over 2–3 weeks per our fertilizer schedule.
- No disturbance — don’t move, trim, or “check on” new plants for at least two weeks. Every touch resets root establishment. This is especially critical for crypts.
Step 6: Remove melt, keep the base
As emersed leaves melt, remove the mushy material promptly — decaying leaves release ammonia and grow fungus that can spread to healthy tissue. But never discard the plant while the crown, rhizome, or roots are firm and alive. A crypt that’s lost every leaf but has firm roots is a plant that’s about to recover, not a dead plant. Give it 3–4 weeks before judging.
Telling Normal Melt From Real Problems
Normal transition melt:
- Affects oldest/emersed leaves first, newest growth last
- New submersed leaves emerge even as old ones dissolve
- Roots and crown stay firm and white/green
- Timeline: 1–4 weeks, then obvious new growth
Concerning melt (see our full melting diagnosis guide):
- New growth also melts or emerges deformed
- Rhizome or crown turns mushy and brown — this is rot, not transition
- Entire plant dissolves within days with no new growth after 4+ weeks
- Melting spreads to established plants that weren’t recently moved
Buying Tips to Minimize Melt
- Buy submersed-grown when available — hobbyist-grown cuttings transition with almost no melt.
- Choose tissue culture for sensitive species — crypts and delicate stems establish far more reliably from sterile cups.
- Avoid plants already melting in the store tank — some melt is normal, but a plant that’s mostly mush at purchase has less energy for recovery.
- Transport carefully — keep plants damp and out of direct sun/heat. A plant that dries out or cooks in a hot car melts far worse than one transported properly.
The First-Month Timeline: What to Expect Week by Week
Knowing what’s normal when removes most acclimation anxiety. Here’s the typical timeline for a healthy plant adapting to a new tank:
Week 1: The quiet week
Almost nothing visible happens. The plant is growing roots you can’t see and assessing its new environment. Some species (vallisneria, stem plants) may start shedding their lowest leaves. This is normal. Resist the urge to “help” — no moving, no extra fertilizer, no light changes. The most common beginner mistake is intervening during a week when the correct action is nothing.
Week 2: Melt peaks
This is when emersed leaves give up in earnest. Crypts may drop everything; swords shed their broad aerial leaves; stem plants lose lower foliage. It looks catastrophic and it’s usually fine. Keep removing mushy material, keep conditions stable, and watch the crown and growing tips — if those are firm and green, recovery is already underway.
Week 3: The turn
New submersed-adapted leaves emerge — smaller, thinner, often a slightly different shade of green than the emersed foliage. Stem plant tips start growing visibly; crypts push tiny curled leaves from the crown; swords unfurl narrow ribbon leaves. This is the moment most beginners exhale for the first time.
Week 4+: Established
New growth outpaces melt, and the plant is functionally yours. You can resume full-strength fertilizer, normal trimming, and stop treating it as fragile. Some slow growers (anubias, bucephalandra) take 6–8 weeks to show obvious progress — that’s their normal speed, not a problem.
Acclimating Different Plant Formats
Tissue-culture cups
Sterile, pest-free, and already adapted to high-humidity (not emersed) growth — tissue cultures melt the least of any format. Rinse the agar gel off gently (leftover gel rots and feeds fungus), split the portion into small plantlets, and plant per our planting guide. They establish slowly for the first two weeks, then accelerate. No dip needed, minimal acclimation stress — this is the premium experience you’re paying for.
Potted plants
Remove the pot and strip away the rockwool completely — leftover rockwool traps debris and rots. Tease the root mass apart gently; if it’s a dense mat, splitting it into 2–3 smaller portions actually establishes faster than planting one big clump (more growing points, better water flow around roots). Potted plants are usually emersed-grown, so expect the standard 2–4 week melt cycle.
Bare-root / bunched stems
Typically sold as weighted bunches. Remove any bands, foam, or weights, strip the lower leaves, and plant stems individually or in small groups. Bunched stems from the store are often already transitioning — check for new submersed growth at the tips, which tells you the plant is mid-adaptation and will settle quickly.
Hobbyist cuttings
Already submersed-grown and the fastest to establish — often showing new growth within days. The main acclimation factor is water-parameter difference between the two tanks. Float to temperature-match, plant promptly, and they’ll usually take off with minimal melt. This is why experienced hobbyists prefer trading cuttings over buying potted plants.
Frequently Asked Questions
Should I use a “plant starter” or transplant fertilizer?
Products marketed for transplant shock are mostly B-vitamins and mild hormones. They don’t hurt, but there’s no strong evidence they help aquarium plants specifically. Stable conditions and patience outperform any bottle. Save the money for more plants.
My new plant melted completely — bare crown, no leaves. Is it dead?
Probably not, if the crown or rhizome is firm. Crypts and swords routinely lose 100% of their leaves and regrow from the base within a month. The test is firmness: firm and pale/green means alive; mushy and brown/black means rot. Give firm-but-leafless plants a full 4 weeks before declaring them dead.
Can I speed up acclimation with extra light or CO2?
No — and trying usually backfires. A melting plant can’t use extra light; the excess just grows algae on its dying leaves. Keep light moderate and CO2 stable (not boosted) during acclimation. Growth speed comes from the plant’s own adaptation timeline, which you can’t rush, only avoid delaying.
Should new plants go straight into my main display tank?
After quarantine/dipping, yes — there’s no benefit to a separate “growing-in” tank for most plants. They acclimate to your water fastest in the tank they’ll live in. The exception is very delicate species going into a tank with boisterous fish; give those a few weeks in a calm corner or breeder box first.
The Patience Rule
The single most important acclimation skill is restraint: plant it right, set gentle conditions, remove decay, and then leave it alone for a month. The hobbyists with the best plant growth aren’t doing something clever in week one — they’re simply not interfering in weeks two through four while the plants do what they’ve evolved to do. Melt looks like failure and feels like failure, but in most cases it’s the visible part of a plant successfully becoming yours.