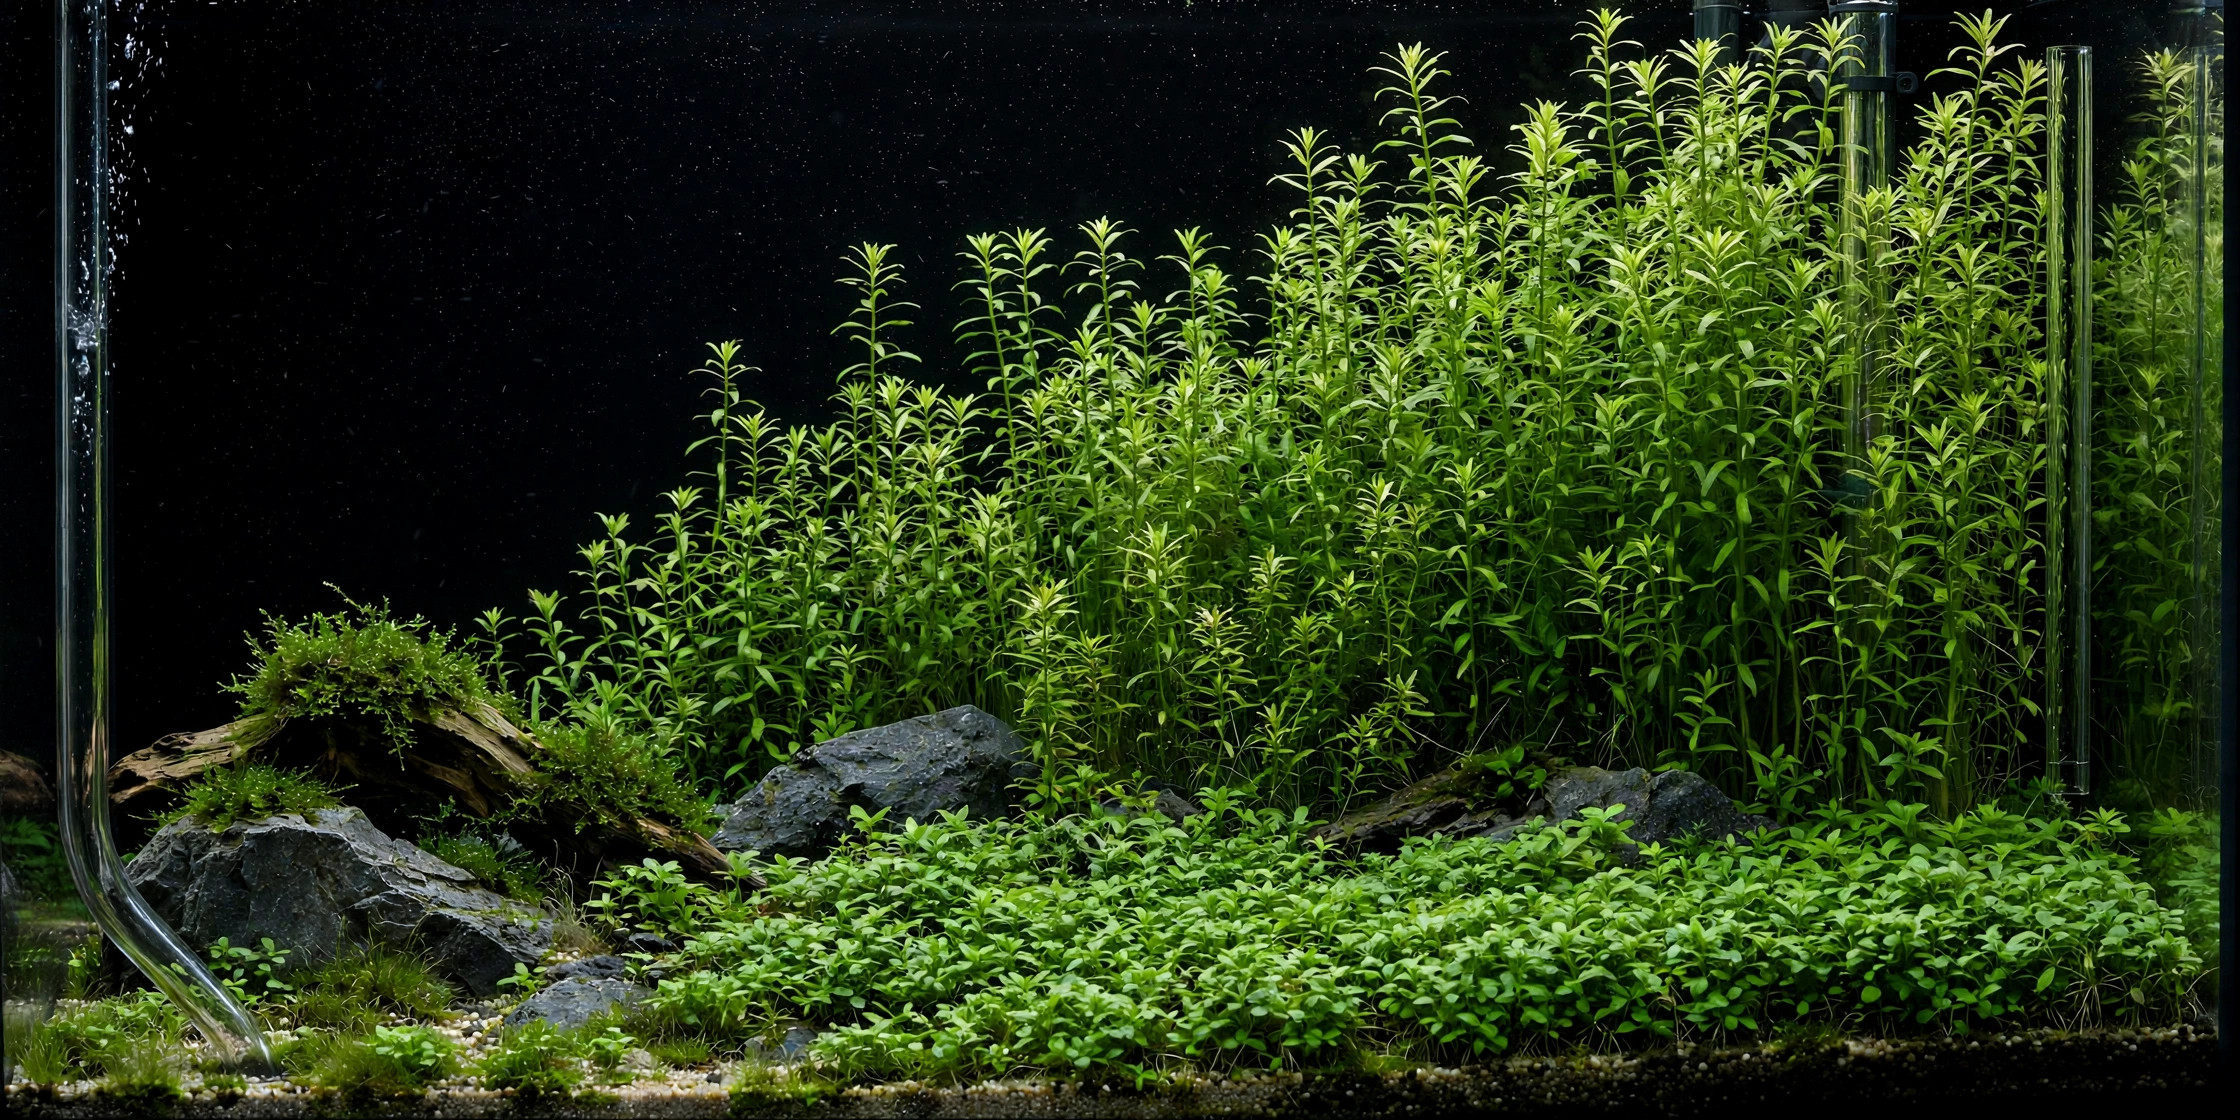
Learning how to hide aquarium equipment is the difference between a tank that looks like a slice of nature and one that looks like an appliance display. Nothing breaks the illusion of a wild riverbank faster than a chunky heater glowing against the glass, a neon thermometer strip on the front pane, or filter tubes tangled behind the driftwood. Professional aquascapers rarely own fancier gear — they plan equipment placement into the layout from the very first sketch, using background choice, living plant walls, hardscape, and external hardware to make every piece of kit vanish. This guide walks through each technique, plus the safety rules that keep fish healthy while the hardware disappears.
How to Hide Aquarium Equipment: Why Visible Gear Ruins the Illusion
The human eye is a contrast detector. It will skip a hundred green leaves and lock onto the single black rectangle that does not belong — the heater, the intake strainer, the suction-cupped thermometer. Aquascaping is theater, and visible hardware is a stagehand wandering into the spotlight. A heater clamped mid-glass says "box of water with gadgets"; the same heater behind a curtain of Vallisneria lets the viewer believe in a river. Hiding equipment is composition, not an afterthought — every technique below works best when decided before water touches glass.
The First Rule: Plan Equipment Into the Layout
The biggest mistake is aquascaping first and dealing with hardware later. Instead, gather every item — filter intake and outlet, heater, thermometer, air line, CO2 diffuser, cables — and dry-fit it during the hardscape phase. Tape the heater where it might live, hold the intake tube against the back glass, then look through the front pane at eye level exactly as a viewer will, noting everything that draws attention.
This dry run pairs naturally with the hardscape-first method, where rocks and wood are arranged before any planting. With hardscape locked and equipment mock-placed, you can see precisely which gaps need plant screens and which corners can swallow a heater whole. A ten-minute dry fit saves months of staring at a suction cup you wish you had hidden.
Technique 1: Let the Background Do the Heavy Lifting
A background is the cheapest invisibility cloak in the hobby. A matte black background absorbs dark equipment almost completely — a black heater, black intake, and black tubing melt into it, especially in the low-contrast corners. Frosted or dark-tinted film works similarly. Avoid pale blue "ocean" posters and translucent setups: anything light-colored silhouettes hardware as a dark outline, and rear lighting turns cables into dramatic shadows.
Match equipment color to the background wherever possible: black heaters and black airline tubing with a black background, rather than clear. In a rimless tank with no background, the rear glass mirrors room clutter, so either add a background or accept that plants and hardscape must do all the hiding. Background choice alone can erase half the visibility problem before a single plant is trimmed.
Technique 2: Build Tall Stem Walls Along the Back
The classic screen is a dense wall of tall background stems planted in a band along the rear glass, directly in front of the equipment. Fast growers such as Vallisneria, Rotala rotundifolia, Ludwigia repens, and Hygrophila polysperma are ideal: they reach the surface quickly, tolerate the slightly dimmer zone behind hardscape, and their vertical lines read as riverbank, not curtain. Plant thickly from day one — thin plantings take months to fill and leave equipment peeking through.
Keep a maintenance corridor in mind. A stem wall is living architecture that needs pruning, so leave a narrow gap — even 3–4 cm between equipment and glass — for a hand or tweezers to reach the heater or wipe the intake. The best screens are the ones you can service without dismantling the aquascape.
Technique 3: Use Broad-Leaf Midground Screens
For targeted concealment, a cluster of broad-leaf plants parked directly in front of a heater or thermometer works like a privacy hedge. A large Anubias barteri tied to wood, a clump of Java fern on a stone, or a mound of Cryptocoryne wendtii each throw enough leaf area to swallow a heater tube from the front viewing angle.
Position screens with the viewer's sightline in mind. Equipment is viewed through the front pane, so the screen only needs to block the straight-ahead view. Angle a driftwood piece so its Anubias-covered face points at the front glass, place the heater behind it, and the problem is solved from every seat on the couch. Slow-growing broad-leaf plants hold their shape far longer between trims than stem walls.
Technique 4: Conceal Hardware Inside the Hardscape
Rocks and wood are the most honest hiding places because they were going to be there anyway. A filter intake tucked into a cleft between two stones reads as water flowing through a rock gap, not a plastic tube. A heater laid horizontally along the back, cradled in a driftwood fork and half-buried in substrate, vanishes once plants grow in around it. Even a simple ring of small stones around an intake strainer breaks up its outline enough that the eye slides past.
This is where single-piece driftwood layouts shine: one strong sculptural branch provides natural pockets, overhangs, and shadow zones that swallow hardware. When placing stones or wood around equipment, always leave water room — a heater needs circulation on all sides and an intake needs a clear approach. Hardscape should frame equipment, never entomb it.
Technique 5: Put Hardware Where the Eye Doesn't Go
Composition rules are concealment tools. Viewers look at the focal point and at bright, high-contrast areas; the back corners are visual dead zones, making them the natural home for heaters, intakes, and thermometers. Cluster hardware into one utility corner rather than spreading it across the back glass — one corner is far easier to screen with a single plant wall than three scattered gadgets.
Corner clustering pairs well with techniques that create depth in your aquascape, since the equipment corner can double as the dark, receding zone that makes the foreground feel deeper. It also respects negative-space aquascaping principles: keep the open, breathing areas completely hardware-free, and let the dense planted zones do the hiding.
Technique 6: Planted Sponge Barriers and Moss Walls
For mid-water equipment that resists every other trick — typically a chunky internal filter — build a planted sponge barrier. Cut coarse filter sponge to fit the corner, then push Java moss, Anubias nana petite, or Bucephalandra rhizomes into its pores or tie moss on with thread. Within weeks the sponge becomes a living green wall with the equipment sealed behind it, adding bonus biological filtration.
Moss walls work the same way at larger scale: a mesh panel covered in Java or Christmas moss, mounted an inch off the back glass, hides everything behind it while giving shrimp a grazing surface. The trade-off is maintenance — moss and sponge collect detritus and need periodic rinsing — so design them to lift out easily rather than fixing them permanently.
Technique 7: Move the Equipment Out of the Tank Entirely
The most complete hiding technique is removal. Inline heaters such as the Hydor ETH in-line external heater splice into canister filter tubing, so the element lives inside the cabinet and no heater ever enters the tank. Several canister filters now ship with built-in heater modules, and inline CO2 diffusers and reactors dissolve gas in the outflow line, deleting the in-tank diffuser from the composition.
Glass lily pipes replace bulky plastic with near-invisible glass — a form of concealment in itself (our dedicated lily-pipe guide covers that hardware in full; here it is simply a layout decision). External digital thermometer probes — a thin wire with a tiny sensor — replace chunky in-tank thermometers, with the display in the cabinet. Every item moved outside the glass is an item you never have to hide.
Taming Cables, Air Lines, and Thermometers
Small accessories cause outsized damage because thin, high-contrast lines cross the composition. Route every cable and air line straight up the rear corner silicone seam, where the seam camouflages them, securing them with small black zip ties or suction cups. Give each cable a drip loop below the outlet for safety, then gather loops behind the stand in a cable raceway or black box. From the front, the tank should show zero wires.
Run black or dark-green air tubing instead of clear — clear tubing grows algae inside and turns into a green worm within months. Bury the final stretch under the substrate so the air stone appears to emerge from the hardscape, and hide the check valve behind the stand rather than dangling it mid-line. Stick-on LCD thermometers belong on the outside of the rear glass, never the front pane; better still, switch to a probe thermometer with the display in the cabinet.
What You Must Never Hide Completely
Concealment has hard safety limits, and crossing them is one of the most common beginner aquascaping mistakes. Never bury a heater in substrate or wedge it so tightly between rocks that water cannot circulate — trapped heat cracks glass heaters and cooks the surrounding substrate. Never let plants grow into the intake strainer: blocked intakes starve the filter, strain the motor, and can crash your cycle. Keep clear water around every intake.
Heaters need circulation on all sides to distribute heat evenly, so place them in the filter's flow path — near the outflow is ideal — and confirm the thermometer reading matches the far side of the tank. Leave every concealed item reachable: intakes need monthly cleaning, heaters seasonal adjustment. A hiding spot you cannot service without tearing down the aquascape will eventually cause a flood, a cold snap, or a dead filter. Hide hardware from the viewer, never from yourself.
Quick Reference: Equipment vs. Concealment Method
| Equipment | Best concealment methods | Watch out for |
|---|---|---|
| In-tank heater | Broad-leaf midground screen, hardscape cradle, corner placement; upgrade to inline heater | Needs water circulation on all sides; never bury in substrate |
| Filter intake / strainer | Rock cleft or stone ring, tall stem wall in front, moss-covered sponge barrier | Keep clear approach for water; clean monthly — must stay reachable |
| Filter outlet / spray bar | Black background, lily pipes, tuck behind hardscape overhang | Do not point flow into substrate or directly at the heater |
| Thermometer | Stick-on LCD on rear outer glass, or external digital probe with cabinet display | Must remain readable — check it, don't just hide it |
| Air line and air stone | Dark tubing up the rear silicone seam, buried final stretch, stone nested in rock pile | Keep the check valve accessible above the waterline |
| Cables and power cords | Drip loops, rear-corner routing, raceway or box behind the stand | Never overload one outlet; keep connections dry |
| CO2 diffuser | Low at the back behind foreground hardscape, or switch to inline diffuser/reactor | Needs flow across it; keep visible enough to check bubble rate |
| Powerhead / wavemaker | Lower rear corner behind rock pile, aimed along the back glass | Needs open water to push; don't choke it behind dense plants |
Frequently Asked Questions
Can I bury my heater in the substrate to hide it?
No — this is dangerous and should never be done. A buried heater cannot shed heat into circulating water, so it overheats its surroundings, risks cracking the glass tube, and can create anaerobic hot spots in the substrate. It also becomes impossible to see the indicator light or remove the unit without a full teardown. Hide heaters behind plants, hardscape, or a background instead, always leaving open water circulating on all sides of the element.
Will plants growing against my filter intake harm filtration?
Yes, if they touch or cover the strainer. Plants pressed against an intake restrict water flow, forcing the motor to work harder and reducing turnover until the filter can no longer support the bio-load. Keep a clear zone around every intake, trim background stems before they lean into it, and position the strainer with future growth in mind. A monthly intake wipe during water changes prevents most blockages before they start.
Are inline heaters worth buying just to hide equipment?
For many aquascapers, absolutely. An inline heater splices into canister filter tubing so no heating element ever enters the tank, removing the single bulkiest piece of hardware in one move. They cost more than glass tube heaters and require a canister filter, but they distribute heat more evenly through the outflow and eliminate any risk of fish burns. If a heater-free display is the goal, it is the cleanest solution available.
How do I hide equipment in a small nano tank?
Nano tanks are harder because every centimeter is visible and the equipment is proportionally larger. Prioritize removal over concealment: use a small canister or hang-on-back filter with glass lily pipes, an inline heater if you run a canister, and a probe thermometer. Then use one dense corner planting — mosses and Anubias petite on a small stone — as your single utility screen. In larger aquariums you can spread hardware across dead zones, but in a nano, less equipment in the tank beats cleverer hiding.
Does a black background really make that much difference?
More than almost any other single change. Against a black background, black heaters, dark intakes, and black tubing lose their edges and dissolve into the backdrop, especially under typical lighting where rear corners fall into shadow. Against a light or transparent background, the same equipment is silhouetted as a sharp dark outline. Fit a matte black background and you will erase roughly half of your visible-equipment problem in ten minutes.
Make Invisibility Part of the Design
The tanks that look effortlessly equipment-free were never effortless — their owners decided where every heater, tube, and cable would live before the first stone was placed. Start with the background, cluster hardware into one utility corner, screen it with plants and hardscape you were planting anyway, and move whatever you can outside the glass. Keep every hidden item reachable and every intake breathing, and the viewer will notice only the world you built. That is the whole trick: the equipment was never hidden as an afterthought, because it was part of the design from day one.
Tissue-culture plants are the exception — they’re grown in sterile gel and adapt with minimal melting, which is part of what you’re paying for. Plants bought submersed from another hobbyist’s tank also transition with little melt, since they’re already in the right form.
Which Plants Melt Most (and Least)
Heavy melters (expect significant leaf loss)
- Cryptocorynes — infamous for “crypt melt,” sometimes dropping every leaf after any disturbance. They almost always recover from the roots within weeks.
- Stem plants grown emersed — rotala, ludwigia, and hygrophila often shed lower emersed leaves while the growing tips transition.
- Amazon swords — emersed-grown swords typically lose their broad oval aerial leaves and replace them with longer submersed ribbon leaves.
Light melters
- Anubias, java fern, bucephalandra — slow-growing rhizome plants transition gradually; occasional old-leaf melt but rarely dramatic.
- Vallisneria — usually transitions well, though it dislikes the move itself and may sulk for a week.
- Floating plants — minimal melt since their leaves were already at the air-water interface.
The Acclimation Protocol
Step 1: Quarantine or dip first
Before acclimating to your tank’s conditions, make sure you’re not acclimating pests along with the plant. Run new arrivals through our quarantine and dip protocol — it adds days upfront but prevents months of regret.
Step 2: Float to temperature-match (30 minutes)
Float the bag or container in your tank for 20–30 minutes to equalize temperature. Plants are less temperature-sensitive than fish, but a 10°F shock on top of transplant stress is an avoidable insult.
Step 3: Trim before planting
Remove any leaves that are already damaged, yellowing, or heavily algae-covered — they won’t recover and they’ll rot in your tank, feeding algae. For stem plants, trim off the bottom inch and any emersed leaves that look unlikely to adapt; the plant wastes energy maintaining leaves it’s going to shed anyway. Keep the healthy growing tips — that’s where recovery starts.
Step 4: Plant correctly the first time
Follow our planting guide — right depth, crown exposed on rosettes, rhizomes unburied on epiphytes. Every uprooting and replanting restarts the acclimation clock, so get placement right on the first attempt. Decide where each plant goes before it goes in the water.
Step 5: Run a gentle first week
For the first 7 days after planting:
- Moderate light — run your normal photoperiod but consider dropping intensity 20–30% if your light is dimmable. Blast-level light on a melting plant grows algae on the dying leaves, not recovery.
- Stable CO2 — if you inject CO2, keep it consistent. Fluctuating CO2 during acclimation is a melt accelerator. If you’re low-tech, this doesn’t apply — see growing without CO2.
- Half-strength fertilizer — new plants with damaged leaves can’t use full dosing, and the excess feeds algae. Ramp to full strength over 2–3 weeks per our fertilizer schedule.
- No disturbance — don’t move, trim, or “check on” new plants for at least two weeks. Every touch resets root establishment. This is especially critical for crypts.
Step 6: Remove melt, keep the base
As emersed leaves melt, remove the mushy material promptly — decaying leaves release ammonia and grow fungus that can spread to healthy tissue. But never discard the plant while the crown, rhizome, or roots are firm and alive. A crypt that’s lost every leaf but has firm roots is a plant that’s about to recover, not a dead plant. Give it 3–4 weeks before judging.
Telling Normal Melt From Real Problems
Normal transition melt:
- Affects oldest/emersed leaves first, newest growth last
- New submersed leaves emerge even as old ones dissolve
- Roots and crown stay firm and white/green
- Timeline: 1–4 weeks, then obvious new growth
Concerning melt (see our full melting diagnosis guide):
- New growth also melts or emerges deformed
- Rhizome or crown turns mushy and brown — this is rot, not transition
- Entire plant dissolves within days with no new growth after 4+ weeks
- Melting spreads to established plants that weren’t recently moved
Buying Tips to Minimize Melt
- Buy submersed-grown when available — hobbyist-grown cuttings transition with almost no melt.
- Choose tissue culture for sensitive species — crypts and delicate stems establish far more reliably from sterile cups.
- Avoid plants already melting in the store tank — some melt is normal, but a plant that’s mostly mush at purchase has less energy for recovery.
- Transport carefully — keep plants damp and out of direct sun/heat. A plant that dries out or cooks in a hot car melts far worse than one transported properly.
The First-Month Timeline: What to Expect Week by Week
Knowing what’s normal when removes most acclimation anxiety. Here’s the typical timeline for a healthy plant adapting to a new tank:
Week 1: The quiet week
Almost nothing visible happens. The plant is growing roots you can’t see and assessing its new environment. Some species (vallisneria, stem plants) may start shedding their lowest leaves. This is normal. Resist the urge to “help” — no moving, no extra fertilizer, no light changes. The most common beginner mistake is intervening during a week when the correct action is nothing.
Week 2: Melt peaks
This is when emersed leaves give up in earnest. Crypts may drop everything; swords shed their broad aerial leaves; stem plants lose lower foliage. It looks catastrophic and it’s usually fine. Keep removing mushy material, keep conditions stable, and watch the crown and growing tips — if those are firm and green, recovery is already underway.
Week 3: The turn
New submersed-adapted leaves emerge — smaller, thinner, often a slightly different shade of green than the emersed foliage. Stem plant tips start growing visibly; crypts push tiny curled leaves from the crown; swords unfurl narrow ribbon leaves. This is the moment most beginners exhale for the first time.
Week 4+: Established
New growth outpaces melt, and the plant is functionally yours. You can resume full-strength fertilizer, normal trimming, and stop treating it as fragile. Some slow growers (anubias, bucephalandra) take 6–8 weeks to show obvious progress — that’s their normal speed, not a problem.
Acclimating Different Plant Formats
Tissue-culture cups
Sterile, pest-free, and already adapted to high-humidity (not emersed) growth — tissue cultures melt the least of any format. Rinse the agar gel off gently (leftover gel rots and feeds fungus), split the portion into small plantlets, and plant per our planting guide. They establish slowly for the first two weeks, then accelerate. No dip needed, minimal acclimation stress — this is the premium experience you’re paying for.
Potted plants
Remove the pot and strip away the rockwool completely — leftover rockwool traps debris and rots. Tease the root mass apart gently; if it’s a dense mat, splitting it into 2–3 smaller portions actually establishes faster than planting one big clump (more growing points, better water flow around roots). Potted plants are usually emersed-grown, so expect the standard 2–4 week melt cycle.
Bare-root / bunched stems
Typically sold as weighted bunches. Remove any bands, foam, or weights, strip the lower leaves, and plant stems individually or in small groups. Bunched stems from the store are often already transitioning — check for new submersed growth at the tips, which tells you the plant is mid-adaptation and will settle quickly.
Hobbyist cuttings
Already submersed-grown and the fastest to establish — often showing new growth within days. The main acclimation factor is water-parameter difference between the two tanks. Float to temperature-match, plant promptly, and they’ll usually take off with minimal melt. This is why experienced hobbyists prefer trading cuttings over buying potted plants.
Frequently Asked Questions
Should I use a “plant starter” or transplant fertilizer?
Products marketed for transplant shock are mostly B-vitamins and mild hormones. They don’t hurt, but there’s no strong evidence they help aquarium plants specifically. Stable conditions and patience outperform any bottle. Save the money for more plants.
My new plant melted completely — bare crown, no leaves. Is it dead?
Probably not, if the crown or rhizome is firm. Crypts and swords routinely lose 100% of their leaves and regrow from the base within a month. The test is firmness: firm and pale/green means alive; mushy and brown/black means rot. Give firm-but-leafless plants a full 4 weeks before declaring them dead.
Can I speed up acclimation with extra light or CO2?
No — and trying usually backfires. A melting plant can’t use extra light; the excess just grows algae on its dying leaves. Keep light moderate and CO2 stable (not boosted) during acclimation. Growth speed comes from the plant’s own adaptation timeline, which you can’t rush, only avoid delaying.
Should new plants go straight into my main display tank?
After quarantine/dipping, yes — there’s no benefit to a separate “growing-in” tank for most plants. They acclimate to your water fastest in the tank they’ll live in. The exception is very delicate species going into a tank with boisterous fish; give those a few weeks in a calm corner or breeder box first.
The Patience Rule
The single most important acclimation skill is restraint: plant it right, set gentle conditions, remove decay, and then leave it alone for a month. The hobbyists with the best plant growth aren’t doing something clever in week one — they’re simply not interfering in weeks two through four while the plants do what they’ve evolved to do. Melt looks like failure and feels like failure, but in most cases it’s the visible part of a plant successfully becoming yours.