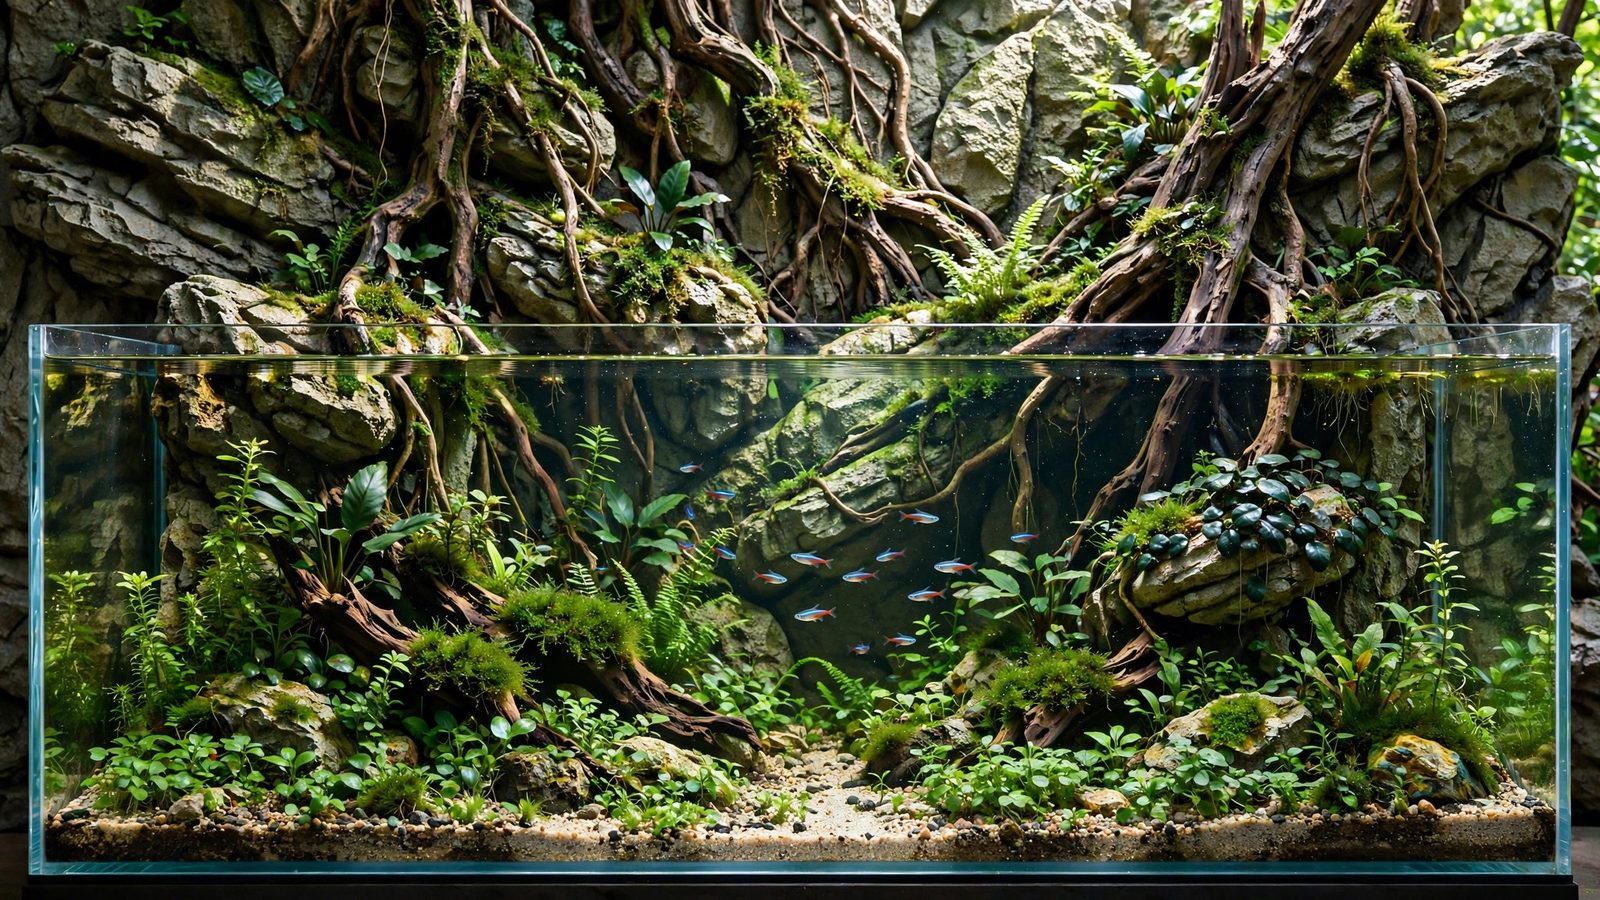
That flat black poster on the back of your tank is leaving depth on the table. A 3D aquarium background — a sculpted, rock-textured panel that sits inside the glass — can add what looks like a foot of extra depth to a planted tank, hide every cable and intake, and give epiphytes like Anubias and moss a natural cliff face to colonize. But it can also be a regret you'll stare at every day: a background that leaches uncured cement into your water, traps rotting mulm in the gap behind it, or clashes with your hardscape until the whole layout feels fake. This guide walks you through the ready-made panels versus DIY builds, the fish-safety rules that matter, and how to make a 3D background work with a planted tank instead of against it.
How a 3D Aquarium Background Changes a Planted Tank
A printed background is decoration. A 3D background is architecture. Because it physically intrudes 5–10 cm into the tank and carries its own shadows, it redefines the back third of your aquascape: plant lines curve around rock outcrops instead of meeting a flat plane, filter intakes and heater cables disappear into crevices, and the eye reads layered depth even in a shallow tank. If you've worked on creating depth in a small aquascape, a textured back wall does half that work for you automatically.
The trade-offs are physical. That 5–10 cm of intrusion eats into swim space and substrate footprint, so in tanks under 20 gallons a bulky background can make the tank feel smaller, not deeper. And every 3D panel is a commitment — removing a silicone-sealed background from an established tank is a half-day demolition job that disturbs everything. Choose and install it before planting, not after.
Ready-Made vs. DIY: The Honest Comparison
| Factor | Ready-made polyurethane panels | DIY styrofoam + cement |
|---|---|---|
| Cost (60 cm tank) | $60–$120 | $20–$40 materials |
| Time to tank-ready | Same day (rinse and install) | 2–4 weeks (carve + coat + cure) |
| Fish safety | Tested by manufacturer | Only after full curing and pH testing |
| Customization | Fixed design, trimmable edges | Anything you can carve |
| Weight | Light (foam, ~1–2 kg) | Moderate (cement adds weight) |
| Durability | 10+ years, colorfast | Good if sealed well; cement can crack |
Ready-Made Panels: What to Buy
The market leaders are all polyurethane or similar inert foams with hand-painted rock textures. Back to Nature (the Swedish original) makes deeply sculpted panels in slim versions for smaller tanks — their slimline range protrudes as little as 3 cm, which keeps nano layouts breathing. Aquadecor offers some of the most realistic sandstone and slate finishes in the hobby, and JUWEL's Stone/Cliff panels are designed to slot exactly into JUWEL tanks with pre-cut filter access. All three are aquarium-safe out of the box: a rinse under warm water is enough before install.
Shopping rules: measure the inside width of your tank, not the outside, and buy 5–10 mm undersized — you'll hide the seams with silicone and substrate. Check the protrusion depth against your tank's front-to-back measurement; in a 30 cm deep nano, a 10 cm panel eats a third of the tank. And read reviews for colorfastness complaints before buying budget panels — cheap foam backgrounds can develop a chalky sheen after a year under strong lighting.
DIY Builds: Styrofoam, Cement, and Patience
The classic DIY method layers expanded polystyrene (XPS insulation foam, not beaded packaging foam) into a rough wall, carves it with a hot wire or serrated knife, then coats it in 3–5 thin layers of cement or hydraulic mortar, finishing with aquarium-safe concrete sealer or acrylic paint followed by a clear epoxy topcoat.
The curing rule nobody can skip
Fresh cement is extremely alkaline — it will drive tank pH past 9 and kill everything you own. The fix is boring but mandatory: soak the finished background in a bucket of water, changing the water daily, for a minimum of 14 days (21–28 for thick builds), testing pH of the soak water until it holds neutral for 48 hours. Fast-curing additives and pond-grade sealers shorten this, but never trust a build that hasn't shown stable pH across a weekend.
Design tips for carved builds
Carve deep horizontal crevices, not just surface texture — crevices catch light, grow moss, and anchor planting. Keep the lower third simpler; you'll bury it in substrate anyway. Build in ledges at two heights so you can wedge Anubias rhizomes and fern roots directly into the rock face. And leave one clean vertical channel where the filter intake will sit, so equipment stays serviceable — burying your intake behind solid foam is how filters get starved.
Installation: Sealing, Spacing, and the Dead Zone
Installation day decides whether your background is a feature or a filtration problem. Work through this sequence:
- Dry-fit first. Place the panel in the empty tank. Trim edges with a sharp knife or fine saw so it sits flat against the back glass with no rocking.
- Leave breathing room. Don't wedge the panel flush. Keep 1–2 cm of clearance behind it (or use the panel's own rear standoffs) so water circulates. Stagnant water behind a sealed background becomes a nitrate and hydrogen-sulfide factory.
- Silicone the perimeter. Run a bead of aquarium-safe silicone along the top edge and both sides, pressed into the glass. The top edge is critical — it stops fish food, leaves, and fish themselves from slipping behind the panel.
- Substrate before water. Pile substrate against the panel's base to bury the bottom edge; this hides the seam and gives background plants a deeper bed right where you want stems to emerge.
- Intakes and heaters stay in front. Route filter intakes and heater cables along the side glass or through pre-cut equipment channels, never in the dead zone behind the panel.
The hidden equipment problem is exactly what backgrounds solve — but only if you plan equipment placement before the silicone cures. Draw your intake, outflow, heater, and thermometer positions on the back glass with a dry-erase marker while dry-fitting.
Planting a 3D Background
A textured background is a vertical planting surface, and epiphytes treat it like a cliff face in nature. Anubias, Bucephalandra, and Java fern rhizomes wedge into crevices or attach with a drop of cyanoacrylate gel and colonize faster than on glass — the roughness gives rhizoids purchase. Moss (Taxiphyllum, Fissidens) pressed into cracks and misted daily for the first week will creep across the panel and soften every hard edge within two months. Many aquascapers run a rock wall cliff face look this way without stacking a single real stone.
For the substrate line, run tall background stems right against the panel — Rotala, Ludwigia, and Vallisneria emerging from behind a rock ledge read as growing from the cliff itself, which sells the forced-perspective trick. And mind your lighting: a deep 3D panel casts its own shadow band along the bottom, so the back row of substrate may sit 10–20 PAR lower than mid-tank. Choose background plants that tolerate that, or angle a supplemental light toward the back third.
Harmonizing Background and Hardscape
A 3D background multiplies your rock — visually, the panel is hardscape. That means the biggest design risk is a style clash: a grey sandstone panel behind reddish dragon stone reads as two different mountains colliding. Match the stone family (sandstone with sandstone, slate with seiryu-style grey, lava texture with lava rock) and the color temperature (warm beige panels pair with warm-toned rock and wood; cool grey panels with dark seiryu and grey stone). The one-rock aquascape layouts shows how stone has its own personality — your background should belong to the same family as the one you chose.
Wood behaves differently: driftwood against a rock panel reads as a fallen tree against a cliff, which is natural and forgiving. If you use a bonsai driftwood tree as your centerpiece, a subtle, low-contrast panel keeps the tree as the hero; a dramatic craggy panel will fight it for attention. As with any composition, one focal point rules — a good composition guide will tell you to let the background support the layout's main line instead of adding a second one.
Cleaning Behind and Around the Panel
Detritus accumulates where flow stalls: along the panel's base seam and in its crevices. During weekly maintenance, run a gravel vacuum along the substrate-panel junction and blast crevices with a turkey baster or pipette to lift mulm before it decays — moss-covered backgrounds otherwise trap more waste than a bare back wall. Never pull the panel to clean behind it; a silicone-sealed background that gets yanked rarely reseats watertight.
Algae on textured panels is mostly a light problem. Green spot algae loves rough surfaces under intense light; if your panel blooms while the front glass stays clean, trim photoperiod at the back by shading the rear third or reducing intensity. Bristlenose plecos and Amano shrimp graze flat panel faces happily, but deep crevices need your baster, not livestock.
Fish Safety Checklist
Before the first livestock goes in, run through these:
- Cured and pH-stable: ready-made panels are fine after a rinse; DIY cement builds need the full soak-and-test cycle — soak water holding neutral pH for 48 hours.
- No sharp edges: run a finger along every crevice and ledge. Sand down any cement points that could tear fins or scrape loaches and plecos.
- Top sealed: no gap a fish can wedge into between panel top and waterline — small tetras and shrimp are escape artists.
- Flow verified: with the filter running, watch that water moves past the panel's face; dead spots at the base signal you need to reposition the outflow.
- No off-gassing: brand-new foam panels can carry a faint plastic odor; air them out 24 hours before install, and never install one that smells of solvents.
Cost and Sizing Guide
| Tank size | Ready-made panel | DIY materials |
|---|---|---|
| Nano (20–40 L) | $60–$90 (slim panels) | $15–$25 |
| 60 cm / ~60 L | $80–$130 | $20–$40 |
| 90 cm / ~200 L | $140–$220 | $30–$50 |
| 120 cm / ~300 L+ | $200–$350+ (often two panels joined) | $40–$70 |
Note: DIY savings shrink once you count silicone, sealer, and the electricity of running a spare bucket for three weeks — but the bigger cost is your time. If you're building your first aquascape, a ready-made panel removes a whole failure mode from an already complex project.
Frequently Asked Questions
Will a 3D background raise my pH?
Ready-made polyurethane panels are pH-neutral and won't move your water chemistry. DIY cement backgrounds absolutely will raise pH until fully cured — that's why the 2–4 week soak with daily water changes is non-negotiable. After a proper cure, a well-sealed cement background holds neutral pH like any hardscape rock.
Can I attach a 3D background to an established, filled tank?
Not well, and not safely. The panel needs aquarium silicone against dry glass to bond, which means a full drain and dry-down. Magnetic or suction-cup mounted panels exist for filled tanks, but they're thin, prone to shifting, and can't support the sculpted depth that makes a 3D background worth having. Plan backgrounds for tank setup day.
How do I stop mulm from building up behind the background?
Leave 1–2 cm of circulation gap behind the panel, seal the top edge with silicone so nothing falls in, and keep filter outflow aimed to sweep the base seam. During water changes, blast the base seam and crevices with a turkey baster. A background with zero circulation gap will develop anaerobic pockets — the dark, rotten-egg-smelling sludge that spikes nitrates.
Are 3D backgrounds safe for shrimp and fry?
Yes, with two conditions: seal the top edge so tiny shrimp and fry can't slip behind the panel where they'll starve, and choose panels without pinhole cavities small enough to trap them. Smooth, well-sealed ready-made panels are excellent for breeding tanks because the crevices grow biofilm that shrimp graze on constantly.
Can plants actually root onto a 3D background?
Epiphytes — Anubias, Bucephalandra, Java fern, and mosses — attach readily to rough textured panels with a dab of cyanoacrylate gel or simply wedged into crevices. True rooting plants can't penetrate foam or cement, so keep rooted stems in the substrate at the panel's base where they emerge naturally from behind the rock face. The illusion is identical to cliff-side growth.
Will a 3D background make my tank look smaller?
In tanks under about 60 liters, a thick panel can — 10 cm of intrusion in a 30 cm deep tank is a third of your footprint gone. Use slimline panels (3–5 cm protrusion) in nanos, and reserve deep, dramatic panels for 60 cm tanks and up. For small tanks, pairing a slim background with forced-perspective diorama techniques delivers the depth illusion without the footprint cost.
The Bottom Line
A 3D aquarium background is the fastest way to give a planted tank real depth — but it's also the least forgiving element you'll add, because it's the hardest to change. Buy ready-made when fish safety and your time matter most; build DIY only when the design you want doesn't exist and you're willing to honor the curing process. Either way, seal the top, keep the dead zone breathing, match your stone, and plant the crevices. Do that, and the back glass stops being a wall and starts being a cliffside. For more on building around your new backdrop, see the guide on sculpting layouts with the hardscape-first method.