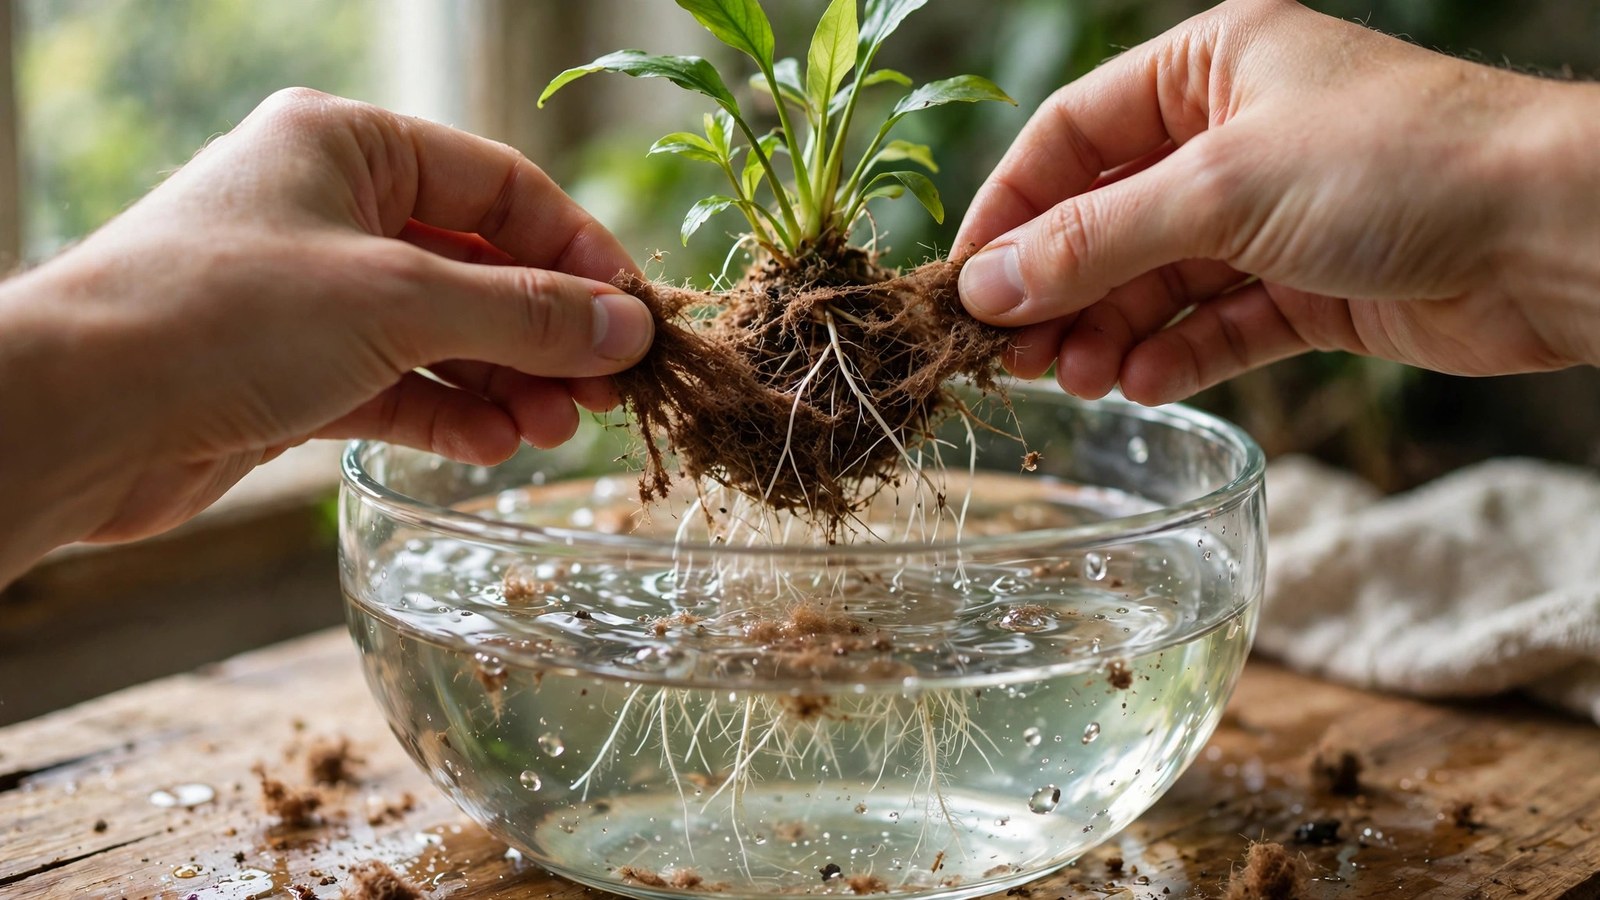
Tearing straight through a root ball is the fastest way to kill a healthy new plant, and yet that's exactly what most beginners do the moment they unbox potted aquarium plants. The dense gray plug holding those roots together is rock wool, and removing it without shredding the root system takes a gentler approach than ripping or cutting. In this guide you'll learn the safe way to remove rock wool from aquarium plants — plus what the plug hides, what to do with the pot it came in, and how to settle your plants afterward so they root quickly.
Why Your Plants Arrive in Rock Wool
If you've ever ordered rock wool aquarium plants from a nursery (companies like Tropica grow their potted plants in rock wool for exactly this reason), the gray, fibrous plug in the plastic pot is rock wool (also called mineral wool or stone wool). It's made from spun volcanic basalt rock — the same material used in commercial hydroponics and described in detail by the rockwool manufacturer Grodan. Nurseries grow stem plants and rosette plants in it because it holds water and nutrients evenly, anchors roots firmly, and survives shipping without crumbling.
The problem is that rock wool does its job too well once it enters your aquarium. That dense plug is soaked in the nursery's hydroponic fertilizer solution, which can dump a sudden pulse of ammonia and phosphates into a fresh tank and feed an early algae bloom. The fibrous maze also traps algae spores, and in worst cases it can carry snail or pest eggs that hitchhiked from the grow-out facility. For those reasons, the standard advice in the hobby is clear: the rock wool comes off before the plant goes in.
Gather Your Tools First
This is a five-minute job, but only if you're set up before you start. Work in a wide bowl — not directly over the aquarium — so loose fibers and debris never reach the tank. Use dechlorinated water at room temperature, ideally between 22 and 26°C (72–79°F); water that's much colder shocks tropical roots, while hot tap water can scald them.
| Tool | What it's for | Notes |
|---|---|---|
| Wide bowl or bucket | Soaking pot and working underwater | Big enough to submerge the whole plug |
| Dechlorinated water | Soak and rinse bath | Tank water or tap water treated with conditioner; 22–26°C |
| Aquascaping tweezers | Teasing fibers away from roots | Fine tips beat fingers for dense root balls |
| Sharp scissors | Trimming dead roots and old leaves | Aquascaping scissors stay sharp underwater |
| Old toothbrush (optional) | Gently brushing stubborn fibers | Soft bristles only, never a wire brush |
| Planting tweezers | Replanting stems immediately | Same pair you use for planting aquarium plants in substrate |
Before you begin, float the whole potted plant in the bowl of prepared water for 5–10 minutes. This pre-soak softens the rock wool, releases some of the trapped fertilizer salts, and loosens the fibers so they separate from the roots with far less force.
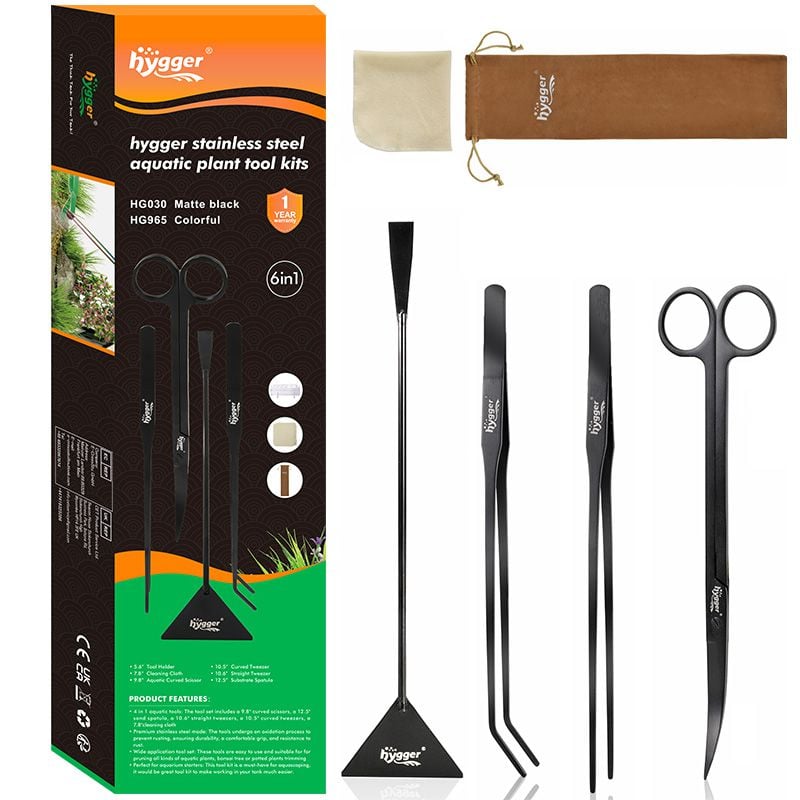 ★4.6
hygger 6-in-1 Long Aquarium Aquascaping Tools Kit
Check Price on Amazon ★4.6Rock Wool Aquarium Plants: How to Remove the Plug, Step by Step
Once the plug is soaked through, slide it out of the plastic pot and basket. The basket is usually just a cage around the plug — pull the halves apart or work the plug out gently. Now follow these steps, taking your time with dense root balls:
| Step | Action | Details |
|---|---|---|
| 1 | Split the plug | With the plug submerged, gently tear the rock wool block into 2–3 sections by hand. It should part easily along the fiber grain. |
| 2 | Peel fibers outward | Working from the outside toward the crown, peel or tease fibers away. Use tweezers to pick out clumps caught between roots. |
| 3 | Separate the stems | Most potted plants are several stems or plantlets. Divide them into individual stems or small groups so each can be planted properly. |
| 4 | Rinse the roots | Swish each plant gently in clean water to flush remaining fibers and fertilizer residue. Change the water if it clouds up. |
| 5 | Trim dead roots | Snip away brown, mushy, or tangled dead roots with sharp scissors. Leave healthy white or tan roots untouched. |
Handling delicate species
Fine-rooted plants — subwassertang care guide notes apply to mosses generally, and the same delicacy rule holds for plants like Hemianthus callitrichoides or Blyxa — can be damaged by aggressive picking. For these, soak longer (15 minutes or more) and rely on the rinse-and-swish motion rather than tweezers. A soft toothbrush, used with barely any pressure, can sweep fibers out of fine root mats without tearing them. If a few fibers remain woven into the crown of a delicate plant, accept it: it's better to leave a small tuft than to rip the crown apart. Anchor the plant as usual and the remaining fibers will eventually break down or get covered by new growth.
Stem bunches need splitting
Nurseries often cram five to ten stems into a single pot to make it look lush. If you plant that whole clump, the inner stems rot from lack of light and water flow. After removing the rock wool, divide the bunch into groups of 2–3 stems and plant each group with a little spacing. This is the same spacing logic behind planting aquarium plants properly, and it's the single biggest reason new stem plants melt — not bad water, but being planted as a suffocating clump.
Trimming Roots Without Hurting the Plant
Root trimming is optional for healthy plants but smart for stressed ones. When you acclimate new aquarium plants after shipping, you'll often find a fringe of brown, limp roots at the bottom of the root ball. Those dead roots rot in the substrate and invite decay bacteria, so cut them back to just above the healthy tissue with clean scissors.
Healthy roots are white, tan, or slightly pinkish and firm to the touch. Leave them completely alone — they are your plant's head start. Some aquarists trim healthy roots to about 2–3 cm to make planting easier and force the plant to grow fresh roots into the substrate. That's a legitimate technique for robust rosette plants like Echinodorus or Cryptocoryne, but don't do it to fragile stems or to plants already weakened by shipping. When in doubt, leave healthy roots as they are.
What to Do with the Pot and Basket
The plastic pot and slotted basket are nursery equipment, not aquarium equipment. For most hobbyists the correct move is the recycling bin. Planting inside the pot restricts root spread, traps debris, and in a small tank can create anaerobic pockets under the plug.
That said, the basket is genuinely useful as a temporary tool: you can drop cleaned, bare-rooted plants back into the basket for a few days while you rearrange the scape, since the basket keeps stems upright and grouped. If you reuse the basket this way, scrub it with hot water and a dash of bleach (then rinse thoroughly and soak in dechlorinated water) so no rock wool fibers or fertilizer residue linger. The same goes for any pot you keep for quarantining plants in a holding bucket — the how to quarantine aquarium plants process works better with clean, disinfected containers rather than straight from the nursery.
Why Some Aquascapers Plant With Rock Wool Anyway
Here's the exception to the rule. Professional contest aquascapers — the people building tanks for competitions like the International Aquatic Plants Layout Contest — sometimes plant with the rock wool intact. Their reasoning is specific to their situation: competition tanks are rescaped within weeks or months, the tanks are meticulously maintained with heavy water changes that flush out any fertilizer leaching, and the intact plug gives instant, rock-solid anchoring for a photo-ready scape on day one.
None of that applies to a home aquarium. Your tank needs to run for months or years, and the slow leaching of trapped fertilizer salts plus the risk of snail eggs and algae spores inside the plug will cost you far more than the five minutes of removal work saves. The "leave it in" shortcut is a competition-day trick, not a long-term aquarium strategy.
After Removal: Replant and Acclimate
Plant immediately after the rock wool is off — exposed roots dry out fast, and even a few minutes in the air stresses them. Keep a spray bottle of tank water handy if you're rearranging for a while, and mist the roots every couple of minutes. Use planting tweezers to push stems down to their first leaf node, or set rosette plants so the crown sits just above the substrate surface.
Once planted, your plants are in acclimation mode for the next 7–14 days. New plants commonly melt a few older leaves as they switch from nursery growth to submerged growth — this is normal and not a sign the rock wool removal hurt them. Keep the photoperiod moderate (6–8 hours), don't trim aquarium plants for the first two weeks, and start your regular fertilization schedule after about a week so the plants can take up nutrients with fresh root growth. The full timeline of what to expect is covered in your first 90 days of a planted tank, and a steady weekly plant routine — including removing dead plant leaves and cleaning algae off plant leaves — keeps new arrivals healthy while they establish.
If your plants arrived bare-root or in gel (tissue culture), the same plant-immediately rule applies, and the tissue culture planting guide walks through those specifically. Some hobbyists also give new plants a bleach dip or a hydrogen peroxide dip before planting to knock out algae and pests — that's optional, but if you do it, do the dip after removing the rock wool so the dip actually reaches the leaf surfaces, and decide when to add plants to a new aquarium based on your cycle rather than your schedule.
Frequently Asked Questions
Is rock wool toxic to fish or shrimp?
The material itself isn't poisonous — it's inert spun basalt, similar to aquarium-safe lava rock in composition. The real danger is the hydroponic fertilizer solution it soaks up at the nursery, which can spike ammonia and phosphates. Always rinse it away before planting. In a well-maintained tank, trace fibers that escape won't harm fish or shrimp, but loose fibers can irritate skin while you work, so wear gloves if you handle it a lot.
Can I just plant the pot directly in the substrate?
You can, but you shouldn't for a long-term tank. The pot restricts root growth, traps detritus, and the rock wool keeps leaching fertilizer salts that feed algae. The one exception is short-term competition scapes, where aquascapers accept the trade-off for instant anchoring. For home aquariums, take the five minutes to remove it.
What if fibers are stuck in the roots and won't come out?
Soak the plant longer — up to 20 minutes in dechlorinated water — then swish it gently and pick at the fibers with fine tweezers underwater. A soft toothbrush helps with fine-rooted species. If a small tuft remains deep in the crown after all that, leave it: the plant will grow past it, and forcing the issue risks tearing the crown. Never pull hard enough to break roots just to chase every last fiber.
Should I trim the roots after removing rock wool?
Trim only dead, brown, or mushy roots — cut them back to healthy tissue with sharp scissors. Leave healthy white or tan roots alone, since they're the plant's head start on establishing. Trimming healthy roots down to 2–3 cm is an accepted technique for tough rosette plants to encourage fresh root growth, but skip it for delicate stems or plants already weakened by shipping.
Does removing rock wool help with snails and pests?
Yes — it's one of the best reasons to do it. The fibrous plug can trap snail eggs, algae spores, and other hitchhikers from the grow-out facility. Removing the rock wool eliminates that hiding spot. For full protection, combine removal with a quarantine period and, if you're cautious, a bleach or hydrogen peroxide dip after the rock wool is off so the dip contacts the actual plant.
Your Five Minutes Well Spent
Removing rock wool is one of those small habits that separates thriving planted tanks from struggling ones. Five unhurried minutes in a bowl of tank water — soften, split, peel, rinse, trim — and your new plants go in clean, pest-free, and ready to root. Do it once, and you'll never unbox potted plants any other way. For more on getting new arrivals off to the best start, see the guide on acclimating new aquarium plants.