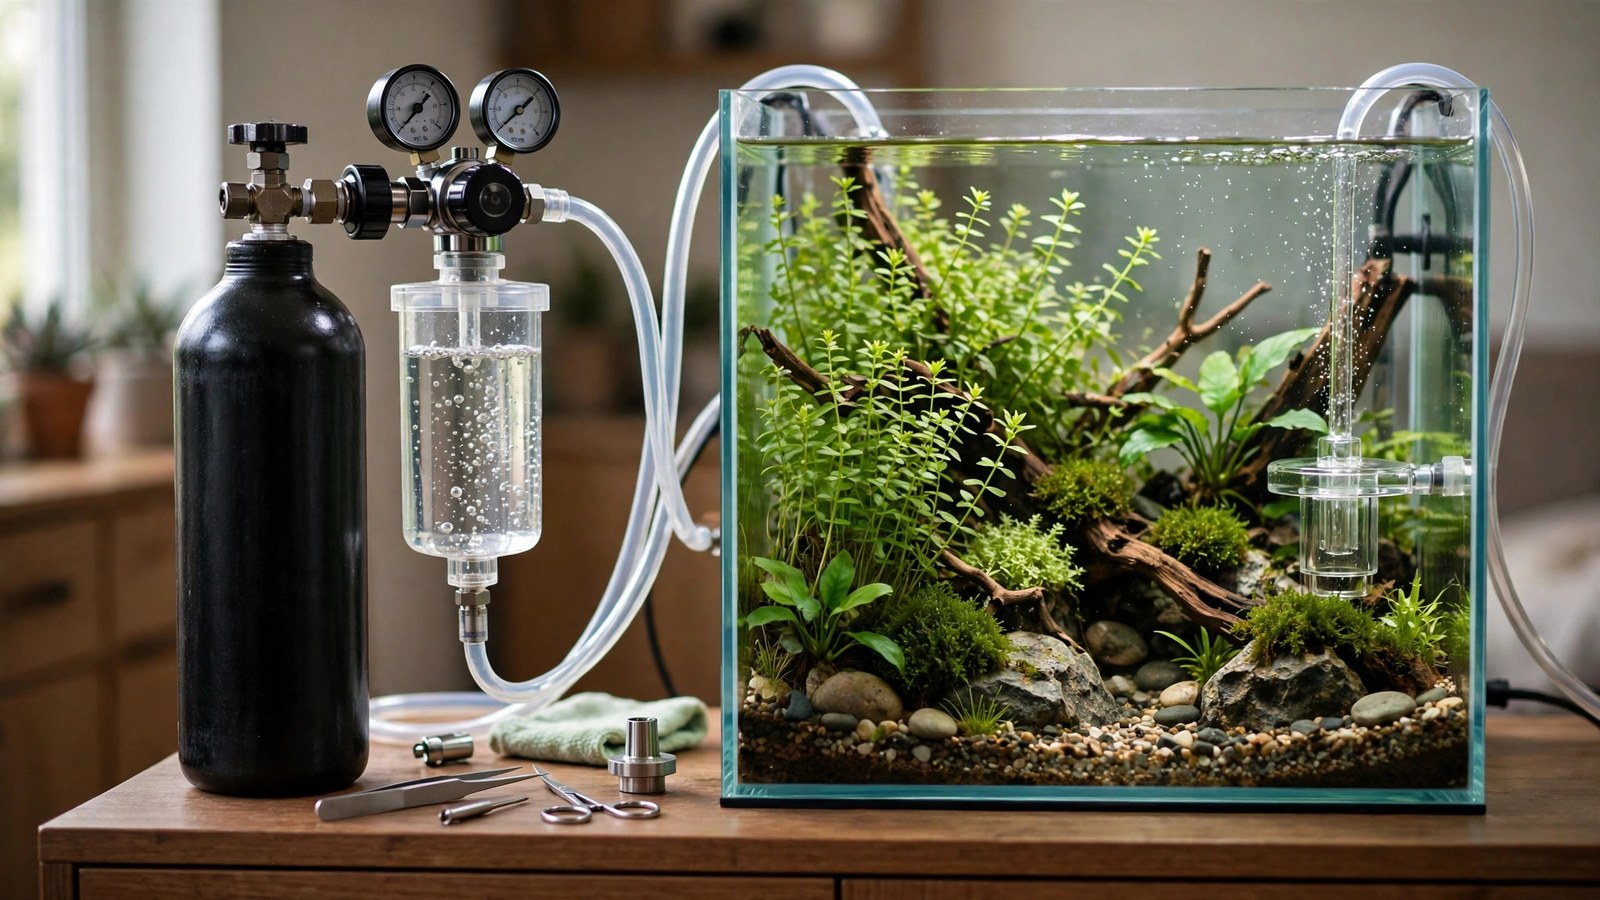
The most expensive CO2 mistake isn't buying the wrong regulator — it's the first week. Most people setting up CO2 aquarium systems for the first time either flood the tank with gas on day one and send their fish gasping at the surface, or lose an entire 5 lb cylinder to a slow leak they never tested for. This walkthrough takes you through the full arc: the complete parts list, the exact connection order, the soapy-water leak test, safe day-one settings, timer sync with your lights, and how to tune everything to a steady green drop checker over your first seven days.
The complete parts list
A pressurized CO2 system is simpler than it looks: one pressure source, one control chain, one delivery point, and one measuring tool. Every part below has a job nothing else on the list can do, so don't skip any of them.
| Part | What it does | What to buy |
|---|---|---|
| CO2 cylinder | Holds pressurized CO2 gas | 5 lb aluminum tank for most home setups; make sure it's in-date and exchangeable locally |
| Dual-stage regulator | Drops tank pressure (~800–1000 psi) to a safe, stable working pressure | Dual-stage, not single-stage — it won't "end-of-tank dump" gas when the cylinder runs low; see our guide to choosing a dual-stage regulator |
| Solenoid valve | Opens and closes the gas flow on a timer | 12V DC solenoid rated for CO2; quiet and cool-running |
| Needle valve | Fine-tunes the flow to a precise bubble rate | Quality matters here — cheap needle valves drift; many good regulators include one |
| CO2-rated tubing | Carries gas from regulator to tank | CO2-proof tubing only — standard airline tubing goes porous and leaks within weeks |
| Check valve | Stops tank water back-siphoning into the regulator when pressure drops | CO2-rated check valve, arrow pointing toward the tank, mounted above the waterline |
| Diffuser or reactor | Dissolves CO2 into the water as a fine mist or fully dissolved solution | Ceramic diffuser for tanks under ~75 gallons; inline reactor for larger tanks — start with picking the right diffuser |
| Drop checker | Continuously shows your CO2 level via a color-changing liquid | Fill with 4 dKH reference solution (never tank water) for accurate readings |
Gather everything before you start. Assembling with half the parts means you'll rush the half you have, and the leak test is worthless until the whole chain is connected.
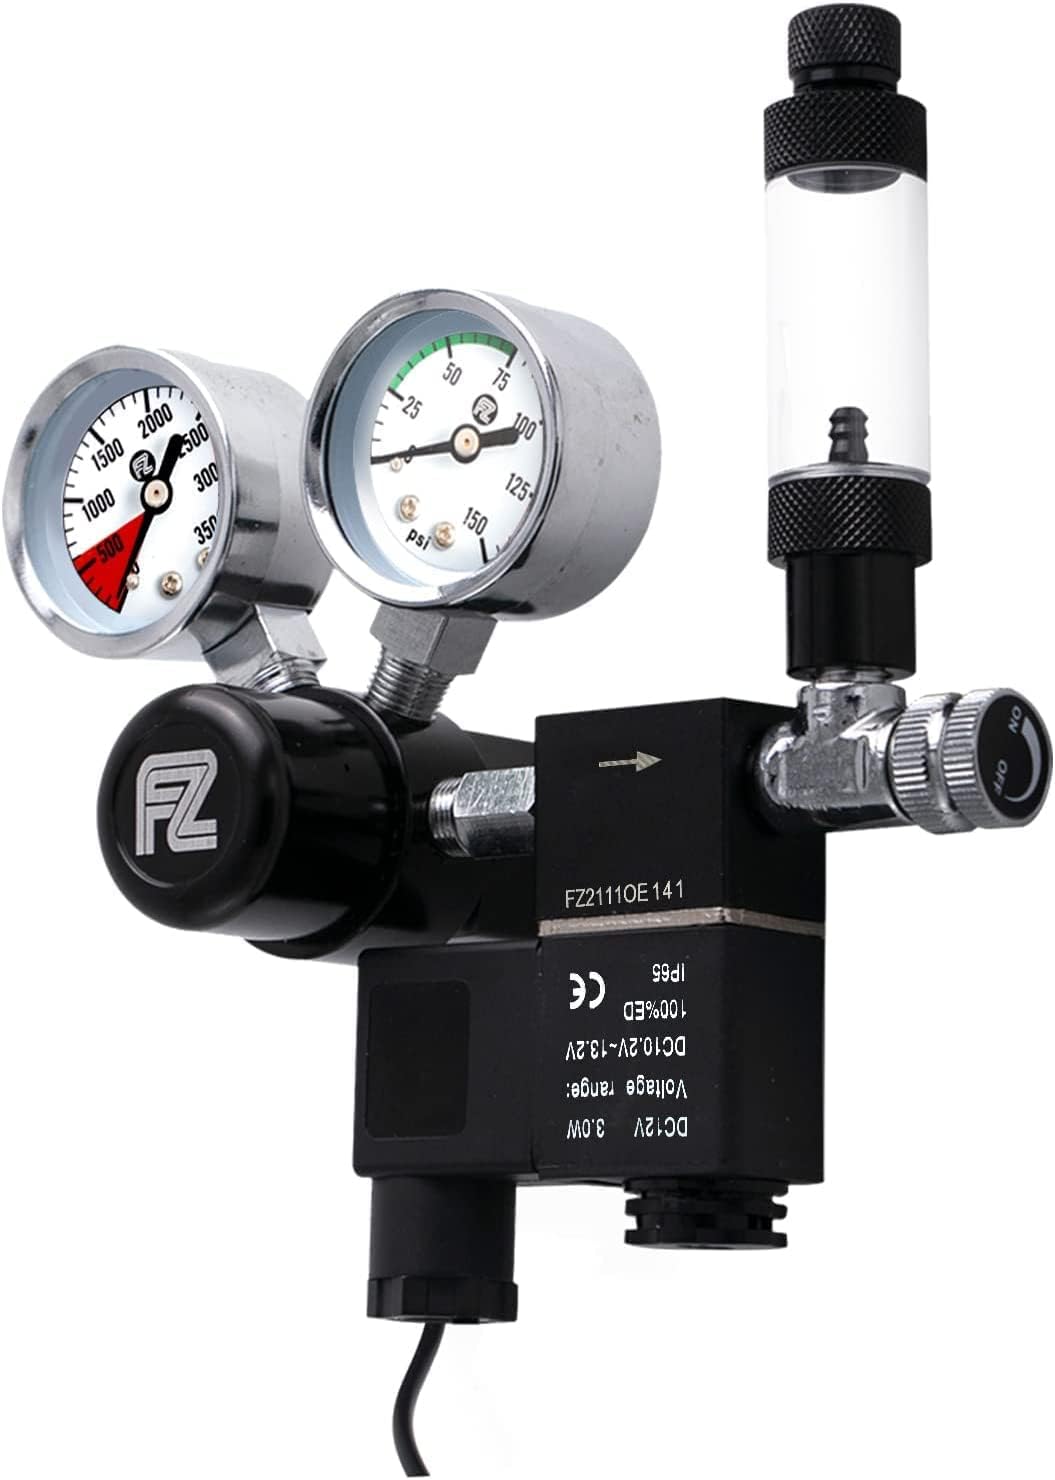 ★4.2
Fzone Pro Series Dual Stage CO2 Regulator
Check Price on Amazon ★4.2Setting up a CO2 aquarium: connection order, step by step
The gas path has one correct direction, and every component only works when it's in its right slot. Think of it as a line from the cylinder to the fish:
- Secure the cylinder upright. Strap it to the inside of the stand so it cannot tip, rock, or be bumped. Do this before attaching anything — a loose cylinder with a regulator attached is a lever waiting for an accident.
- Attach the regulator. Confirm the cylinder valve is fully closed, check the fiber washer is in place on the regulator nut (no thread tape on CGA-320 fittings — the washer does the sealing), then tighten the nut with a wrench until snug.
- Open the cylinder valve slowly. Crack it open a quarter turn, then open fully. The high-pressure gauge should read 800–1000 psi on a full cylinder. The low-pressure gauge should read zero for now.
- Mount the solenoid. Thread it onto the regulator's output port. It sits here so it can cut the whole downstream flow at night.
- Attach the needle valve after the solenoid (if your regulator doesn't already have one built in). Close it fully for now — turn it clockwise until it stops, gently.
- Fill the bubble counter (if integrated) halfway with water or mineral oil, then connect the CO2-rated tubing from the needle valve output.
- Install the check valve in the tubing run, arrow pointing toward the tank. Mount it above the waterline outside the tank — it only protects you if gravity is on its side.
- Place the diffuser in the tank, low and under the filter outflow so the fine mist gets carried around the tank instead of rising straight to the surface. Mount the drop checker on the opposite side of the tank, about 3–4 inches below the water surface, filled with 4 dKH solution.
- Set working pressure, then open the needle valve. With everything connected, slowly adjust the regulator's low-pressure knob to 30–40 psi. Then open the needle valve until you reach your day-one bubble rate (table below). Watch the bubble counter for one full minute to confirm the rate is steady.
Leak-test every joint before CO2 goes live
A single slow leak at a threaded joint can empty a 5 lb cylinder in under a week — and you won't smell it, hear it, or see it. The soap test takes five minutes and catches all of them.
- Mix a few drops of dish soap into a cup of water and brush it generously over every joint: regulator-to-cylinder, solenoid threads, needle valve threads, bubble counter seals, and both tubing connections.
- Open the cylinder valve and watch each joint for 30–60 seconds. Growing bubbles mean a leak: close the cylinder, vent the line, tighten or re-seat the fitting, and test again.
- Pass the overnight test too: leave the cylinder valve open, note the high-pressure gauge reading, and check it the next morning before the lights come on. A healthy system holds pressure overnight.
Repeat the soap test every time you swap or refill a cylinder. Joints that sealed last time can leak this time, especially with a fresh fiber washer seating in.
Day-one settings: working pressure and your starting bubble rate
Day one is about starting low and staying stable — you will tune upward over the week as the drop checker guides you. Set the working pressure to 30–40 psi on the low-pressure gauge, then open the needle valve to a conservative starting rate for your tank size:
| Tank size | Starting bubble rate |
|---|---|
| 10–20 gallons | ~1 bubble per second |
| 30–40 gallons | 1.5–2 bubbles per second |
| 55 gallons | 2–3 bubbles per second |
| 75+ gallons | 3+ bubbles per second (consider an inline reactor) |
These are starting points, not targets — real demand depends on plant mass, light intensity, and surface agitation. Resist the urge to crank it up because the drop checker is still blue on day one; it reacts slowly, and an overshoot is far worse than a slow ramp. (The full bubble-rate reference covers dialing in harder cases — this article keeps you on the safe path.)
Put CO2 on the same clock as your lights
Plants only use CO2 while the lights are on. Running gas in the dark does nothing for growth — it just wastes CO2 and lets pH drift down overnight while your fish are trying to sleep. The standard schedule:
- CO2 ON: 1–2 hours before the lights come on, so the water is saturated when photosynthesis starts.
- CO2 OFF: 1 hour before lights-out, so plants use up the remaining dissolved CO2 during the last hour of light.
Plug the solenoid into a simple digital timer and mirror your photoperiod — if your lights run 8 hours, your CO2 runs about 8–9 hours centered slightly ahead of the lights. Follow our solenoid and timer wiring guide for the electrical setup, and double-check your light schedule against the photoperiod duration guide so the two stay in sync as your tank matures.
Week one: reading and tuning with the drop checker
The drop checker is your truth-teller — it shows actual dissolved CO2 as blue (too little), green (just right, roughly 30 ppm), or yellow (too much, back off now). Three things make it trustworthy:
- It lags about 2 hours. What you see now reflects the CO2 level two hours ago. Never adjust the needle valve based on a reading taken right after you changed something.
- Read it at lights-out. That's when CO2 has been at its peak longest, and it's the moment fish-stress risk is highest.
- Move the bubble rate in small steps. Change no more than ~0.5 bubbles per second per day, then read again the next evening. Rushing this step is how tanks end up gassed.
Your week-one routine: on days 2–3, note the lights-out color. Still blue? Nudge the rate up 0.5 bps. Lime green? Hold — you're close. Yellow, or fish hanging at the surface gasping? Cut the rate immediately and add surface agitation until everyone breathes normally. Most tanks land on a stable green-by-lights-out reading by day 5–7. The drop checker reference guide covers solution prep, placement in tricky aquascapes, and troubleshooting stubborn blue readings.
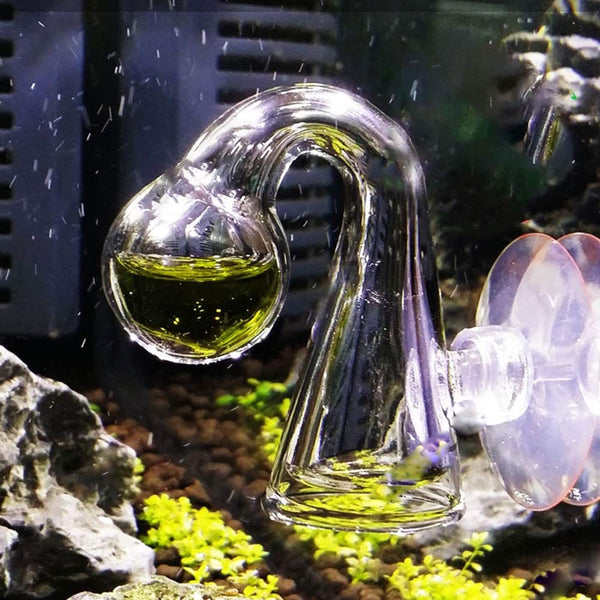 ★4.6
FZONE Glass CO2 Drop Checker Kit
Check Price on Amazon ★4.6The safety rules nobody should skip
A pressurized CO2 system is safe equipment — but only when it stays upright, sealed, and within its pressure limits. These rules take two minutes to follow and remove every realistic hazard:
- Strap the cylinder upright, always. A freestanding cylinder that tips can shear its valve against the stand and turn into a high-pressure projectile. A cheap cam strap or chain to the stand leg ends the risk.
- Keep working pressure at 30–40 psi. That's plenty to drive most diffusers, and running higher only stresses every seal downstream.
- Keep the check valve in the line — above the waterline, arrow toward the tank. Without it, a power cut lets tank water back-siphon into the regulator and destroy it.
- Never heat a cylinder to "squeeze out the last bit" — heat spikes internal pressure fast. When the high-pressure gauge drops below ~500 psi, plan the refill; when it hits ~100, swap it.
- Soap-test after every cylinder swap, and keep the tank room ventilated. CO2 is odorless — a big leak in a sealed room is the one scenario where this stops being a fishkeeping problem.
Frequently Asked Questions
Can I run CO2 without a solenoid?
You can, but you'll regret it. Without a solenoid, CO2 flows 24/7 — wasting gas all night when plants can't use it and dragging pH down while fish sleep. Your alternatives are manually opening and closing the needle valve twice a day (you will forget) or running a constant low rate (too little by day, risky by night). A 12V solenoid on a timer costs less than one wasted cylinder refill and automates the whole schedule, so treat it as part of the base system, not an upgrade.
How long does a 5 lb cylinder last?
Typically 3–6 months on a timer-driven setup, depending on bubble rate and daily run time. A 40-gallon tank running 2 bubbles per second for 9 hours a day usually lands around 4–5 months per fill; a 20-gallon at 1 bubble per second can stretch past 6 months. Consumption scales directly with bubbles per second times hours per day, so halving your rate roughly doubles the interval. When the high-pressure gauge falls below ~500 psi, start planning the swap — refills are cheap, emergency midnight runs are not.
Do I turn CO2 off at night?
Yes — always. Plants photosynthesize (and consume CO2) only when the lights are on; in the dark they respire like your fish do, actually adding CO2 to the water. Leaving injection running overnight piles dissolved CO2 on top of that, wastes gas, and can push pH down far enough to stress livestock by morning. The standard rhythm is CO2 on 1–2 hours before lights, off 1 hour before lights-out — your solenoid timer handles it automatically.
Why is my drop checker still blue after a week?
First, make sure the checker is honest: it must hold 4 dKH reference solution (never tank water), sit opposite the diffuser rather than in a dead spot, and be read at lights-out, accounting for its ~2-hour lag. If all that's right, your rate is too low — raise it 0.5 bps daily until it turns green. Also check the diffuser mist is circulating: mist rising straight to the surface means CO2 is off-gassing. Moving the diffuser under the filter outflow often fixes a stubborn blue checker on its own.
Is pressurized CO2 safe around kids and pets?
Yes, when the cylinder is secured. The gas itself only becomes dangerous in a sealed room with a major leak, which the soap test and a ventilated room prevent. The real hazard is the cylinder tipping and shearing its valve — exactly what strapping it upright to the stand eliminates. Keep kids and pets from pulling on tubing or playing around the stand, choose a spot where the cylinder can't be knocked over, and never let anyone heat a cylinder.
Your first-week routine, all in one place
Day 1: strap the cylinder, connect in order, soap-test every joint, set 30–40 psi and your starting bubble rate, and put the solenoid timer on the lights schedule. Days 2–3: read the drop checker at lights-out and adjust no more than 0.5 bubbles per second per day. Days 4–7: lock in a stable green-by-lights-out reading and watch your fish — calm, mid-water behavior means you're dialed in; surface gasping means back off and aerate immediately. By the end of the week you'll have a system that saturates the tank before lights-on, feeds your plants all photoperiod, and shuts itself down every night. If a pressurized cylinder still feels like too much hardware, yeast and citric-acid DIY setups offer a gentler, cheaper on-ramp with the same tuning principles.