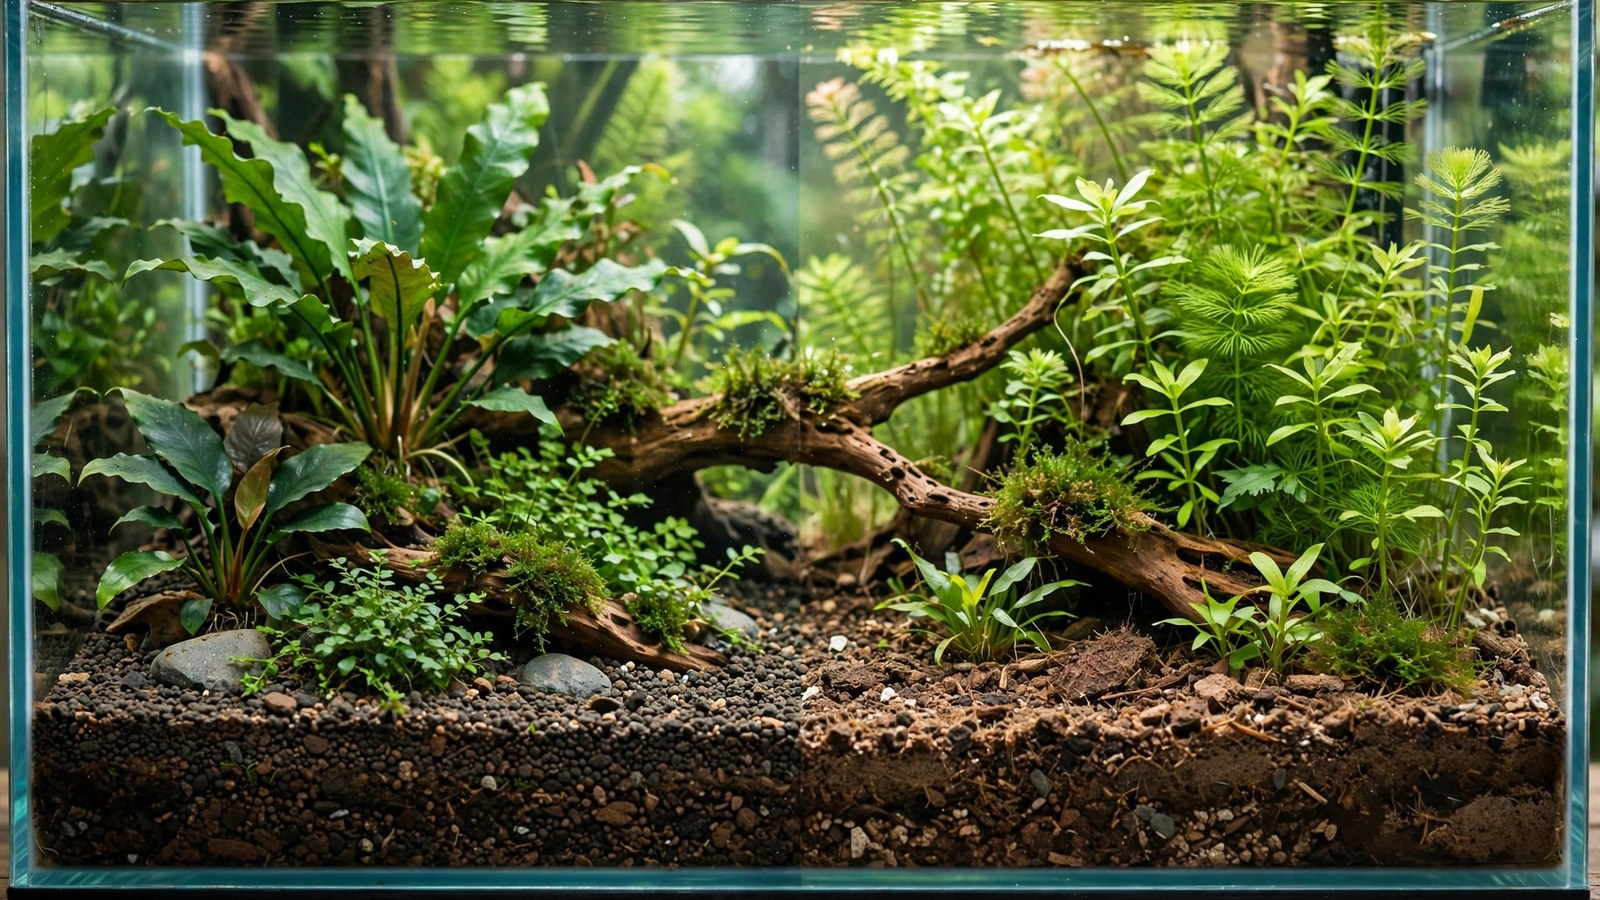
Every dirted-tank guide says "use organic soil" — but walk into a garden center and you'll face a wall of bags: topsoil, potting mix, "organic" blends, Miracle-Gro variants. Pick wrong and you get perlite floating in your tank for a year, fertilizer beads nuking your livestock, or a stalled, stinking mess. This guide compares the two real options — mineralized soil vs potting mix — so you build your dirted tank on the right foundation.
The Two Candidates
Option A: Plain organic topsoil (then mineralized)
Plain organic topsoil — the cheap bag labeled "topsoil," not "potting mix," not "garden soil with fertilizer" — is mostly actual soil: weathered mineral matter plus decomposed organic material. It's dense, heavy, and relatively low in the fast-burning organics that cause new-tank chaos. The gold standard is then mineralizing it: repeated soak-and-dry cycles over 2–3 weeks that let bacteria burn off the volatile organics before the soil ever enters your tank. Our mineralization guide gives the full process.
Option B: Organic potting mix (used straight)
Organic potting mix is engineered for container plants, not aquariums: peat or coir base, composted bark, plus amendments like perlite (white volcanic popcorn — floats forever), vermiculite, and often slow-release fertilizer beads. Used straight under a cap, it's the classic Walstad-method substrate — Diana Walstad's pioneering work used potting soil, and it grows plants spectacularly. But every amendment in the bag is a potential aquarium problem.
Head-to-Head Comparison
| Factor | Mineralized topsoil | Organic potting mix (straight) |
|---|---|---|
| Preparation effort | High — 2–3 weeks of wet/dry cycles | None — pour and cap |
| Startup ammonia/algae | Low — volatiles pre-burned | High — expect a rough first month |
| Floating debris (perlite etc.) | None — sifted out during prep | Common — perlite escapes for months |
| Fertilizer bead risk | None | Real — must buy bead-free mix |
| Peak growth | Strong, steady | Explosive, then tapering |
| Longevity | Longer — stable humus base | Shorter peak — fast organics burn out |
| Forgiveness for beginners | High — stable from day one | Low — punishes mistakes early |
| Cost | Near zero (topsoil is cheapest) | Cheap (potting mix costs a bit more) |
The Potting Mix Pitfalls (and How to Dodge Them)
Potting mix can work beautifully — the Walstad method proves it — but only if you dodge the traps:
- Perlite: those white specks float. They'll work up through your cap for months, dotting the surface and collecting in filter intakes. Sift or pick out visible perlite before the soil goes in, or buy a perlite-free mix. This single step eliminates the most common potting-mix complaint.
- Slow-release fertilizer beads: the little yellow/green prills in many "enriched" mixes dump concentrated fertilizer on their own schedule — potentially an ammonia/nitrate spike months into an established tank. Buy organic potting mix with NO added fertilizer — read the bag; "feeds for 6 months" is a red flag.
- Wetland/peat-heavy mixes: very peaty mixes are extremely light and acidic — they float, they migrate through caps, and they can drive pH surprisingly low. A soil with real mineral content (actual dirt, not just peat) behaves far better underwater.
- Manure-based mixes: some organic mixes contain composted manure — fine for tomatoes, but the ammonia load and pathogen risk in an aquarium aren't worth it. Stick to plant-based organics.
- Bark chunks: large bark pieces decompose slowly and can float up. Sift out anything bigger than a pea.
The Mineralization Process (Why It's Worth 3 Weeks)
Mineralization sounds technical; it's just controlled composting:
- Spread topsoil 2–3 inches deep in a shallow tub, soak it thoroughly, and let it sit 2–3 days (bacteria bloom, consuming easy organics).
- Let it dry completely in the sun (kills the bloom, cracks the soil).
- Repeat the soak/dry cycle 3–4 times over 2–3 weeks.
- On the final cycle, sift out sticks, stones, and debris; what's left is stable, humus-rich soil with the volatile fraction burned off.
What this buys you: no ammonia flood, no algae explosion, no floating debris, no surprises. The soil that enters your tank is already biologically stable — it mineralizes slowly and steadily from day one instead of dumping everything in month one. Full details in our mineralization guide. The 3-week wait is the hardest part; everything after is easier.
Which Should You Choose?
Choose mineralized topsoil if…
- This is your first dirted tank — the stability is worth the prep time.
- You keep shrimp or sensitive fish — no ammonia surprises.
- You value longevity — see our longevity guide; mineralized soil's stable humus base outlasts potting mix's fast-burn organics.
- You're patient enough to wait 3 weeks (the soil isn't going anywhere).
Choose organic potting mix (carefully selected) if…
- You want to set up this weekend and accept a chaotic first month.
- You're following the Walstad method specifically — it's designed around potting soil's properties (low-tech, no CO2, heavy planting).
- You've done it before and know how to manage the startup (heavy planting, big water changes, low light initially).
- You meticulously de-perlite and de-bead the mix first.
The hybrid: mineralized potting mix
Here's the insider move: mineralize organic potting mix instead of topsoil. You get potting mix's richer organic content with mineralization's stability — the best growth curve of any DIY soil. Sift out perlite first, run the wet/dry cycles, and you have a premium dirted substrate for the cost of a bag of potting mix. This is what many experienced dirt keepers actually run.
Cap and Depth: Same Rules Either Way
Whichever soil you choose, the structural rules are identical: 1 inch of soil maximum, capped with 2–3 inches of coarse sand or fine gravel (pool filter sand is the classic cap). Hardscape goes on the glass first. These aren't suggestions — they're the difference between a 5-year tank and a 5-month mud puddle, as our longevity guide explains in detail.
Real-World Results: What Keepers Report
Strip away the theory and here's the pattern from years of hobby reports:
- Mineralized topsoil tanks: the most consistent success stories. Keepers describe uneventful startups (no algae bloom, no ammonia spike), strong steady growth from month one, and tanks still thriving at years 3–5 with only root-tab supplementation. The complaint, when there is one, is the 3-week prep feeling like wasted time — until the tank runs trouble-free and they understand the trade.
- Potting mix tanks (Walstad-style): spectacular growth once established, but the first 4–8 weeks sort the careful from the casual. Keepers who planted heavily, changed water aggressively, and started with low light report the legendary explosive growth. Those who planted sparsely and hoped for the best report algae farms and perlite snow. The method works; it just has a narrower margin for error.
- The perlite regret: across hundreds of build threads, un-sifted perlite is the single most regretted shortcut — white specks surfacing for a year, clogging filter intakes, ruining photos. Ten minutes with a sieve prevents a year of annoyance.
Cost Breakdown: Dirt vs Everything Else
For a standard 40-gallon breeder at proper depth:
- Mineralized topsoil + sand cap: a few dollars (topsoil bag + pool filter sand). The cheapest functional planted substrate in the hobby.
- Organic potting mix + sand cap: slightly more — potting mix costs more than topsoil, but still trivial.
- Budget aquasoil (e.g., Stratum): roughly 15–25× the dirted cost.
- Premium aquasoil (e.g., Amazonia): roughly 30–50× the dirted cost.
Dirt's cost advantage is overwhelming — which is exactly why it's worth doing right. A failed dirted tank that you tear down and replace with aquasoil costs more than just buying aquasoil first. The prep work (mineralizing, sifting, proper capping) is what converts the cheapest substrate into a genuinely good one.
Frequently Asked Questions
Can I use Miracle-Gro Organic Choice potting mix?
It's the most commonly used potting mix in the hobby (the Walstad classic), and it works — but the formulation changes over the years, so read the current bag: check for added fertilizer, perlite content, and manure. Sift out perlite regardless. Many keepers now prefer plain organic topsoil precisely because potting mix formulations drift.
Is topsoil from my yard okay?
Possibly, with big caveats: no pesticide/herbicide history, no industrial contamination, no heavy clay (pure clay compacts badly), and you must mineralize it — yard soil is full of unpredictable organics, seeds, and possibly pathogens. Bagged organic topsoil of known composition is cheap enough that yard soil rarely justifies the risk unless you know your land well.
Do I need to add anything to the soil — clay, laterite, etc.?
Optional refinements, not requirements. A sprinkle of laterite adds iron insurance; a little crushed coral in the soil can buffer pH in very soft water. But plain mineralized topsoil grows excellent plants on its own — additives are optimization, not necessity. Don't let perfectionism delay the setup.
How do I know if my potting mix has fertilizer beads?
Look for small round prills (usually yellow, green, or tan, 1–3 mm) in the dry mix — they're visibly distinct from soil particles. The bag may also say "feeds plants for X months" or list a fertilizer analysis (N-P-K numbers). If beads are present throughout, choose a different product; picking them out individually isn't practical.
Can I mineralize in winter / without sun?
Yes — sun speeds drying but isn't required. Spread the soil thin indoors with a fan, or near a heat source; each dry cycle just takes longer. The bacteria do the work during the wet phase at room temperature. Apartment mineralization in a storage tub is completely doable, just slower.
Pick Your Soil, Then Build It Right
The mineralized-vs-potting-mix debate has a clear answer for most keepers: mineralized topsoil is the safer, more stable, longer-lived choice, and the 3-week prep is a one-time cost for years of benefit. Potting mix is the fast, fiery alternative for experienced hands following Walstad principles. Either way, the soil is only half the build — the cap depth, the planting density, and the hands-off discipline matter just as much. Get the foundation right and the dirt does the rest.
Tissue-culture plants are the exception — they’re grown in sterile gel and adapt with minimal melting, which is part of what you’re paying for. Plants bought submersed from another hobbyist’s tank also transition with little melt, since they’re already in the right form.
Which Plants Melt Most (and Least)
Heavy melters (expect significant leaf loss)
- Cryptocorynes — infamous for “crypt melt,” sometimes dropping every leaf after any disturbance. They almost always recover from the roots within weeks.
- Stem plants grown emersed — rotala, ludwigia, and hygrophila often shed lower emersed leaves while the growing tips transition.
- Amazon swords — emersed-grown swords typically lose their broad oval aerial leaves and replace them with longer submersed ribbon leaves.
Light melters
- Anubias, java fern, bucephalandra — slow-growing rhizome plants transition gradually; occasional old-leaf melt but rarely dramatic.
- Vallisneria — usually transitions well, though it dislikes the move itself and may sulk for a week.
- Floating plants — minimal melt since their leaves were already at the air-water interface.
The Acclimation Protocol
Step 1: Quarantine or dip first
Before acclimating to your tank’s conditions, make sure you’re not acclimating pests along with the plant. Run new arrivals through our quarantine and dip protocol — it adds days upfront but prevents months of regret.
Step 2: Float to temperature-match (30 minutes)
Float the bag or container in your tank for 20–30 minutes to equalize temperature. Plants are less temperature-sensitive than fish, but a 10°F shock on top of transplant stress is an avoidable insult.
Step 3: Trim before planting
Remove any leaves that are already damaged, yellowing, or heavily algae-covered — they won’t recover and they’ll rot in your tank, feeding algae. For stem plants, trim off the bottom inch and any emersed leaves that look unlikely to adapt; the plant wastes energy maintaining leaves it’s going to shed anyway. Keep the healthy growing tips — that’s where recovery starts.
Step 4: Plant correctly the first time
Follow our planting guide — right depth, crown exposed on rosettes, rhizomes unburied on epiphytes. Every uprooting and replanting restarts the acclimation clock, so get placement right on the first attempt. Decide where each plant goes before it goes in the water.
Step 5: Run a gentle first week
For the first 7 days after planting:
- Moderate light — run your normal photoperiod but consider dropping intensity 20–30% if your light is dimmable. Blast-level light on a melting plant grows algae on the dying leaves, not recovery.
- Stable CO2 — if you inject CO2, keep it consistent. Fluctuating CO2 during acclimation is a melt accelerator. If you’re low-tech, this doesn’t apply — see growing without CO2.
- Half-strength fertilizer — new plants with damaged leaves can’t use full dosing, and the excess feeds algae. Ramp to full strength over 2–3 weeks per our fertilizer schedule.
- No disturbance — don’t move, trim, or “check on” new plants for at least two weeks. Every touch resets root establishment. This is especially critical for crypts.
Step 6: Remove melt, keep the base
As emersed leaves melt, remove the mushy material promptly — decaying leaves release ammonia and grow fungus that can spread to healthy tissue. But never discard the plant while the crown, rhizome, or roots are firm and alive. A crypt that’s lost every leaf but has firm roots is a plant that’s about to recover, not a dead plant. Give it 3–4 weeks before judging.
Telling Normal Melt From Real Problems
Normal transition melt:
- Affects oldest/emersed leaves first, newest growth last
- New submersed leaves emerge even as old ones dissolve
- Roots and crown stay firm and white/green
- Timeline: 1–4 weeks, then obvious new growth
Concerning melt (see our full melting diagnosis guide):
- New growth also melts or emerges deformed
- Rhizome or crown turns mushy and brown — this is rot, not transition
- Entire plant dissolves within days with no new growth after 4+ weeks
- Melting spreads to established plants that weren’t recently moved
Buying Tips to Minimize Melt
- Buy submersed-grown when available — hobbyist-grown cuttings transition with almost no melt.
- Choose tissue culture for sensitive species — crypts and delicate stems establish far more reliably from sterile cups.
- Avoid plants already melting in the store tank — some melt is normal, but a plant that’s mostly mush at purchase has less energy for recovery.
- Transport carefully — keep plants damp and out of direct sun/heat. A plant that dries out or cooks in a hot car melts far worse than one transported properly.
The First-Month Timeline: What to Expect Week by Week
Knowing what’s normal when removes most acclimation anxiety. Here’s the typical timeline for a healthy plant adapting to a new tank:
Week 1: The quiet week
Almost nothing visible happens. The plant is growing roots you can’t see and assessing its new environment. Some species (vallisneria, stem plants) may start shedding their lowest leaves. This is normal. Resist the urge to “help” — no moving, no extra fertilizer, no light changes. The most common beginner mistake is intervening during a week when the correct action is nothing.
Week 2: Melt peaks
This is when emersed leaves give up in earnest. Crypts may drop everything; swords shed their broad aerial leaves; stem plants lose lower foliage. It looks catastrophic and it’s usually fine. Keep removing mushy material, keep conditions stable, and watch the crown and growing tips — if those are firm and green, recovery is already underway.
Week 3: The turn
New submersed-adapted leaves emerge — smaller, thinner, often a slightly different shade of green than the emersed foliage. Stem plant tips start growing visibly; crypts push tiny curled leaves from the crown; swords unfurl narrow ribbon leaves. This is the moment most beginners exhale for the first time.
Week 4+: Established
New growth outpaces melt, and the plant is functionally yours. You can resume full-strength fertilizer, normal trimming, and stop treating it as fragile. Some slow growers (anubias, bucephalandra) take 6–8 weeks to show obvious progress — that’s their normal speed, not a problem.
Acclimating Different Plant Formats
Tissue-culture cups
Sterile, pest-free, and already adapted to high-humidity (not emersed) growth — tissue cultures melt the least of any format. Rinse the agar gel off gently (leftover gel rots and feeds fungus), split the portion into small plantlets, and plant per our planting guide. They establish slowly for the first two weeks, then accelerate. No dip needed, minimal acclimation stress — this is the premium experience you’re paying for.
Potted plants
Remove the pot and strip away the rockwool completely — leftover rockwool traps debris and rots. Tease the root mass apart gently; if it’s a dense mat, splitting it into 2–3 smaller portions actually establishes faster than planting one big clump (more growing points, better water flow around roots). Potted plants are usually emersed-grown, so expect the standard 2–4 week melt cycle.
Bare-root / bunched stems
Typically sold as weighted bunches. Remove any bands, foam, or weights, strip the lower leaves, and plant stems individually or in small groups. Bunched stems from the store are often already transitioning — check for new submersed growth at the tips, which tells you the plant is mid-adaptation and will settle quickly.
Hobbyist cuttings
Already submersed-grown and the fastest to establish — often showing new growth within days. The main acclimation factor is water-parameter difference between the two tanks. Float to temperature-match, plant promptly, and they’ll usually take off with minimal melt. This is why experienced hobbyists prefer trading cuttings over buying potted plants.
Frequently Asked Questions
Should I use a “plant starter” or transplant fertilizer?
Products marketed for transplant shock are mostly B-vitamins and mild hormones. They don’t hurt, but there’s no strong evidence they help aquarium plants specifically. Stable conditions and patience outperform any bottle. Save the money for more plants.
My new plant melted completely — bare crown, no leaves. Is it dead?
Probably not, if the crown or rhizome is firm. Crypts and swords routinely lose 100% of their leaves and regrow from the base within a month. The test is firmness: firm and pale/green means alive; mushy and brown/black means rot. Give firm-but-leafless plants a full 4 weeks before declaring them dead.
Can I speed up acclimation with extra light or CO2?
No — and trying usually backfires. A melting plant can’t use extra light; the excess just grows algae on its dying leaves. Keep light moderate and CO2 stable (not boosted) during acclimation. Growth speed comes from the plant’s own adaptation timeline, which you can’t rush, only avoid delaying.
Should new plants go straight into my main display tank?
After quarantine/dipping, yes — there’s no benefit to a separate “growing-in” tank for most plants. They acclimate to your water fastest in the tank they’ll live in. The exception is very delicate species going into a tank with boisterous fish; give those a few weeks in a calm corner or breeder box first.
The Patience Rule
The single most important acclimation skill is restraint: plant it right, set gentle conditions, remove decay, and then leave it alone for a month. The hobbyists with the best plant growth aren’t doing something clever in week one — they’re simply not interfering in weeks two through four while the plants do what they’ve evolved to do. Melt looks like failure and feels like failure, but in most cases it’s the visible part of a plant successfully becoming yours.