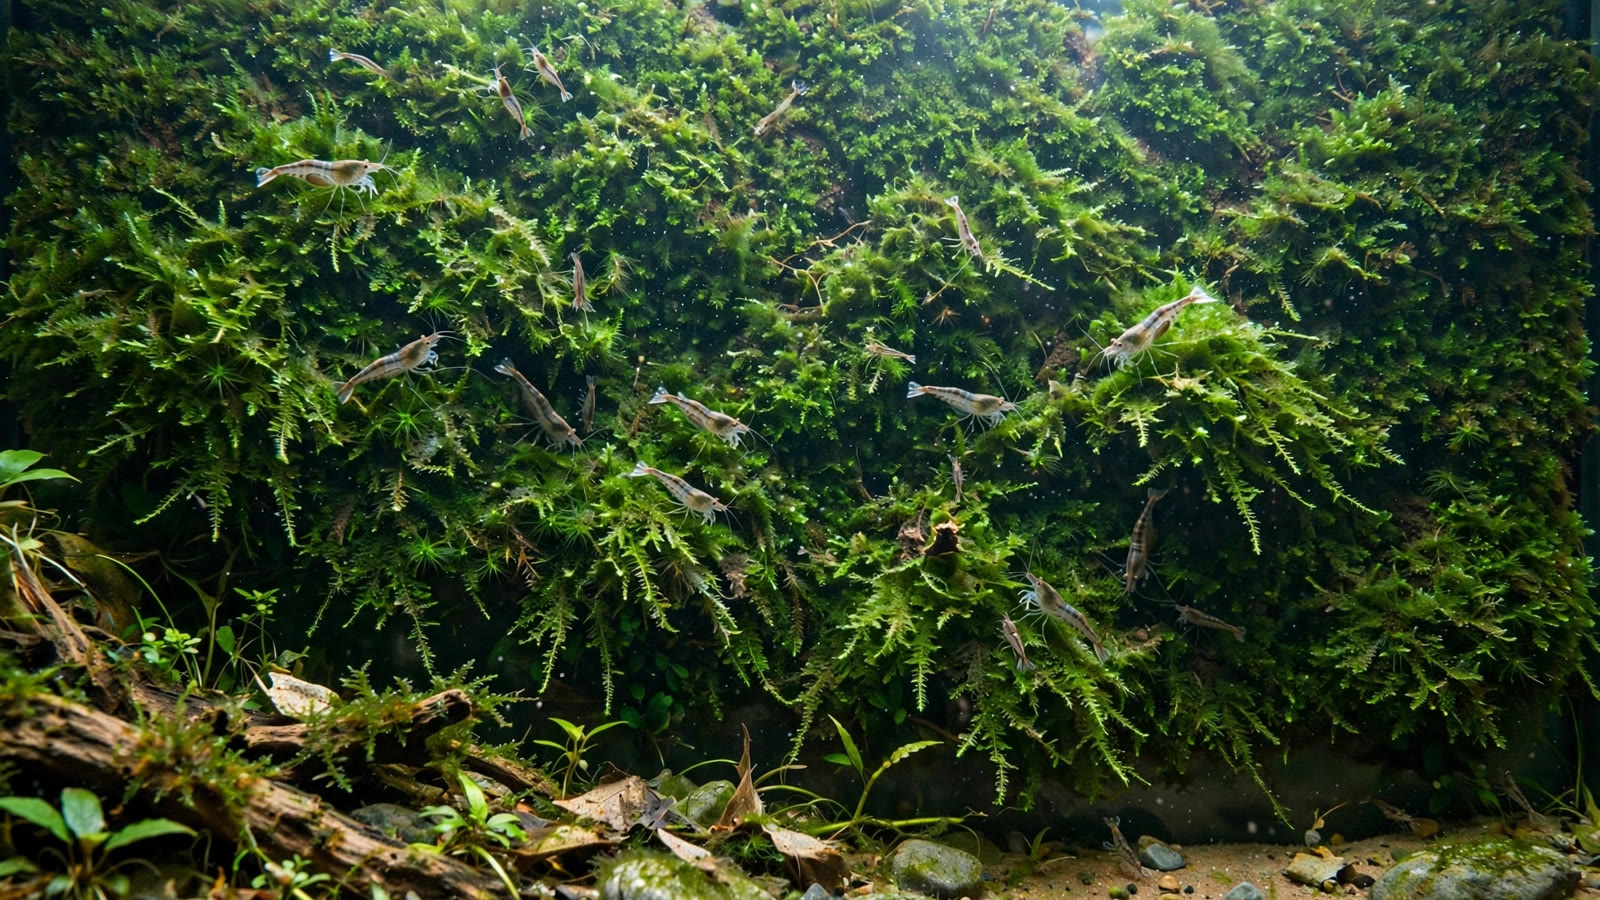
Learning how to make a moss wall aquarium setup is one of the most satisfying DIY projects in planted aquascaping. A moss wall turns the flat back glass of your tank into a living backdrop of green — hiding filter intakes and heater cables, giving shrimp and fry a refuge, and doing it all for a fraction of the cost of a molded background. Best of all, you can build one in an afternoon with little more than plastic mesh, suction cups, and a handful of moss.
This guide walks you through the two proven methods — the mesh sandwich and the glue-dot technique — compares them honestly, helps you pick the right moss for the look you want, and covers the one mistake that kills more moss walls than any other: poor water circulation behind the panel.
Why a Moss Wall Works So Well
Mosses are epiphytes that attach to surfaces with tiny root-like rhizoids. They need no substrate and draw most of their nutrients straight from the water column, which makes the otherwise dead space of your back glass the perfect place for them. A mature wall also hosts nitrifying bacteria across every frond, quietly supplementing your filter, while shrimp graze biofilm off it all day and newborn fry hide inside it. Compared to store-bought 3D backgrounds, a DIY moss wall typically costs under fifteen dollars and improves water quality instead of complicating it. The trade-off is patience — you are growing a plant, not unboxing one.
Choosing Your Moss: Match the Plant to the Look
The species you choose decides whether your wall looks like a soft green cloud, a neat hedge, or a textured forest floor standing on end.
Java Moss: Fast and Forgiving
Java moss (Taxiphyllum barbieri) is the classic beginner choice: it grows quickly in almost any water, tolerates low light, and fills a mesh panel in four to six weeks. It is one of the hardiest members of the Taxiphyllum moss genus, the group behind most wall-friendly aquarium mosses. Its growth is irregular and somewhat scraggly, which looks natural but turns messy if you skip trimmings. The site's Java moss care guide covers its parameters and propagation in depth.
Christmas Moss: Neat and Manicured
Christmas moss (Vesicularia montagnei) grows in triangular, tree-like fronds that lie flat against surfaces. It is slower than Java moss but far tidier, producing a dense, carpet-like wall that looks groomed even between trims. It prefers slightly cooler, stable water and moderate light. Choose it when the priority is a refined, deliberate look rather than maximum speed.
Flame Moss: Textured Showpiece
Flame moss (Taxiphyllum sp. 'Flame') grows in upright, spiraling fronds that catch light beautifully. On a wall it creates incredible texture — but it is the slowest and pickiest of the three. Reserve it for established tanks where you can give the wall a few months, or mix Flame moss accents into a faster wall later.
Buy more moss than you think you need. A common failure is spreading a thin layer across a large panel and expecting it to fill in; walls started densely look finished months sooner. As a rough rule, plan on one golf-ball-sized clump per six square inches of panel, sourced from a reputable seller or from trimmings in your own tank.
Method 1: The Mesh Sandwich (Recommended for Beginners)
The mesh sandwich is the most reliable way to build your first moss wall. It needs no glue, creates an even surface, and the moss is physically held in place while it attaches.
Materials
| Material | What to get | Cheap alternative |
|---|---|---|
| Plastic mesh | Two aquarium-safe sheets, cut to panel size | Craft-store plastic canvas — rigid, undyed, rinsed well |
| Suction cups | 4–6 aquarium suction cups | Stainless zip ties looped through the mesh, hooked over the rim |
| Fasteners | Small nylon cable ties | Fishing line — but it stretches, so check it monthly |
| Moss | Generous clumps of Java, Christmas, or Flame moss | Trimmings from your own tank or a hobbyist club — free and tank-conditioned |
| Scissors | Aquascaping scissors | Clean kitchen scissors, never used with soap |
Build Steps
- Cut your mesh. Measure the back glass and cut two matching sheets about half an inch smaller on each side. The gap keeps the panel off the silicone seams so you can remove it later without scraping.
- Rinse everything. Wash the mesh, suction cups, and ties under plain tap water. No soap or detergent — residue is toxic to shrimp and invertebrates.
- Spread the moss. Lay one sheet flat and cover it with an even layer of moss about a quarter inch thick. Tear large clumps apart with your fingers rather than cutting — torn fronds branch more readily and attach faster.
- Sandwich and stitch. Lay the second sheet on top and stitch the edges with cable ties, one every inch or so. Keep it snug but not crushed; water must flow through the moss.
- Mount it. Attach the suction cups and press the panel onto the back glass, leaving one to two inches of clearance between the panel and the glass. That gap is the circulation channel your wall depends on.
- Leave it alone. Do not touch the wall for the first two weeks. Moss attaches through rhizoids that take roughly ten to fourteen days to grip.
Within three weeks you should see fresh green growth pushing through the mesh. Within six to eight weeks — faster with Java moss — the mesh should be nearly invisible behind a curtain of moss. If your tank is rimless or suction cups will not hold on a textured background, you can weight the panel instead: wiring the bottom edge to a flat stone gives it a stable base, and the site's slate aquascaping guide covers working with this handy stone.
Method 2: The Glue-Dot Technique
The glue-dot method skips the mesh: you dab small dots of cyanoacrylate gel (aquarium-safe) onto the back glass and press clumps of moss into them. For more on working with adhesives in a planted tank, see the site's aquascaping glue guide. Apply a pea-sized dot, press in a tuft, hold for thirty seconds; the gel cures on contact with water and is inert once set. Use only gel formulations — never thin liquid glue near livestock.
The advantage is a natural, free-form wall with no visible grid. The same technique excels for moss accents on hardscape — a porous stone like lava rock gives rhizoids an easy grip. The disadvantage is reliability: moss held at scattered points takes longer to colonize, loose fronds drift, and one overzealous algae scraper can tear patches off. This method suits experienced hobbyists who enjoy the process and do not mind touch-ups.
How to Make a Moss Wall Aquarium: Which Method Wins
| Factor | Mesh sandwich | Glue-dot |
|---|---|---|
| Beginner success | High — moss is held in place while it attaches | Moderate — patches detach if disturbed |
| Appearance | Even and uniform; mesh shows faintly until growth fills in | Organic and free-form; no grid lines |
| Build time | 30–45 minutes for a standard 20-gallon panel | 45–90 minutes of section-by-section work |
| Maintenance | Panel removes easily for trimming or algae cleanup | Cannot be removed; trim and clean in place |
| Long-term stability | Excellent — the sandwich holds old and new growth together | Good once established, but thin spots can peel |
For most people, the mesh sandwich wins on every count except the free-form aesthetic. A good hybrid: build a mesh-sandwich base for coverage, then glue-dot a few Flame moss accents onto the established wall for texture.
The #1 Failure Point: Flow Behind the Wall
The cause of most dying moss walls is stagnant water behind the panel. Moss still needs fresh water delivering CO2 and nutrients and carrying waste away; when water sits motionless between the wall and the glass, oxygen drops, detritus accumulates, and the moss suffocates from the back outward.
- Leave a gap. Mount the panel one to two inches off the glass. A panel pressed flat against the glass will fail no matter what else you do.
- Point flow at it. Aim your filter outlet or a small powerhead so gentle current sweeps behind the wall — a soft, continuous movement, not a jet blasting moss off the mesh.
- Watch for dead pockets. In wide tanks, one outlet may leave the far end stagnant. If debris settles on the moss in one area, that area needs more flow.
- Clean the channel monthly. During water changes, direct your siphon into the gap behind the panel as part of your regular substrate and detritus cleaning routine. Trapped detritus decays and fuels algae.
This matters most in nano aquascapes: small tanks have gentler filters, and a moss wall in a still corner of a 5-gallon tank is the classic recipe for a brown, slimy failure. A tiny circulation pump is cheap insurance.
Light and Nutrients: Keep It Simple
Moss walls thrive in ordinary community-tank conditions: 68–78°F (20–26°C), pH 6.0–7.5, and low to moderate light. Too much light is a bigger risk than too little — a wall blasted with high-intensity light grows algae faster than moss. Start with six to eight hours of moderate light per day; no injected CO2 is needed.
A light liquid fertilizer at half strength supports growth without feeding algae. Skip root tabs — moss has no true roots in substrate and cannot use them. One caution: liquid carbon supplements can be harsh on mosses and delicate plants, so if you dose them, start at the lowest recommended amount and watch the wall for the first week. Shade from terraced hardscape is usually fine — mosses tolerate shade far better than blazing light.
The Trimming Routine: How Walls Survive Long-Term
An untrimmed wall collapses. As the outer layer thickens, it shades the inner fronds against the mesh; they die from light starvation, their grip fails, and whole sheets slough off, exposing bare mesh and brown patches. Every neglected moss wall follows this script.
- Trim every three to four weeks once the wall is established — you are controlling thickness, not styling.
- Cut back to about half an inch from the mesh. Sharp aquascaping scissors, an even cut like a haircut; trimmed tips branch and grow back denser.
- Siphon trimmings immediately. Loose fragments settle everywhere and colonize filters and substrate. A water change right after trimming catches most of them.
- Inspect as you trim. Thin spots where mesh shows through never fix themselves — tuck fresh moss into them the same way you built the wall.
Save your trimmings: they are free moss for a second panel, for tucking onto properly prepared driftwood or aquarium-safe river rocks, or for trading with other hobbyists. A moss wall is a moss farm that happens to look great.
Troubleshooting
Wall browns from the back
The dead-zone problem: poor circulation behind the panel. Widen the gap, redirect flow, clean the channel. Browned inner fronds rarely recover, but healthy outer growth will re-cover the area once conditions improve.
Algae takes over
Reduce light intensity or photoperiod first — excess light is the usual trigger. Amano shrimp and otocinclus graze a wall clean without harming it. Never rip algae out by hand with force; you will take moss with it. If a patch is hopelessly tangled, trim the whole section off and let it regrow.
Patches fall off the mesh
Usually from starting too thin, skipping the two-week hands-off period, or livestock picking at it. Restock bare spots with fresh moss tucked under the top mesh layer and leave it alone. If fish are the culprits, they are likely grazing biofilm and taking moss with it — offer them more vegetable matter.
Growth is too slow
Check light, flow, and temperature — moss above 80°F grows sluggishly. Half-strength liquid fertilizer helps, and so does patience: Christmas and Flame moss take months, not weeks. Switching to Java moss for your first wall removes most of this frustration.
Frequently Asked Questions
How long does a moss wall take to fill in?
With a densely planted mesh sandwich and Java moss, expect a full panel in six to eight weeks under moderate light. Christmas moss typically needs ten to fourteen weeks, and Flame moss three to four months. Starting thin, dim light, or poor circulation can double these times — so pack the moss generously at build time.
Can I build a moss wall in a tank that already has fish?
Yes — an established tank is actually ideal, with stable water and plenty of biofilm for the moss. Build the panel, rinse it well, mount it, and the fish will largely ignore it. Shrimp may pick at loose fronds for the first few days, but that settles once biofilm colonizes the mesh.
Does a moss wall need CO2 injection?
No. Mosses are among the few plants that genuinely thrive without injected CO2, and most moss walls you see online are low-tech. Growth is slower than in CO2-injected tanks, but the wall still fills in reliably. Moderate light and regular water changes matter more for moss than CO2 does.
How do I clean algae off a moss wall?
Start with light reduction and a cleanup crew — Amano shrimp are the best tool for the job. For stubborn patches, spot-treat with a pipette of diluted hydrogen peroxide during a water change, then siphon. If algae has woven deep into the moss, trim the affected section off entirely rather than trying to pick it clean.
Do I need to fertilize a moss wall?
Not heavily. In a stocked tank, fish waste provides most of what moss needs, and a half-strength dose of liquid fertilizer once or twice a week speeds growth. Skip root tabs — moss cannot use them. Overdosing fertilizer feeds algae far more than it feeds moss.
Can a moss wall work as a tank divider?
Yes. A double-sided mesh sandwich mounted mid-tank creates a living divider that fry and shrimp pass through but larger fish cannot. Build it twice as dense as a back wall since both faces are visible, and trim both sides on the same schedule.
Bringing It All Together
Building a moss wall comes down to four honest principles: choose the mesh sandwich for reliability, pack the moss densely from day one, keep water moving behind the panel, and trim on a schedule so the wall renews itself instead of collapsing. Do those four things and your wall will reward you for years — a living backdrop that hides equipment, shelters shrimp, and turns the least interesting pane of glass into the most interesting one. Pair it with textured stonework such as dragon stone, whose pitted surface takes moss accents beautifully, for a backdrop that looks grown rather than built.
Tissue-culture plants are the exception — they’re grown in sterile gel and adapt with minimal melting, which is part of what you’re paying for. Plants bought submersed from another hobbyist’s tank also transition with little melt, since they’re already in the right form.
Which Plants Melt Most (and Least)
Heavy melters (expect significant leaf loss)
- Cryptocorynes — infamous for “crypt melt,” sometimes dropping every leaf after any disturbance. They almost always recover from the roots within weeks.
- Stem plants grown emersed — rotala, ludwigia, and hygrophila often shed lower emersed leaves while the growing tips transition.
- Amazon swords — emersed-grown swords typically lose their broad oval aerial leaves and replace them with longer submersed ribbon leaves.
Light melters
- Anubias, java fern, bucephalandra — slow-growing rhizome plants transition gradually; occasional old-leaf melt but rarely dramatic.
- Vallisneria — usually transitions well, though it dislikes the move itself and may sulk for a week.
- Floating plants — minimal melt since their leaves were already at the air-water interface.
The Acclimation Protocol
Step 1: Quarantine or dip first
Before acclimating to your tank’s conditions, make sure you’re not acclimating pests along with the plant. Run new arrivals through our quarantine and dip protocol — it adds days upfront but prevents months of regret.
Step 2: Float to temperature-match (30 minutes)
Float the bag or container in your tank for 20–30 minutes to equalize temperature. Plants are less temperature-sensitive than fish, but a 10°F shock on top of transplant stress is an avoidable insult.
Step 3: Trim before planting
Remove any leaves that are already damaged, yellowing, or heavily algae-covered — they won’t recover and they’ll rot in your tank, feeding algae. For stem plants, trim off the bottom inch and any emersed leaves that look unlikely to adapt; the plant wastes energy maintaining leaves it’s going to shed anyway. Keep the healthy growing tips — that’s where recovery starts.
Step 4: Plant correctly the first time
Follow our planting guide — right depth, crown exposed on rosettes, rhizomes unburied on epiphytes. Every uprooting and replanting restarts the acclimation clock, so get placement right on the first attempt. Decide where each plant goes before it goes in the water.
Step 5: Run a gentle first week
For the first 7 days after planting:
- Moderate light — run your normal photoperiod but consider dropping intensity 20–30% if your light is dimmable. Blast-level light on a melting plant grows algae on the dying leaves, not recovery.
- Stable CO2 — if you inject CO2, keep it consistent. Fluctuating CO2 during acclimation is a melt accelerator. If you’re low-tech, this doesn’t apply — see growing without CO2.
- Half-strength fertilizer — new plants with damaged leaves can’t use full dosing, and the excess feeds algae. Ramp to full strength over 2–3 weeks per our fertilizer schedule.
- No disturbance — don’t move, trim, or “check on” new plants for at least two weeks. Every touch resets root establishment. This is especially critical for crypts.
Step 6: Remove melt, keep the base
As emersed leaves melt, remove the mushy material promptly — decaying leaves release ammonia and grow fungus that can spread to healthy tissue. But never discard the plant while the crown, rhizome, or roots are firm and alive. A crypt that’s lost every leaf but has firm roots is a plant that’s about to recover, not a dead plant. Give it 3–4 weeks before judging.
Telling Normal Melt From Real Problems
Normal transition melt:
- Affects oldest/emersed leaves first, newest growth last
- New submersed leaves emerge even as old ones dissolve
- Roots and crown stay firm and white/green
- Timeline: 1–4 weeks, then obvious new growth
Concerning melt (see our full melting diagnosis guide):
- New growth also melts or emerges deformed
- Rhizome or crown turns mushy and brown — this is rot, not transition
- Entire plant dissolves within days with no new growth after 4+ weeks
- Melting spreads to established plants that weren’t recently moved
Buying Tips to Minimize Melt
- Buy submersed-grown when available — hobbyist-grown cuttings transition with almost no melt.
- Choose tissue culture for sensitive species — crypts and delicate stems establish far more reliably from sterile cups.
- Avoid plants already melting in the store tank — some melt is normal, but a plant that’s mostly mush at purchase has less energy for recovery.
- Transport carefully — keep plants damp and out of direct sun/heat. A plant that dries out or cooks in a hot car melts far worse than one transported properly.
The First-Month Timeline: What to Expect Week by Week
Knowing what’s normal when removes most acclimation anxiety. Here’s the typical timeline for a healthy plant adapting to a new tank:
Week 1: The quiet week
Almost nothing visible happens. The plant is growing roots you can’t see and assessing its new environment. Some species (vallisneria, stem plants) may start shedding their lowest leaves. This is normal. Resist the urge to “help” — no moving, no extra fertilizer, no light changes. The most common beginner mistake is intervening during a week when the correct action is nothing.
Week 2: Melt peaks
This is when emersed leaves give up in earnest. Crypts may drop everything; swords shed their broad aerial leaves; stem plants lose lower foliage. It looks catastrophic and it’s usually fine. Keep removing mushy material, keep conditions stable, and watch the crown and growing tips — if those are firm and green, recovery is already underway.
Week 3: The turn
New submersed-adapted leaves emerge — smaller, thinner, often a slightly different shade of green than the emersed foliage. Stem plant tips start growing visibly; crypts push tiny curled leaves from the crown; swords unfurl narrow ribbon leaves. This is the moment most beginners exhale for the first time.
Week 4+: Established
New growth outpaces melt, and the plant is functionally yours. You can resume full-strength fertilizer, normal trimming, and stop treating it as fragile. Some slow growers (anubias, bucephalandra) take 6–8 weeks to show obvious progress — that’s their normal speed, not a problem.
Acclimating Different Plant Formats
Tissue-culture cups
Sterile, pest-free, and already adapted to high-humidity (not emersed) growth — tissue cultures melt the least of any format. Rinse the agar gel off gently (leftover gel rots and feeds fungus), split the portion into small plantlets, and plant per our planting guide. They establish slowly for the first two weeks, then accelerate. No dip needed, minimal acclimation stress — this is the premium experience you’re paying for.
Potted plants
Remove the pot and strip away the rockwool completely — leftover rockwool traps debris and rots. Tease the root mass apart gently; if it’s a dense mat, splitting it into 2–3 smaller portions actually establishes faster than planting one big clump (more growing points, better water flow around roots). Potted plants are usually emersed-grown, so expect the standard 2–4 week melt cycle.
Bare-root / bunched stems
Typically sold as weighted bunches. Remove any bands, foam, or weights, strip the lower leaves, and plant stems individually or in small groups. Bunched stems from the store are often already transitioning — check for new submersed growth at the tips, which tells you the plant is mid-adaptation and will settle quickly.
Hobbyist cuttings
Already submersed-grown and the fastest to establish — often showing new growth within days. The main acclimation factor is water-parameter difference between the two tanks. Float to temperature-match, plant promptly, and they’ll usually take off with minimal melt. This is why experienced hobbyists prefer trading cuttings over buying potted plants.
Frequently Asked Questions
Should I use a “plant starter” or transplant fertilizer?
Products marketed for transplant shock are mostly B-vitamins and mild hormones. They don’t hurt, but there’s no strong evidence they help aquarium plants specifically. Stable conditions and patience outperform any bottle. Save the money for more plants.
My new plant melted completely — bare crown, no leaves. Is it dead?
Probably not, if the crown or rhizome is firm. Crypts and swords routinely lose 100% of their leaves and regrow from the base within a month. The test is firmness: firm and pale/green means alive; mushy and brown/black means rot. Give firm-but-leafless plants a full 4 weeks before declaring them dead.
Can I speed up acclimation with extra light or CO2?
No — and trying usually backfires. A melting plant can’t use extra light; the excess just grows algae on its dying leaves. Keep light moderate and CO2 stable (not boosted) during acclimation. Growth speed comes from the plant’s own adaptation timeline, which you can’t rush, only avoid delaying.
Should new plants go straight into my main display tank?
After quarantine/dipping, yes — there’s no benefit to a separate “growing-in” tank for most plants. They acclimate to your water fastest in the tank they’ll live in. The exception is very delicate species going into a tank with boisterous fish; give those a few weeks in a calm corner or breeder box first.
The Patience Rule
The single most important acclimation skill is restraint: plant it right, set gentle conditions, remove decay, and then leave it alone for a month. The hobbyists with the best plant growth aren’t doing something clever in week one — they’re simply not interfering in weeks two through four while the plants do what they’ve evolved to do. Melt looks like failure and feels like failure, but in most cases it’s the visible part of a plant successfully becoming yours.