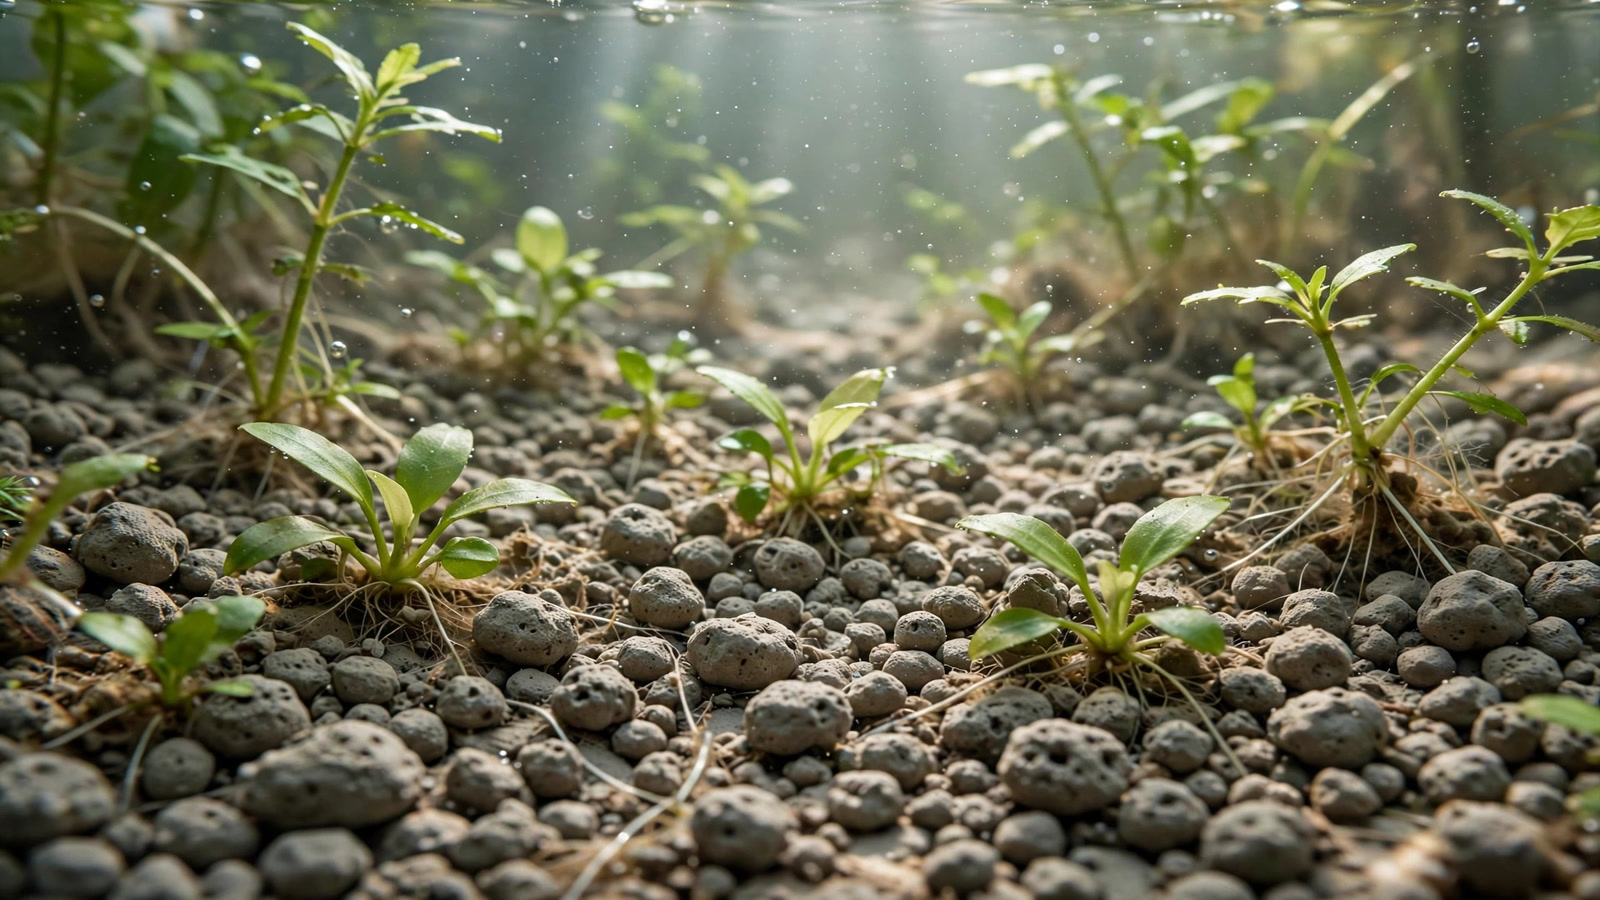
Using cat litter as aquarium substrate sounds like a prank someone plays on beginners, but it has a serious scientific basis: plain, unscented, non-clumping cat litter is calcined montmorillonite clay — chemically and structurally the same family of material as the baked-clay substrates sold for planted tanks at ten to twenty times the price. Hobbyists have been running thriving planted aquariums on it for well over a decade. The catch, and it is a hard one, is that only one very specific kind of litter is safe. Get the wrong bag and you will poison your livestock. Get the right bag, rinse it properly, and you can substrate a 20-gallon planted tank for a few dollars.
Why Calcined Clay Works in a Planted Tank
To understand the method, you have to understand what "plain" cat litter actually is. The safe varieties are made from montmorillonite, a natural clay that the manufacturer heats in a kiln — a process called calcining — until the granules harden into a porous, gravel-like structure. That is precisely how dedicated baked-clay aquarium substrates are made; the litter version simply skips the aquarium branding and the markup.
What makes this clay interesting for planted tanks is its cation exchange capacity (CEC). Montmorillonite carries a strong negative electrical charge, which lets it attract and hold positively charged nutrient ions — potassium, calcium, magnesium, and ammonium — the way a magnet holds paperclips. Penn State's extension service uses exactly that magnet analogy to explain how cation exchange capacity works in clay soils, and the mechanism is identical underwater: the clay granules act as a nutrient bank, storing dissolved minerals from the water column and releasing them to plant roots on demand. Sand, by contrast, has almost no CEC and lets fertilizer wash straight past the roots.
Calcined clay is also genuinely porous, so it holds oxygenated water in its structure, supports beneficial bacteria, and gives roots something to grip — high CEC, high porosity, and slope-holding granules at a fraction of branded-clay prices.
The Safety Gate: Only Plain, Unscented, Non-Clumping Clay
Read this section twice before you ever pick up a bag, because everything in this article depends on it. The litter aisle is full of products engineered to mask odor, clump urine, or destroy bacteria, and those additives can be lethal to fish and shrimp. The rule is absolute: plain, unscented, non-clumping, 100% clay — and nothing else. If any one of those four conditions is uncertain, do not buy the bag.
- Scented litter is dangerous. Fragrances, perfumes, and "fresh scent" formulations are chemicals designed to volatilize into the air; dissolved in water, they can irritate gills, stress or kill fish, and wipe out sensitive shrimp colonies.
- Clumping litter is dangerous. Clumping products contain sodium bentonite and binding agents that swell massively on contact with water. The fine, expanding particles can cloud the tank for days, irritate fish gills, clog filter intakes, and some formulations include additional additives that were never meant to sit underwater.
- Deodorizing, self-cleaning, and antimicrobial litters are dangerous. Odor crystals, activated-charcoal mixes, and antibacterial treatments may be harmless to a cat's nose and paws, but they were not formulated for submerged livestock, and no aquarium keeper should be the one to find out.
- Silica gel crystals, walnut shells, corn, wheat, and paper litters are the wrong material entirely. They are not clay at all, and none of them belongs in this method.
The acceptable product's ingredient list should read simply as clay — often listed as natural clay or montmorillonite clay — with the words unscented and non-clumping on the front of the bag. If the label is vague, markets "odor control technology," or lists anything beyond clay, walk away. Ambiguity is a no.
What to Look for on the Shelf
Once the safety gate is satisfied, the remaining choice is granule quality. Look for firm granules roughly 2–4 mm across that hold their shape — crumbly, chalk-soft pellets disintegrate faster underwater, while very coarse chunks trap detritus and fine powder clouds the water. Color is purely cosmetic; most plain clay fires to a grayish tan that looks natural, though light beds show algae films and waste more readily than dark ones. Finally, re-read the label on every bag you buy: manufacturers reformulate without notice, so last year's safe bag is no guarantee this year.
Rinsing and Preparing Cat Litter
Fresh-from-the-bag clay litter is loaded with manufacturing dust, and skipping the rinse is the single most common reason first-timers report a "dust storm" tank. Work through these steps:
- Sift out the fines. Pour the dry litter through a coarse kitchen sieve or colander over a bucket. Discard the powder that falls through — it would have clouded the tank and contributed nothing structurally.
- Rinse in batches. Work about 2–3 liters at a time in a bucket, blasting with a hose or strong tap flow while stirring aggressively. Pour off the cloudy water, repeat. Expect five to ten rinses before the water runs mostly clear.
- Do the soak test. Submerge a handful of rinsed granules in a glass of water for an hour, then stir hard. If the water turns milky again, keep rinsing; if it stays clear and the granules stay firm, that batch is ready.
- Spread and inspect. Dump the rinsed clay on a tarp or old towel and pick out any plastic, cardboard, or foreign pellets before they enter the tank.
Skip soap, detergents, and boiling — thermal shock shatters calcined granules into the very fines you just washed out. Thorough rinsing with plain water is the entire preparation.
Cat Litter as Aquarium Substrate: The Setup Method
Setting up the bed is straightforward, but the details determine whether your first week is clear water and happy plants or a cloudy mess. Follow the depth, slope, and filling technique carefully.
How Deep to Go
Lay the rinsed clay about 4–5 cm (roughly 2 inches) deep at the front glass, sloping up to 7–10 cm toward the back. That rear slope gives stem plants and swords the root room they need and adds real depth to the scape. Plan on roughly 1.5–2 pounds of dry litter per gallon — a 20-gallon tank takes one standard 20-pound bag, typically costing less than a single small bag of branded aquasoil. Anything deeper than about 10 cm risks compacted, oxygen-starved pockets, so resist the urge to pile it high.
To Cap or Not to Cap
You can run clay litter uncapped, and many hobbyists do — the exposed granules then interact directly with the water column, putting their full CEC to work absorbing fertilizer. But a cap of coarse sand 1–2 cm thick has real advantages for beginners: it locks dust down, keeps newly planted stems from floating up, and gives the scape a cleaner, more finished look. The technique is the same as capping aquarium soil with sand — use coarse pool-filter or blasting sand, since fine play sand can seal the clay off from water flow (see our pool filter sand guide for cap-material details).
Planting Technique
Plant with long aquascaping tweezers, not fingers. Grip each stem near its base, push it into the clay at a slight angle until the roots sit 2–3 cm deep, then open the tweezers and withdraw them slowly so the granules collapse back around the plant. For heavy root feeders like Amazon swords, cryptocorynes, and lotuses, push a root tab 5–8 cm from the plant base at planting time — clay has excellent nutrient storage but almost no nutrients of its own at startup, so you need to stock the bank on day one. Press carpeting-plant plugs firmly into shallow depressions, nudging granules tight around each one.
Nutrients: What Clay Gives You (and What It Doesn't)
Here is the honest accounting. Calcined clay contains trace minerals — small amounts of iron, silica, calcium, and magnesium locked in its structure — but it is not a fertilizer the way aquasoil is. It will not leach ammonia to cycle your tank, it will not feed demanding plants on its own, and it will not buffer your pH downward. Think of it as infrastructure, not food: a high-CEC vault that holds whatever nutrients you supply through water-column dosing and root tabs and releases them to roots over time. That is the same role played by dedicated calcined clay substrates for planted tanks, and it pairs beautifully with a simple, consistent liquid-fertilizer routine. Compared with other inert substrates, that nutrient bank is calcined clay's real advantage.
Practically, this means a clay-litter tank thrives on a modest dosing schedule: a comprehensive all-in-one liquid fertilizer dosed per its instructions, plus root tabs refreshed every two to three months under heavy root feeders. Turface, the sports-field clay that serves a similar role, works on the identical principle — inert, porous, high-CEC granules you fertilize through rather than rely on. The advantage of starting with an empty nutrient bank is predictability: no surprise ammonia spikes, and algae problems trace cleanly to the variables you control.
Honest Comparison: Cat Litter vs Aquasoil vs Pool Filter Sand
| Feature | Plain Clay Cat Litter | Commercial Aquasoil | Pool Filter Sand |
|---|---|---|---|
| Cost per 10 gallons | A few dollars | $30–$50+ | Under $10 |
| Built-in nutrients | Minimal (trace minerals only) | Rich NPK + micronutrients | None |
| Cation exchange capacity | High (montmorillonite clay) | High | Near zero |
| Buffers pH down | No | Yes (soft, acidic water) | No |
| Initial ammonia leaching | None | Yes — cycles the filter | None |
| Granule durability | Good for 1–3 years, then softens | 1–2 years before crumbling | Permanent |
| Ease of planting | Good with tweezers | Excellent | Stems can slide out |
| Rescape tolerance | Moderate — churns up dust | Poor — granules crush | Excellent |
| Best for | Budget planted tanks, easy–medium plants | High-tech aquascapes, demanding plants, soft-water species | Simple, low-maintenance setups |
Pitfalls and Honest Downsides
No substrate is free, and clay litter's discounts come with real trade-offs you should know before committing. First, the dust: even well-rinsed clay releases some fines whenever the bed is disturbed, so planting and replanting bring a brief haze that clears with filtration. Fill the tank slowly over a plate or plastic bag on the first fill, and run fine filter floss for the first week — mechanical polish makes an enormous difference.
Second, granules are not immortal. Over one to three years the lowest layer gradually softens and compresses into a denser zone — plants still root in it happily, but you must never vacuum the clay bed aggressively. Skim only the surface; jamming a siphon deep into the substrate crushes granules and releases the deep fines all at once. When the bed is finally spent, the pragmatic fix is to cap the tired layer with a fresh inch of new, rinsed clay rather than tearing the tank down.
Third, there is no pH buffering. Unlike aquasoil, which pushes water toward the soft, slightly acidic range many plants prefer (see ADA's official Amazonia substrate manual), calcined clay leaves your water chemistry alone. That is usually fine for easy and medium plants in moderately hard water — but soft-water specialists like crystal shrimp and certain delicate carpets still do better on a buffering soil, as our guide to the best aquasoils for planted tanks explains. Finally, the light gray-tan color shows algae films, waste, and mulm far more readily than dark substrates, so plan on slightly more diligent surface cleaning.
Frequently Asked Questions
Is cat litter really safe for fish and shrimp?
Only one kind: plain, unscented, non-clumping litter made from 100% clay. Scented, clumping, deodorizing, antibacterial, and crystal litters contain additives that can irritate gills, poison shrimp, or clog filters, and must never be used. Even with the right bag, rinse the clay thoroughly and cycle the tank fully before adding sensitive livestock.
Does cat litter lower pH like aquasoil does?
No. Calcined clay is essentially pH-neutral with no buffering capacity, so your water stays whatever your tap dictates. Aquasoil actively drives pH and hardness down into the soft, slightly acidic range many plants prefer. In moderately hard water, clay litter works fine for most easy and medium plants, but soft-water specialists still need a buffering substrate.
How long does a cat litter substrate last?
Expect one to three years of good structure before the granules begin softening and the lower bed compresses. Its nutrient-holding CEC does not "wear out" — water changes and fertilizer dosing keep recharging it — but the physical granules do degrade. The standard fix is topping the tired bed with a fresh layer of rinsed clay rather than tearing down the scape.
Do I need to cap cat litter with sand?
Not strictly — the clay functions perfectly well uncapped, and leaving it exposed lets its CEC interact directly with fertilized water. A coarse sand cap of one to two centimeters mainly helps beginners by pinning down dust and anchoring newly planted stems. Avoid fine play sand as a cap, since it can seal the clay off from water circulation.
Which brand of cat litter should I buy?
No brand is permanently trustworthy, because manufacturers reformulate without notice. The litter most often referenced in hobby forums is a store-brand plain, unscented, non-clumping 100% clay product — but treat that as a starting lead, not a guarantee. Read the ingredient list on the exact bag in your hands every time; if the label is ambiguous, choose a different product.
Will cat litter cloud my water?
Fresh bags are dusty, so unrinsed clay absolutely will cloud a tank. Rinse in batches until the runoff runs nearly clear, sift out the fines first, and fill the tank slowly over a plate or plastic bag to avoid blasting the bed. With proper rinsing and a few days of mechanical filtration, the water clears completely.
The Bottom Line
Cat litter as aquarium substrate is one of the hobby's best-kept budget secrets — but only under the strict conditions this guide lays out. Plain, unscented, non-clumping, 100% clay gives you a porous, high-CEC, plant-friendly bed for a fraction of aquasoil's price, provided you rinse it patiently, fertilize through it, and accept its dust and shorter lifespan. It will not buffer your water or spoon-feed demanding plants the way a premium soil does, yet for easy and medium planted tanks it is a genuinely legitimate substrate, not a gimmick. Choose the bag with the care your livestock deserve.
Tissue-culture plants are the exception — they’re grown in sterile gel and adapt with minimal melting, which is part of what you’re paying for. Plants bought submersed from another hobbyist’s tank also transition with little melt, since they’re already in the right form.
Which Plants Melt Most (and Least)
Heavy melters (expect significant leaf loss)
- Cryptocorynes — infamous for “crypt melt,” sometimes dropping every leaf after any disturbance. They almost always recover from the roots within weeks.
- Stem plants grown emersed — rotala, ludwigia, and hygrophila often shed lower emersed leaves while the growing tips transition.
- Amazon swords — emersed-grown swords typically lose their broad oval aerial leaves and replace them with longer submersed ribbon leaves.
Light melters
- Anubias, java fern, bucephalandra — slow-growing rhizome plants transition gradually; occasional old-leaf melt but rarely dramatic.
- Vallisneria — usually transitions well, though it dislikes the move itself and may sulk for a week.
- Floating plants — minimal melt since their leaves were already at the air-water interface.
The Acclimation Protocol
Step 1: Quarantine or dip first
Before acclimating to your tank’s conditions, make sure you’re not acclimating pests along with the plant. Run new arrivals through our quarantine and dip protocol — it adds days upfront but prevents months of regret.
Step 2: Float to temperature-match (30 minutes)
Float the bag or container in your tank for 20–30 minutes to equalize temperature. Plants are less temperature-sensitive than fish, but a 10°F shock on top of transplant stress is an avoidable insult.
Step 3: Trim before planting
Remove any leaves that are already damaged, yellowing, or heavily algae-covered — they won’t recover and they’ll rot in your tank, feeding algae. For stem plants, trim off the bottom inch and any emersed leaves that look unlikely to adapt; the plant wastes energy maintaining leaves it’s going to shed anyway. Keep the healthy growing tips — that’s where recovery starts.
Step 4: Plant correctly the first time
Follow our planting guide — right depth, crown exposed on rosettes, rhizomes unburied on epiphytes. Every uprooting and replanting restarts the acclimation clock, so get placement right on the first attempt. Decide where each plant goes before it goes in the water.
Step 5: Run a gentle first week
For the first 7 days after planting:
- Moderate light — run your normal photoperiod but consider dropping intensity 20–30% if your light is dimmable. Blast-level light on a melting plant grows algae on the dying leaves, not recovery.
- Stable CO2 — if you inject CO2, keep it consistent. Fluctuating CO2 during acclimation is a melt accelerator. If you’re low-tech, this doesn’t apply — see growing without CO2.
- Half-strength fertilizer — new plants with damaged leaves can’t use full dosing, and the excess feeds algae. Ramp to full strength over 2–3 weeks per our fertilizer schedule.
- No disturbance — don’t move, trim, or “check on” new plants for at least two weeks. Every touch resets root establishment. This is especially critical for crypts.
Step 6: Remove melt, keep the base
As emersed leaves melt, remove the mushy material promptly — decaying leaves release ammonia and grow fungus that can spread to healthy tissue. But never discard the plant while the crown, rhizome, or roots are firm and alive. A crypt that’s lost every leaf but has firm roots is a plant that’s about to recover, not a dead plant. Give it 3–4 weeks before judging.
Telling Normal Melt From Real Problems
Normal transition melt:
- Affects oldest/emersed leaves first, newest growth last
- New submersed leaves emerge even as old ones dissolve
- Roots and crown stay firm and white/green
- Timeline: 1–4 weeks, then obvious new growth
Concerning melt (see our full melting diagnosis guide):
- New growth also melts or emerges deformed
- Rhizome or crown turns mushy and brown — this is rot, not transition
- Entire plant dissolves within days with no new growth after 4+ weeks
- Melting spreads to established plants that weren’t recently moved
Buying Tips to Minimize Melt
- Buy submersed-grown when available — hobbyist-grown cuttings transition with almost no melt.
- Choose tissue culture for sensitive species — crypts and delicate stems establish far more reliably from sterile cups.
- Avoid plants already melting in the store tank — some melt is normal, but a plant that’s mostly mush at purchase has less energy for recovery.
- Transport carefully — keep plants damp and out of direct sun/heat. A plant that dries out or cooks in a hot car melts far worse than one transported properly.
The First-Month Timeline: What to Expect Week by Week
Knowing what’s normal when removes most acclimation anxiety. Here’s the typical timeline for a healthy plant adapting to a new tank:
Week 1: The quiet week
Almost nothing visible happens. The plant is growing roots you can’t see and assessing its new environment. Some species (vallisneria, stem plants) may start shedding their lowest leaves. This is normal. Resist the urge to “help” — no moving, no extra fertilizer, no light changes. The most common beginner mistake is intervening during a week when the correct action is nothing.
Week 2: Melt peaks
This is when emersed leaves give up in earnest. Crypts may drop everything; swords shed their broad aerial leaves; stem plants lose lower foliage. It looks catastrophic and it’s usually fine. Keep removing mushy material, keep conditions stable, and watch the crown and growing tips — if those are firm and green, recovery is already underway.
Week 3: The turn
New submersed-adapted leaves emerge — smaller, thinner, often a slightly different shade of green than the emersed foliage. Stem plant tips start growing visibly; crypts push tiny curled leaves from the crown; swords unfurl narrow ribbon leaves. This is the moment most beginners exhale for the first time.
Week 4+: Established
New growth outpaces melt, and the plant is functionally yours. You can resume full-strength fertilizer, normal trimming, and stop treating it as fragile. Some slow growers (anubias, bucephalandra) take 6–8 weeks to show obvious progress — that’s their normal speed, not a problem.
Acclimating Different Plant Formats
Tissue-culture cups
Sterile, pest-free, and already adapted to high-humidity (not emersed) growth — tissue cultures melt the least of any format. Rinse the agar gel off gently (leftover gel rots and feeds fungus), split the portion into small plantlets, and plant per our planting guide. They establish slowly for the first two weeks, then accelerate. No dip needed, minimal acclimation stress — this is the premium experience you’re paying for.
Potted plants
Remove the pot and strip away the rockwool completely — leftover rockwool traps debris and rots. Tease the root mass apart gently; if it’s a dense mat, splitting it into 2–3 smaller portions actually establishes faster than planting one big clump (more growing points, better water flow around roots). Potted plants are usually emersed-grown, so expect the standard 2–4 week melt cycle.
Bare-root / bunched stems
Typically sold as weighted bunches. Remove any bands, foam, or weights, strip the lower leaves, and plant stems individually or in small groups. Bunched stems from the store are often already transitioning — check for new submersed growth at the tips, which tells you the plant is mid-adaptation and will settle quickly.
Hobbyist cuttings
Already submersed-grown and the fastest to establish — often showing new growth within days. The main acclimation factor is water-parameter difference between the two tanks. Float to temperature-match, plant promptly, and they’ll usually take off with minimal melt. This is why experienced hobbyists prefer trading cuttings over buying potted plants.
Frequently Asked Questions
Should I use a “plant starter” or transplant fertilizer?
Products marketed for transplant shock are mostly B-vitamins and mild hormones. They don’t hurt, but there’s no strong evidence they help aquarium plants specifically. Stable conditions and patience outperform any bottle. Save the money for more plants.
My new plant melted completely — bare crown, no leaves. Is it dead?
Probably not, if the crown or rhizome is firm. Crypts and swords routinely lose 100% of their leaves and regrow from the base within a month. The test is firmness: firm and pale/green means alive; mushy and brown/black means rot. Give firm-but-leafless plants a full 4 weeks before declaring them dead.
Can I speed up acclimation with extra light or CO2?
No — and trying usually backfires. A melting plant can’t use extra light; the excess just grows algae on its dying leaves. Keep light moderate and CO2 stable (not boosted) during acclimation. Growth speed comes from the plant’s own adaptation timeline, which you can’t rush, only avoid delaying.
Should new plants go straight into my main display tank?
After quarantine/dipping, yes — there’s no benefit to a separate “growing-in” tank for most plants. They acclimate to your water fastest in the tank they’ll live in. The exception is very delicate species going into a tank with boisterous fish; give those a few weeks in a calm corner or breeder box first.
The Patience Rule
The single most important acclimation skill is restraint: plant it right, set gentle conditions, remove decay, and then leave it alone for a month. The hobbyists with the best plant growth aren’t doing something clever in week one — they’re simply not interfering in weeks two through four while the plants do what they’ve evolved to do. Melt looks like failure and feels like failure, but in most cases it’s the visible part of a plant successfully becoming yours.