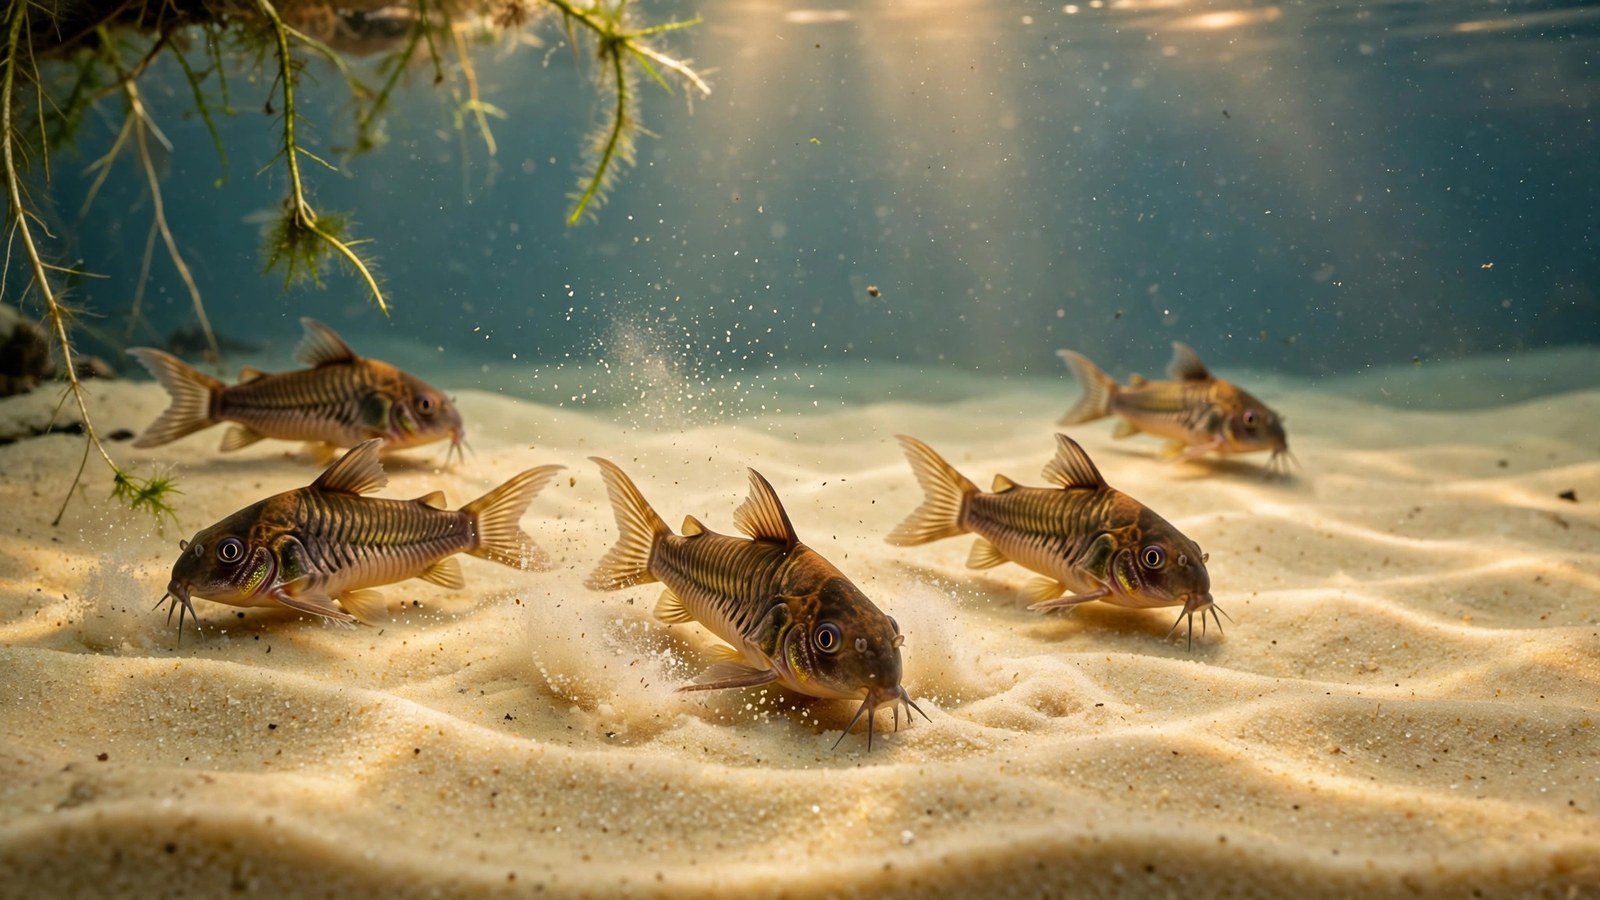
If you keep corydoras catfish, choosing the best substrate for corydoras is one of the highest-impact decisions you will make for your tank. These bottom-dwelling shoalers spend their whole lives with their faces in the floor of the aquarium — sifting, digging, and tasting everything through the sensitive barbels around their mouths. The wrong substrate leaves them unable to do any of that, and a too-sharp or badly kept substrate is widely associated with the worn, shortened barbels so many keepers report. This guide ranks the most popular sand and gravel options by grain size, grain roundness, and real-world barbel safety, then walks through depth, cleaning, and setup so your corys get a floor they can actually live on.
Why Substrate Matters So Much to Corydoras
Corydoras are benthic fish, meaning they live and feed on the bottom. In the wild they patrol soft riverbeds of fine sand and leaf litter, nosing into the sediment with their barbels — the whisker-like sensory organs around the mouth that detect food by taste and touch. A proper substrate lets them do this all day long, which is not just feeding behavior but enrichment: a cory shoveling sand through its gills is a cory being itself.
Two problems arise when the floor is wrong. First, substrate that is too coarse or too sharp discourages the digging behavior outright — the fish stop foraging and become less active. Second, substrate that traps waste or is poorly maintained becomes a bacterial reservoir. Most experienced keepers report that barbel wear shows up most often in tanks where the substrate is dirty, compacted, or coated with mulm, rather than in tanks with clean substrate of any particular brand. That distinction matters: it means your cleaning routine is at least as important as what you put on the floor.
Finally, substrate affects the whole system — plants, bacteria, water clarity, and maintenance effort. The rankings below weigh all of that, but barbel safety always comes first.
How to Judge Any Substrate for Corydoras
Before the rankings, it helps to know what "cory-safe" actually means in physical terms. Most corydoras keepers find that safe substrates share four traits:
- Small grain size. Grains around 0.5–2 mm let barbels move between particles and let the fish take mouthfuls of sand and expel it through their gills. Pea-gravel-sized chunks trap food between gaps where corys cannot reach it.
- Rounded, not angular, grains. Tumbled or naturally water-worn grains feel smooth under the barbels and against the belly. Crushed, sharp-edged material is the thing to avoid.
- Clean and dust-free. Fine dust suspended in the water irritates gills and settles into the substrate bed where it feeds anaerobic pockets. Whatever you buy, rinse it.
- Inert chemistry. Corydoras prefer stable, neutral to slightly soft water. Substrates that push pH or hardness up (crushed coral, limestone-heavy mixes) are a poor match, as explained in our guide to whether aquarium rocks raise pH.
With those criteria set, here is how the most popular options stack up.
Substrate Types Ranked for Corydoras
The ranking table at a glance
| Rank | Substrate | Typical grain size | Grain shape | Barbel safety | Notes |
|---|---|---|---|---|---|
| 1 | Pool filter sand | ~0.45–0.55 mm | Rounded, uniform | Excellent | Consistent grading, heavy grains resist compaction; the hobby standard for cory tanks |
| 2 | Play sand | ~0.3–0.5 mm | Rounded, variable | Excellent once rinsed | Cheapest option; needs very thorough rinsing to remove fine dust |
| 3 | Fine natural aquarium sand | ~0.5–1.0 mm | Rounded | Excellent | Pre-washed, aquarium-graded; pricier but plug-and-play |
| 4 | Black blasting sand (coal slag) | ~0.3–0.6 mm | Angular | Good when clean, debated | Stunning dark look; wash aggressively; keep it spotless to offset angular grains |
| 5 | Smooth fine gravel (1–2 mm) | 1–2 mm | Rounded | Acceptable | Digging is limited and waste falls between grains; a workable compromise |
| 6 | Coarse or sharp gravel | 3 mm+ | Often angular | Poor | Food rots in the gaps, digging is blocked — avoid for dedicated cory tanks |
1. Pool filter sand — the community favorite
Ask ten long-term cory keepers what is on their tank floors and most will answer pool filter sand. It is manufactured for pool filters, which means the grains are uniformly graded, rounded, and heavy — heavy enough that they settle fast and do not stay suspended when corys dig. The typical 0.45–0.55 mm size is ideal: fine enough to sift through gills, coarse enough not to pack into concrete. It is also inert, cheap in 25–50 lb bags, and comes in a natural tan that shows off cory patterns beautifully. Learn more in our deep dive on pool filter sand for planted tanks.
2. Play sand — cheapest, with a rinse tax
Play sand from hardware stores is the budget champion, often a few dollars for 50 lb. It is a naturally rounded silica sand. The catch is dust: bagged play sand carries a heavy load of ultra-fine silt that will cloud a tank for days if you skip the rinse. Plan on washing it in small batches in a bucket until the water runs clear — tedious once, then you are done. Because grains are finer than pool filter sand, it can compact a little more readily, so keep the bed depth moderate (see below). Pairing play sand with good root-feeding plants works well; see the best sands for planted aquariums for plant-specific picks.
3. Fine natural aquarium sand — the no-fuss option
Branded aquarium sands (the tan "river sand" style products) are essentially the hobby convenience version of the above: pre-washed, pre-graded, and guaranteed aquarium-safe. You pay a premium per pound, but for a 10–20 gallon cory tank that premium is only a few dollars total. Grain shape is rounded, color options range from natural tan to dark brown, and because the dust is already gone, setup is fast. If you want the look of a planted show tank without a weekend of bucket-washing, this is your pick.
4. Black blasting sand — gorgeous, but demands discipline
Black blasting sand (coal slag, sold for sandblasters) has a cult following for one reason: it makes fish colors pop like nothing else. Grains are fine enough for digging, and countless keepers run corys on it with healthy, long barbels. The honest caveat is that the grains are angular, not rounded — crushed slag rather than water-worn sand. That makes immaculate maintenance non-negotiable: any mulm buildup turns an angular bed from harmless to irritating. Wash it even more aggressively than play sand (it sheds a fine black dust that can clog filter impellers if it gets into the intake), and vacuum the surface weekly without fail. Our article on black blasting sand in planted tanks covers preparation in detail.
5. Smooth fine gravel — workable, not ideal
A fine (1–2 mm), well-tumbled gravel is acceptable for corys: barbels navigate it without damage when it is clean, and waste is easier to vacuum out than in coarse gravel. The trade-off is that corys cannot really dig in it — they can nose between grains but not shovel mouthfuls. You lose the signature sand-sifting behavior that makes corys so entertaining. Gravel size matters a lot here; read how gravel size affects planted tanks before choosing.
6. Coarse or sharp gravel — avoid for cory tanks
Standard pet-store gravel at 3–5 mm with sharp, crushed edges is the worst of all worlds for bottom feeders. Food falls into the gaps and rots where corys cannot reach it, anaerobic pockets form, and the fish cannot dig at all. If your tank currently has this and you keep corys, switching to sand is one of the most worthwhile upgrades you can make — see the transition steps below.
How Deep Should Corydoras Substrate Be?
Depth is where sand gets a bad reputation it does not deserve. A sand bed of 1.5–2 inches (4–5 cm) is the sweet spot for a cory tank: deep enough for natural digging and for rooted plants, shallow enough that it will not compact into an anaerobic slab under normal maintenance. Deeper beds are not automatically dangerous — planted-tank keepers run 3+ inches safely — but they demand more attention: Malaysian trumpet snails, rooted plants, and occasional gentle stirring keep the bed oxygenated. Our full breakdown of substrate depth for aquarium plants covers the planted-tank side of this decision.
Slope the sand slightly — deeper at the back, shallower at the front — so debris drifts forward where your siphon can reach it. Corys will happily bulldoze any slope you build, so do not overthink the landscaping.
Cleaning Technique: The Barbel-Safety Secret Weapon
Here is the part many substrate guides underplay: maintenance matters more than brand. The pattern most keepers observe is that barbel erosion shows up in tanks with dirty substrate, whatever the substrate is. Dirty sand harbors the bacteria and waste buildup that irritate sensitive tissue; clean sand of almost any rounded type keeps barbels long.
The technique for sand is different from gravel, and it is easy once you learn it:
- Hover, don't plunge. Hold the siphon 0.5–1 inch above the sand surface and let the waste lift off. Sand is heavier than mulm, so debris rises while the bed stays put.
- Swirl the top layer. Use the siphon tube or your fingers to gently stir just the top half-inch of sand in small sections each week. This releases trapped gases and prevents compaction. Corys do some of this themselves by digging, but they do not replace you.
- Clean in sections. Vacuum roughly a third to half of the floor each water change, rotating sections, so you never strip the whole bed of beneficial bacteria at once.
- Keep filter intakes elevated. Sand near the intake gets sucked in and chews up impellers. Raise intakes 2–3 inches above the substrate or fit a pre-filter sponge.
- Do a deep check monthly. Once a month, gently probe deeper with a chopstick in a corner. A rotten-egg smell means hydrogen sulfide pockets — stir the bed more often and consider shallowing that area.
Our step-by-step guide to cleaning aquarium substrate around plants shows the siphon technique in action.
Setting Up Sand in a New or Existing Tank
For a new tank, rinse the sand (even "pre-washed" bags benefit), add it dry, slope it, then fill slowly over a plate or plastic bag to avoid craters. Plant before filling — wet sand is far easier to plant into than dry.
Switching an existing cory tank from gravel to sand is straightforward:
- Move fish to a bucket of tank water with the heater and filter running.
- Scoop out the old gravel and do a large water change.
- Add rinsed sand, replant, refill, and re-acclimate the fish like a water change.
- Expect a day of cloudy water and enthusiastic digging — corys meeting sand for the first time is genuinely joyful to watch.
If you run nutrient-rich aqua soil under a sand cap for plants, see how to cap aquarium soil with sand for a cory-compatible approach.
Frequently Asked Questions
Will corydoras lose their barbels on gravel?
Barbel wear is commonly observed in tanks with dirty, compacted, or sharp substrate, but most experienced keepers find that water quality and maintenance play the larger role. Corydoras kept on clean, smooth fine gravel usually keep healthy barbels, while corys on neglected sand can still show wear. If you notice shortening barbels, review your cleaning routine and water parameters first — and consider that sharp or coarse gravel is one of several possible contributing factors, not a diagnosis. A vet or experienced fish health professional can help with persistent problems.
Is play sand really safe for corydoras?
Yes, provided you rinse it thoroughly before use. Play sand is a naturally rounded silica sand with grains in the 0.3–0.5 mm range, which is ideal for barbel safety and digging. The main drawback is the heavy dust load in the bag, which will cloud your tank and settle into the bed if skipped. Wash it in small bucket batches until the rinse water runs completely clear. Once rinsed, most keepers find it performs essentially like more expensive aquarium sands.
Can I use black blasting sand with corydoras?
Many keepers do, with excellent results — the fine grains allow normal digging and the dark color is striking. The honest trade-off is that blasting sand grains are angular crushed slag rather than rounded, so spotless maintenance is essential: vacuum the surface weekly and keep mulm from accumulating. Wash it very aggressively before setup, since the fine black dust can damage filter impellers. If you prefer a set-and-forget substrate, rounded pool filter sand is the safer default.
How deep should sand be in a corydoras tank?
Aim for 1.5–2 inches (4–5 cm) across most of the tank floor. This gives corys room to dig naturally and supports rooted plants, while staying shallow enough to avoid serious compaction under normal maintenance. Deeper beds work in heavily planted tanks where roots and trumpet snails keep the sand turned, but they need more attention. Slope the bed slightly deeper at the back so debris collects at the front where your siphon reaches it easily.
Do corydoras need sand, or is smooth gravel fine?
Corydoras survive on smooth fine gravel, but they thrive on sand. Sand unlocks their natural sifting behavior — taking mouthfuls and expelling them through the gills — which gravel physically prevents. If your priority is watching corys behave like corys, sand is worth the switch. Smooth 1–2 mm gravel remains a reasonable compromise in tanks where other stock or filtration makes sand impractical, as long as it is kept clean.
Why is my new sand cloudy, and is it harmful?
Cloudiness after adding sand is almost always fine dust that survived the rinse, and it is generally harmless — it settles or gets filtered out within a day or two. Run fine filter floss or a polishing pad to clear it faster, and avoid stirring the bed until it settles. If cloudiness persists beyond a few days, the sand likely needed more rinsing; a few targeted siphon passes over the surface will pull the remaining silt out. Bacterial blooms can also cloud new tanks, which is a separate cycling issue.
The Bottom Line on the Best Substrate for Corydoras
The best substrate for corydoras is a clean, rounded, fine sand — and pool filter sand earns the top spot for its uniform grading, natural look, and bargain price. Play sand matches it once rinsed; branded aquarium sands trade money for convenience; black blasting sand trades maintenance discipline for stunning looks. Whatever you choose, the unglamorous truth holds: a clean bed of almost any rounded substrate beats a neglected bed of the "perfect" one. Give your corys sand they can dig in, keep it clean with the hover-and-swirl technique, and you will be rewarded with a shoal of whiskered bulldozers at their absolute best.
Tissue-culture plants are the exception — they’re grown in sterile gel and adapt with minimal melting, which is part of what you’re paying for. Plants bought submersed from another hobbyist’s tank also transition with little melt, since they’re already in the right form.
Which Plants Melt Most (and Least)
Heavy melters (expect significant leaf loss)
- Cryptocorynes — infamous for “crypt melt,” sometimes dropping every leaf after any disturbance. They almost always recover from the roots within weeks.
- Stem plants grown emersed — rotala, ludwigia, and hygrophila often shed lower emersed leaves while the growing tips transition.
- Amazon swords — emersed-grown swords typically lose their broad oval aerial leaves and replace them with longer submersed ribbon leaves.
Light melters
- Anubias, java fern, bucephalandra — slow-growing rhizome plants transition gradually; occasional old-leaf melt but rarely dramatic.
- Vallisneria — usually transitions well, though it dislikes the move itself and may sulk for a week.
- Floating plants — minimal melt since their leaves were already at the air-water interface.
The Acclimation Protocol
Step 1: Quarantine or dip first
Before acclimating to your tank’s conditions, make sure you’re not acclimating pests along with the plant. Run new arrivals through our quarantine and dip protocol — it adds days upfront but prevents months of regret.
Step 2: Float to temperature-match (30 minutes)
Float the bag or container in your tank for 20–30 minutes to equalize temperature. Plants are less temperature-sensitive than fish, but a 10°F shock on top of transplant stress is an avoidable insult.
Step 3: Trim before planting
Remove any leaves that are already damaged, yellowing, or heavily algae-covered — they won’t recover and they’ll rot in your tank, feeding algae. For stem plants, trim off the bottom inch and any emersed leaves that look unlikely to adapt; the plant wastes energy maintaining leaves it’s going to shed anyway. Keep the healthy growing tips — that’s where recovery starts.
Step 4: Plant correctly the first time
Follow our planting guide — right depth, crown exposed on rosettes, rhizomes unburied on epiphytes. Every uprooting and replanting restarts the acclimation clock, so get placement right on the first attempt. Decide where each plant goes before it goes in the water.
Step 5: Run a gentle first week
For the first 7 days after planting:
- Moderate light — run your normal photoperiod but consider dropping intensity 20–30% if your light is dimmable. Blast-level light on a melting plant grows algae on the dying leaves, not recovery.
- Stable CO2 — if you inject CO2, keep it consistent. Fluctuating CO2 during acclimation is a melt accelerator. If you’re low-tech, this doesn’t apply — see growing without CO2.
- Half-strength fertilizer — new plants with damaged leaves can’t use full dosing, and the excess feeds algae. Ramp to full strength over 2–3 weeks per our fertilizer schedule.
- No disturbance — don’t move, trim, or “check on” new plants for at least two weeks. Every touch resets root establishment. This is especially critical for crypts.
Step 6: Remove melt, keep the base
As emersed leaves melt, remove the mushy material promptly — decaying leaves release ammonia and grow fungus that can spread to healthy tissue. But never discard the plant while the crown, rhizome, or roots are firm and alive. A crypt that’s lost every leaf but has firm roots is a plant that’s about to recover, not a dead plant. Give it 3–4 weeks before judging.
Telling Normal Melt From Real Problems
Normal transition melt:
- Affects oldest/emersed leaves first, newest growth last
- New submersed leaves emerge even as old ones dissolve
- Roots and crown stay firm and white/green
- Timeline: 1–4 weeks, then obvious new growth
Concerning melt (see our full melting diagnosis guide):
- New growth also melts or emerges deformed
- Rhizome or crown turns mushy and brown — this is rot, not transition
- Entire plant dissolves within days with no new growth after 4+ weeks
- Melting spreads to established plants that weren’t recently moved
Buying Tips to Minimize Melt
- Buy submersed-grown when available — hobbyist-grown cuttings transition with almost no melt.
- Choose tissue culture for sensitive species — crypts and delicate stems establish far more reliably from sterile cups.
- Avoid plants already melting in the store tank — some melt is normal, but a plant that’s mostly mush at purchase has less energy for recovery.
- Transport carefully — keep plants damp and out of direct sun/heat. A plant that dries out or cooks in a hot car melts far worse than one transported properly.
The First-Month Timeline: What to Expect Week by Week
Knowing what’s normal when removes most acclimation anxiety. Here’s the typical timeline for a healthy plant adapting to a new tank:
Week 1: The quiet week
Almost nothing visible happens. The plant is growing roots you can’t see and assessing its new environment. Some species (vallisneria, stem plants) may start shedding their lowest leaves. This is normal. Resist the urge to “help” — no moving, no extra fertilizer, no light changes. The most common beginner mistake is intervening during a week when the correct action is nothing.
Week 2: Melt peaks
This is when emersed leaves give up in earnest. Crypts may drop everything; swords shed their broad aerial leaves; stem plants lose lower foliage. It looks catastrophic and it’s usually fine. Keep removing mushy material, keep conditions stable, and watch the crown and growing tips — if those are firm and green, recovery is already underway.
Week 3: The turn
New submersed-adapted leaves emerge — smaller, thinner, often a slightly different shade of green than the emersed foliage. Stem plant tips start growing visibly; crypts push tiny curled leaves from the crown; swords unfurl narrow ribbon leaves. This is the moment most beginners exhale for the first time.
Week 4+: Established
New growth outpaces melt, and the plant is functionally yours. You can resume full-strength fertilizer, normal trimming, and stop treating it as fragile. Some slow growers (anubias, bucephalandra) take 6–8 weeks to show obvious progress — that’s their normal speed, not a problem.
Acclimating Different Plant Formats
Tissue-culture cups
Sterile, pest-free, and already adapted to high-humidity (not emersed) growth — tissue cultures melt the least of any format. Rinse the agar gel off gently (leftover gel rots and feeds fungus), split the portion into small plantlets, and plant per our planting guide. They establish slowly for the first two weeks, then accelerate. No dip needed, minimal acclimation stress — this is the premium experience you’re paying for.
Potted plants
Remove the pot and strip away the rockwool completely — leftover rockwool traps debris and rots. Tease the root mass apart gently; if it’s a dense mat, splitting it into 2–3 smaller portions actually establishes faster than planting one big clump (more growing points, better water flow around roots). Potted plants are usually emersed-grown, so expect the standard 2–4 week melt cycle.
Bare-root / bunched stems
Typically sold as weighted bunches. Remove any bands, foam, or weights, strip the lower leaves, and plant stems individually or in small groups. Bunched stems from the store are often already transitioning — check for new submersed growth at the tips, which tells you the plant is mid-adaptation and will settle quickly.
Hobbyist cuttings
Already submersed-grown and the fastest to establish — often showing new growth within days. The main acclimation factor is water-parameter difference between the two tanks. Float to temperature-match, plant promptly, and they’ll usually take off with minimal melt. This is why experienced hobbyists prefer trading cuttings over buying potted plants.
Frequently Asked Questions
Should I use a “plant starter” or transplant fertilizer?
Products marketed for transplant shock are mostly B-vitamins and mild hormones. They don’t hurt, but there’s no strong evidence they help aquarium plants specifically. Stable conditions and patience outperform any bottle. Save the money for more plants.
My new plant melted completely — bare crown, no leaves. Is it dead?
Probably not, if the crown or rhizome is firm. Crypts and swords routinely lose 100% of their leaves and regrow from the base within a month. The test is firmness: firm and pale/green means alive; mushy and brown/black means rot. Give firm-but-leafless plants a full 4 weeks before declaring them dead.
Can I speed up acclimation with extra light or CO2?
No — and trying usually backfires. A melting plant can’t use extra light; the excess just grows algae on its dying leaves. Keep light moderate and CO2 stable (not boosted) during acclimation. Growth speed comes from the plant’s own adaptation timeline, which you can’t rush, only avoid delaying.
Should new plants go straight into my main display tank?
After quarantine/dipping, yes — there’s no benefit to a separate “growing-in” tank for most plants. They acclimate to your water fastest in the tank they’ll live in. The exception is very delicate species going into a tank with boisterous fish; give those a few weeks in a calm corner or breeder box first.
The Patience Rule
The single most important acclimation skill is restraint: plant it right, set gentle conditions, remove decay, and then leave it alone for a month. The hobbyists with the best plant growth aren’t doing something clever in week one — they’re simply not interfering in weeks two through four while the plants do what they’ve evolved to do. Melt looks like failure and feels like failure, but in most cases it’s the visible part of a plant successfully becoming yours.