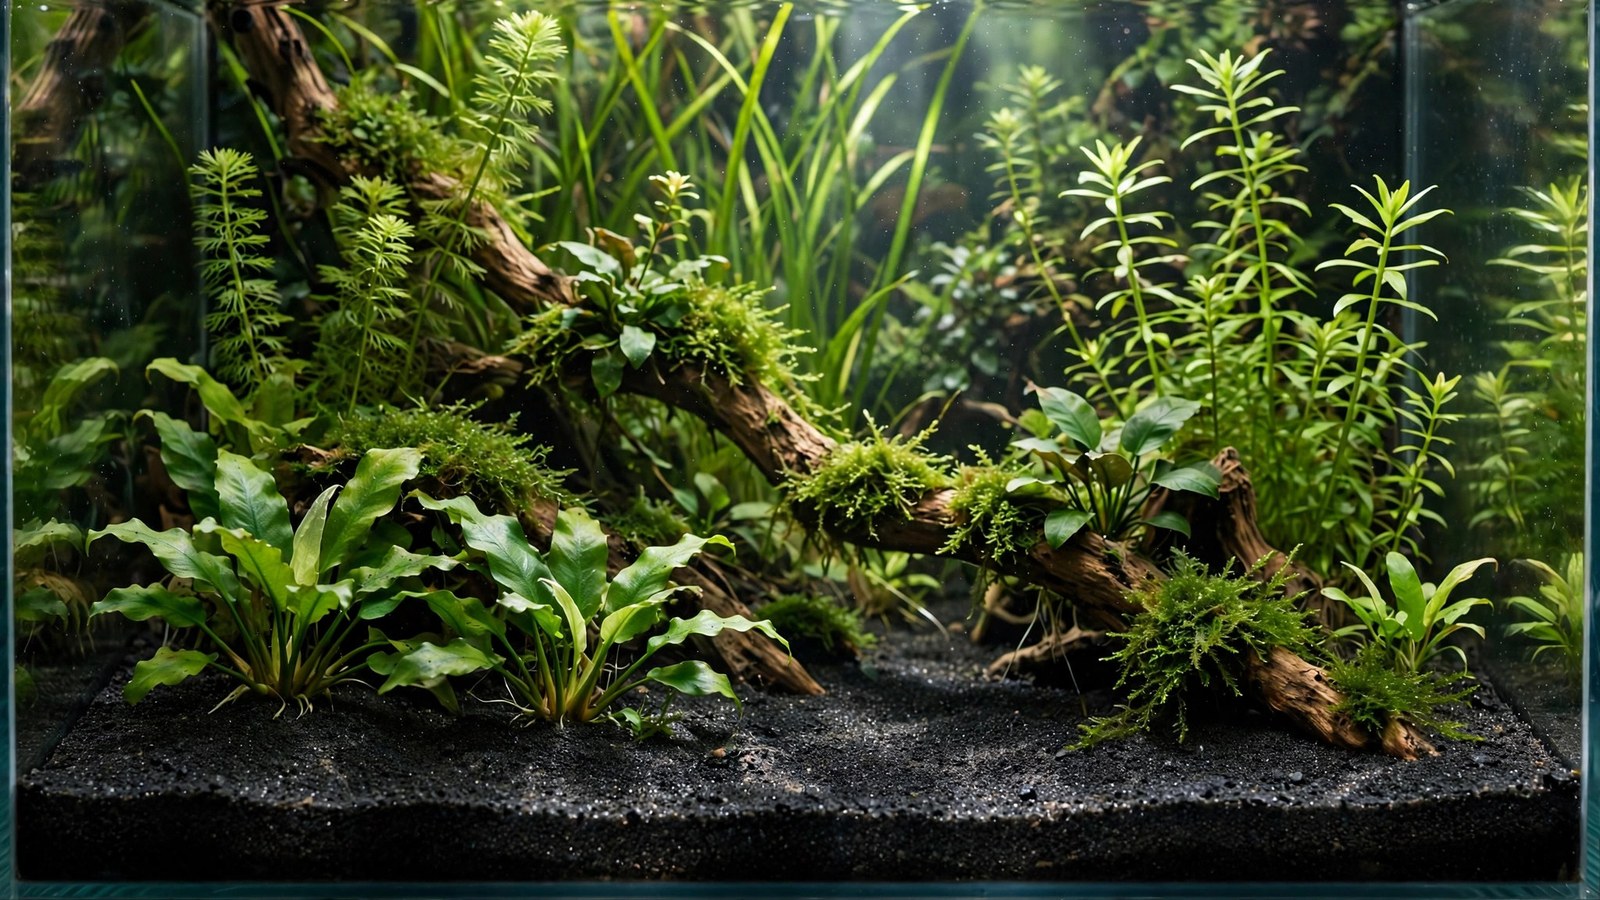
There's no faster way to make a planted tank look expensive than a black substrate. Green plants glow against it, colorful fish pop, and detritus all but disappears. Black blasting sand — coal-slag abrasive sold for sandblasting — delivers that premium look for a few dollars a bag, and it's become one of the hobby's worst-kept secrets. But it's an industrial product, not an aquarium product, so buying the right grade and preparing it correctly matters. Here's the complete guide.
What Black Blasting Sand Actually Is
Black blasting sand (often sold as "Black Diamond Blasting Sand" by Black Diamond, a U.S. Coal product) is coal slag — a byproduct of coal combustion, crushed and graded as abrasive media. It's mostly silica and alumina with iron oxides (which give it the black color), and it's chemically inert in aquarium conditions: it doesn't alter pH, KH, or GH.
The key fact: it's sold in grades (mesh sizes), and the grade determines whether it's a great aquarium substrate or a dangerous one:
- Medium grade (20/40 mesh, ~0.4–0.85 mm): the aquarium-safe choice. Grains are small enough to plant in easily but large enough not to compact badly. This is the grade experienced keepers use.
- Fine grade (30/60 mesh): usable but dustier; needs thorough rinsing and runs shallower to avoid compaction.
- Coarse grades: too sharp and chunky for planted tanks or bottom-dwellers.
Buy the 20/40 medium grade. It's commonly stocked at farm supply stores (Tractor Supply in the US) in 50-lb bags for the price of a coffee. If the bag doesn't specify grade, don't buy it.
Safety: The Questions Everyone Asks
Is coal slag toxic to fish?
In aquarium use, no — with the standard caveat that it's an industrial product with less quality control than aquarium-branded substrates. Coal slag is essentially vitrified (glass-like) mineral matter; it doesn't leach anything meaningful at aquarium pH and temperature. Thousands of keepers have run it for years with sensitive species including shrimp. That said: rinse it thoroughly (below), buy from a reputable brand, and if a bag smells strongly of chemicals or oil, return it — contamination happens occasionally in bulk industrial packaging.
Is it sharp? Will it hurt corydoras?
The honest answer: the 20/40 grade is mildly angular but generally safe for bottom-dwellers — many keepers run corydoras colonies on it without barbel issues. But it's sharper than pool filter sand, so if your tank is built around delicate bottom-dwellers (corys, loaches, stingrays), smooth pool filter sand is the safer choice. Barbel erosion is primarily caused by poor water quality, not substrate, but there's no reason to add risk for a dedicated bottom-dweller tank.
Is it magnetic?
Coal slag contains iron compounds and some batches are mildly magnetic — magnetic algae cleaners can pick up grains and scratch glass. Keep magnets away from the substrate line, or accept the risk. This is the most common real-world complaint about blasting sand, and it's easily managed.
Preparation: Rinse Like You Mean It
Blasting sand is filthy out of the bag — fine dust that will turn your tank into ink if you skip this. Rinse in 5-lb batches in a bucket: fill, churn vigorously, pour off the black water, repeat until the runoff is mostly clear. Expect 8–12 rinses per batch. It's tedious; do it while listening to something good. A final rinse with dechlorinated water doesn't hurt.
Don't skip this because "the filter will clear it." It won't, not quickly — the dust is fine enough to pass through most filter media and settle on every leaf in the tank, and cleaning dust-coated plants is miserable.
Planting in Blasting Sand
The 20/40 grade plants beautifully — grains are heavy enough to grip stems and fine enough for carpet roots. A few notes:
- It's inert — zero nutrients. Run the two-channel feeding system: root tabs in a grid for root feeders, liquid fertilizer for the water column. This is non-negotiable; blasting sand grows nothing on its own.
- Depth: 2–3 inches. The angular grains resist compaction better than play sand, but don't push past 3 inches without a reason — see our depth guide.
- It holds slopes well — the angularity that worries cory keepers is a plus for aquascaping. You can build steeper hills than with rounded sand.
- Root tabs disappear into it invisibly — push them deep (2+ inches) with tweezers; the black color hides the disturbance completely.
Maintenance on Black Sand
Here's the paradox of black substrate: it hides detritus visually but still needs cleaning. Because you can't see the waste, it's tempting to skip vacuuming — don't. Hover a siphon just above the surface weekly; the dark grains make it easy to see the lighter detritus lifting off, which is actually convenient.
Algae on black sand is more visible than on black gravel (flat surface shows film algae), so keep up the cleaning routine from our substrate cleaning guide. Malaysian trumpet snails are excellent companions — they turn the upper layer at night, preventing any compaction, and they're nearly invisible on black sand during the day.
Blasting Sand vs The Alternatives
| Substrate | Look | Cost | Bottom-dweller safety | Planting ease |
|---|---|---|---|---|
| Black blasting sand (20/40) | Deep black, slight sparkle | Very cheap (bulk) | Good, not perfect | Excellent |
| Pool filter sand | Natural tan | Very cheap (bulk) | Excellent | Excellent |
| Black aquarium sand (branded) | Deep black | Expensive | Excellent | Excellent |
| Aquasoil | Dark brown/black | Premium | Good | Excellent + nutrients |
The real competition is branded black aquarium sand (CaribSea Tahitian Moon, etc.): same look, smoother grains, aquarium-grade QC, at 5–10× the price. If the budget allows and the tank centers on bottom-dwellers, the branded product is the worry-free choice. If you're covering a big tank or running multiple tanks, blasting sand's value is unbeatable. For the full sand landscape, see our best sand roundup.
Step-by-Step First Setup
Putting it all together — the full sequence for a blasting-sand tank:
- Buy 20/40 medium grade — 50 lbs covers roughly a 40-gallon breeder at 2.5 inches. When in doubt, buy the extra bag; running short mid-scape is worse than having leftovers.
- Rinse in batches until runoff is mostly clear (8–12 rinses per 5-lb batch). Yes, it's tedious. Yes, it's mandatory.
- Add hardscape first — place driftwood and rocks on the bare glass, then pour sand around them. Heavy hardscape sitting on sand shifts; hardscape on glass with sand packed around it is rock-solid.
- Slope the sand — 2 inches front, 3 inches back. The angular grains hold a slope better than rounded sand.
- Fill slowly over a plate or plastic bag to avoid cratering your careful slopes.
- Plant before the water fully clears if you like — slight haze doesn't hurt planting, and getting plants in early starts the biological clock sooner.
- Root tabs in a grid + liquid fertilizer from week one. The sand feeds nothing; you feed everything.
- Add Malaysian trumpet snails once the tank is cycled — free substrate maintenance for life.
Long-Term Color: Keeping It Black
Fresh blasting sand is a deep, slightly sparkly black. Over 1–2 years, the very top layer gradually lightens — biofilm, micro-scratches on grains, and settled mulm create a dark-gray patina. It's subtle and many keepers never notice, but if you want showroom black:
- Top-dress annually: sprinkle 0.25–0.5 inches of fresh, rinsed blasting sand over the existing bed. Five minutes, dramatic refresh.
- Don't deep-vacuum black sand aggressively trying to restore color — you'll just stir fines. The hover-siphon technique preserves the surface.
- Control algae on the surface — green film on black sand is the main thing that ruins the look. Consistent CO2/light balance and a cleanup crew (nerites, otos) keep it pristine.
Frequently Asked Questions
Which exact product do I buy?
Black Diamond Blasting Sand, medium grade 20/40 — the 50-lb bag. It's the product the entire hobby's experience base is built on. Avoid "fine" grades for planted tanks (too dusty) and never buy ungraded or unlabeled bulk abrasive. If Black Diamond isn't available in your region, look for coal-slag abrasive in 20/40 mesh from any reputable abrasive supplier.
Will it raise pH or affect water chemistry?
No. Proper coal slag is chemically inert in aquarium conditions — it doesn't buffer, doesn't leach carbonates, and doesn't soften water. Your parameters stay exactly what your source water makes them. (This is also why it's covered by our inert substrates guide philosophy: all nutrition comes from you.)
Can I mix it with aquasoil?
As a cap over aquasoil, yes — it's a popular sand cap choice because the black color looks sharp and the weight holds well. Mixed into aquasoil, no — you'd just dilute the soil's nutrition and complicate both materials' behavior. Layer, don't blend.
How long does it last?
Effectively forever. It's crushed mineral — it doesn't break down, exhaust, or decompose. The only "replacement" is aesthetic: after years, the very top layer can lighten slightly from biofilm and micro-scratches. A thin top-dress of fresh sand every few years restores the deep black.
My blasting sand smells like oil/chemicals. Is it safe?
Return it. A proper bag smells like nothing (maybe faintly mineral). Industrial packaging sometimes contaminates bags with oils or solvents, and no amount of rinsing makes a contaminated bag worth the risk to livestock. This is rare, but it's the reason to buy from stores with turnover rather than mystery bulk bins.
The Verdict
Black blasting sand is the hobby's best value in substrates: a premium look for pocket change, with planting performance that matches products costing ten times more. Respect it as an industrial product — buy the right grade, rinse it thoroughly, keep magnets away — feed your plants with tabs and liquid ferts, and it will serve your tank beautifully for as long as you keep the tank.
Tissue-culture plants are the exception — they’re grown in sterile gel and adapt with minimal melting, which is part of what you’re paying for. Plants bought submersed from another hobbyist’s tank also transition with little melt, since they’re already in the right form.
Which Plants Melt Most (and Least)
Heavy melters (expect significant leaf loss)
- Cryptocorynes — infamous for “crypt melt,” sometimes dropping every leaf after any disturbance. They almost always recover from the roots within weeks.
- Stem plants grown emersed — rotala, ludwigia, and hygrophila often shed lower emersed leaves while the growing tips transition.
- Amazon swords — emersed-grown swords typically lose their broad oval aerial leaves and replace them with longer submersed ribbon leaves.
Light melters
- Anubias, java fern, bucephalandra — slow-growing rhizome plants transition gradually; occasional old-leaf melt but rarely dramatic.
- Vallisneria — usually transitions well, though it dislikes the move itself and may sulk for a week.
- Floating plants — minimal melt since their leaves were already at the air-water interface.
The Acclimation Protocol
Step 1: Quarantine or dip first
Before acclimating to your tank’s conditions, make sure you’re not acclimating pests along with the plant. Run new arrivals through our quarantine and dip protocol — it adds days upfront but prevents months of regret.
Step 2: Float to temperature-match (30 minutes)
Float the bag or container in your tank for 20–30 minutes to equalize temperature. Plants are less temperature-sensitive than fish, but a 10°F shock on top of transplant stress is an avoidable insult.
Step 3: Trim before planting
Remove any leaves that are already damaged, yellowing, or heavily algae-covered — they won’t recover and they’ll rot in your tank, feeding algae. For stem plants, trim off the bottom inch and any emersed leaves that look unlikely to adapt; the plant wastes energy maintaining leaves it’s going to shed anyway. Keep the healthy growing tips — that’s where recovery starts.
Step 4: Plant correctly the first time
Follow our planting guide — right depth, crown exposed on rosettes, rhizomes unburied on epiphytes. Every uprooting and replanting restarts the acclimation clock, so get placement right on the first attempt. Decide where each plant goes before it goes in the water.
Step 5: Run a gentle first week
For the first 7 days after planting:
- Moderate light — run your normal photoperiod but consider dropping intensity 20–30% if your light is dimmable. Blast-level light on a melting plant grows algae on the dying leaves, not recovery.
- Stable CO2 — if you inject CO2, keep it consistent. Fluctuating CO2 during acclimation is a melt accelerator. If you’re low-tech, this doesn’t apply — see growing without CO2.
- Half-strength fertilizer — new plants with damaged leaves can’t use full dosing, and the excess feeds algae. Ramp to full strength over 2–3 weeks per our fertilizer schedule.
- No disturbance — don’t move, trim, or “check on” new plants for at least two weeks. Every touch resets root establishment. This is especially critical for crypts.
Step 6: Remove melt, keep the base
As emersed leaves melt, remove the mushy material promptly — decaying leaves release ammonia and grow fungus that can spread to healthy tissue. But never discard the plant while the crown, rhizome, or roots are firm and alive. A crypt that’s lost every leaf but has firm roots is a plant that’s about to recover, not a dead plant. Give it 3–4 weeks before judging.
Telling Normal Melt From Real Problems
Normal transition melt:
- Affects oldest/emersed leaves first, newest growth last
- New submersed leaves emerge even as old ones dissolve
- Roots and crown stay firm and white/green
- Timeline: 1–4 weeks, then obvious new growth
Concerning melt (see our full melting diagnosis guide):
- New growth also melts or emerges deformed
- Rhizome or crown turns mushy and brown — this is rot, not transition
- Entire plant dissolves within days with no new growth after 4+ weeks
- Melting spreads to established plants that weren’t recently moved
Buying Tips to Minimize Melt
- Buy submersed-grown when available — hobbyist-grown cuttings transition with almost no melt.
- Choose tissue culture for sensitive species — crypts and delicate stems establish far more reliably from sterile cups.
- Avoid plants already melting in the store tank — some melt is normal, but a plant that’s mostly mush at purchase has less energy for recovery.
- Transport carefully — keep plants damp and out of direct sun/heat. A plant that dries out or cooks in a hot car melts far worse than one transported properly.
The First-Month Timeline: What to Expect Week by Week
Knowing what’s normal when removes most acclimation anxiety. Here’s the typical timeline for a healthy plant adapting to a new tank:
Week 1: The quiet week
Almost nothing visible happens. The plant is growing roots you can’t see and assessing its new environment. Some species (vallisneria, stem plants) may start shedding their lowest leaves. This is normal. Resist the urge to “help” — no moving, no extra fertilizer, no light changes. The most common beginner mistake is intervening during a week when the correct action is nothing.
Week 2: Melt peaks
This is when emersed leaves give up in earnest. Crypts may drop everything; swords shed their broad aerial leaves; stem plants lose lower foliage. It looks catastrophic and it’s usually fine. Keep removing mushy material, keep conditions stable, and watch the crown and growing tips — if those are firm and green, recovery is already underway.
Week 3: The turn
New submersed-adapted leaves emerge — smaller, thinner, often a slightly different shade of green than the emersed foliage. Stem plant tips start growing visibly; crypts push tiny curled leaves from the crown; swords unfurl narrow ribbon leaves. This is the moment most beginners exhale for the first time.
Week 4+: Established
New growth outpaces melt, and the plant is functionally yours. You can resume full-strength fertilizer, normal trimming, and stop treating it as fragile. Some slow growers (anubias, bucephalandra) take 6–8 weeks to show obvious progress — that’s their normal speed, not a problem.
Acclimating Different Plant Formats
Tissue-culture cups
Sterile, pest-free, and already adapted to high-humidity (not emersed) growth — tissue cultures melt the least of any format. Rinse the agar gel off gently (leftover gel rots and feeds fungus), split the portion into small plantlets, and plant per our planting guide. They establish slowly for the first two weeks, then accelerate. No dip needed, minimal acclimation stress — this is the premium experience you’re paying for.
Potted plants
Remove the pot and strip away the rockwool completely — leftover rockwool traps debris and rots. Tease the root mass apart gently; if it’s a dense mat, splitting it into 2–3 smaller portions actually establishes faster than planting one big clump (more growing points, better water flow around roots). Potted plants are usually emersed-grown, so expect the standard 2–4 week melt cycle.
Bare-root / bunched stems
Typically sold as weighted bunches. Remove any bands, foam, or weights, strip the lower leaves, and plant stems individually or in small groups. Bunched stems from the store are often already transitioning — check for new submersed growth at the tips, which tells you the plant is mid-adaptation and will settle quickly.
Hobbyist cuttings
Already submersed-grown and the fastest to establish — often showing new growth within days. The main acclimation factor is water-parameter difference between the two tanks. Float to temperature-match, plant promptly, and they’ll usually take off with minimal melt. This is why experienced hobbyists prefer trading cuttings over buying potted plants.
Frequently Asked Questions
Should I use a “plant starter” or transplant fertilizer?
Products marketed for transplant shock are mostly B-vitamins and mild hormones. They don’t hurt, but there’s no strong evidence they help aquarium plants specifically. Stable conditions and patience outperform any bottle. Save the money for more plants.
My new plant melted completely — bare crown, no leaves. Is it dead?
Probably not, if the crown or rhizome is firm. Crypts and swords routinely lose 100% of their leaves and regrow from the base within a month. The test is firmness: firm and pale/green means alive; mushy and brown/black means rot. Give firm-but-leafless plants a full 4 weeks before declaring them dead.
Can I speed up acclimation with extra light or CO2?
No — and trying usually backfires. A melting plant can’t use extra light; the excess just grows algae on its dying leaves. Keep light moderate and CO2 stable (not boosted) during acclimation. Growth speed comes from the plant’s own adaptation timeline, which you can’t rush, only avoid delaying.
Should new plants go straight into my main display tank?
After quarantine/dipping, yes — there’s no benefit to a separate “growing-in” tank for most plants. They acclimate to your water fastest in the tank they’ll live in. The exception is very delicate species going into a tank with boisterous fish; give those a few weeks in a calm corner or breeder box first.
The Patience Rule
The single most important acclimation skill is restraint: plant it right, set gentle conditions, remove decay, and then leave it alone for a month. The hobbyists with the best plant growth aren’t doing something clever in week one — they’re simply not interfering in weeks two through four while the plants do what they’ve evolved to do. Melt looks like failure and feels like failure, but in most cases it’s the visible part of a plant successfully becoming yours.