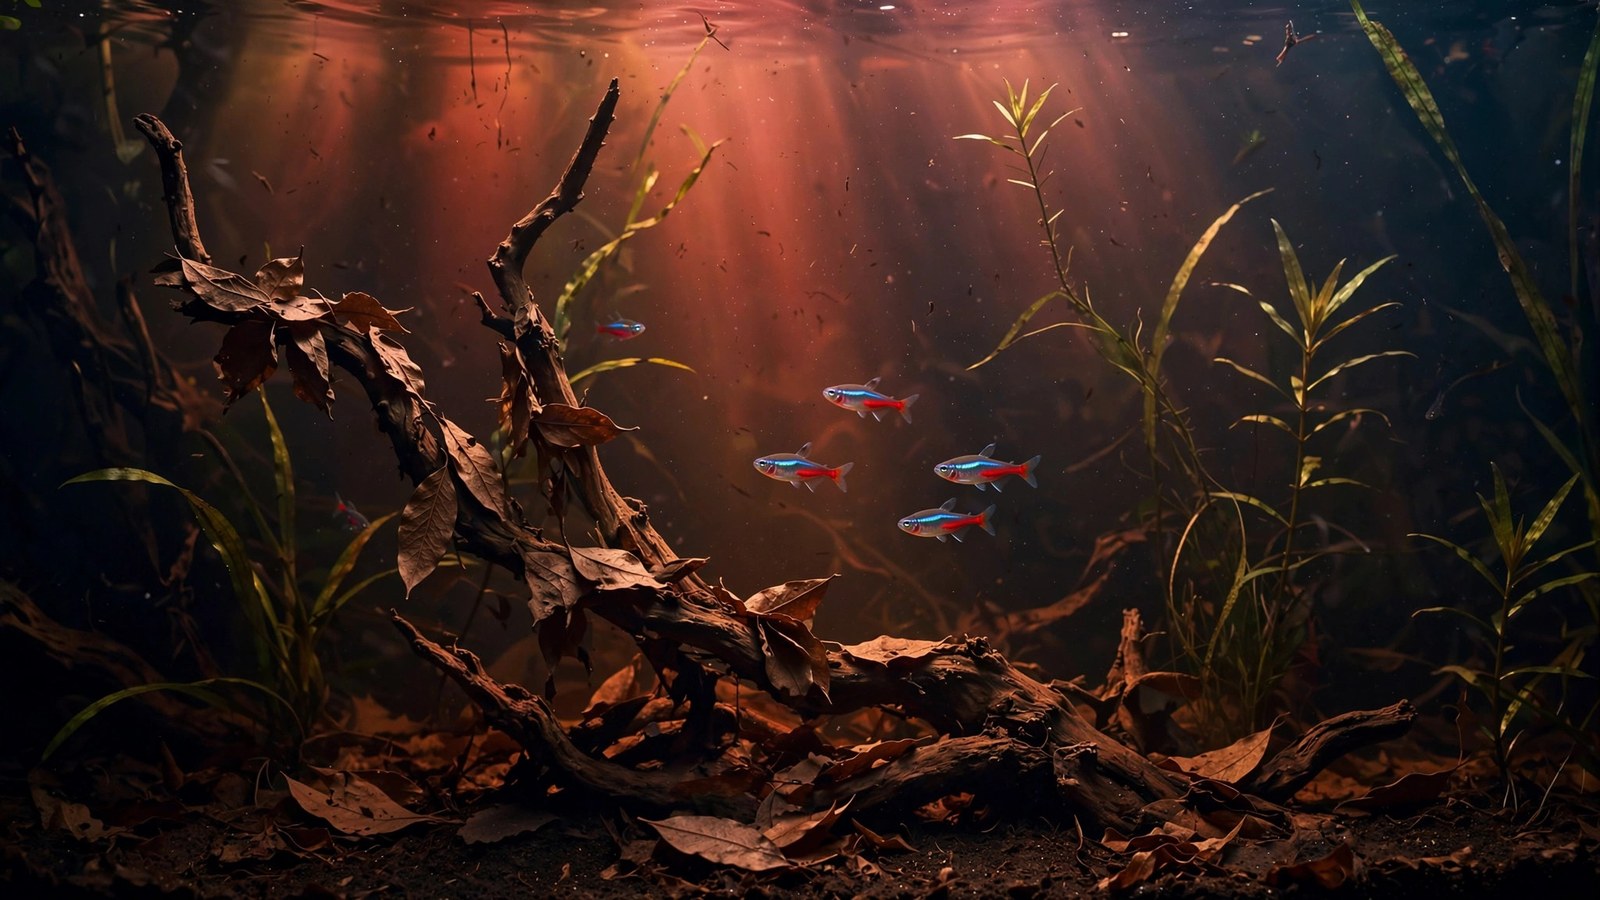
A blackwater planted tank setup is one of the most rewarding builds in the hobby: a dim, tea-stained slice of a flooded Amazon forest where leaves, roots, and soft-acid water do the decorating. Unlike bright high-tech aquascapes, a blackwater build leans on natural chemistry — tannins from botanical materials lower the pH, gentle lighting shapes the mood, and plants chosen for acidic, low-mineral water thrive with surprisingly little fuss. This guide walks you through the full practical build: the parameters that actually work, which leaves, wood, and cones release tannins safely, which plants tolerate soft acid water, how to cycle it, and how to keep it healthy month after month.
What Makes a Blackwater Tank Different
Blackwater habitats — like the Rio Negro and countless forest streams of the Amazon basin — get their character from dissolved organic compounds, mostly tannins and humic substances released by decaying plant matter. The water takes on a golden-brown to deep tea color, the pH drifts acidic, and hardness stays low. Light penetrates poorly, which is why these streams still grow lush underwater plants in nature: their species evolved for soft, acidic, dim conditions.
In practical terms, building a blackwater planted tank means managing three things at once: water chemistry (soft, acidic, low buffering), tannin sources (botanicals that stain and acidify the water), and plant selection (species that grow in those conditions). This is the hands-on build guide — parameters, cycling, plant lists, and maintenance — rather than pure hardscape design.
Target Water Parameters for Your Blackwater Planted Tank Setup
Blackwater chemistry is defined by softness and acidity, not by extremes. The table below shows the ranges most hobbyists aim for in a planted setup — conservative enough for a wide range of community fish and shrimp, and stable enough to keep plants growing steadily.
| Parameter | Target range | Notes |
|---|---|---|
| pH | 5.5–6.8 | Stability matters more than a specific number; avoid chasing decimals. |
| General hardness (GH) | 3–6 dGH | Soft water is the defining trait; remineralize RO water if needed. |
| Carbonate hardness (KH) | 0–3 dKH | Low KH lets botanicals pull pH down naturally. |
| Temperature | 24–27 °C (75–80 °F) | Matches most Amazonian species and plant growth. |
| Ammonia / nitrite | 0 ppm | Cycle fully before adding livestock, as always. |
| Nitrate | 5–20 ppm | Plants consume it; very low nitrates can stall growth. |
For how these parameters interact in planted aquariums generally, see the guide to planted tank water parameters. A few blackwater-specific notes:
- Start with soft source water. If your tap water is hard and alkaline, tannins alone will struggle to bring the pH down — carbonate buffering will fight them. Most successful blackwater tanks use RO (reverse osmosis) or rainwater, remineralized lightly to the GH range above.
- KH is the lever. With KH near zero, even modest amounts of botanicals shift pH into the acidic zone. With KH above 4 dKH, the same botanicals barely move it. Test your KH before you start.
- Don't chase a number. A stable pH of 6.6 is better than a 5.5 that swings after every water change. Fish and plants adapt to stable chemistry far more easily than to "ideal" chemistry that bounces around.
Tannin Sources: Leaves, Wood, and Cones
Tannins are the engine of the blackwater look and much of its chemistry. Different botanical materials release different amounts, at different speeds, and with different longevity.
Leaves
Indian almond leaves (Catappa) are the classic choice: they release tannins steadily for several weeks, tint the water a warm amber, and create leaf litter that fish and shrimp graze. Use 1 leaf per 20–40 liters as a starting dose, replacing them every 3–4 weeks as they break down. Safe alternatives include oak, guava, and magnolia — collect pesticide-free, rinse, and dry them first. Boiling leaves for a few minutes releases the initial burst of tannins faster and sterilizes them, but shortens their lifespan in the tank, so many hobbyists mix boiled and unboiled leaves.
Driftwood
Malaysian driftwood, spider wood, and mopani are all strong tannin releasers. Mopani in particular can stain water deeply for months. Pre-soak wood for at least a week, changing the soak water daily, or boil smaller pieces to tame the initial flood — otherwise your first fill can turn nearly opaque. Wood is a near-permanent tannin source: a large piece keeps leaching gently for a year or more, making it the backbone of long-term stability and the vertical structure that completes the look.
Alder cones and seed pods
Alder cones are small but potent — roughly 1 cone per 4–5 liters drops pH measurably in soft water and tints it golden. Use them as a fine-tuning tool: add cones when the water is lighter than you want, remove some if it gets too dark. Seed pods (Sterculia, casuarina) behave similarly and add attractive litter shapes. Because cones are concentrated, add them gradually and watch your test kit rather than dumping in a whole bag.
Dose in stages
The most common beginner mistake is adding everything at once and waking up to pitch-black water with a crashed pH. Add botanicals in stages over two to three weeks, testing pH and KH between additions. You can always add more leaves; you cannot easily un-stain the water. If the tank overshoots, a partial water change with fresh soft water dilutes the color without destabilizing it.
Substrate, Lighting, and Filtration
The hardware of a blackwater tank is deliberately simple — the water and botanicals carry the aesthetic, so equipment should be quiet, gentle, and reliable.
- Substrate: A nutrient-rich base works beautifully here because dimmer light means slower growth and a steadier nutrient balance. Many hobbyists run a soil-based setup following a dirted tank setup or a gentle approach like a low-tech planted tank setup, capped with fine sand or small gravel for the dark riverbed look. Dark caps also make the amber water glow by contrast.
- Lighting: Moderate, warm-toned light, 6–8 hours daily at modest intensity. Tannin-stained water already filters light, so high-intensity fixtures mostly buy you algae. A dimmable LED or raised fixture lets you tune the mood, and warmer color temperatures (3000–4000K) suit the tea color.
- Filtration: Gentle flow with generous biological media — sponge filters, small canisters, or baffled hang-on-back filters all work. Avoid strong currents; most blackwater species come from slow streams. Do not run activated carbon or clarifying media — they strip the very tannins you are cultivating. Fine filter floss polishes the water while leaving the tint intact.
Plants That Thrive in Soft, Acidic Water
Species from soft-water regions generally grow well in acidic, low-KH water, while hard-water specialists sulk. Reliable performers:
| Plant | Placement | Light needs | Why it suits blackwater |
|---|---|---|---|
| Amazon sword (Echinodorus bleheri) | Background | Low–moderate | Classic Amazon native; heavy root feeder that loves rich substrate. |
| Cryptocoryne wendtii | Midground | Low | Tolerates pH down to ~5.5; steady grower in soft water. |
| Anubias barteri | On wood | Low | Nearly indestructible in dim, acidic tanks; attach, don't bury. See Tropica's species profile for Anubias barteri for exact care data. |
| Java fern (Microsorum pterotoides) | On wood/rock | Low | Thrives in soft water; slow growth suits the low-energy setup. |
| Vallisneria spiralis | Background | Low–moderate | Long flowing leaves echo river grass; spreads by runners. |
| Amazon frogbit (Limnobium laevigatum) | Floating | Low–moderate | Shades the tank naturally; roots dangle into the water column. |
| Water sprite (Ceratopteris thalictroides) | Floating/planted | Low–moderate | Fast grower that outcompetes algae for nutrients. |
| Red tiger lotus (Nymphaea zenkeri) | Midground focal | Moderate | Red leaves pop against amber water; trim to control height. |
Plant densely from day one. Fast growers like water sprite absorb excess nutrients while the tank matures and the botanicals settle. And quarantine new plants before they enter the tank — a simple dip and holding period, as described in the quarantine tank plants guide, keeps pests and algae spores out of a system whose chemistry you have carefully tuned.
On fertilization: blackwater tanks need less, not more. A nutrient-rich substrate covers root feeders, and roughly half the label rate of liquid fertilizer, once or twice weekly, is plenty. Start low, watch new growth for two to three weeks, and only increase if deficiency signs appear.
Cycling a Blackwater Planted Tank
Cycle a blackwater tank like any planted aquarium — beneficial bacteria do not care about tannins. What changes is the timeline and a couple of details:
- Set up hardscape and substrate first. Place wood, add substrate, and fill carefully with soft water to avoid disturbing the cap.
- Add botanicals in stages during the first two weeks, so pH settles gradually rather than crashing mid-cycle.
- Plant densely immediately. Plants consume ammonia and nitrate from day one, softening the cycle curve.
- Dose ammonia to 2 ppm (fishless cycling) and test daily. In acidic water the cycle can run slightly slower — expect 3–6 weeks. To shorten the process, the techniques in how to cycle a planted tank faster apply here too: seeded filter media and bottled bacteria work in tannin-stained water.
- Confirm zero ammonia and nitrite for several consecutive days before adding livestock, and make sure pH has been stable (not just low) for at least a week.
In acidic water, ammonia exists mostly as less-toxic ammonium, giving a small safety margin during the cycle — but test kits read total ammonia either way, so do not stock early.
Stocking Considerations
A blackwater planted tank is a natural home for soft-water species: tetras (neon, cardinal, ember, rummy-nose), dwarf cichlids like Apistogramma, pencilfish, hatchetfish, and small rasboras all come from exactly this kind of water. Classic combinations include a school of cardinal tetras over leaf litter, or a pair of angelfish among tall swords — see the planted angelfish tank setup for compatible layouts. Angelfish and discus keepers in particular favor blackwater chemistry, and a planted discus tank setup runs on the same soft-acid principles at warmer temperatures.
Keep stocking conservative. Dimmer light and slower plant growth mean the system processes waste more slowly than a bright high-tech tank, and decomposing litter adds its own gentle bioload — understock slightly rather than pushing capacity. Add a cleanup crew (small Corydoras, Otocinclus, or Amano shrimp), but read the cleanup crew planted tank guide first, since some popular algae eaters prefer harder water than a blackwater tank provides. And drip-acclimate new arrivals over 45–60 minutes — the pH gap between a shop's neutral holding water and your 6.0 tank is real.
Weekly and Monthly Maintenance
Blackwater tanks are low-maintenance once mature, but they have their own rhythm:
- Weekly 20–25% water changes with soft water matched to tank temperature. This is the main control for tannin color — larger or more frequent changes lighten the water, smaller ones let it deepen. Remineralize RO water to your target GH before adding.
- Top up botanicals monthly. Leaves break down and cones lose potency; add a fresh leaf or two and a few cones each month, staggering replacements so chemistry never shifts at once.
- Vacuum leaf litter lightly. Leave most litter in place as foraging ground, but siphon fully decomposed sludge during water changes.
- Thin floating plants weekly so submerged plants keep receiving light.
- Test pH, KH, and nitrates monthly (weekly while new). Drifting readings mean it is time to adjust botanical dosing or water-change volume.
- Rinse mechanical filter media in old tank water monthly; never rinse biological media under the tap.
Frequently Asked Questions
How long does it take for a blackwater tank to turn tea-colored?
Expect noticeable amber tinting within 24–72 hours of adding leaves or cones, with full color developing over one to two weeks as botanicals saturate. Large driftwood pieces release tannins for months, deepening the color gradually. For faster color, boil a batch of leaves and pour the cooled, strained "tea" into the tank — but go easy, since overshooting into near-black water is simple.
Can I use tap water for a blackwater planted tank?
It depends on hardness. Soft, low-KH tap water works well — botanicals pull the pH down naturally. Hard, alkaline tap water resists acidification because carbonate buffering neutralizes the tannins' effect, and pH rebounds after every water change. If your KH is above 4 dKH, use RO or rainwater remineralized to 3–6 dGH instead; the tank will be far more stable.
Will tannins harm my plants or fish?
No — tannins occur naturally in the habitats most of these species come from, and many hobbyists report richer coloration and more natural behavior in tannin-stained water. Plants are unaffected by the color itself; the only consideration is reduced light penetration, which is why low-light-tolerant species are recommended. The real risk is adding too many botanicals too fast and crashing the pH, which is why staged dosing and testing matter.
Do I need CO2 injection in a blackwater tank?
Usually not. The recommended plants are all low-demand species that grow well without injected CO2, and dimmer lighting keeps growth rates — and CO2 demand — modest. If you later want faster growth or more demanding species, low-level CO2 is compatible with blackwater chemistry, but keep the dose conservative: acidic water already holds CO2 readily, and livestock in soft water can be sensitive to overdosing.
How do I keep the water from getting too dark?
Control color through water changes and botanical dosing, not chemical clarifiers. A 25% weekly water change with fresh soft water dilutes tannins steadily; increasing change volume or frequency lightens the tank, skipping a week deepens it. Removing some spent leaves and cones reduces the source. Avoid activated carbon and "water clarifier" products — they strip tannins unpredictably and work against the whole point of the setup.
Can shrimp live in a blackwater planted tank?
Yes, with the right species. Caridina shrimp such as crystal reds actually prefer the soft, acidic water of a blackwater tank. Neocaridina (cherry shrimp) prefer harder, more alkaline water and tend to breed poorly below pH 6.5, so they are a weaker fit. Whichever you keep, acclimate very slowly and make sure the tank is fully mature — shrimp are far less forgiving of unstable parameters than fish.
Start With Water, Let the Botanicals Do the Rest
A successful blackwater planted tank is built on patience: soft water, botanicals added in stages, plants chosen for acidic low-light conditions, and a cycle given the full three to six weeks it needs. Follow that order and you get a tank that is both strikingly beautiful and remarkably forgiving. Start your botanical collection now, test your water before you fill, and let the forest floor come to you.
Tissue-culture plants are the exception — they’re grown in sterile gel and adapt with minimal melting, which is part of what you’re paying for. Plants bought submersed from another hobbyist’s tank also transition with little melt, since they’re already in the right form.
Which Plants Melt Most (and Least)
Heavy melters (expect significant leaf loss)
- Cryptocorynes — infamous for “crypt melt,” sometimes dropping every leaf after any disturbance. They almost always recover from the roots within weeks.
- Stem plants grown emersed — rotala, ludwigia, and hygrophila often shed lower emersed leaves while the growing tips transition.
- Amazon swords — emersed-grown swords typically lose their broad oval aerial leaves and replace them with longer submersed ribbon leaves.
Light melters
- Anubias, java fern, bucephalandra — slow-growing rhizome plants transition gradually; occasional old-leaf melt but rarely dramatic.
- Vallisneria — usually transitions well, though it dislikes the move itself and may sulk for a week.
- Floating plants — minimal melt since their leaves were already at the air-water interface.
The Acclimation Protocol
Step 1: Quarantine or dip first
Before acclimating to your tank’s conditions, make sure you’re not acclimating pests along with the plant. Run new arrivals through our quarantine and dip protocol — it adds days upfront but prevents months of regret.
Step 2: Float to temperature-match (30 minutes)
Float the bag or container in your tank for 20–30 minutes to equalize temperature. Plants are less temperature-sensitive than fish, but a 10°F shock on top of transplant stress is an avoidable insult.
Step 3: Trim before planting
Remove any leaves that are already damaged, yellowing, or heavily algae-covered — they won’t recover and they’ll rot in your tank, feeding algae. For stem plants, trim off the bottom inch and any emersed leaves that look unlikely to adapt; the plant wastes energy maintaining leaves it’s going to shed anyway. Keep the healthy growing tips — that’s where recovery starts.
Step 4: Plant correctly the first time
Follow our planting guide — right depth, crown exposed on rosettes, rhizomes unburied on epiphytes. Every uprooting and replanting restarts the acclimation clock, so get placement right on the first attempt. Decide where each plant goes before it goes in the water.
Step 5: Run a gentle first week
For the first 7 days after planting:
- Moderate light — run your normal photoperiod but consider dropping intensity 20–30% if your light is dimmable. Blast-level light on a melting plant grows algae on the dying leaves, not recovery.
- Stable CO2 — if you inject CO2, keep it consistent. Fluctuating CO2 during acclimation is a melt accelerator. If you’re low-tech, this doesn’t apply — see growing without CO2.
- Half-strength fertilizer — new plants with damaged leaves can’t use full dosing, and the excess feeds algae. Ramp to full strength over 2–3 weeks per our fertilizer schedule.
- No disturbance — don’t move, trim, or “check on” new plants for at least two weeks. Every touch resets root establishment. This is especially critical for crypts.
Step 6: Remove melt, keep the base
As emersed leaves melt, remove the mushy material promptly — decaying leaves release ammonia and grow fungus that can spread to healthy tissue. But never discard the plant while the crown, rhizome, or roots are firm and alive. A crypt that’s lost every leaf but has firm roots is a plant that’s about to recover, not a dead plant. Give it 3–4 weeks before judging.
Telling Normal Melt From Real Problems
Normal transition melt:
- Affects oldest/emersed leaves first, newest growth last
- New submersed leaves emerge even as old ones dissolve
- Roots and crown stay firm and white/green
- Timeline: 1–4 weeks, then obvious new growth
Concerning melt (see our full melting diagnosis guide):
- New growth also melts or emerges deformed
- Rhizome or crown turns mushy and brown — this is rot, not transition
- Entire plant dissolves within days with no new growth after 4+ weeks
- Melting spreads to established plants that weren’t recently moved
Buying Tips to Minimize Melt
- Buy submersed-grown when available — hobbyist-grown cuttings transition with almost no melt.
- Choose tissue culture for sensitive species — crypts and delicate stems establish far more reliably from sterile cups.
- Avoid plants already melting in the store tank — some melt is normal, but a plant that’s mostly mush at purchase has less energy for recovery.
- Transport carefully — keep plants damp and out of direct sun/heat. A plant that dries out or cooks in a hot car melts far worse than one transported properly.
The First-Month Timeline: What to Expect Week by Week
Knowing what’s normal when removes most acclimation anxiety. Here’s the typical timeline for a healthy plant adapting to a new tank:
Week 1: The quiet week
Almost nothing visible happens. The plant is growing roots you can’t see and assessing its new environment. Some species (vallisneria, stem plants) may start shedding their lowest leaves. This is normal. Resist the urge to “help” — no moving, no extra fertilizer, no light changes. The most common beginner mistake is intervening during a week when the correct action is nothing.
Week 2: Melt peaks
This is when emersed leaves give up in earnest. Crypts may drop everything; swords shed their broad aerial leaves; stem plants lose lower foliage. It looks catastrophic and it’s usually fine. Keep removing mushy material, keep conditions stable, and watch the crown and growing tips — if those are firm and green, recovery is already underway.
Week 3: The turn
New submersed-adapted leaves emerge — smaller, thinner, often a slightly different shade of green than the emersed foliage. Stem plant tips start growing visibly; crypts push tiny curled leaves from the crown; swords unfurl narrow ribbon leaves. This is the moment most beginners exhale for the first time.
Week 4+: Established
New growth outpaces melt, and the plant is functionally yours. You can resume full-strength fertilizer, normal trimming, and stop treating it as fragile. Some slow growers (anubias, bucephalandra) take 6–8 weeks to show obvious progress — that’s their normal speed, not a problem.
Acclimating Different Plant Formats
Tissue-culture cups
Sterile, pest-free, and already adapted to high-humidity (not emersed) growth — tissue cultures melt the least of any format. Rinse the agar gel off gently (leftover gel rots and feeds fungus), split the portion into small plantlets, and plant per our planting guide. They establish slowly for the first two weeks, then accelerate. No dip needed, minimal acclimation stress — this is the premium experience you’re paying for.
Potted plants
Remove the pot and strip away the rockwool completely — leftover rockwool traps debris and rots. Tease the root mass apart gently; if it’s a dense mat, splitting it into 2–3 smaller portions actually establishes faster than planting one big clump (more growing points, better water flow around roots). Potted plants are usually emersed-grown, so expect the standard 2–4 week melt cycle.
Bare-root / bunched stems
Typically sold as weighted bunches. Remove any bands, foam, or weights, strip the lower leaves, and plant stems individually or in small groups. Bunched stems from the store are often already transitioning — check for new submersed growth at the tips, which tells you the plant is mid-adaptation and will settle quickly.
Hobbyist cuttings
Already submersed-grown and the fastest to establish — often showing new growth within days. The main acclimation factor is water-parameter difference between the two tanks. Float to temperature-match, plant promptly, and they’ll usually take off with minimal melt. This is why experienced hobbyists prefer trading cuttings over buying potted plants.
Frequently Asked Questions
Should I use a “plant starter” or transplant fertilizer?
Products marketed for transplant shock are mostly B-vitamins and mild hormones. They don’t hurt, but there’s no strong evidence they help aquarium plants specifically. Stable conditions and patience outperform any bottle. Save the money for more plants.
My new plant melted completely — bare crown, no leaves. Is it dead?
Probably not, if the crown or rhizome is firm. Crypts and swords routinely lose 100% of their leaves and regrow from the base within a month. The test is firmness: firm and pale/green means alive; mushy and brown/black means rot. Give firm-but-leafless plants a full 4 weeks before declaring them dead.
Can I speed up acclimation with extra light or CO2?
No — and trying usually backfires. A melting plant can’t use extra light; the excess just grows algae on its dying leaves. Keep light moderate and CO2 stable (not boosted) during acclimation. Growth speed comes from the plant’s own adaptation timeline, which you can’t rush, only avoid delaying.
Should new plants go straight into my main display tank?
After quarantine/dipping, yes — there’s no benefit to a separate “growing-in” tank for most plants. They acclimate to your water fastest in the tank they’ll live in. The exception is very delicate species going into a tank with boisterous fish; give those a few weeks in a calm corner or breeder box first.
The Patience Rule
The single most important acclimation skill is restraint: plant it right, set gentle conditions, remove decay, and then leave it alone for a month. The hobbyists with the best plant growth aren’t doing something clever in week one — they’re simply not interfering in weeks two through four while the plants do what they’ve evolved to do. Melt looks like failure and feels like failure, but in most cases it’s the visible part of a plant successfully becoming yours.