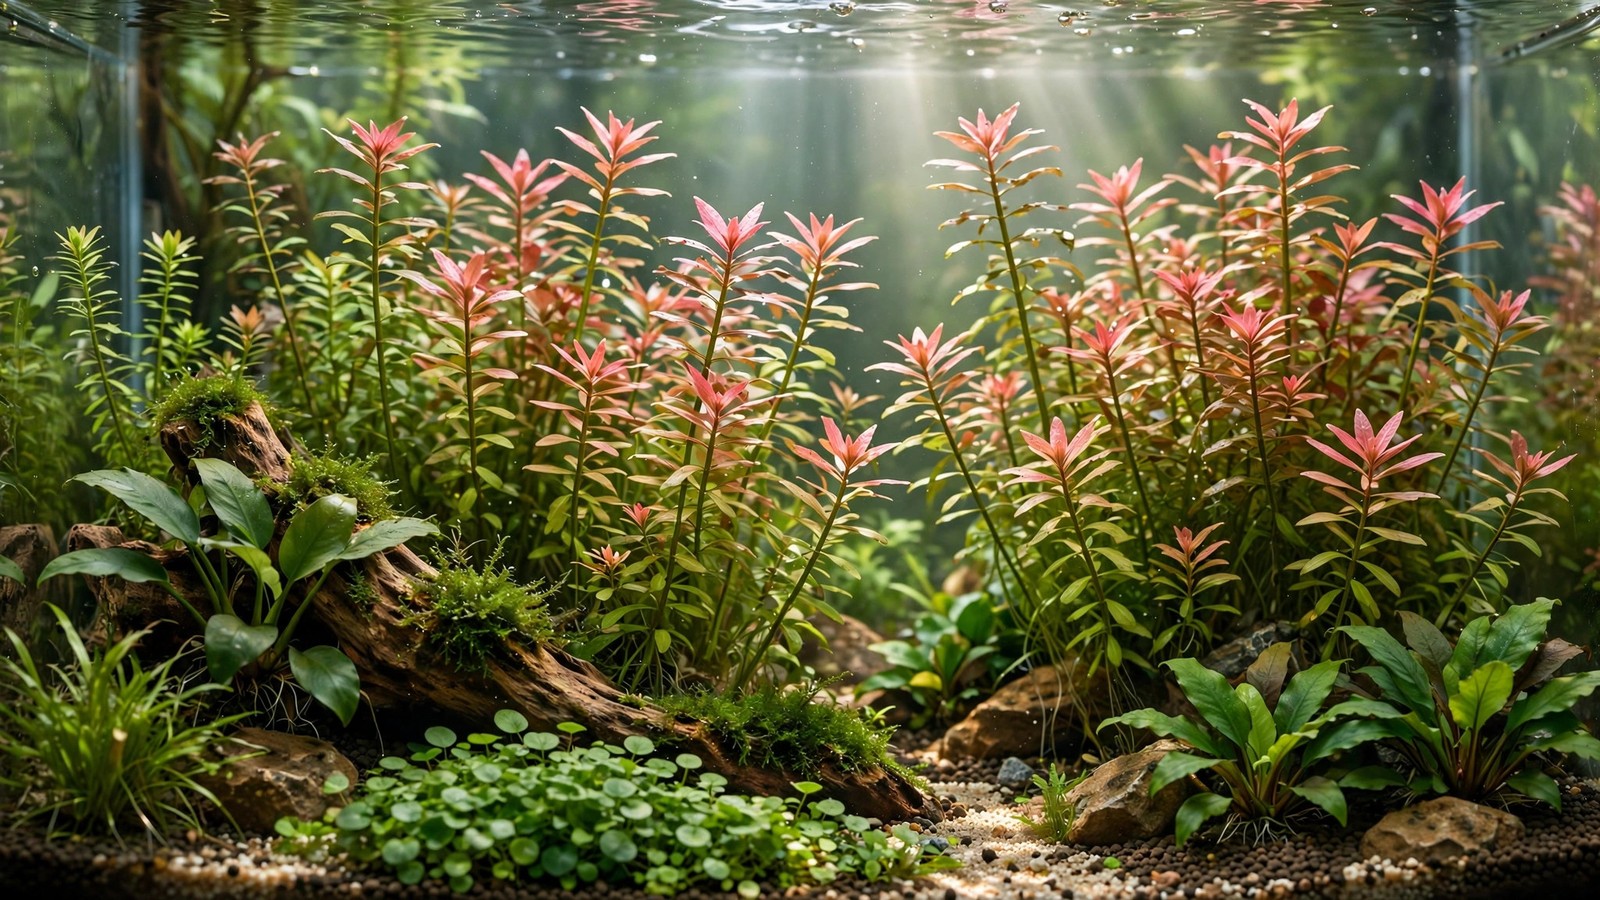
If you want a fast-growing background stem that rewards you with pink-tinged tips and fluffy density, few plants beat it. Rotala rotundifolia care is genuinely beginner-friendly: it grows well in low-tech tanks, responds dramatically to better light and CO2, and trims into neat hedges like few other species. Originally from marshy habitats in Southeast Asia, this adaptable plant has become a staple in aquascapes of every style.
This guide covers everything Rotala rotundifolia needs: light levels, CO2 and fertilizer strategy, planting and trimming techniques, propagation, and how to fix the most common problems like leggy growth and melting.
Quick Care Reference
| Parameter | Requirement |
|---|---|
| Light | Medium to high (2–3 watts per gallon equivalent, or 50+ PAR) |
| CO2 | Optional; faster growth and stronger color with injected CO2 |
| Growth rate | Fast (up to several inches per week under good conditions) |
| Placement | Background |
| Difficulty | Easy to moderate |
| Temperature | 68–82°F (20–28°C) |
| pH | 5.5–7.5 |
| Height | 12–24 inches (30–60 cm) |
Natural Habitat and Varieties
Rotala rotundifolia is native to swamps, rice paddies, and slow-moving streams across Southeast Asia, where it grows both emersed and submersed depending on the season. This amphibious lifestyle is exactly why it transitions so well into aquariums — it's genetically programmed to handle change.
The name causes some confusion: rotundifolia means "round-leaved," which describes the emersed form you often see in nursery pots. Once submerged, it produces the narrow, delicate leaves aquarists recognize. A few popular cultivated varieties exist:
- Rotala rotundifolia (standard) — green stems with pink-orange tops under strong light.
- Rotala rotundifolia 'H'ra' — a Vietnamese variant with narrower leaves and more intense pink-to-orange coloration; needs a bit more light than the standard form.
- Rotala rotundifolia 'Colorata' — selected for red coloration under high light and CO2.
Care is essentially identical across all three, so the guidance below applies to the whole group. If you like Rotala, you may also enjoy the finer-leaved Rotala wallichii, which shares similar requirements but demands stronger light.
Planting Rotala Rotundifolia
Rotala is sold either as emersed-grown bunches (the round-leaved nursery form) or as submersed cuttings from another tank. Both work, but they behave differently in the first two weeks. Emersed stock will often shed its lower round leaves as it converts to submersed growth — this is normal adaptation, not a failure. Submersed cuttings usually take off within days.
Plant individual stems, not bunches. Strip the lower leaves from the bottom inch of each stem and push it about an inch deep into the substrate, spacing stems roughly an inch apart. Planting too densely starves the lower leaves of light and flow, causing the bare-bottomed look beginners complain about. Inert gravel works fine, but a nutrient-rich substrate gives noticeably stronger root development — see our water wisteria guide for another stem plant that rewards rich substrate in the same way.
Rotala is a background plant by nature. Give it the full height of your tank, ideally behind midground plants like Staurogyne repens so its bare lower stems stay hidden while the colorful tops take center stage.
Light Requirements
Light is the single biggest factor in how your Rotala looks. Under medium light (around 40–60 PAR), it grows green and healthy at a steady pace — perfectly attractive, just not colorful. Push into the 60–100+ PAR range with good coverage, and the upper stems blush pink, orange, or red, especially near the surface.
Run an 8-hour photoperiod to start. If you notice algae forming on the leaves, shorten to 7 hours before reducing intensity — Rotala tolerates slightly less light far better than it tolerates an algae coating. Uneven coloration (green bottoms, pink tops) is normal and actually reflects the natural light gradient in the tank.
CO2 and Fertilizer
Here's the good news: Rotala rotundifolia does not require CO2 injection. It grows respectably in low-tech setups, making it one of the few red-capable stems beginners can actually keep. With injected CO2 at 20–30 ppm, though, growth roughly doubles and the color intensifies dramatically — stems get thicker, leaves get tighter, and the pink tones go from a hint to a statement.
For fertilizer, Rotala is a moderate feeder that pulls nutrients from both the water column and its roots. A weekly comprehensive liquid fertilizer works well; dose a little heavier than the bottle suggests if growth is fast, since a rapidly growing stem is a hungry stem. Iron supplementation nudges the pink and red tones, though light matters far more than iron for color — don't chase redness with iron alone while running dim light. Watch for the classic signs in our dwarf sagittaria profile of nutrient imbalance: pale new growth points to iron or nitrate issues, pinholes in older leaves point to potassium shortage.
In low-tech tanks, Rotala does well with just fish waste and occasional root tabs near its base. In high-tech setups, follow a full estimative-index or lean-dosing routine — the plant will consume nitrates eagerly, which also helps keep algae in check.
Trimming and Propagation
Rotala grows fast enough that trimming becomes a regular ritual — expect to trim every 1–3 weeks depending on your setup. You have two main techniques:
Topping (replanting the tops)
Cut stems about two-thirds up, replant the healthy tops, and discard or leave the rooted bottoms. The bottoms will sprout new side shoots within days, giving you a bushier stand. This is the method that produces those dense Dutch-style hedges.
Mowing (cutting straight across)
For a manicured hedge look, shear the whole stand at one height with long aquascaping scissors. The cut stems branch at the cut point, doubling the stem count each time. Mow slightly lower than your target height to account for regrowth.
Propagation couldn't be simpler: every cutting with a few leaf nodes roots within a week when replanted. Rotala is generous — one healthy bunch can become a full background stand within two months. Share the trimmings with fellow hobbyists; they're among the easiest plants to give away because they travel and restart so well.
Troubleshooting Common Problems
Leggy, sparse growth with bare lower stems
This is almost always insufficient light reaching the lower leaves. The plant stretches toward the surface and abandons shaded lower foliage. Increase light intensity, space stems further apart when planting, and trim regularly so the stand stays bushy instead of tall and bare. Planting a midground species in front to hide the lower stems is a classic aquascaping fix, not a failure.
Melting after planting
Emersed-grown stock melts its round leaves when submerged — completely normal. As long as the stem tips stay firm and green, new submersed leaves will emerge within 1–2 weeks. Remove mushy leaves promptly so they don't rot and spike ammonia. If submersed cuttings melt instead, suspect a major parameter shock (very different pH or temperature from the source tank) or ammonia in a brand-new cycling tank.
Stunted tips or curled new growth
Deformed growing tips usually signal calcium deficiency or CO2 fluctuation. Check that your CO2 (if injected) is stable through the photoperiod — Rotala is sensitive to fluctuating CO2 levels, which cause the crinkled-tip look. In soft-water tanks, a GH booster can resolve calcium-related stunting.
Algae on leaves
Rotala's fine leaves collect hair algae and staghorn when nutrients and light are out of balance. The plant itself is rarely the problem — reduce the photoperiod slightly, confirm CO2 is consistent, and make sure you're not overdosing fertilizer relative to plant mass. A cleanup crew of amano shrimp and nerite snails helps, but fix the balance first. Compare notes with our Ludwigia repens care guide, another fast stem where the same algae dynamics apply.
Green instead of pink/red
Color is a light story, full stop. Green, healthy Rotala under medium light is a success, not a problem. To push color: raise light intensity, add CO2, keep nitrates moderate rather than sky-high (mild nitrate limitation intensifies reds but don't starve the plant), and ensure good iron availability. Color develops on new growth — old green leaves won't change, so judge progress on the tips.
Tank Placement and Companions
Rotala rotundifolia shines as a background curtain, either as a single-species stand or mixed with other fine-leaved stems like Limnophila sessiliflora for textural contrast. In Dutch-style layouts, alternate it with redder stems such as Ludwigia Super Red to build a pink-to-crimson gradient across the back glass.
It pairs beautifully with carpeting foregrounds — a Monte Carlo carpet in front of a Rotala hedge is one of the most reliable aquascape compositions in the hobby. Fish-wise, it's ideal for small schooling species like tetras and rasboras, which weave through the stems and look spectacular against the pink tops.
Frequently Asked Questions
Does Rotala rotundifolia need CO2?
No — it's one of the best red-capable stems for low-tech tanks and grows perfectly well without injected CO2. That said, CO2 injection roughly doubles its growth rate, thickens stems, tightens leaf spacing, and intensifies the pink and orange coloration. Think of CO2 as the upgrade path: start without it, add it later when you want maximum color and density.
Why is my Rotala melting after planting?
If you bought emersed-grown stock (round leaves), melting of those leaves is normal adaptation — the plant is replacing air-adapted foliage with submersed leaves. Keep the stems planted, remove mushy leaves, and wait 1–2 weeks for new growth. If submersed cuttings are melting, check for ammonia spikes, extreme parameter differences from the source tank, or buried growing tips.
How do I make Rotala rotundifolia red?
Strong light is the primary driver — aim for 60+ PAR with good coverage. CO2 injection and moderate (not excessive) nitrates help, and adequate iron supports the pigments. Judge progress on new tip growth, since existing green leaves won't change color. The 'H'ra' and 'Colorata' varieties color up more readily than the standard form.
How fast does Rotala rotundifolia grow?
Very fast. Under medium light without CO2, expect 1–2 inches per week; with high light and CO2, 3–4 inches per week is common. Plan on trimming every 1–3 weeks. Its speed makes it excellent for new tanks, where it quickly absorbs excess nutrients and outcompetes algae during the vulnerable early months.
Can Rotala rotundifolia grow floating?
Yes — trimmings left floating will grow roots from the nodes and continue growing at the surface, often with intense coloration from the unfiltered light. Floating Rotala is a handy way to hold cuttings, but it shades everything below, so don't leave it floating long in a planted tank.
Is Rotala rotundifolia invasive?
In some warm regions it has naturalized in waterways, so never release aquarium plants into the wild — compost or trash unwanted trimmings instead. Indoors in an aquarium it's simply a vigorous grower, easily controlled with regular trimming. Responsible disposal keeps the hobby sustainable everywhere.
Bringing It All Together
Rotala rotundifolia earns its place in the beginner hall of fame: forgiving enough for a first tank, rewarding enough for a high-tech showpiece, and fast enough to teach you trimming skills on a plant that forgives mistakes. Start with a modest bunch in the background, give it decent light and consistent care, and within a couple of months you'll be trimming hedges and handing cuttings to friends — which is exactly how this hobby is supposed to feel.
Tissue-culture plants are the exception — they’re grown in sterile gel and adapt with minimal melting, which is part of what you’re paying for. Plants bought submersed from another hobbyist’s tank also transition with little melt, since they’re already in the right form.
Which Plants Melt Most (and Least)
Heavy melters (expect significant leaf loss)
- Cryptocorynes — infamous for “crypt melt,” sometimes dropping every leaf after any disturbance. They almost always recover from the roots within weeks.
- Stem plants grown emersed — rotala, ludwigia, and hygrophila often shed lower emersed leaves while the growing tips transition.
- Amazon swords — emersed-grown swords typically lose their broad oval aerial leaves and replace them with longer submersed ribbon leaves.
Light melters
- Anubias, java fern, bucephalandra — slow-growing rhizome plants transition gradually; occasional old-leaf melt but rarely dramatic.
- Vallisneria — usually transitions well, though it dislikes the move itself and may sulk for a week.
- Floating plants — minimal melt since their leaves were already at the air-water interface.
The Acclimation Protocol
Step 1: Quarantine or dip first
Before acclimating to your tank’s conditions, make sure you’re not acclimating pests along with the plant. Run new arrivals through our quarantine and dip protocol — it adds days upfront but prevents months of regret.
Step 2: Float to temperature-match (30 minutes)
Float the bag or container in your tank for 20–30 minutes to equalize temperature. Plants are less temperature-sensitive than fish, but a 10°F shock on top of transplant stress is an avoidable insult.
Step 3: Trim before planting
Remove any leaves that are already damaged, yellowing, or heavily algae-covered — they won’t recover and they’ll rot in your tank, feeding algae. For stem plants, trim off the bottom inch and any emersed leaves that look unlikely to adapt; the plant wastes energy maintaining leaves it’s going to shed anyway. Keep the healthy growing tips — that’s where recovery starts.
Step 4: Plant correctly the first time
Follow our planting guide — right depth, crown exposed on rosettes, rhizomes unburied on epiphytes. Every uprooting and replanting restarts the acclimation clock, so get placement right on the first attempt. Decide where each plant goes before it goes in the water.
Step 5: Run a gentle first week
For the first 7 days after planting:
- Moderate light — run your normal photoperiod but consider dropping intensity 20–30% if your light is dimmable. Blast-level light on a melting plant grows algae on the dying leaves, not recovery.
- Stable CO2 — if you inject CO2, keep it consistent. Fluctuating CO2 during acclimation is a melt accelerator. If you’re low-tech, this doesn’t apply — see growing without CO2.
- Half-strength fertilizer — new plants with damaged leaves can’t use full dosing, and the excess feeds algae. Ramp to full strength over 2–3 weeks per our fertilizer schedule.
- No disturbance — don’t move, trim, or “check on” new plants for at least two weeks. Every touch resets root establishment. This is especially critical for crypts.
Step 6: Remove melt, keep the base
As emersed leaves melt, remove the mushy material promptly — decaying leaves release ammonia and grow fungus that can spread to healthy tissue. But never discard the plant while the crown, rhizome, or roots are firm and alive. A crypt that’s lost every leaf but has firm roots is a plant that’s about to recover, not a dead plant. Give it 3–4 weeks before judging.
Telling Normal Melt From Real Problems
Normal transition melt:
- Affects oldest/emersed leaves first, newest growth last
- New submersed leaves emerge even as old ones dissolve
- Roots and crown stay firm and white/green
- Timeline: 1–4 weeks, then obvious new growth
Concerning melt (see our full melting diagnosis guide):
- New growth also melts or emerges deformed
- Rhizome or crown turns mushy and brown — this is rot, not transition
- Entire plant dissolves within days with no new growth after 4+ weeks
- Melting spreads to established plants that weren’t recently moved
Buying Tips to Minimize Melt
- Buy submersed-grown when available — hobbyist-grown cuttings transition with almost no melt.
- Choose tissue culture for sensitive species — crypts and delicate stems establish far more reliably from sterile cups.
- Avoid plants already melting in the store tank — some melt is normal, but a plant that’s mostly mush at purchase has less energy for recovery.
- Transport carefully — keep plants damp and out of direct sun/heat. A plant that dries out or cooks in a hot car melts far worse than one transported properly.
The First-Month Timeline: What to Expect Week by Week
Knowing what’s normal when removes most acclimation anxiety. Here’s the typical timeline for a healthy plant adapting to a new tank:
Week 1: The quiet week
Almost nothing visible happens. The plant is growing roots you can’t see and assessing its new environment. Some species (vallisneria, stem plants) may start shedding their lowest leaves. This is normal. Resist the urge to “help” — no moving, no extra fertilizer, no light changes. The most common beginner mistake is intervening during a week when the correct action is nothing.
Week 2: Melt peaks
This is when emersed leaves give up in earnest. Crypts may drop everything; swords shed their broad aerial leaves; stem plants lose lower foliage. It looks catastrophic and it’s usually fine. Keep removing mushy material, keep conditions stable, and watch the crown and growing tips — if those are firm and green, recovery is already underway.
Week 3: The turn
New submersed-adapted leaves emerge — smaller, thinner, often a slightly different shade of green than the emersed foliage. Stem plant tips start growing visibly; crypts push tiny curled leaves from the crown; swords unfurl narrow ribbon leaves. This is the moment most beginners exhale for the first time.
Week 4+: Established
New growth outpaces melt, and the plant is functionally yours. You can resume full-strength fertilizer, normal trimming, and stop treating it as fragile. Some slow growers (anubias, bucephalandra) take 6–8 weeks to show obvious progress — that’s their normal speed, not a problem.
Acclimating Different Plant Formats
Tissue-culture cups
Sterile, pest-free, and already adapted to high-humidity (not emersed) growth — tissue cultures melt the least of any format. Rinse the agar gel off gently (leftover gel rots and feeds fungus), split the portion into small plantlets, and plant per our planting guide. They establish slowly for the first two weeks, then accelerate. No dip needed, minimal acclimation stress — this is the premium experience you’re paying for.
Potted plants
Remove the pot and strip away the rockwool completely — leftover rockwool traps debris and rots. Tease the root mass apart gently; if it’s a dense mat, splitting it into 2–3 smaller portions actually establishes faster than planting one big clump (more growing points, better water flow around roots). Potted plants are usually emersed-grown, so expect the standard 2–4 week melt cycle.
Bare-root / bunched stems
Typically sold as weighted bunches. Remove any bands, foam, or weights, strip the lower leaves, and plant stems individually or in small groups. Bunched stems from the store are often already transitioning — check for new submersed growth at the tips, which tells you the plant is mid-adaptation and will settle quickly.
Hobbyist cuttings
Already submersed-grown and the fastest to establish — often showing new growth within days. The main acclimation factor is water-parameter difference between the two tanks. Float to temperature-match, plant promptly, and they’ll usually take off with minimal melt. This is why experienced hobbyists prefer trading cuttings over buying potted plants.
Frequently Asked Questions
Should I use a “plant starter” or transplant fertilizer?
Products marketed for transplant shock are mostly B-vitamins and mild hormones. They don’t hurt, but there’s no strong evidence they help aquarium plants specifically. Stable conditions and patience outperform any bottle. Save the money for more plants.
My new plant melted completely — bare crown, no leaves. Is it dead?
Probably not, if the crown or rhizome is firm. Crypts and swords routinely lose 100% of their leaves and regrow from the base within a month. The test is firmness: firm and pale/green means alive; mushy and brown/black means rot. Give firm-but-leafless plants a full 4 weeks before declaring them dead.
Can I speed up acclimation with extra light or CO2?
No — and trying usually backfires. A melting plant can’t use extra light; the excess just grows algae on its dying leaves. Keep light moderate and CO2 stable (not boosted) during acclimation. Growth speed comes from the plant’s own adaptation timeline, which you can’t rush, only avoid delaying.
Should new plants go straight into my main display tank?
After quarantine/dipping, yes — there’s no benefit to a separate “growing-in” tank for most plants. They acclimate to your water fastest in the tank they’ll live in. The exception is very delicate species going into a tank with boisterous fish; give those a few weeks in a calm corner or breeder box first.
The Patience Rule
The single most important acclimation skill is restraint: plant it right, set gentle conditions, remove decay, and then leave it alone for a month. The hobbyists with the best plant growth aren’t doing something clever in week one — they’re simply not interfering in weeks two through four while the plants do what they’ve evolved to do. Melt looks like failure and feels like failure, but in most cases it’s the visible part of a plant successfully becoming yours.