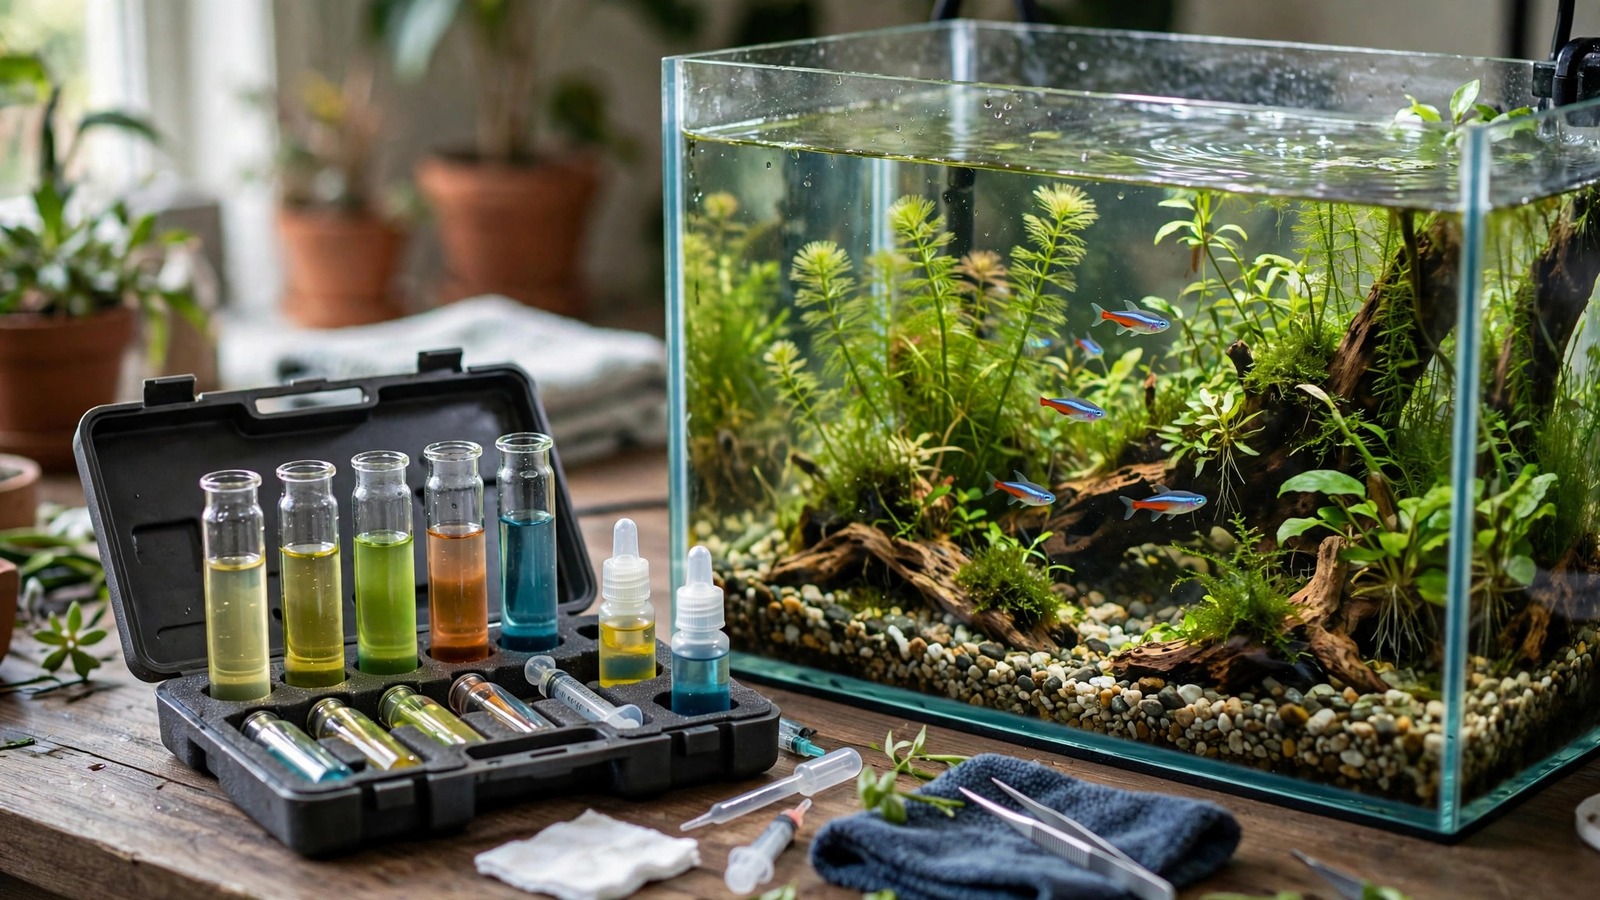
Every planted tank is a chemistry experiment running silently behind glass, and a good water test kit for planted tanks is how you read the results before your plants do. The problem is that most kits on the shelf were designed for fish-only tanks: they track ammonia, nitrite, and nitrate, then shrug at the nutrients your plants are actually starving for. This guide sorts the useful from the noise — which tests a planted-tank keeper genuinely needs, how often to run them, what the numbers mean for plant health, and how to turn a reading into a diagnosis instead of a panic.
Most Test Kits Are Built for Fish, Not Plants
A standard freshwater master kit answers one question: "Is my water safe for fish?" Ammonia and nitrite should be zero, nitrate should be low, and if everything checks out, the kit's job is done. But a planted tank asks a second, harder question: "Does this water contain what plants need to grow?" A tank can score perfectly on a fish-safety test while its plants melt, stall, or grow leaves full of holes from nutrient gaps the kit never looked for.
This does not mean fish-focused tests are useless in a planted tank — ammonia spikes after a substrate disturbance and nitrate readings directly affect plant health. But you need to think of the kit as a diagnostic tool with two modes: the toxicity checks that protect livestock, and the fertility checks that feed your plants.
The Five Water Tests That Actually Matter in a Planted Tank
Walk into any aquarium shop and you will see kits boasting a dozen parameters. In practice, five tests cover roughly 95 percent of the decisions a planted-tank keeper makes. Here is what each one tells you, and why it earns its place.
1. Ammonia and Nitrite: The Emergency Pair
Ammonia (NH₃/NH₄⁺) and nitrite (NO₂⁻) are the cycling parameters. In an established planted tank they should read zero — always. They matter to plant keepers because an ammonia spike after disturbing aquasoil or cleaning a filter triggers algae blooms fast, and plants dying after a water change often trace back to chloramine or ammonia in the tap water itself. Test these any time livestock looks stressed, plants melt suddenly, or you have done something disruptive like rescaping.
2. Nitrate: The Nutrient You Can Actually See
Nitrate (NO₃⁻) is the end product of the nitrogen cycle and the single most informative reading for a planted tank. Fish keepers want it low; plant keepers want it present but controlled — typically 5 to 20 ppm, with heavily planted high-energy tanks often running happily toward the upper end. A nitrate reading that sits stubbornly at zero for weeks is one of the classic signs of nitrogen deficiency in aquarium plants: yellowing old leaves, stalled growth, and plants cannibalizing their lower foliage.
Nitrate also works as a proxy for your overall fertilization balance. If nitrate climbs week after week despite regular water changes, you are dosing more than the plants can use — which is one of the early signs of over-fertilizing and a common setup for algae. One test, two opposite diagnoses depending on the direction. That is why nitrate earns its bottle.
3. pH: Context, Not a Target
Beginners often obsess over hitting a "perfect" pH. Experienced planted-tank keepers treat pH as context: it tells you something about CO₂ levels and buffer strength, but chasing a number is usually counterproductive. Most community plants grow fine anywhere from about 6.0 to 7.6. What matters far more is stability.
pH testing is still useful in two situations. If you run pressurized CO₂, comparing your degassed pH (water left to sit for 24 hours) against your injected pH estimates CO₂ — a drop of about 1.0 point suggests you are near the commonly targeted 30 ppm. And a sudden unexplained pH crash can reveal that your KH buffer has been exhausted, which aquasoils accelerate as they age.
4. GH and KH: The Stability Tools
General hardness (GH) measures dissolved calcium and magnesium; carbonate hardness (KH) measures buffering capacity against pH swings. Low GH (below ~3 dGH) alongside twisted new growth points to a calcium or magnesium gap, while a KH that has collapsed to zero explains mysterious pH crashes and the melting that follows. Test both monthly, plus any time you change water sources or growth stalls without explanation.
5. Phosphate: The Optional Sixth Sense
Phosphate (PO₄³⁻) is the one extra bottle worth owning once the basics are covered. Plants need phosphorus, and in lean-dosed or low-tech tanks, phosphate running at zero can bottleneck growth — often showing up as stunted tips and dark old leaves. A target of roughly 0.5 to 2 ppm suits most planted tanks. Despite the persistent myth, moderate phosphate in a tank with healthy, growing plants is fuel for plants, not a guaranteed algae trigger.
Strip, Liquid, or Digital: Choosing a Water Test Kit for a Planted Tank
Test strips are fast and cheap, and fine for quick sanity checks — but their coarse bands cannot reliably distinguish 10 ppm nitrate from 40 ppm, and they degrade in humid fish rooms.
Liquid drop tests are the workhorse of planted-tank keeping: more accurate, far more precise, and cheaper per test. Standard freshwater master kits cover ammonia, nitrite, nitrate, and pH, with GH/KH and phosphate available as add-ons. The extra two minutes of shaking and timing are the entire cost of going from guesswork to data. Read your kit's instructions fully before your first round — shaking times and drop counts matter more than brand.
Digital testers are conveniences, not necessities. A pH pen is handy for CO₂ users taking before/after readings, and a TDS meter gives a quick whole-tank snapshot of dissolved solids. Calibrate pens regularly — a drifting pH pen has misled more aquarists than any strip. For most keepers, a liquid kit plus a cheap TDS meter is the sweet spot. University extension publications on water quality targets for fish-and-plant systems (PDF) confirm the same core parameters this article prioritizes.
Target Ranges at a Glance
Tape this table inside your tank cabinet. These are practical working ranges for a typical planted community tank — not laboratory ideals, and your specific plants and livestock may sit a little outside them with no trouble.
| Parameter | Target range for planted tanks | How often to test |
|---|---|---|
| Ammonia (NH₃) | 0 ppm — always | After disturbances; when livestock looks stressed |
| Nitrite (NO₂⁻) | 0 ppm — always | After disturbances; during cycling |
| Nitrate (NO₃⁻) | 5–20 ppm | Weekly while dialing in dosing; monthly once stable |
| pH | 6.0–7.6, stable | Weekly during setup; monthly or when something changes |
| GH | 3–8 dGH | Monthly; after water-source changes |
| KH | 2–6 dKH | Monthly; more often with aquasoil under 12 months old |
| Phosphate (PO₄³⁻) | 0.5–2 ppm | Biweekly while troubleshooting; monthly once stable |
How Often to Test: A Schedule That Doesn't Make You Crazy
The biggest mistake new keepers make is testing everything every day for a month, then never testing again. A new tank gets ammonia, nitrite, and nitrate tests every couple of days during cycling, tapering to weekly once livestock is in. A stable tank needs nitrate and pH checked weekly while you are still learning it, dropping to monthly once the tank is dialed in.
Events that should always trigger a test round: an unexplained livestock death, sudden plant melting, an algae bloom appearing within days, switching water sources, adding or removing a large plant mass, and filter maintenance beyond a gentle rinse. Keep a simple log — date, parameter, reading. A year of sparse readings beats a month of obsessive ones, because trends diagnose: nitrate creeping up 2 ppm a month tells a story a single reading never will.
Reading Your Results: From Numbers to Plant Diagnosis
A test result is only useful if it changes what you do. Here is how to translate the most common readings into actions:
- Nitrate at 0, plants yellowing from the bottom up: classic nitrogen shortage. Increase your nitrogen source — more complete fertilizer dosing, or slightly heavier livestock feeding — and retest in a week. Expect improvement in new growth within two to three weeks.
- Nitrate climbing past 40 ppm, algae appearing: you are dosing beyond what plants consume. Cut fertilizer in half, check that your light period has not crept longer, and confirm filter flow has not dropped. Fuzz algae on leaves is a frequent companion of this pattern.
- Ammonia above 0 after rescaping: you have disturbed the substrate. Do a 30–40 percent water change, dose a dechlorinator that detoxifies ammonia, and retest in 24 hours. Repeat until it reads zero.
- pH crashing while KH reads near 0: your buffer is exhausted — common with aging aquasoil. Partial water changes rebuild it; if the source water is very soft, a small amount of crushed coral or KH buffer in the filter restores stability gradually.
- GH reads fine, but new growth is twisted and pale between veins: GH measures calcium plus magnesium together, so a "fine" GH can hide a magnesium shortage. If your water is calcium-heavy, a conservative magnesium supplement (Epsom salt dosing is the common hobby method) is the targeted fix — watch new growth, since old damaged leaves will not recover.
- Phosphate at 0, growth stalled despite adequate nitrate: phosphorus is the bottleneck. A phosphate-containing fertilizer or modest monopotassium phosphate dose unblocks it. Increase slowly and watch for the growth response before changing anything else.
The golden rule of diagnosis: change one variable at a time and give it two weeks. Thread algae, melting, and stalled growth all tempt the keeper into changing lights, ferts, and CO₂ in one weekend — after which nobody, including the keeper, knows what fixed the problem or whether anything actually did.
Frequently Asked Questions
Do I really need a test kit if my tank looks healthy?
If everything is growing and livestock is thriving, frequent testing adds little. But a basic liquid kit is still worth owning for the day something goes wrong — an unexplained death, sudden melting, or a surprise algae bloom. Troubleshooting without test data is guessing, and guessing in aquariums usually means changing three things at once. Buy the kit when the tank is healthy so it is on the shelf when you need it.
Are aquarium test strips accurate enough for a planted tank?
Strips are fine for quick "is anything wildly off?" checks, but their coarse color bands make them poor tools for planted-tank decisions. The difference between 10 and 40 ppm nitrate — the difference between under-dosing and over-dosing — can be one muddy shade on a strip. Liquid drop tests resolve that clearly and cost less per test. Use strips for travel or emergencies; use liquid tests for actual diagnosis.
Which test kit brand is best for planted tanks?
The major liquid-test brands all use the same basic chemistry and are accurate enough for hobby decisions when the reagents are fresh and the instructions are followed exactly — especially shaking times for the nitrate test, which most people under-shake. Pick one brand and stay with it so your readings are comparable over time, and replace kits past their printed expiry date. Consistency matters more than brand loyalty.
How do I test my tap water, and why does it matter?
Test your tap water for ammonia, nitrate, pH, GH, and KH once, and repeat if your water company changes sources seasonally. Tap water containing chloramine will show an ammonia reading even after dechlorination with basic products, which explains mysterious ammonia tests in otherwise healthy tanks. Knowing your tap's baseline GH and KH also tells you whether water changes are stabilizing or destabilizing your parameters — a common hidden cause of tanks that never quite settle.
Can I test for iron, potassium, or CO₂ directly?
Iron test kits exist but are fiddly — iron chelates break down quickly and readings rarely reflect what plants can actually use, so most keepers dose iron on a schedule instead of testing for it. Potassium has no practical hobby test. CO₂ is estimated indirectly: either with a drop checker (a small glass indicator that sits in the tank and changes color with CO₂ levels) or by comparing pH before and after CO₂ injection. Chasing precision on these three is a classic beginner trap; watch the plants instead.
My nitrate test always reads zero but my plants are fine — is the kit broken?
Probably not. In a densely planted, lightly stocked tank, plants can consume nitrate as fast as the cycle produces it, holding the reading at zero while everything thrives. Zero nitrate only becomes a problem when it comes with symptoms: yellowing lower leaves, stalled growth, or thinning foliage. Healthy plants with zero nitrate just mean your plant mass and bioload are well matched — arguably the ideal state.
The Bottom Line on Testing
A water test kit for a planted tank earns its place not by how many parameters it measures, but by whether its readings change your decisions. Ammonia and nitrite guard the livestock, nitrate and phosphate feed the diagnosis of plant problems, and pH, GH, and KH explain the mysteries — the crashes, the stalls, the melts that have no visible cause. Buy the liquid kit, learn the five tests that matter, test when events demand it, and let one variable change at a time. Your plants have been reading the water all along; the kit just lets you read it with them.
Tissue-culture plants are the exception — they’re grown in sterile gel and adapt with minimal melting, which is part of what you’re paying for. Plants bought submersed from another hobbyist’s tank also transition with little melt, since they’re already in the right form.
Which Plants Melt Most (and Least)
Heavy melters (expect significant leaf loss)
- Cryptocorynes — infamous for “crypt melt,” sometimes dropping every leaf after any disturbance. They almost always recover from the roots within weeks.
- Stem plants grown emersed — rotala, ludwigia, and hygrophila often shed lower emersed leaves while the growing tips transition.
- Amazon swords — emersed-grown swords typically lose their broad oval aerial leaves and replace them with longer submersed ribbon leaves.
Light melters
- Anubias, java fern, bucephalandra — slow-growing rhizome plants transition gradually; occasional old-leaf melt but rarely dramatic.
- Vallisneria — usually transitions well, though it dislikes the move itself and may sulk for a week.
- Floating plants — minimal melt since their leaves were already at the air-water interface.
The Acclimation Protocol
Step 1: Quarantine or dip first
Before acclimating to your tank’s conditions, make sure you’re not acclimating pests along with the plant. Run new arrivals through our quarantine and dip protocol — it adds days upfront but prevents months of regret.
Step 2: Float to temperature-match (30 minutes)
Float the bag or container in your tank for 20–30 minutes to equalize temperature. Plants are less temperature-sensitive than fish, but a 10°F shock on top of transplant stress is an avoidable insult.
Step 3: Trim before planting
Remove any leaves that are already damaged, yellowing, or heavily algae-covered — they won’t recover and they’ll rot in your tank, feeding algae. For stem plants, trim off the bottom inch and any emersed leaves that look unlikely to adapt; the plant wastes energy maintaining leaves it’s going to shed anyway. Keep the healthy growing tips — that’s where recovery starts.
Step 4: Plant correctly the first time
Follow our planting guide — right depth, crown exposed on rosettes, rhizomes unburied on epiphytes. Every uprooting and replanting restarts the acclimation clock, so get placement right on the first attempt. Decide where each plant goes before it goes in the water.
Step 5: Run a gentle first week
For the first 7 days after planting:
- Moderate light — run your normal photoperiod but consider dropping intensity 20–30% if your light is dimmable. Blast-level light on a melting plant grows algae on the dying leaves, not recovery.
- Stable CO2 — if you inject CO2, keep it consistent. Fluctuating CO2 during acclimation is a melt accelerator. If you’re low-tech, this doesn’t apply — see growing without CO2.
- Half-strength fertilizer — new plants with damaged leaves can’t use full dosing, and the excess feeds algae. Ramp to full strength over 2–3 weeks per our fertilizer schedule.
- No disturbance — don’t move, trim, or “check on” new plants for at least two weeks. Every touch resets root establishment. This is especially critical for crypts.
Step 6: Remove melt, keep the base
As emersed leaves melt, remove the mushy material promptly — decaying leaves release ammonia and grow fungus that can spread to healthy tissue. But never discard the plant while the crown, rhizome, or roots are firm and alive. A crypt that’s lost every leaf but has firm roots is a plant that’s about to recover, not a dead plant. Give it 3–4 weeks before judging.
Telling Normal Melt From Real Problems
Normal transition melt:
- Affects oldest/emersed leaves first, newest growth last
- New submersed leaves emerge even as old ones dissolve
- Roots and crown stay firm and white/green
- Timeline: 1–4 weeks, then obvious new growth
Concerning melt (see our full melting diagnosis guide):
- New growth also melts or emerges deformed
- Rhizome or crown turns mushy and brown — this is rot, not transition
- Entire plant dissolves within days with no new growth after 4+ weeks
- Melting spreads to established plants that weren’t recently moved
Buying Tips to Minimize Melt
- Buy submersed-grown when available — hobbyist-grown cuttings transition with almost no melt.
- Choose tissue culture for sensitive species — crypts and delicate stems establish far more reliably from sterile cups.
- Avoid plants already melting in the store tank — some melt is normal, but a plant that’s mostly mush at purchase has less energy for recovery.
- Transport carefully — keep plants damp and out of direct sun/heat. A plant that dries out or cooks in a hot car melts far worse than one transported properly.
The First-Month Timeline: What to Expect Week by Week
Knowing what’s normal when removes most acclimation anxiety. Here’s the typical timeline for a healthy plant adapting to a new tank:
Week 1: The quiet week
Almost nothing visible happens. The plant is growing roots you can’t see and assessing its new environment. Some species (vallisneria, stem plants) may start shedding their lowest leaves. This is normal. Resist the urge to “help” — no moving, no extra fertilizer, no light changes. The most common beginner mistake is intervening during a week when the correct action is nothing.
Week 2: Melt peaks
This is when emersed leaves give up in earnest. Crypts may drop everything; swords shed their broad aerial leaves; stem plants lose lower foliage. It looks catastrophic and it’s usually fine. Keep removing mushy material, keep conditions stable, and watch the crown and growing tips — if those are firm and green, recovery is already underway.
Week 3: The turn
New submersed-adapted leaves emerge — smaller, thinner, often a slightly different shade of green than the emersed foliage. Stem plant tips start growing visibly; crypts push tiny curled leaves from the crown; swords unfurl narrow ribbon leaves. This is the moment most beginners exhale for the first time.
Week 4+: Established
New growth outpaces melt, and the plant is functionally yours. You can resume full-strength fertilizer, normal trimming, and stop treating it as fragile. Some slow growers (anubias, bucephalandra) take 6–8 weeks to show obvious progress — that’s their normal speed, not a problem.
Acclimating Different Plant Formats
Tissue-culture cups
Sterile, pest-free, and already adapted to high-humidity (not emersed) growth — tissue cultures melt the least of any format. Rinse the agar gel off gently (leftover gel rots and feeds fungus), split the portion into small plantlets, and plant per our planting guide. They establish slowly for the first two weeks, then accelerate. No dip needed, minimal acclimation stress — this is the premium experience you’re paying for.
Potted plants
Remove the pot and strip away the rockwool completely — leftover rockwool traps debris and rots. Tease the root mass apart gently; if it’s a dense mat, splitting it into 2–3 smaller portions actually establishes faster than planting one big clump (more growing points, better water flow around roots). Potted plants are usually emersed-grown, so expect the standard 2–4 week melt cycle.
Bare-root / bunched stems
Typically sold as weighted bunches. Remove any bands, foam, or weights, strip the lower leaves, and plant stems individually or in small groups. Bunched stems from the store are often already transitioning — check for new submersed growth at the tips, which tells you the plant is mid-adaptation and will settle quickly.
Hobbyist cuttings
Already submersed-grown and the fastest to establish — often showing new growth within days. The main acclimation factor is water-parameter difference between the two tanks. Float to temperature-match, plant promptly, and they’ll usually take off with minimal melt. This is why experienced hobbyists prefer trading cuttings over buying potted plants.
Frequently Asked Questions
Should I use a “plant starter” or transplant fertilizer?
Products marketed for transplant shock are mostly B-vitamins and mild hormones. They don’t hurt, but there’s no strong evidence they help aquarium plants specifically. Stable conditions and patience outperform any bottle. Save the money for more plants.
My new plant melted completely — bare crown, no leaves. Is it dead?
Probably not, if the crown or rhizome is firm. Crypts and swords routinely lose 100% of their leaves and regrow from the base within a month. The test is firmness: firm and pale/green means alive; mushy and brown/black means rot. Give firm-but-leafless plants a full 4 weeks before declaring them dead.
Can I speed up acclimation with extra light or CO2?
No — and trying usually backfires. A melting plant can’t use extra light; the excess just grows algae on its dying leaves. Keep light moderate and CO2 stable (not boosted) during acclimation. Growth speed comes from the plant’s own adaptation timeline, which you can’t rush, only avoid delaying.
Should new plants go straight into my main display tank?
After quarantine/dipping, yes — there’s no benefit to a separate “growing-in” tank for most plants. They acclimate to your water fastest in the tank they’ll live in. The exception is very delicate species going into a tank with boisterous fish; give those a few weeks in a calm corner or breeder box first.
The Patience Rule
The single most important acclimation skill is restraint: plant it right, set gentle conditions, remove decay, and then leave it alone for a month. The hobbyists with the best plant growth aren’t doing something clever in week one — they’re simply not interfering in weeks two through four while the plants do what they’ve evolved to do. Melt looks like failure and feels like failure, but in most cases it’s the visible part of a plant successfully becoming yours.