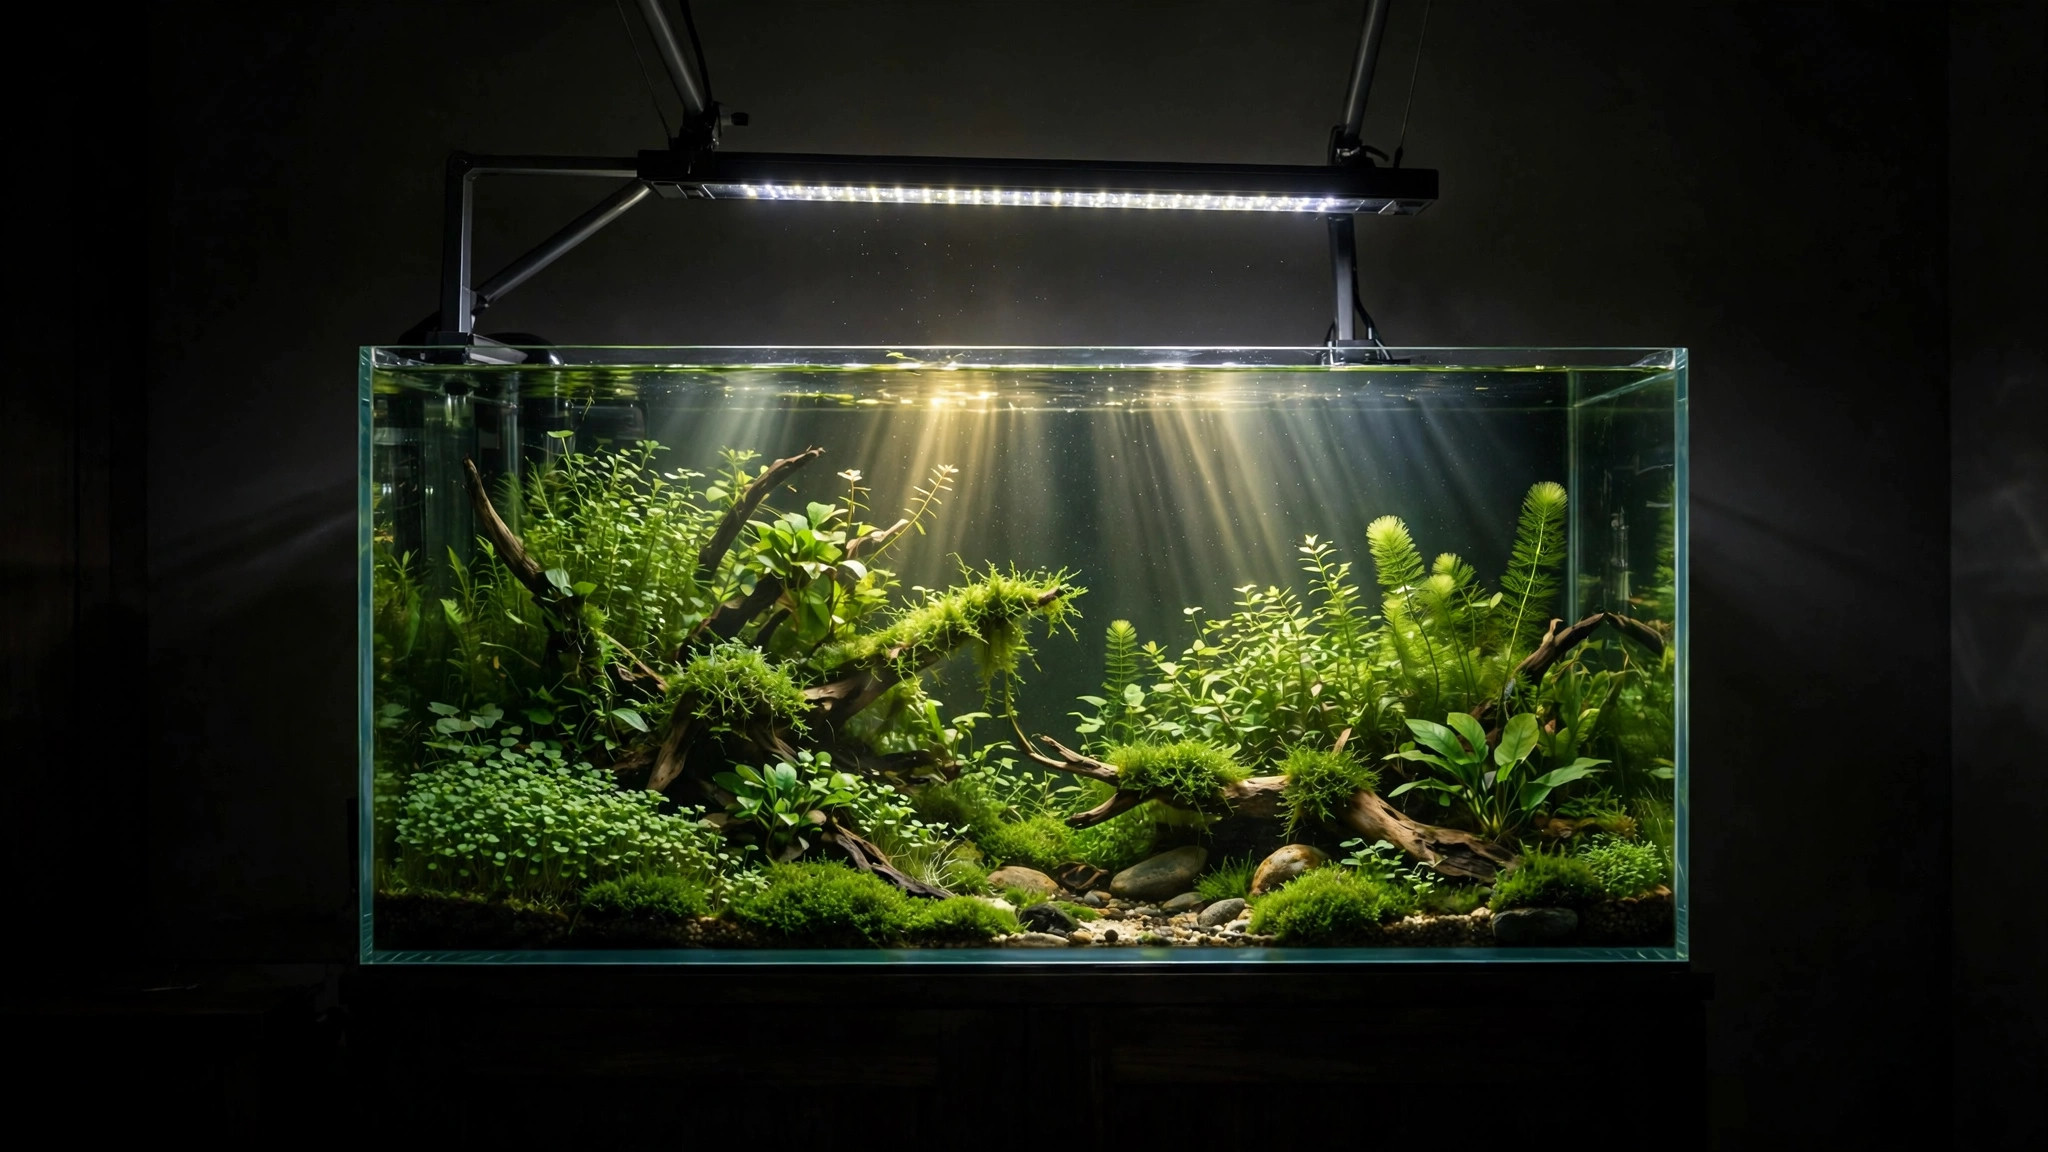
You bought the light, dialed in the perfect settings, and for months your plants grew like weeds. Then, quietly, things changed: growth slowed, algae crept along the glass, and you changed nothing — the fixture settings are exactly where you left them. The question hobbyists rarely ask is the important one: when to replace your aquarium light? All aquarium lights lose intensity over time, and the decline is slow enough to fool your eyes. This guide explains how LED and fluorescent fixtures actually age, the symptoms of an aging light, how to verify the decline with a PAR meter or a simple lux comparison, and whether to raise intensity, hang the fixture lower, or replace it outright.
Do Aquarium Lights Really Lose Intensity Over Time?
Yes — every light source degrades, but the mechanism depends on the technology. LEDs lose brightness through lumen depreciation, a slow dimming over tens of thousands of hours. Fluorescent tubes (T5 and T8) lose intensity faster and also suffer a spectrum shift, where the color quality of the light changes long before the tube burns out. That matters because plants treat light as fuel: a fixture running at 80 percent of its original output delivers 20 percent less growth energy, and the deficit shows up as algae and stalled plants rather than an obviously dim tank.
Human eyes are terrible at detecting this. Your vision adapts to gradual brightness changes, and you see the tank every day, so the drift is invisible. A fixture that looks "fine" can easily be putting out a fifth less light than it did a year ago. The only reliable way to know is to measure.
How LED Aquarium Lights Age
LEDs rarely die suddenly in a healthy fixture; they fade. Manufacturers rate diode lifespan with an L70 rating — the hours until output drops to 70 percent of original brightness. Quality aquarium LEDs usually carry L70 ratings of 30,000 to 50,000 hours. At an 8-hour aquarium light schedule for plants, 50,000 hours is over 17 years of use.
So why do hobbyists notice LED dimming after a few years? Three things shorten real-world fixture life:
- Heat. LEDs that run hot age faster — every sustained 10°C above the diode's design temperature roughly halves its lifespan. Cheap fixtures with thin heatsinks degrade noticeably within 3–5 years.
- Driver degradation. The power supply inside the fixture ages too. A failing driver can dim the LEDs, cause flicker, or kill channels entirely.
- Lens clouding. Mineral deposits, salt creep, and micro-scratches on the splash guard block light before it reaches the water. This isn't diode decay — it's maintenance — and it can account for a shocking amount of lost output.
In practice, a well-built LED fixture delivers useful light for 7–10 years. When an LED seems to have "died suddenly," the driver or an LED channel failed — the diodes themselves were still capable. Watch for flickering, a channel that no longer responds to the dimmer, a new greenish or pinkish cast in one zone, or a fan that has seized and left the housing silent.
How Fluorescent T5/T8 Tubes Age — Faster, With Spectrum Shift
Fluorescent tubes degrade more aggressively than LEDs, and in two ways at once: output drops and the spectrum shifts. The phosphor coating inside the tube wears out with use, so a tube can lose roughly 10 percent of its usable output within its first 9–12 months of heavy use, while the color balance drifts toward green and yellow — wavelengths plants use less efficiently than the reds and blues they evolved under.
This is why old planted-tank wisdom says to replace T5/T8 tubes every 9–12 months even though they still light up. The tube isn't dead; it has stopped delivering the light quality plants need. If you have been comparing T5 vs LED lighting for planted tanks, this is the biggest running-cost difference between them: tubes are cheap but need scheduled replacement, while LEDs cost more up front and fade slowly.
- T8 tubes: noticeable decline after 6–9 months of daily use; replace yearly.
- T5HO tubes: hold output better than T8 but still drift; replace every 9–12 months for demanding plants.
- Metal halide bulbs: fast depreciation (20–30 percent in 6–9 months) plus dramatic spectrum shift; replace bulbs every 6–9 months.
Symptoms of an Aging Aquarium Light
The decline is gradual, so the evidence appears in the tank before you suspect the light. The classic pattern: your settings, dosing, and light schedule are unchanged, but the tank is slowly getting worse. Watch for:
- Stalled growth. Stem plants that once needed weekly trimming barely reach the surface. Carpeting plants stop spreading. Red plants fade back toward green — the intensity that drove red pigmentation is gone.
- Rising algae. Dust and thread algae coating glass and slow-growing leaves while plants stall is the hallmark of declining light: plants can no longer outcompete algae, and a weakening light often shifts toward the greener spectrum algae tolerate easily.
- Uneven zones. One end of the tank grows fine while the other stagnates — a dying tube at one end of a fluorescent fixture, or a dimmed LED row.
- The "nothing changed" mystery. You ruled out fertilizer, CO2, and water changes because nothing in your routine changed. When every variable is constant except the age of the fixture, the fixture is the variable.
If you are seeing algae alongside stalled growth, resist the reflex to assume you have too much light. When algae blooms while plants grow explosively, light is excessive — see the signs of too much light in a planted tank. When algae blooms while plants stall, light has fallen below the sweet spot your tank was balanced for. Knowing how much light aquarium plants need helps you judge which side of the balance you have fallen to.
How to Verify a Dimming Light (Instead of Guessing)
Your eyes will lie about gradual dimming, so measure. Two practical methods: one precise, one free.
Method 1: A PAR meter
A PAR meter measures photosynthetically active radiation — the actual light energy plants can use — in µmol/m²/s. It is the only tool that tells you what your plants are really getting. Measure at the substrate in several spots and compare against known targets for your plant selection (see our PAR meter guide). If your low-tech tank reads 20 µmol/m²/s where it used to read 40, the fixture has faded — no ambiguity. For the science behind why PAR matters more than lumens, Purdue Extension's guide to measuring light is an excellent primer. Take baseline readings on day one with any new fixture and write them down for future diagnosis.
Method 2: A lux comparison with a phone app
No meter? A free lux meter app plus a simple protocol gives a useful relative reading. Place the phone sensor at the substrate (in a zip bag, screen up) with the room dark and identical fixture settings, and compare against your own baseline from when the light was new — a drop of 15–20 percent confirms meaningful depreciation. You can also compare a suspect tube side by side against a new identical one at the same distance. Lux is not PAR, but for tracking change over time on the same fixture it is perfectly valid: same phone, same spot, same settings — a falling number is a falling light.
Before You Replace: Clean, Check, and Reset
A surprising number of "dying" fixtures are just dirty. Before spending money, do a maintenance audit — you may recover 10–20 percent of lost output in an hour:
- Clean the lens and splash guard. Mineral film and condensation droplets scatter and block light. Wipe with a damp cloth and vinegar rinse; replace guards that have gone permanently cloudy or yellow.
- Check the tank cover glass. A film of algae on the glass lid eats a real percentage of light.
- Check fans and heatsinks. Dust-clogged heatsinks make LEDs run hot and age faster; a seized fan may explain flicker and heat damage.
- Cycle every channel. Run whites, blues, and RGB separately at full power. A dead channel changes both intensity and spectrum; some fixtures allow replacing individual LED strips or the driver.
- Confirm your schedule survived resets. After power outages, some fixtures revert to factory defaults or a dim "moonlight" mode — a programming reset masquerades perfectly as a dying light.
Expected Lifespans by Fixture Type
Use this table for replacement planning. "Useful life" means the period the fixture delivers its rated light quality for plants — electronics can fail sooner, and good units can run longer.
| Fixture type | Useful life (8 hrs/day) | Replace on schedule? |
|---|---|---|
| Quality LED (good heatsink, known brand) | 7–10 years | No — replace when measured output falls or electronics fail |
| Budget LED (thin heatsink, sealed) | 3–5 years | No — monitor for dimming, heat, flicker |
| T5HO fluorescent tubes | 9–12 months per tube | Yes — even if still lit |
| T8 fluorescent tubes | 6–9 months per tube | Yes — replace yearly at minimum |
| Metal halide bulbs | 6–9 months | Yes — replace on schedule |
If you are choosing your next fixture with longevity in mind, our breakdown of the best aquarium lighting for planted tanks weighs output, controllability, and long-term value side by side.
Deciding When to Replace Aquarium Light: Raise Intensity, Hang Lower, or Replace?
Once you have verified the decline, you have three options — the right one depends on how far output has fallen and what technology you are running.
- Raise the intensity setting (LED, modest decline). If your dimmable LED faded 10–15 percent and still has headroom, nudge intensity up to restore the original PAR. Re-measure afterward — aim for your original target, not "brighter than before."
- Hang the fixture lower. Moving the light closer to the water raises substrate PAR dramatically (light follows the inverse-square law). Works for pendant and hanging fixtures with clearance to spare.
- Replace tubes on schedule (fluorescent). If your T5/T8 tubes are 10+ months old, new tubes are the fix — not a decision.
- Replace the fixture (severe decline or failing electronics). If output is down 20–30 percent with no headroom left, or a driver or channel has failed, replacement beats compensation.
A practical rule: compensate while the decline is under about 15 percent and the fixture is healthy; replace when the decline is deeper, electronics are failing, or tubes are past their scheduled date. Never chase algae by cranking a dying fixture to 100 percent — if the spectrum has shifted, more of the wrong light grows more algae, not better plants.
How to Reset Your Schedule After Replacing the Light
A new fixture — or fresh tubes — can be 20–30 percent stronger at the substrate than the worn one it replaces. Dropping a full-strength new light onto a tank adapted to a dim one is the classic recipe for a green-water bloom, so reset carefully:
- Start at 60–70 percent of your target intensity for the first week.
- Step up about 10 percent per week until you reach your target PAR, if growth resumes without algae.
- Keep the photoperiod stable. Hold your normal light schedule and adjust intensity only, so one variable changes at a time.
- Recheck after two weeks. Take new PAR or lux readings at the substrate and write them down as your new baseline.
Seasonal Reminder: Audit Your Fixture This Fall
Shorter days are nature's prompt to check your gear. Take an hour this fall to audit your fixture: clean the lens, verify every channel, check the fans, and take a PAR or lux reading against your baseline. If your tubes are due, replace them before the low-light season amplifies their decline. A six-month light audit costs almost nothing and prevents the slow drift that turns a thriving tank into a stalled one.
Frequently Asked Questions
Do LED aquarium lights lose brightness over time?
Yes, but slowly. Quality LEDs dim through gradual lumen depreciation, typically reaching 70 percent of original output after 30,000–50,000 hours — many years at 8 hours a day. Heat, poor heatsinking, and failing drivers shorten this dramatically, which is why budget fixtures can look tired after 3–5 years. If an LED seems to have "died suddenly," the driver or an LED channel usually failed, not the diodes themselves.
How often should I replace T5 aquarium light tubes?
Every 9–12 months for T5HO tubes in a planted tank, even if they still light up. Fluorescent phosphors wear out with use, so old tubes lose output and shift toward a greener spectrum that plants use less efficiently — long before they burn out. T8 tubes fade faster and should be replaced at least yearly; many planted-tank keepers replace them every 6–9 months.
Can I just turn up the brightness instead of replacing my light?
Sometimes. If a dimmable LED has faded 10–15 percent and still has headroom, raising intensity back to your original PAR target works — re-measure to avoid overshooting. But if the decline is deeper, the spectrum has shifted (common with old fluorescent tubes), or electronics are failing, cranking the setting only feeds algae. Compensate modest decline; replace deep decline.
How do I test my aquarium light without a PAR meter?
Use a free lux meter phone app with a consistent protocol: phone at the substrate in a sealed bag, room dark, same fixture settings, and compare against your own baseline from when the light was new or against a new identical tube side by side. Lux isn't PAR, but for tracking change over time on the same fixture it's a valid comparison — a falling number means a falling light.
Why are my plants stalling and algae growing if I changed nothing?
This is the classic signature of an aging light. As output and spectrum quality decline, plants can no longer outcompete algae for nutrients, so growth stalls while algae spreads — even though your settings, dosing, and schedule are unchanged. Verify with a PAR meter or lux comparison before changing anything else, because the culprit is the one variable with an age: the fixture itself.
Should I shorten my light schedule after installing a new light?
No — keep the photoperiod stable and reduce intensity instead. Start the new fixture at 60–70 percent intensity for the first week, then step up about 10 percent weekly until you hit your target PAR. Changing intensity while holding the schedule constant keeps one variable at a time, so you can tell whether the tank is responding well without triggering an algae bloom from a sudden full-strength light.
Keeping Your Light — and Your Tank — on Schedule
An aquarium light is a consumable with a timer you cannot see. LEDs fade gracefully over years; fluorescent tubes need calendar-based replacement; in every case the tank shows the truth before your eyes do. Measure instead of guessing, maintain before replacing, and ramp any new light in gently. Add a six-month light audit to your routine and your fixture will never again be the silent variable behind a stalled tank.
Tissue-culture plants are the exception — they’re grown in sterile gel and adapt with minimal melting, which is part of what you’re paying for. Plants bought submersed from another hobbyist’s tank also transition with little melt, since they’re already in the right form.
Which Plants Melt Most (and Least)
Heavy melters (expect significant leaf loss)
- Cryptocorynes — infamous for “crypt melt,” sometimes dropping every leaf after any disturbance. They almost always recover from the roots within weeks.
- Stem plants grown emersed — rotala, ludwigia, and hygrophila often shed lower emersed leaves while the growing tips transition.
- Amazon swords — emersed-grown swords typically lose their broad oval aerial leaves and replace them with longer submersed ribbon leaves.
Light melters
- Anubias, java fern, bucephalandra — slow-growing rhizome plants transition gradually; occasional old-leaf melt but rarely dramatic.
- Vallisneria — usually transitions well, though it dislikes the move itself and may sulk for a week.
- Floating plants — minimal melt since their leaves were already at the air-water interface.
The Acclimation Protocol
Step 1: Quarantine or dip first
Before acclimating to your tank’s conditions, make sure you’re not acclimating pests along with the plant. Run new arrivals through our quarantine and dip protocol — it adds days upfront but prevents months of regret.
Step 2: Float to temperature-match (30 minutes)
Float the bag or container in your tank for 20–30 minutes to equalize temperature. Plants are less temperature-sensitive than fish, but a 10°F shock on top of transplant stress is an avoidable insult.
Step 3: Trim before planting
Remove any leaves that are already damaged, yellowing, or heavily algae-covered — they won’t recover and they’ll rot in your tank, feeding algae. For stem plants, trim off the bottom inch and any emersed leaves that look unlikely to adapt; the plant wastes energy maintaining leaves it’s going to shed anyway. Keep the healthy growing tips — that’s where recovery starts.
Step 4: Plant correctly the first time
Follow our planting guide — right depth, crown exposed on rosettes, rhizomes unburied on epiphytes. Every uprooting and replanting restarts the acclimation clock, so get placement right on the first attempt. Decide where each plant goes before it goes in the water.
Step 5: Run a gentle first week
For the first 7 days after planting:
- Moderate light — run your normal photoperiod but consider dropping intensity 20–30% if your light is dimmable. Blast-level light on a melting plant grows algae on the dying leaves, not recovery.
- Stable CO2 — if you inject CO2, keep it consistent. Fluctuating CO2 during acclimation is a melt accelerator. If you’re low-tech, this doesn’t apply — see growing without CO2.
- Half-strength fertilizer — new plants with damaged leaves can’t use full dosing, and the excess feeds algae. Ramp to full strength over 2–3 weeks per our fertilizer schedule.
- No disturbance — don’t move, trim, or “check on” new plants for at least two weeks. Every touch resets root establishment. This is especially critical for crypts.
Step 6: Remove melt, keep the base
As emersed leaves melt, remove the mushy material promptly — decaying leaves release ammonia and grow fungus that can spread to healthy tissue. But never discard the plant while the crown, rhizome, or roots are firm and alive. A crypt that’s lost every leaf but has firm roots is a plant that’s about to recover, not a dead plant. Give it 3–4 weeks before judging.
Telling Normal Melt From Real Problems
Normal transition melt:
- Affects oldest/emersed leaves first, newest growth last
- New submersed leaves emerge even as old ones dissolve
- Roots and crown stay firm and white/green
- Timeline: 1–4 weeks, then obvious new growth
Concerning melt (see our full melting diagnosis guide):
- New growth also melts or emerges deformed
- Rhizome or crown turns mushy and brown — this is rot, not transition
- Entire plant dissolves within days with no new growth after 4+ weeks
- Melting spreads to established plants that weren’t recently moved
Buying Tips to Minimize Melt
- Buy submersed-grown when available — hobbyist-grown cuttings transition with almost no melt.
- Choose tissue culture for sensitive species — crypts and delicate stems establish far more reliably from sterile cups.
- Avoid plants already melting in the store tank — some melt is normal, but a plant that’s mostly mush at purchase has less energy for recovery.
- Transport carefully — keep plants damp and out of direct sun/heat. A plant that dries out or cooks in a hot car melts far worse than one transported properly.
The First-Month Timeline: What to Expect Week by Week
Knowing what’s normal when removes most acclimation anxiety. Here’s the typical timeline for a healthy plant adapting to a new tank:
Week 1: The quiet week
Almost nothing visible happens. The plant is growing roots you can’t see and assessing its new environment. Some species (vallisneria, stem plants) may start shedding their lowest leaves. This is normal. Resist the urge to “help” — no moving, no extra fertilizer, no light changes. The most common beginner mistake is intervening during a week when the correct action is nothing.
Week 2: Melt peaks
This is when emersed leaves give up in earnest. Crypts may drop everything; swords shed their broad aerial leaves; stem plants lose lower foliage. It looks catastrophic and it’s usually fine. Keep removing mushy material, keep conditions stable, and watch the crown and growing tips — if those are firm and green, recovery is already underway.
Week 3: The turn
New submersed-adapted leaves emerge — smaller, thinner, often a slightly different shade of green than the emersed foliage. Stem plant tips start growing visibly; crypts push tiny curled leaves from the crown; swords unfurl narrow ribbon leaves. This is the moment most beginners exhale for the first time.
Week 4+: Established
New growth outpaces melt, and the plant is functionally yours. You can resume full-strength fertilizer, normal trimming, and stop treating it as fragile. Some slow growers (anubias, bucephalandra) take 6–8 weeks to show obvious progress — that’s their normal speed, not a problem.
Acclimating Different Plant Formats
Tissue-culture cups
Sterile, pest-free, and already adapted to high-humidity (not emersed) growth — tissue cultures melt the least of any format. Rinse the agar gel off gently (leftover gel rots and feeds fungus), split the portion into small plantlets, and plant per our planting guide. They establish slowly for the first two weeks, then accelerate. No dip needed, minimal acclimation stress — this is the premium experience you’re paying for.
Potted plants
Remove the pot and strip away the rockwool completely — leftover rockwool traps debris and rots. Tease the root mass apart gently; if it’s a dense mat, splitting it into 2–3 smaller portions actually establishes faster than planting one big clump (more growing points, better water flow around roots). Potted plants are usually emersed-grown, so expect the standard 2–4 week melt cycle.
Bare-root / bunched stems
Typically sold as weighted bunches. Remove any bands, foam, or weights, strip the lower leaves, and plant stems individually or in small groups. Bunched stems from the store are often already transitioning — check for new submersed growth at the tips, which tells you the plant is mid-adaptation and will settle quickly.
Hobbyist cuttings
Already submersed-grown and the fastest to establish — often showing new growth within days. The main acclimation factor is water-parameter difference between the two tanks. Float to temperature-match, plant promptly, and they’ll usually take off with minimal melt. This is why experienced hobbyists prefer trading cuttings over buying potted plants.
Frequently Asked Questions
Should I use a “plant starter” or transplant fertilizer?
Products marketed for transplant shock are mostly B-vitamins and mild hormones. They don’t hurt, but there’s no strong evidence they help aquarium plants specifically. Stable conditions and patience outperform any bottle. Save the money for more plants.
My new plant melted completely — bare crown, no leaves. Is it dead?
Probably not, if the crown or rhizome is firm. Crypts and swords routinely lose 100% of their leaves and regrow from the base within a month. The test is firmness: firm and pale/green means alive; mushy and brown/black means rot. Give firm-but-leafless plants a full 4 weeks before declaring them dead.
Can I speed up acclimation with extra light or CO2?
No — and trying usually backfires. A melting plant can’t use extra light; the excess just grows algae on its dying leaves. Keep light moderate and CO2 stable (not boosted) during acclimation. Growth speed comes from the plant’s own adaptation timeline, which you can’t rush, only avoid delaying.
Should new plants go straight into my main display tank?
After quarantine/dipping, yes — there’s no benefit to a separate “growing-in” tank for most plants. They acclimate to your water fastest in the tank they’ll live in. The exception is very delicate species going into a tank with boisterous fish; give those a few weeks in a calm corner or breeder box first.
The Patience Rule
The single most important acclimation skill is restraint: plant it right, set gentle conditions, remove decay, and then leave it alone for a month. The hobbyists with the best plant growth aren’t doing something clever in week one — they’re simply not interfering in weeks two through four while the plants do what they’ve evolved to do. Melt looks like failure and feels like failure, but in most cases it’s the visible part of a plant successfully becoming yours.