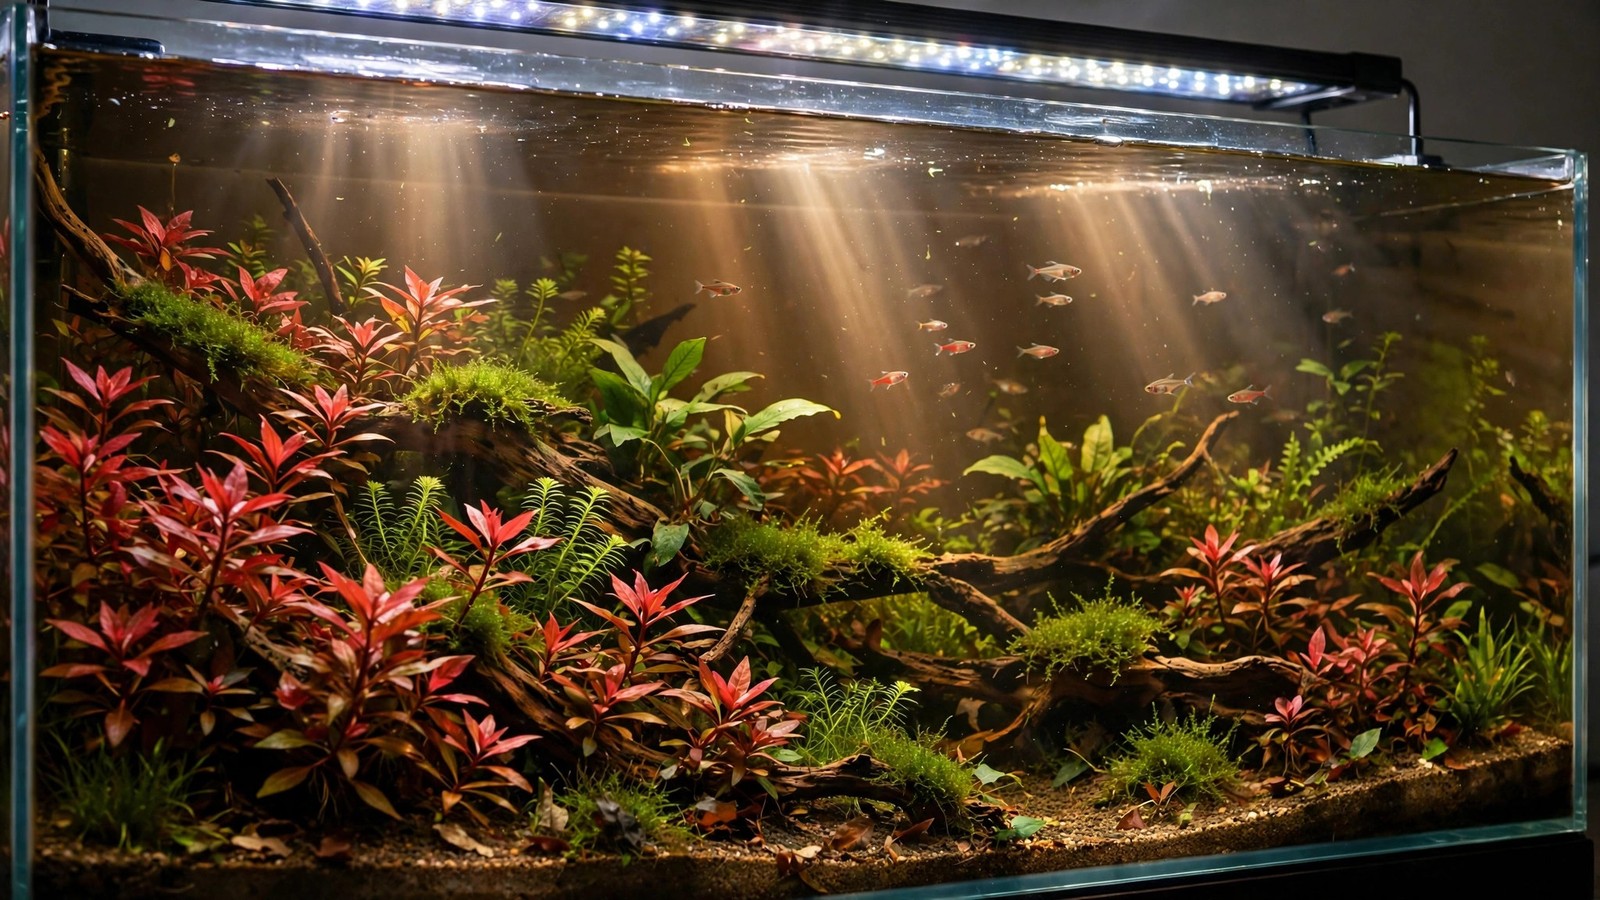
If you're shopping for a serious planted-tank LED in 2026, the fluval plant 4.0 vs 3.0 debate is probably the first thing you've run into. Fluval's Plant 3.0 was the default recommendation for years — the light that grew everything from low-tech swords to demanding carpet plants. Now the Plant 4.0 has arrived as its successor, promising more power, better color rendering, and a smarter app. The 3.0, meanwhile, is still on shelves at a tempting discount. So which one deserves a place over your tank?
After sorting through what actually changed between the two generations, the honest answer is: it depends on your plants, your tank size, and your budget. Let's break it down head-to-head so you can buy with confidence.
Fluval Plant 4.0 vs 3.0: The Short Answer
Buy the Fluval Plant 3.0 if you run a low-tech or medium-light tank, don't use CO2, and want proven growth at a lower price. It's the value champion, and secondhand units are bargains.
Buy the Fluval Plant 4.0 if you're scaping high-light, CO2-injected tanks, want the best color rendition of reds and greens, or value the newer app and extra power. It's the better light — it just costs more.
What Changed: Headline Differences
The Plant 4.0 isn't a cosmetic refresh. It's a re-engineered light built around a new LED array and a new control platform. Here's what matters:
- More power. The 4.0 ships with a higher-wattage LED array than the 3.0 across comparable sizes, which translates to more PAR at the substrate — meaningful for tanks 18 inches or taller and for light-hungry carpeting plants.
- 90 CRI color rendering. The 4.0 is rated at 90 CRI, a genuine step up from the 3.0. Reds in plants like Ludwigia and Alternanthera look truer, and fish colors pop with less of the flat, washed-out look older LEDs can produce.
- FluvalConnect app. The 4.0 moves to Fluval's newer FluvalConnect platform. The 3.0 relied on an older Bluetooth pairing flow that many users found fussy; the new app is designed around more reliable connections and a cleaner interface.
- Price bands. Expect roughly $90–170 for remaining 3.0 stock and about $130–300 for the 4.0, depending on length. Prices vary by retailer and size, so always check current listings.
- 3.0 still sold. The older generation hasn't vanished — clearance stock and used fixtures keep it in the game, which is exactly what makes this comparison useful.
Fluval Plant 4.0 vs 3.0: Side-by-Side Comparison
| Feature | Fluval Plant 3.0 | Fluval Plant 4.0 |
|---|---|---|
| Generation | Previous generation (2020-era) | Current generation (2026) |
| Power / PAR | Proven medium-high output; grows most plants | Higher-wattage array; more PAR at depth |
| CRI | Good color rendering (lower than 4.0) | 90 CRI rated — noticeably truer reds/greens |
| Light spectrum | Full spectrum + pink, cyan, blue, deep blue, warm/cool white channels | Refined full-spectrum array with improved channel tuning |
| App control | Older Bluetooth app; pairing quirks reported | FluvalConnect app; more reliable, modern interface |
| 24/7 cycle | Yes — automatic sunrise/day/sunset/moon presets | Yes — automated 24/7 cycle with finer customization |
| Weather effects | Storm, cloud cover, lightning presets | Carried over with more granular scheduling |
| Sizes | 15" through 59" widths | Comparable range; confirm your tank width before ordering |
| Mounting | Adjustable tank-mount legs; legs at outer edges on some sizes | Updated mounting hardware; hanging-kit friendly |
| Street price | ~$90–170 (new); often cheaper used | ~$130–300 by size |
Exact specs vary by fixture length, so treat these bands as orientation — always confirm the wattage, PAR claims, and dimensions on Fluval's official Plant 4.0 product page, which confirms the 90 CRI rating and FluvalConnect control, with per-size specs on the 46W model listing. For the older generation, the 3.0's published specs (59W at 48–60 in) are the reference point for comparison — double-check any used listing against them.
PAR, Coverage, and Real-World Growth
PAR (photosynthetically active radiation) is the number that matters for plants, and it's also the number manufacturers are least eager to publish in a directly comparable way. Fluval provides PAR data at various depths for both generations, but real-world values shift with mounting height, tank depth, and water clarity.
Low-tech tanks (no CO2)
For low-tech setups, the 3.0 is honestly hard to beat. Low and medium-light plants — Anubias, Java fern, swords, crypts, most Ludwigia stems — thrive under the 3.0's output, and you can always dial intensity down. In fact, running either light at full blast on a low-tech tank is a recipe for algae; the headroom you don't use isn't worth paying for. If your plant list reads like our guide to LED lights for low-tech planted tanks, the discounted 3.0 is the smart money.
High-tech tanks (CO2 + demanding plants)
Here's where the 4.0 earns its price. Carpeting Hemianthus callitrichoides, high-light Rotala species, and dense Dutch-style stems all benefit from the extra PAR and tighter color rendering. The 90 CRI output also makes reds read as true reds instead of muddy maroon — a visible difference in a display scape. If you're already dosing CO2 and chasing growth speed, pair the 4.0 with a properly timed injection schedule as described in our CO2 timing guide, and start both fixtures at reduced intensity until the tank stabilizes.
FluvalConnect App: What You Actually Get
The app is where the generational jump feels biggest. The 3.0's older Bluetooth pairing was widely reported as temperamental — dropped connections, fussy re-pairing, an interface that felt dated. FluvalConnect, built for the 4.0, is a meaningful rebuild:
- More reliable pairing and reconnection. The most common complaint about the old generation is addressed head-on.
- Finer scheduling control. Custom 24/7 cycles with per-channel dimming, so you can tune the spectrum to your plants rather than running presets.
- Weather and moonlight effects. Storm, cloud, and lightning presets remain, with finer control over intensity and timing.
- Multi-light control. Manage more than one fixture from one screen — useful on rimless tanks where two fixtures are needed for even coverage.
One honest caveat: app quality is still software, and software updates can both fix and introduce quirks. Check recent app-store reviews for your platform before buying either generation. The hardware is excellent; your day-to-day experience lives or dies on the app.
Who Should Buy the Fluval Plant 3.0
Choose the 3.0 if any of these describe you:
- You run a low-tech or medium-light tank and don't inject CO2.
- Budget matters — the 3.0 delivers most of the growth at a meaningfully lower price.
- You find a good used unit (see buying-used tips below) and want the best value in the hobby.
- You don't care about the absolute best color rendering and just want healthy plants.
Paired with a sensible aquarium light schedule for plants, the 3.0 grows a huge range of species. It remains one of the best LED fixtures for planted tanks in its price class, and our best aquarium lighting roundup keeps it on the value shortlist for good reason.
Who Should Buy the Fluval Plant 4.0
Choose the 4.0 if any of these describe you:
- You run a CO2-injected, high-light scape and want maximum growth potential.
- Display quality matters — the 90 CRI array genuinely improves how the tank looks.
- You've been burned by the 3.0's Bluetooth quirks and want the modern FluvalConnect experience.
- Your tank is deep (18"+) and you need the extra PAR at the substrate.
- You're buying new and the price gap is small enough to justify the better hardware.
Honest Downsides of Both Generations
No light is perfect, and both generations have real trade-offs worth knowing before you buy.
Price
Both fixtures sit above budget LED bars. If your tank is a simple low-tech setup, a cheaper fixture from our low-tech LED guide grows plants fine — you're paying Fluval prices for spectrum control, build quality, and the app ecosystem, not strictly for growth.
App dependence
The 24/7 cycle and full spectrum tuning live in the app. If the app misbehaves on your phone or tablet, you lose the best features. The 3.0's pairing quirks are the bigger risk here; the 4.0's FluvalConnect is better but still software — keep your firmware updated and don't delete the app mid-cycle.
Mounting height and light spread
Both fixtures sit close to the water on the included legs, which can create bright hotspots in the center and dimmer corners on wide tanks. Raising the fixture smooths coverage but costs PAR. Our hanging light height guide walks through finding the right mounting height for your tank dimensions, whether you hang with a kit or DIY a riser.
3.0-specific: end-of-life support risk
Buying the older generation means accepting that app updates and spare parts prioritize the current product. The 3.0 is a mature, stable platform, so this is a low risk — but factor it in if you plan to keep the light for five-plus years.
4.0-specific: the early-adopter premium
You pay full price for hardware the community hasn't stress-tested for years yet. The 3.0 has a half-decade of "grows everything" testimonials; the 4.0 is building that track record now.
Setup and Programming Tips
Whichever generation you buy, these fundamentals keep algae down and plants growing:
- Start at 60–70% intensity on a new tank and ramp up over 2–3 weeks. Fresh scapes with immature biofilms can't use full output, and excess light just feeds algae.
- Run a 6–8 hour photoperiod initially, then extend toward 8–10 hours as plants establish. Our light schedule guide has exact templates.
- Set your sunrise/sunset ramps. Both apps offer automated 24/7 cycles — use them. Abrupt on/off lighting stresses fish and gives algae a window.
- Dim channels to tune spectrum. If greens look washed out, pull back the whites and lean on the pink/red and cyan channels; if the tank looks flat, check that you're not running everything at 100%.
- Match CO2 to the light. On high-tech tanks, start CO2 1–2 hours before lights-on and cut it an hour before lights-off so peak injection coincides with peak light. Details in our CO2 timing guide.
- Reassess after rescaping. A fresh trim or plant change alters light demand — dropping intensity for a week after major work is cheap algae insurance.
Buying a Used Fluval Plant 3.0: What to Check
The 4.0's launch has made the used market for 3.0s genuinely attractive. A good secondhand fixture at half price is arguably the best lighting deal in the hobby right now. Check these before paying:
- Ask for photos of the fixture on at full output. Look for dark or flickering LED clusters — dead LEDs don't repair economically.
- Confirm it connects to the app. Have the seller demonstrate pairing, or ask for a video. A fixture that won't pair loses most of its value.
- Check the legs and seals. Cracked mounting legs and salt-creep corrosion on contacts are the common failure points.
- Verify the length. Fluval sizes span 15" to 59"; a fixture that's too short leaves dark edges, too long overhangs the rim.
- Compare against new. With new 3.0 stock discounted, a used unit should be meaningfully cheaper — otherwise buy new with a warranty.
Frequently Asked Questions
Is the Fluval Plant 4.0 brighter than the 3.0?
Yes — the 4.0 uses a higher-wattage LED array and delivers more PAR than the 3.0 at comparable sizes and depths, which is its main advantage for tall tanks and high-light plants. That said, extra output only helps if your tank can use it: on a low-tech tank without CO2, the 3.0's output is already more than enough.
Can I still buy the Fluval Plant 3.0 in 2026?
Yes. The 3.0 remains available new at many retailers, usually at a discount as clearance stock cycles through, and the secondhand market is full of them. Support-wise it's a mature platform, so buying one now isn't buying into a dead product — just an older generation.
Which is better for red plants?
The 4.0 has the edge: its 90 CRI array renders reds more truly, and the extra PAR supports the higher light levels red species prefer. But honest truth — light alone doesn't make plants red. CO2, iron and nitrate management, and species choice matter as much as the fixture.
Do I need the app to use these lights?
No, but you should want it. Both generations run basic presets without deep app involvement, yet the automated 24/7 sunrise-to-moon cycle, per-channel dimming, and weather effects are app features. If you're unwilling to use the app at all, a simpler fixture may suit you better.
Is the Plant 4.0 worth the upgrade from a 3.0 I already own?
For most owners, no — a working 3.0 still grows excellent plants. Upgrade only if you're chasing the better color rendering for a display scape, need more PAR for a deeper tank, or the old Bluetooth pairing has genuinely worn you down. Otherwise, keep your money and spend it on plants.
Fluval Plant 4.0 or a cheaper LED — what's the real difference?
Growth-wise, a mid-range LED can grow most of the same plants. What Fluval charges for is spectrum tuning, the automated 24/7 cycle, build quality, and the app ecosystem. If you just need light for a low-tech tank, compare with our budget picks first — you may not need premium features. See our T5 vs LED comparison for a broader view of the lighting landscape.
The Bottom Line
The Fluval Plant 4.0 is the better light — more power, truer color, a smarter app. But the 3.0 remains a genuinely excellent fixture, and at clearance or used prices it's the best value in planted-tank lighting right now. Buy the 4.0 if you're building a high-light, CO2-driven scape and want every edge; buy the 3.0 if you want proven growth for less money. Either way, check how it stacks up against the rest of the best aquarium lighting for planted tanks before you check out — and then go enjoy the grow-out.
Tissue-culture plants are the exception — they’re grown in sterile gel and adapt with minimal melting, which is part of what you’re paying for. Plants bought submersed from another hobbyist’s tank also transition with little melt, since they’re already in the right form.
Which Plants Melt Most (and Least)
Heavy melters (expect significant leaf loss)
- Cryptocorynes — infamous for “crypt melt,” sometimes dropping every leaf after any disturbance. They almost always recover from the roots within weeks.
- Stem plants grown emersed — rotala, ludwigia, and hygrophila often shed lower emersed leaves while the growing tips transition.
- Amazon swords — emersed-grown swords typically lose their broad oval aerial leaves and replace them with longer submersed ribbon leaves.
Light melters
- Anubias, java fern, bucephalandra — slow-growing rhizome plants transition gradually; occasional old-leaf melt but rarely dramatic.
- Vallisneria — usually transitions well, though it dislikes the move itself and may sulk for a week.
- Floating plants — minimal melt since their leaves were already at the air-water interface.
The Acclimation Protocol
Step 1: Quarantine or dip first
Before acclimating to your tank’s conditions, make sure you’re not acclimating pests along with the plant. Run new arrivals through our quarantine and dip protocol — it adds days upfront but prevents months of regret.
Step 2: Float to temperature-match (30 minutes)
Float the bag or container in your tank for 20–30 minutes to equalize temperature. Plants are less temperature-sensitive than fish, but a 10°F shock on top of transplant stress is an avoidable insult.
Step 3: Trim before planting
Remove any leaves that are already damaged, yellowing, or heavily algae-covered — they won’t recover and they’ll rot in your tank, feeding algae. For stem plants, trim off the bottom inch and any emersed leaves that look unlikely to adapt; the plant wastes energy maintaining leaves it’s going to shed anyway. Keep the healthy growing tips — that’s where recovery starts.
Step 4: Plant correctly the first time
Follow our planting guide — right depth, crown exposed on rosettes, rhizomes unburied on epiphytes. Every uprooting and replanting restarts the acclimation clock, so get placement right on the first attempt. Decide where each plant goes before it goes in the water.
Step 5: Run a gentle first week
For the first 7 days after planting:
- Moderate light — run your normal photoperiod but consider dropping intensity 20–30% if your light is dimmable. Blast-level light on a melting plant grows algae on the dying leaves, not recovery.
- Stable CO2 — if you inject CO2, keep it consistent. Fluctuating CO2 during acclimation is a melt accelerator. If you’re low-tech, this doesn’t apply — see growing without CO2.
- Half-strength fertilizer — new plants with damaged leaves can’t use full dosing, and the excess feeds algae. Ramp to full strength over 2–3 weeks per our fertilizer schedule.
- No disturbance — don’t move, trim, or “check on” new plants for at least two weeks. Every touch resets root establishment. This is especially critical for crypts.
Step 6: Remove melt, keep the base
As emersed leaves melt, remove the mushy material promptly — decaying leaves release ammonia and grow fungus that can spread to healthy tissue. But never discard the plant while the crown, rhizome, or roots are firm and alive. A crypt that’s lost every leaf but has firm roots is a plant that’s about to recover, not a dead plant. Give it 3–4 weeks before judging.
Telling Normal Melt From Real Problems
Normal transition melt:
- Affects oldest/emersed leaves first, newest growth last
- New submersed leaves emerge even as old ones dissolve
- Roots and crown stay firm and white/green
- Timeline: 1–4 weeks, then obvious new growth
Concerning melt (see our full melting diagnosis guide):
- New growth also melts or emerges deformed
- Rhizome or crown turns mushy and brown — this is rot, not transition
- Entire plant dissolves within days with no new growth after 4+ weeks
- Melting spreads to established plants that weren’t recently moved
Buying Tips to Minimize Melt
- Buy submersed-grown when available — hobbyist-grown cuttings transition with almost no melt.
- Choose tissue culture for sensitive species — crypts and delicate stems establish far more reliably from sterile cups.
- Avoid plants already melting in the store tank — some melt is normal, but a plant that’s mostly mush at purchase has less energy for recovery.
- Transport carefully — keep plants damp and out of direct sun/heat. A plant that dries out or cooks in a hot car melts far worse than one transported properly.
The First-Month Timeline: What to Expect Week by Week
Knowing what’s normal when removes most acclimation anxiety. Here’s the typical timeline for a healthy plant adapting to a new tank:
Week 1: The quiet week
Almost nothing visible happens. The plant is growing roots you can’t see and assessing its new environment. Some species (vallisneria, stem plants) may start shedding their lowest leaves. This is normal. Resist the urge to “help” — no moving, no extra fertilizer, no light changes. The most common beginner mistake is intervening during a week when the correct action is nothing.
Week 2: Melt peaks
This is when emersed leaves give up in earnest. Crypts may drop everything; swords shed their broad aerial leaves; stem plants lose lower foliage. It looks catastrophic and it’s usually fine. Keep removing mushy material, keep conditions stable, and watch the crown and growing tips — if those are firm and green, recovery is already underway.
Week 3: The turn
New submersed-adapted leaves emerge — smaller, thinner, often a slightly different shade of green than the emersed foliage. Stem plant tips start growing visibly; crypts push tiny curled leaves from the crown; swords unfurl narrow ribbon leaves. This is the moment most beginners exhale for the first time.
Week 4+: Established
New growth outpaces melt, and the plant is functionally yours. You can resume full-strength fertilizer, normal trimming, and stop treating it as fragile. Some slow growers (anubias, bucephalandra) take 6–8 weeks to show obvious progress — that’s their normal speed, not a problem.
Acclimating Different Plant Formats
Tissue-culture cups
Sterile, pest-free, and already adapted to high-humidity (not emersed) growth — tissue cultures melt the least of any format. Rinse the agar gel off gently (leftover gel rots and feeds fungus), split the portion into small plantlets, and plant per our planting guide. They establish slowly for the first two weeks, then accelerate. No dip needed, minimal acclimation stress — this is the premium experience you’re paying for.
Potted plants
Remove the pot and strip away the rockwool completely — leftover rockwool traps debris and rots. Tease the root mass apart gently; if it’s a dense mat, splitting it into 2–3 smaller portions actually establishes faster than planting one big clump (more growing points, better water flow around roots). Potted plants are usually emersed-grown, so expect the standard 2–4 week melt cycle.
Bare-root / bunched stems
Typically sold as weighted bunches. Remove any bands, foam, or weights, strip the lower leaves, and plant stems individually or in small groups. Bunched stems from the store are often already transitioning — check for new submersed growth at the tips, which tells you the plant is mid-adaptation and will settle quickly.
Hobbyist cuttings
Already submersed-grown and the fastest to establish — often showing new growth within days. The main acclimation factor is water-parameter difference between the two tanks. Float to temperature-match, plant promptly, and they’ll usually take off with minimal melt. This is why experienced hobbyists prefer trading cuttings over buying potted plants.
Frequently Asked Questions
Should I use a “plant starter” or transplant fertilizer?
Products marketed for transplant shock are mostly B-vitamins and mild hormones. They don’t hurt, but there’s no strong evidence they help aquarium plants specifically. Stable conditions and patience outperform any bottle. Save the money for more plants.
My new plant melted completely — bare crown, no leaves. Is it dead?
Probably not, if the crown or rhizome is firm. Crypts and swords routinely lose 100% of their leaves and regrow from the base within a month. The test is firmness: firm and pale/green means alive; mushy and brown/black means rot. Give firm-but-leafless plants a full 4 weeks before declaring them dead.
Can I speed up acclimation with extra light or CO2?
No — and trying usually backfires. A melting plant can’t use extra light; the excess just grows algae on its dying leaves. Keep light moderate and CO2 stable (not boosted) during acclimation. Growth speed comes from the plant’s own adaptation timeline, which you can’t rush, only avoid delaying.
Should new plants go straight into my main display tank?
After quarantine/dipping, yes — there’s no benefit to a separate “growing-in” tank for most plants. They acclimate to your water fastest in the tank they’ll live in. The exception is very delicate species going into a tank with boisterous fish; give those a few weeks in a calm corner or breeder box first.
The Patience Rule
The single most important acclimation skill is restraint: plant it right, set gentle conditions, remove decay, and then leave it alone for a month. The hobbyists with the best plant growth aren’t doing something clever in week one — they’re simply not interfering in weeks two through four while the plants do what they’ve evolved to do. Melt looks like failure and feels like failure, but in most cases it’s the visible part of a plant successfully becoming yours.