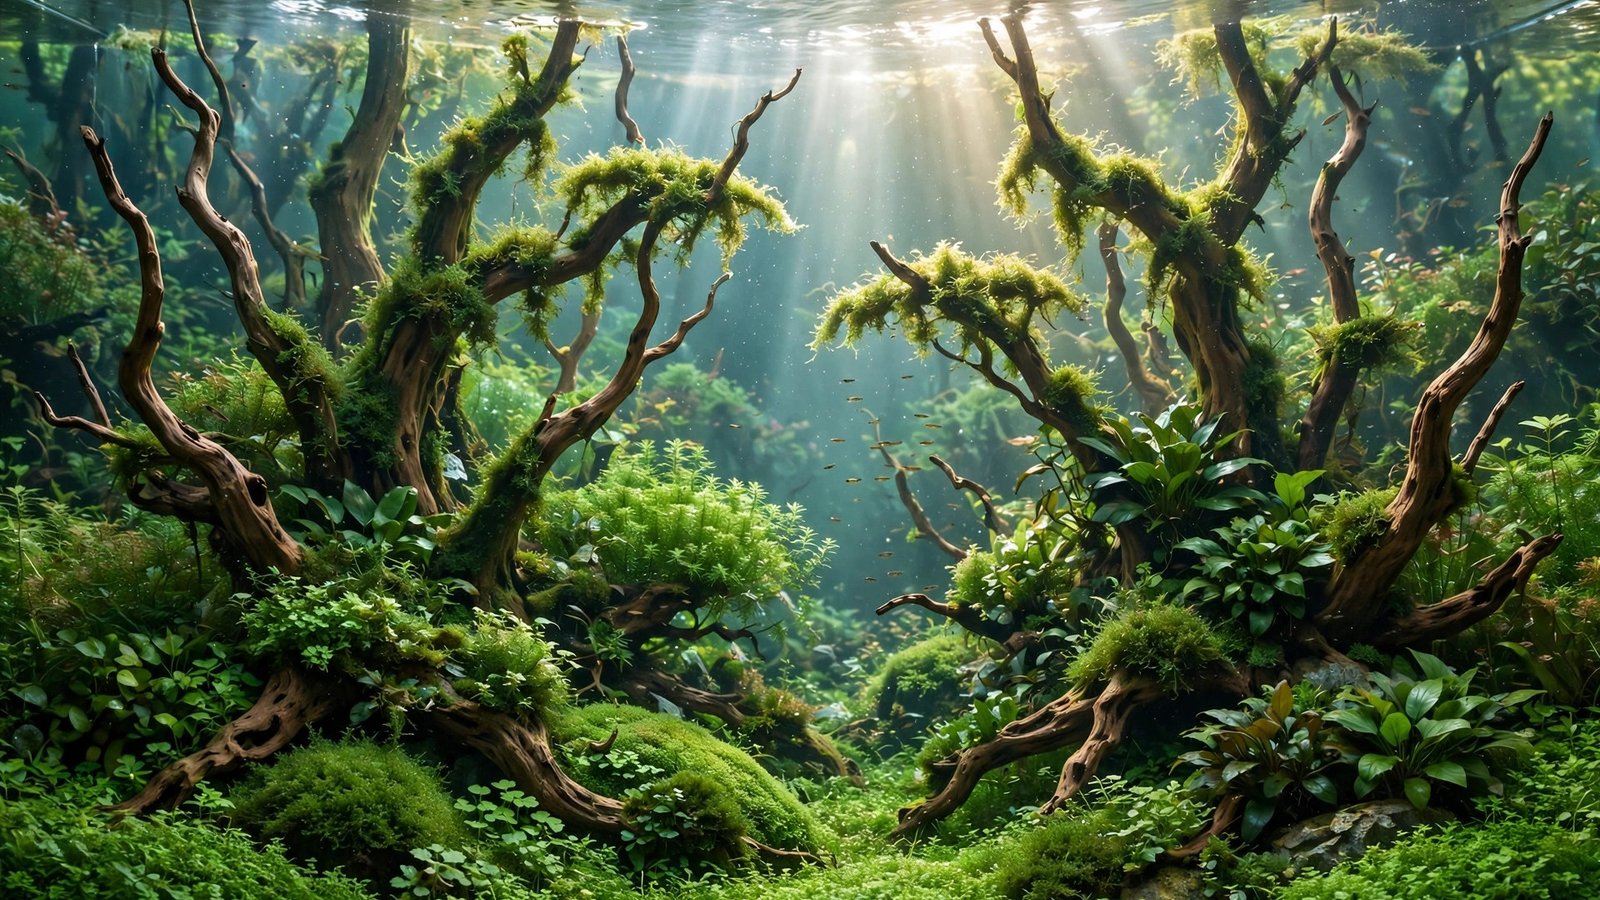
On September 30, 2026, the world's largest Nature Aquarium quietly closed its doors. "Forests Underwater," Takashi Amano's 40-metre, 160,000-litre tropical-forest layout at the Oceanário de Lisboa, had run for eleven years — from April 2015 to the end of September 2026 — greeting millions of visitors. Originally planned as a two-year temporary exhibition, it became a permanent landmark of the aquascaping world instead. You don't need 160,000 litres to inherit what it taught us: here are five takashi amano forests underwater lessons any home aquascaper can apply to their next layout.
"Forests Underwater" by the Numbers
Before the lessons, the scale — because it shapes everything the tank taught us:
| Detail | Fact |
|---|---|
| Length | 40 metres (the longest planted aquarium layout ever built) |
| Volume | 160,000 litres of freshwater |
| Location | Oceanário de Lisboa, Lisbon, Portugal |
| Opened | April 2015 (built as a temporary, two-year exhibition) |
| Closed | September 30, 2026 — after 11 years on display |
| Livestock | More than 10,000 fish across roughly 40 species |
| Designer | Takashi Amano, founder of the Nature Aquarium style, with a volunteer build team |
Lesson 1 — Plant for the Decade, Not the Photoshoot
Most home aquascapes are designed to peak in three months — right when the contest photo is due — and then they collapse. "Forests Underwater" had to look magnificent in year eleven. That single difference explains almost every plant choice in the layout: slow-growing epiphytes tied to the wood — Anubias, Java fern, Bolbitis, and mosses — that age gracefully instead of stretching, melting, or demanding constant replanting. The background relied on structural, long-lived plants like Vallisneria and large Cryptocoryne types that thicken over time rather than racing upward and then rotting at the base.
The takeaway for your tank: pick species for what they look like in eighteen months, not eight weeks. Fast stems have their place, but your layout's backbone should be plants that hold their form. Learning how to attach aquarium plants to driftwood gives you access to exactly the slow, dependable palette Amano leaned on — epiphytes never need substrate replanting, so they forgive years of maintenance. And when you do include faster growers, plan their maintenance rhythm from day one with our guide to keeping aquascape layouts sharp through trimming.
Lesson 2 — Hardscape Is the Skeleton, Plants Are the Flesh
Stand in front of a photograph of "Forests Underwater" and notice what you're actually looking at: a forest of driftwood "trees" and stone formations. The plants dress that skeleton, but the skeleton is doing the compositional work. In the months when a planting section thinned out — and over eleven years, every section thinned at some point — the layout still read as a forest, because wood and stone held the lines.
Home aquascapers usually do this backwards: they buy plants first and arrange hardscape around them. Flip it. Choose your wood and stone, arrange them into a composition you would be happy photographing bare, and only then choose plants to accent it. The hardscape-first aquascaping method walks through exactly this workflow — rock-and-wood arrangement before a single plant is ordered — and it is the single biggest reason some tanks look composed from week one while others look like a plant sale for six months.
Lesson 3 — Scale Comes from Relationships, Not Size
Forty metres of aquarium reads as a forest not because it's big, but because of relationships: fine foreground textures against broad background leaves, repeating tree forms stepping from tall to short, light and shadow alternating along the length. That is forced perspective and proportion at work — the same tools that make a 60-centimetre tank feel vast.
You can borrow the whole toolkit at home:
- Layer bands of texture. Fine moss and foreground carpet in front, medium leaves mid-tank, broad Vallisneria or Echinodorus behind — the same gradient Lisbon used, compressed.
- Slope the substrate. A rising bed from front to back manufactures depth for free.
- Place focal points off-centre. Amano composed to the golden ratio, not the middle. Our focal point placement rules translate that habit to any tank width.
- Repeat forms, then vary them. Three similar pieces of wood, each a little smaller, suggest a forest receding into fog. The nine depth-creation techniques collect more of these tricks in one place.
If you're working with a genuinely large aquarium of your own, the large-tank scale rules adapt these same principles to 75 gallons and up.
Lesson 4 — Rhythm: Let the Eye Rest Before It Moves
Walk the length of "Forests Underwater" in photos and you feel a rhythm: dense wooded passages, then an open sandy clearing where your eye rests, then density again. The clearings — negative space — are what make the forests feel like forests.
Most beginners fill every gap. Resist it. Plan one or two deliberate resting zones in your layout: an open sand path, a low carpet valley between taller plantings, a stretch of uncluttered water column where schooling fish can actually school. The concave "valley" technique is the classic formal version of this idea, and emptiness used deliberately is a design tool rather than unfinished business. Alternating fine and broad foliage keeps the resting zones feeling intentional.
Lesson 5 — Maintenance Is the Real Masterpiece
Eleven years of continuous display meant thousands of hours of underwater work: divers trimming and replanting, glass polished, filters serviced, and a tireless algae crew — including the Amano shrimp, named after the man himself — grazing day and night. The layout you saw in 2026 was not the layout planted in 2015; it was the 2026 version of a living thing, renewed constantly.
Your home tank obeys the same law on a smaller scale. The aquascapes that look stunning at month twelve are not the ones with the best day-one planting — they're the ones whose owners kept a rhythm: weekly trimming before plants shade each other out, regular water changes, filter maintenance that never slips. If your layout looks great at three months and tired at nine, the problem usually isn't the design; it's the maintenance calendar. New layouts also take longer to "fill in" than social media suggests — set honest expectations so you don't rescape a tank that was simply mid-journey. And if you ever feel the urge to start over, remember that most tired layouts need editing, not demolition.
Apply the Lessons: A Practical Checklist for Your Next Layout
Turn the five lessons into action before you buy anything:
- Sketch first. Draw the hardscape skeleton — tree placements, stone positions, open clearings — before ordering plants, and build your plant list from the sketch.
- Build hardscape you'd photograph bare. If the wood and stone composition holds without plants, it will only improve with them.
- Choose a decade palette. At least half your planting should be slow, dependable species — epiphytes, mosses, hardy background plants — not fast stems that peak and melt.
- Compose off-centre and in layers. One dominant focal point placed to the golden ratio, texture bands from fine to broad, substrate sloping upward to the back.
- Leave the fish somewhere to swim. Open water is part of the composition — and your livestock will behave better in it.
- Hide the machinery. Lisbon's life-support was invisible; yours should be too — keep filters, heaters, and tubing out of the frame.
- Schedule maintenance like an exhibition. Weekly trimming, water changes, and glass cleaning on a fixed day — the layout you want in a year is built one maintenance session at a time.
- Learn the style's grammar. "Forests Underwater" is the ultimate expression of the Nature Aquarium style; understanding its rules for plant grouping and hardscape balance makes every lesson above easier to apply.
Frequently Asked Questions
When did "Forests Underwater" close?
The exhibition closed on September 30, 2026, as announced by the Oceanário de Lisboa's exhibition page. It opened in April 2015 as a planned two-year temporary show, so it ultimately ran for about eleven years — far beyond its original lifespan — and is considered the largest Nature Aquarium layout ever built.
How big was "Forests Underwater" exactly?
The tank measured 40 metres long and held 160,000 litres of freshwater, housing more than 10,000 fish across roughly 40 species. For comparison, that is about 2,600 times the volume of a standard 60-litre home aquarium — yet the composition principles it demonstrated, like layering and focal points, scale down directly to small tanks.
Did Takashi Amano build it himself?
Amano designed the layout in 2015 and led its construction with an international team of volunteers over several days of intensive work. It was one of his final major public works — he passed away later in 2015 — which is why the aquarium's closing feels like the end of an era to many aquascapers.
What plants did "Forests Underwater" use?
The layout leaned heavily on hardy, long-lived species suited to an eleven-year run: epiphytes such as Anubias, Java fern, and Bolbitis tied to the driftwood "trees," mosses softening the wood, and structural background plants like Vallisneria providing vertical rhythm. Delicate, fast-growing stems were largely avoided in favour of plants that age gracefully.
Can I recreate the "underwater forest" look in a small tank?
Yes — the forest aesthetic scales down beautifully. A single dramatic piece of branching driftwood planted with Anubias, moss, and ferns can suggest a full forest in a 30–60 litre tank; the trick is building convincing miniature "trees" from wood and epiphytes rather than planting a crowd of small stems.
Why did the exhibition close after eleven years?
The Oceanário announced that the exhibition was drawing to a close after a decade of display, describing it as the end of a chapter for a living work of art that had connected millions of visitors with tropical nature. Large living exhibitions eventually require complete renewal of their biological systems, and the Oceanário chose to retire the installation rather than rebuild it.
What Takashi Amano Forests Underwater Still Teaches Home Aquascapers
"Forests Underwater" is gone from Lisbon, but its real legacy was never the glass box — it was the generation of aquascapers who stood in front of it and went home to rearrange their own tanks. Amano's great insight was that an aquarium is a landscape first and a container second, and that a layout maintained with patience will outlast any single planting. For more on the philosophy behind his work, explore the official Aqua Design Amano site. The forest closed — long live the forest.
Tissue-culture plants are the exception — they’re grown in sterile gel and adapt with minimal melting, which is part of what you’re paying for. Plants bought submersed from another hobbyist’s tank also transition with little melt, since they’re already in the right form.
Which Plants Melt Most (and Least)
Heavy melters (expect significant leaf loss)
- Cryptocorynes — infamous for “crypt melt,” sometimes dropping every leaf after any disturbance. They almost always recover from the roots within weeks.
- Stem plants grown emersed — rotala, ludwigia, and hygrophila often shed lower emersed leaves while the growing tips transition.
- Amazon swords — emersed-grown swords typically lose their broad oval aerial leaves and replace them with longer submersed ribbon leaves.
Light melters
- Anubias, java fern, bucephalandra — slow-growing rhizome plants transition gradually; occasional old-leaf melt but rarely dramatic.
- Vallisneria — usually transitions well, though it dislikes the move itself and may sulk for a week.
- Floating plants — minimal melt since their leaves were already at the air-water interface.
The Acclimation Protocol
Step 1: Quarantine or dip first
Before acclimating to your tank’s conditions, make sure you’re not acclimating pests along with the plant. Run new arrivals through our quarantine and dip protocol — it adds days upfront but prevents months of regret.
Step 2: Float to temperature-match (30 minutes)
Float the bag or container in your tank for 20–30 minutes to equalize temperature. Plants are less temperature-sensitive than fish, but a 10°F shock on top of transplant stress is an avoidable insult.
Step 3: Trim before planting
Remove any leaves that are already damaged, yellowing, or heavily algae-covered — they won’t recover and they’ll rot in your tank, feeding algae. For stem plants, trim off the bottom inch and any emersed leaves that look unlikely to adapt; the plant wastes energy maintaining leaves it’s going to shed anyway. Keep the healthy growing tips — that’s where recovery starts.
Step 4: Plant correctly the first time
Follow our planting guide — right depth, crown exposed on rosettes, rhizomes unburied on epiphytes. Every uprooting and replanting restarts the acclimation clock, so get placement right on the first attempt. Decide where each plant goes before it goes in the water.
Step 5: Run a gentle first week
For the first 7 days after planting:
- Moderate light — run your normal photoperiod but consider dropping intensity 20–30% if your light is dimmable. Blast-level light on a melting plant grows algae on the dying leaves, not recovery.
- Stable CO2 — if you inject CO2, keep it consistent. Fluctuating CO2 during acclimation is a melt accelerator. If you’re low-tech, this doesn’t apply — see growing without CO2.
- Half-strength fertilizer — new plants with damaged leaves can’t use full dosing, and the excess feeds algae. Ramp to full strength over 2–3 weeks per our fertilizer schedule.
- No disturbance — don’t move, trim, or “check on” new plants for at least two weeks. Every touch resets root establishment. This is especially critical for crypts.
Step 6: Remove melt, keep the base
As emersed leaves melt, remove the mushy material promptly — decaying leaves release ammonia and grow fungus that can spread to healthy tissue. But never discard the plant while the crown, rhizome, or roots are firm and alive. A crypt that’s lost every leaf but has firm roots is a plant that’s about to recover, not a dead plant. Give it 3–4 weeks before judging.
Telling Normal Melt From Real Problems
Normal transition melt:
- Affects oldest/emersed leaves first, newest growth last
- New submersed leaves emerge even as old ones dissolve
- Roots and crown stay firm and white/green
- Timeline: 1–4 weeks, then obvious new growth
Concerning melt (see our full melting diagnosis guide):
- New growth also melts or emerges deformed
- Rhizome or crown turns mushy and brown — this is rot, not transition
- Entire plant dissolves within days with no new growth after 4+ weeks
- Melting spreads to established plants that weren’t recently moved
Buying Tips to Minimize Melt
- Buy submersed-grown when available — hobbyist-grown cuttings transition with almost no melt.
- Choose tissue culture for sensitive species — crypts and delicate stems establish far more reliably from sterile cups.
- Avoid plants already melting in the store tank — some melt is normal, but a plant that’s mostly mush at purchase has less energy for recovery.
- Transport carefully — keep plants damp and out of direct sun/heat. A plant that dries out or cooks in a hot car melts far worse than one transported properly.
The First-Month Timeline: What to Expect Week by Week
Knowing what’s normal when removes most acclimation anxiety. Here’s the typical timeline for a healthy plant adapting to a new tank:
Week 1: The quiet week
Almost nothing visible happens. The plant is growing roots you can’t see and assessing its new environment. Some species (vallisneria, stem plants) may start shedding their lowest leaves. This is normal. Resist the urge to “help” — no moving, no extra fertilizer, no light changes. The most common beginner mistake is intervening during a week when the correct action is nothing.
Week 2: Melt peaks
This is when emersed leaves give up in earnest. Crypts may drop everything; swords shed their broad aerial leaves; stem plants lose lower foliage. It looks catastrophic and it’s usually fine. Keep removing mushy material, keep conditions stable, and watch the crown and growing tips — if those are firm and green, recovery is already underway.
Week 3: The turn
New submersed-adapted leaves emerge — smaller, thinner, often a slightly different shade of green than the emersed foliage. Stem plant tips start growing visibly; crypts push tiny curled leaves from the crown; swords unfurl narrow ribbon leaves. This is the moment most beginners exhale for the first time.
Week 4+: Established
New growth outpaces melt, and the plant is functionally yours. You can resume full-strength fertilizer, normal trimming, and stop treating it as fragile. Some slow growers (anubias, bucephalandra) take 6–8 weeks to show obvious progress — that’s their normal speed, not a problem.
Acclimating Different Plant Formats
Tissue-culture cups
Sterile, pest-free, and already adapted to high-humidity (not emersed) growth — tissue cultures melt the least of any format. Rinse the agar gel off gently (leftover gel rots and feeds fungus), split the portion into small plantlets, and plant per our planting guide. They establish slowly for the first two weeks, then accelerate. No dip needed, minimal acclimation stress — this is the premium experience you’re paying for.
Potted plants
Remove the pot and strip away the rockwool completely — leftover rockwool traps debris and rots. Tease the root mass apart gently; if it’s a dense mat, splitting it into 2–3 smaller portions actually establishes faster than planting one big clump (more growing points, better water flow around roots). Potted plants are usually emersed-grown, so expect the standard 2–4 week melt cycle.
Bare-root / bunched stems
Typically sold as weighted bunches. Remove any bands, foam, or weights, strip the lower leaves, and plant stems individually or in small groups. Bunched stems from the store are often already transitioning — check for new submersed growth at the tips, which tells you the plant is mid-adaptation and will settle quickly.
Hobbyist cuttings
Already submersed-grown and the fastest to establish — often showing new growth within days. The main acclimation factor is water-parameter difference between the two tanks. Float to temperature-match, plant promptly, and they’ll usually take off with minimal melt. This is why experienced hobbyists prefer trading cuttings over buying potted plants.
Frequently Asked Questions
Should I use a “plant starter” or transplant fertilizer?
Products marketed for transplant shock are mostly B-vitamins and mild hormones. They don’t hurt, but there’s no strong evidence they help aquarium plants specifically. Stable conditions and patience outperform any bottle. Save the money for more plants.
My new plant melted completely — bare crown, no leaves. Is it dead?
Probably not, if the crown or rhizome is firm. Crypts and swords routinely lose 100% of their leaves and regrow from the base within a month. The test is firmness: firm and pale/green means alive; mushy and brown/black means rot. Give firm-but-leafless plants a full 4 weeks before declaring them dead.
Can I speed up acclimation with extra light or CO2?
No — and trying usually backfires. A melting plant can’t use extra light; the excess just grows algae on its dying leaves. Keep light moderate and CO2 stable (not boosted) during acclimation. Growth speed comes from the plant’s own adaptation timeline, which you can’t rush, only avoid delaying.
Should new plants go straight into my main display tank?
After quarantine/dipping, yes — there’s no benefit to a separate “growing-in” tank for most plants. They acclimate to your water fastest in the tank they’ll live in. The exception is very delicate species going into a tank with boisterous fish; give those a few weeks in a calm corner or breeder box first.
The Patience Rule
The single most important acclimation skill is restraint: plant it right, set gentle conditions, remove decay, and then leave it alone for a month. The hobbyists with the best plant growth aren’t doing something clever in week one — they’re simply not interfering in weeks two through four while the plants do what they’ve evolved to do. Melt looks like failure and feels like failure, but in most cases it’s the visible part of a plant successfully becoming yours.