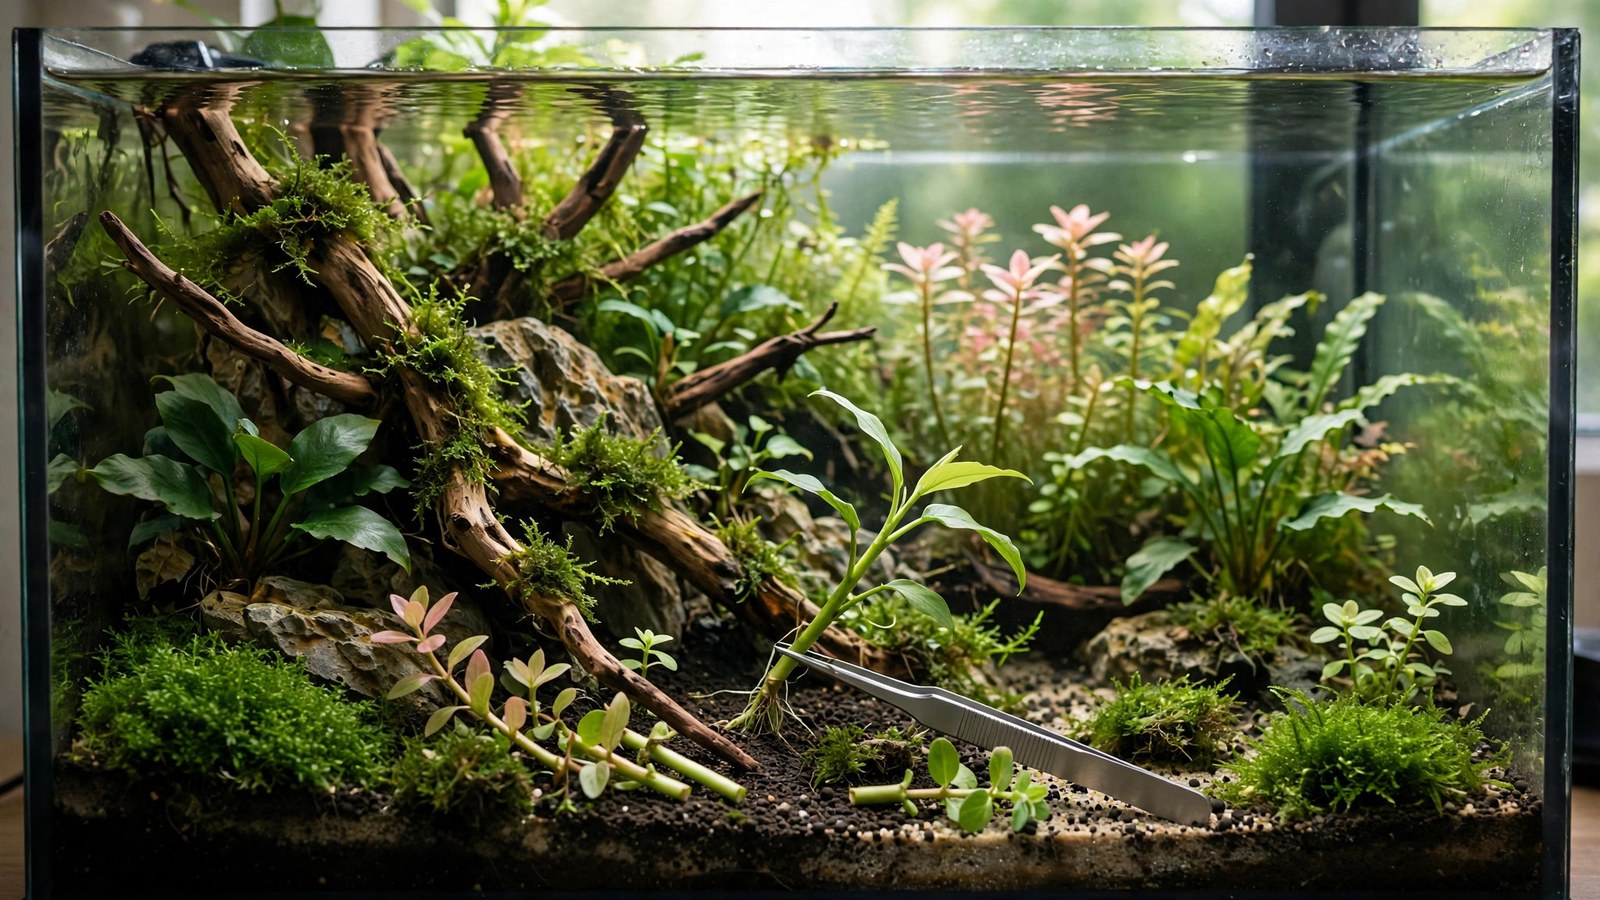
Every aquascape has a lifespan. Tastes change, layouts age, that impulse-buy stone finally finds its purpose — and the thought of tearing down a running ecosystem stops most hobbyists from improving their tanks. But a rescape doesn't have to mean a teardown: with planning, temporary housing, and staged rebuilding, you can transform a layout while keeping livestock safe, preserving your cycle, and reusing healthy plants. This guide covers the full rescape spectrum — from surgical tweaks to complete rebuilds — without the crash.
Rescape vs. Teardown: Know Which You Need
- Renovation (no rescape needed): the hardscape works but planting drifted — rejuvenate stem groups one at a time, replant carpets in sections, swap underperforming species. See our trimming maintenance guide. No livestock moves, no cycle risk.
- Partial rescape: one zone changes — new hardscape arrangement on one side, a new carpet, a converted background. Livestock stays (with precautions), filter stays running, done in a day.
- Full rescape: new hardscape layout, new substrate topography, major replanting. Livestock moves to temporary housing, filter media preserved, 1–2 day project.
- Teardown: everything out, substrate replaced, starting from zero. Only needed for substrate failure (exhausted soil, wrong substrate choice) or contamination. Rare — most "teardowns" are really full rescapes.
Be honest about which level you need. Most rescape urges are renovation-level — the urge to tear down is often just frustration with maintenance debt. Fix the maintenance first; rescape second.
Planning the New Layout
A rescape without a plan is just expensive chaos. Before touching the tank:
- Design the new layout fully — sketch it, choose the composition (triangle, concave, diagonal), and apply the hardscape-first method: arrange the new hardscape dry (on the floor in the tank's footprint, or in the drained tank) before committing.
- Inventory reusable plants: healthy stems (replant tops), epiphytes (detach and reuse — Anubias, ferns, Buce transplant beautifully), crypts (only if you must move them — they hate it), carpets (rarely reusable; plan fresh).
- List what to buy: new hardscape, fresh substrate (if changing), new plants for gaps. Order before rescape day — mid-project shopping trips stall momentum and stress livestock in temporary housing.
- Schedule: a full rescape takes one long day (6–10 hours for a 60cm). Start early. Have everything staged. Don't begin at 8 PM.
Livestock Safety: Temporary Housing
For partial rescapes, livestock can stay with precautions (see below). For full rescapes, move them:
- Housing: a clean bucket, storage tote, or spare tank with existing tank water, a sponge filter or air stone, and a heater if needed. Cover it — stressed fish jump.
- Duration: hours, not days. Plan the rescape so livestock returns the same day. Every extra day in a bucket is stress and parameter drift.
- Shrimp and snails: catch them first, before the water gets cloudy — once you start pulling hardscape, the small ones vanish into murk. A shrimp trap (food in a bottle) the night before helps.
- Plants as holding: toss a handful of floating plants or moss into the holding container — cover calms livestock enormously.
- Acclimate back: float/drip-acclimate to the rescaped tank like new arrivals — parameters will have shifted (fresh substrate, disturbed mulm).
Preserving the Cycle: The Biological Bank
The #1 rescape fear is crashing the nitrogen cycle. Prevent it:
- Never clean the filter during a rescape. The filter media holds the majority of your nitrifying bacteria — keep it running (on the holding container if the main filter can't run, or at minimum keep media wet and aerated). This single rule prevents 90% of rescape crashes.
- Reuse substrate (if it's still good): established substrate is a bacterial goldmine. If you're keeping the same substrate, disturb it as little as possible — siphon the surface, don't deep-clean. If replacing substrate, keep a few cups of the old stuff in mesh bags in the filter or tank for a month to seed the new.
- Keep hardscape wet: bacteria colonize stone and wood surfaces too. If reusing hardscape, don't let it dry out or scrub it sterile — a rinse is fine, a bleach bath is not (unless you're specifically resetting for disease).
- Stock lightly at first: return hardy livestock first, wait a week, then return the rest. Test ammonia/nitrite daily for the first week — a mini-cycle is common and manageable with water changes.
The Partial Rescape: Step by Step
For single-zone changes (new carpet, one-side hardscape redo, background conversion):
- Lower the water to 30–40% — enough for fish to swim, low enough to work. Keep the filter running (adjust intake depth).
- Work in the exposed zone: pull old plants/hardscape from the target area, place new hardscape per your plan, grade substrate.
- Plant the new zone densely — new plantings in an established tank face algae pressure from the existing nutrient load; heavy planting + fast growers win that race.
- Refill slowly (pour over a plate), restart full filtration, do a 50% water change the next day.
- Monitor for a week: disturbed substrate releases nutrients — extra water changes and slightly reduced light for 3–5 days prevent the post-rescape algae bloom.
The Full Rescape: Step by Step
- Stage everything: new hardscape arranged and approved (dry layout), plants ready, substrate on hand, holding container prepared with tank water + filter + heater.
- Move livestock to holding (catch shrimp/snails first).
- Remove plants: harvest reusables into buckets of tank water (stems in one, epiphytes in another, sorted for replanting). Compost the rest.
- Remove hardscape, then drain most of the water (save several gallons of tank water for refill — it eases the transition).
- Substrate decision: keep (siphon surface, level it) or replace (scoop out, add new). For new aquasoil, expect the ammonia leach phase — cycle 2–4 weeks before returning sensitive livestock, or use the old filter + heavy planting + daily water changes to power through faster.
- Build the new layout: hardscape first, grade substrate, plant densely. Take your time here — this is the whole point.
- Fill slowly, start equipment, plant any remaining stems, add saved tank water.
- Return livestock same day (if substrate is reused/established) or after the new cycle stabilizes (if substrate is new — house livestock in the holding setup with daily water changes meanwhile, or better, in a friend's established tank).
- Post-rescape protocol: 50% water changes every 2–3 days for the first two weeks, reduced photoperiod (6 hours, ramp up), test ammonia/nitrite daily. Treat it like a new tank wearing an old filter — respect the transition.
Reusing Plants: What Transplants Well
- Excellent: Anubias, Bucephalandra, java fern, Bolbitis, mosses — detach, reattach, they barely notice. These are rescape gold.
- Good: stem tops — cut fresh tops and replant; they root in days. Swords (if the root ball is intact).
- Reluctant: Cryptocoryne — expect total melt after moving; they recover from roots in weeks, but it's ugly. Move only if necessary, and never judge them for a month.
- Don't bother: old carpets (HC Cuba/Monte Carlo mats rarely survive transplanting — start fresh, possibly via dry start), exhausted stem bases (replant tops instead).
Frequently Asked Questions
Will a rescape kill my beneficial bacteria?
Not if you protect the filter — it holds the bulk of the colony. Keep filter media wet, aerated, and running (or at minimum submerged with an air stone) throughout the project, and the cycle survives. What does hurt: letting media dry out, "cleaning" it thoroughly mid-rescape, or replacing all substrate and filter media simultaneously. Protect one bacterial reservoir and you're safe.
How long before the rescaped tank looks good?
Same as a new tank: 8–16 weeks to maturity (see fill-in timelines). A rescape with reused established plants and preserved filter matures faster than a from-scratch build — often looking respectable in 4–6 weeks — because the biology is ahead. But the layout still needs to grow in; don't judge it at week two.
Can I rescape with fish in the tank?
For partial rescapes: yes, with the water lowered and work done gently — hardy fish tolerate it fine. For full rescapes: move them. The combination of cloudy water, shifting hardscape, hands everywhere, and parameter swings is genuinely dangerous. An hour of catching beats a day of mourning.
Should I replace the substrate during a rescape?
Only if it's exhausted (aquasoil depleted after 1–2+ years — plants stall despite fertilization) or wrong for the new vision (gravel to soil for a planted rebuild). Good substrate is reusable indefinitely with root tabs supplementing. Replacing substrate triggers the new-soil ammonia phase — the biggest complication a rescape can add. Don't do it casually.
What's the biggest rescape mistake?
Scope creep mid-project — deciding to "also replace the substrate" and "also upgrade the filter" halfway through, turning a one-day rescape into a week-long livestock-in-buckets ordeal. Lock the plan before starting; execute the plan. The second biggest: inadequate temporary housing — a bucket with no aeration for 8 hours kills more rescape livestock than anything else.
How often should I rescape?
As rarely as the layout demands — great aquascapes live for years with maintenance alone. Rescape when the design genuinely no longer satisfies you, when the hardscape vision changes, or when biology forces it (substrate exhaustion). Rescaping every 3 months means never seeing a mature layout; the best tanks are the ones their owners didn't tear down.
Evolution, Not Revolution (Unless Needed)
The skilled aquascaper rescapes rarely but decisively: plan the new vision completely, protect the livestock and the bacteria, execute in one focused day, and nurse the transition like a new tank. And remember the hierarchy — renovate when trimming suffices, partially rescape when one zone fails, fully rescape when the vision changes, and tear down almost never. Your tank is a garden; gardens get redesigned, not demolished. When the new layout is growing in, document it with our photography guide — the rescape timelapse, month one to month six, is one of the hobby's most satisfying records.
Tissue-culture plants are the exception — they’re grown in sterile gel and adapt with minimal melting, which is part of what you’re paying for. Plants bought submersed from another hobbyist’s tank also transition with little melt, since they’re already in the right form.
Which Plants Melt Most (and Least)
Heavy melters (expect significant leaf loss)
- Cryptocorynes — infamous for “crypt melt,” sometimes dropping every leaf after any disturbance. They almost always recover from the roots within weeks.
- Stem plants grown emersed — rotala, ludwigia, and hygrophila often shed lower emersed leaves while the growing tips transition.
- Amazon swords — emersed-grown swords typically lose their broad oval aerial leaves and replace them with longer submersed ribbon leaves.
Light melters
- Anubias, java fern, bucephalandra — slow-growing rhizome plants transition gradually; occasional old-leaf melt but rarely dramatic.
- Vallisneria — usually transitions well, though it dislikes the move itself and may sulk for a week.
- Floating plants — minimal melt since their leaves were already at the air-water interface.
The Acclimation Protocol
Step 1: Quarantine or dip first
Before acclimating to your tank’s conditions, make sure you’re not acclimating pests along with the plant. Run new arrivals through our quarantine and dip protocol — it adds days upfront but prevents months of regret.
Step 2: Float to temperature-match (30 minutes)
Float the bag or container in your tank for 20–30 minutes to equalize temperature. Plants are less temperature-sensitive than fish, but a 10°F shock on top of transplant stress is an avoidable insult.
Step 3: Trim before planting
Remove any leaves that are already damaged, yellowing, or heavily algae-covered — they won’t recover and they’ll rot in your tank, feeding algae. For stem plants, trim off the bottom inch and any emersed leaves that look unlikely to adapt; the plant wastes energy maintaining leaves it’s going to shed anyway. Keep the healthy growing tips — that’s where recovery starts.
Step 4: Plant correctly the first time
Follow our planting guide — right depth, crown exposed on rosettes, rhizomes unburied on epiphytes. Every uprooting and replanting restarts the acclimation clock, so get placement right on the first attempt. Decide where each plant goes before it goes in the water.
Step 5: Run a gentle first week
For the first 7 days after planting:
- Moderate light — run your normal photoperiod but consider dropping intensity 20–30% if your light is dimmable. Blast-level light on a melting plant grows algae on the dying leaves, not recovery.
- Stable CO2 — if you inject CO2, keep it consistent. Fluctuating CO2 during acclimation is a melt accelerator. If you’re low-tech, this doesn’t apply — see growing without CO2.
- Half-strength fertilizer — new plants with damaged leaves can’t use full dosing, and the excess feeds algae. Ramp to full strength over 2–3 weeks per our fertilizer schedule.
- No disturbance — don’t move, trim, or “check on” new plants for at least two weeks. Every touch resets root establishment. This is especially critical for crypts.
Step 6: Remove melt, keep the base
As emersed leaves melt, remove the mushy material promptly — decaying leaves release ammonia and grow fungus that can spread to healthy tissue. But never discard the plant while the crown, rhizome, or roots are firm and alive. A crypt that’s lost every leaf but has firm roots is a plant that’s about to recover, not a dead plant. Give it 3–4 weeks before judging.
Telling Normal Melt From Real Problems
Normal transition melt:
- Affects oldest/emersed leaves first, newest growth last
- New submersed leaves emerge even as old ones dissolve
- Roots and crown stay firm and white/green
- Timeline: 1–4 weeks, then obvious new growth
Concerning melt (see our full melting diagnosis guide):
- New growth also melts or emerges deformed
- Rhizome or crown turns mushy and brown — this is rot, not transition
- Entire plant dissolves within days with no new growth after 4+ weeks
- Melting spreads to established plants that weren’t recently moved
Buying Tips to Minimize Melt
- Buy submersed-grown when available — hobbyist-grown cuttings transition with almost no melt.
- Choose tissue culture for sensitive species — crypts and delicate stems establish far more reliably from sterile cups.
- Avoid plants already melting in the store tank — some melt is normal, but a plant that’s mostly mush at purchase has less energy for recovery.
- Transport carefully — keep plants damp and out of direct sun/heat. A plant that dries out or cooks in a hot car melts far worse than one transported properly.
The First-Month Timeline: What to Expect Week by Week
Knowing what’s normal when removes most acclimation anxiety. Here’s the typical timeline for a healthy plant adapting to a new tank:
Week 1: The quiet week
Almost nothing visible happens. The plant is growing roots you can’t see and assessing its new environment. Some species (vallisneria, stem plants) may start shedding their lowest leaves. This is normal. Resist the urge to “help” — no moving, no extra fertilizer, no light changes. The most common beginner mistake is intervening during a week when the correct action is nothing.
Week 2: Melt peaks
This is when emersed leaves give up in earnest. Crypts may drop everything; swords shed their broad aerial leaves; stem plants lose lower foliage. It looks catastrophic and it’s usually fine. Keep removing mushy material, keep conditions stable, and watch the crown and growing tips — if those are firm and green, recovery is already underway.
Week 3: The turn
New submersed-adapted leaves emerge — smaller, thinner, often a slightly different shade of green than the emersed foliage. Stem plant tips start growing visibly; crypts push tiny curled leaves from the crown; swords unfurl narrow ribbon leaves. This is the moment most beginners exhale for the first time.
Week 4+: Established
New growth outpaces melt, and the plant is functionally yours. You can resume full-strength fertilizer, normal trimming, and stop treating it as fragile. Some slow growers (anubias, bucephalandra) take 6–8 weeks to show obvious progress — that’s their normal speed, not a problem.
Acclimating Different Plant Formats
Tissue-culture cups
Sterile, pest-free, and already adapted to high-humidity (not emersed) growth — tissue cultures melt the least of any format. Rinse the agar gel off gently (leftover gel rots and feeds fungus), split the portion into small plantlets, and plant per our planting guide. They establish slowly for the first two weeks, then accelerate. No dip needed, minimal acclimation stress — this is the premium experience you’re paying for.
Potted plants
Remove the pot and strip away the rockwool completely — leftover rockwool traps debris and rots. Tease the root mass apart gently; if it’s a dense mat, splitting it into 2–3 smaller portions actually establishes faster than planting one big clump (more growing points, better water flow around roots). Potted plants are usually emersed-grown, so expect the standard 2–4 week melt cycle.
Bare-root / bunched stems
Typically sold as weighted bunches. Remove any bands, foam, or weights, strip the lower leaves, and plant stems individually or in small groups. Bunched stems from the store are often already transitioning — check for new submersed growth at the tips, which tells you the plant is mid-adaptation and will settle quickly.
Hobbyist cuttings
Already submersed-grown and the fastest to establish — often showing new growth within days. The main acclimation factor is water-parameter difference between the two tanks. Float to temperature-match, plant promptly, and they’ll usually take off with minimal melt. This is why experienced hobbyists prefer trading cuttings over buying potted plants.
Frequently Asked Questions
Should I use a “plant starter” or transplant fertilizer?
Products marketed for transplant shock are mostly B-vitamins and mild hormones. They don’t hurt, but there’s no strong evidence they help aquarium plants specifically. Stable conditions and patience outperform any bottle. Save the money for more plants.
My new plant melted completely — bare crown, no leaves. Is it dead?
Probably not, if the crown or rhizome is firm. Crypts and swords routinely lose 100% of their leaves and regrow from the base within a month. The test is firmness: firm and pale/green means alive; mushy and brown/black means rot. Give firm-but-leafless plants a full 4 weeks before declaring them dead.
Can I speed up acclimation with extra light or CO2?
No — and trying usually backfires. A melting plant can’t use extra light; the excess just grows algae on its dying leaves. Keep light moderate and CO2 stable (not boosted) during acclimation. Growth speed comes from the plant’s own adaptation timeline, which you can’t rush, only avoid delaying.
Should new plants go straight into my main display tank?
After quarantine/dipping, yes — there’s no benefit to a separate “growing-in” tank for most plants. They acclimate to your water fastest in the tank they’ll live in. The exception is very delicate species going into a tank with boisterous fish; give those a few weeks in a calm corner or breeder box first.
The Patience Rule
The single most important acclimation skill is restraint: plant it right, set gentle conditions, remove decay, and then leave it alone for a month. The hobbyists with the best plant growth aren’t doing something clever in week one — they’re simply not interfering in weeks two through four while the plants do what they’ve evolved to do. Melt looks like failure and feels like failure, but in most cases it’s the visible part of a plant successfully becoming yours.