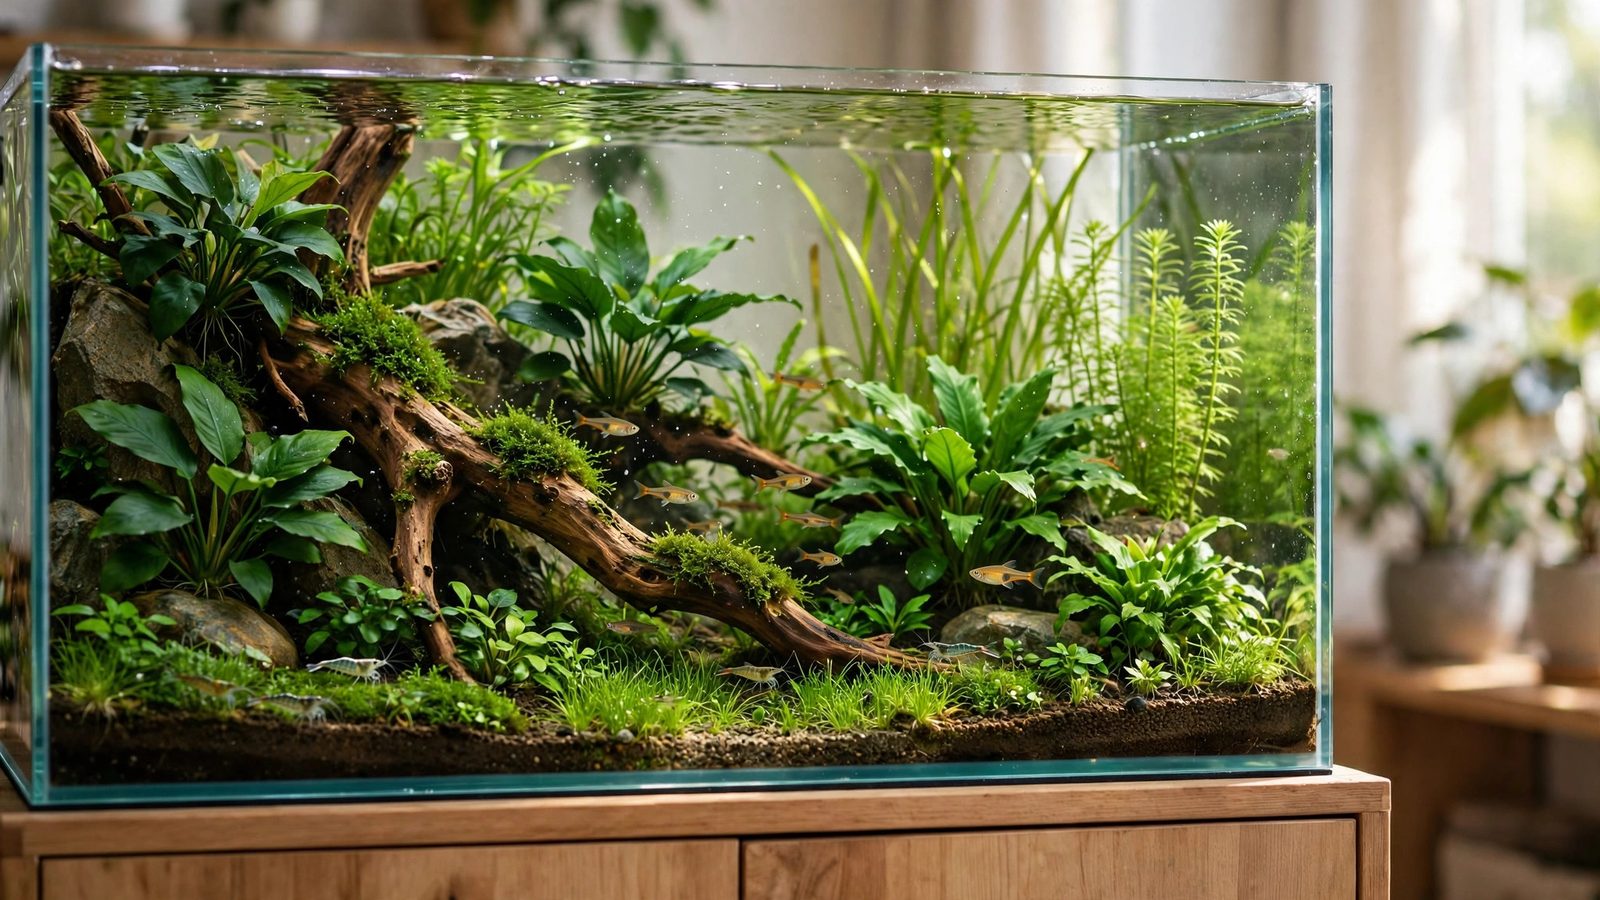
Learning aquascaping for beginners feels a little like learning to paint and keep a garden at the same time — in a glass box full of water. But here's the secret experienced scapers know: a stunning first planted layout isn't about talent or expensive gear. It's about following a sensible order of operations. In this guide, you'll go from an empty tank to a fully planted, balanced layout step by step, choosing plants that forgive mistakes and a design that works with your skill level, not against it.
Step 1: Pick the Right Tank and Placement
Your first aquascape should start with the simplest canvas possible: a rectangular tank between 10 and 20 gallons. Cubes and tiny nano tanks look charming, but their proportions punish every error — there's nowhere to hide a crooked rock or a dying plant. A standard 10-gallon or 20-gallon long gives you room to experiment, forgives awkward composition, and holds water parameters steadier than anything smaller.
Placement matters as much as size. Set the tank somewhere it won't be bumped, near enough to an outlet for filter and heater, and ideally where you see it every day — aquascapes that get daily attention almost always beat neglected ones. Avoid direct sunlight from windows, which invites algae and temperature swings no beginner wants to fight. If you're dreaming of unusual dimensions later, there are excellent approaches like peninsula tank aquascaping and shallow tank aquascaping — but save those for layout number two or three, once the basics are second nature.
Step 2: Choose Your Layout Style
Every great aquascape follows a composition template, and knowing the handful of beginner-friendly ones will save you from the most common first-timer trap: scattering rocks and plants randomly and hoping it looks natural. It never does. Pick one structure and commit to it.
The island style
The island-style aquascape is arguably the kindest layout for beginners: one mound of hardscape in the middle of an open, sandy foreground. It teaches you focal-point discipline, reads beautifully from across a room, and gives you negative space to "breathe" instead of stuffing the tank with plants. If you're working with a smaller tank, the 10-gallon aquascape ideas guide has island variations sized exactly for beginner tanks.
The triangle composition
The triangle composition builds everything off one sloping line — tall plants and hardscape on one side, cascading down to an open low corner on the other. It's the easiest way to create visual flow, and it flatters almost any rock or driftwood piece you own. Nature-style tanks live on this template.
The concave (valley) layout
The concave layout, also called the valley technique, frames a dip in the center between two raised sides. It creates instant depth — your tank looks bigger than it is — and it's extremely forgiving about plant choice, since the composition carries the drama. If depth is your goal, the valley aquascape layout guide goes deeper into river-valley builds.
The simple iwagumi
The iwagumi layout uses just rocks — one main stone, two supporting stones, and a carpet — in a minimalist arrangement. It's the hardest to perfect but the simplest to start: fewer pieces means fewer decisions. Beginners often fail at iwagumi by using too many stones; stick to an odd number, three or five, and resist the urge to add "just one more."
Whichever you pick, spend a few minutes with the composition math before touching the tank. The rule of thirds and golden ratio guides show you exactly where to place your focal point so the layout feels balanced without guesswork.
Step 3: Plan Before You Buy (The Sketch Step)
Nobody's first tank should be improvised at the fish store. Sketch your layout on paper first — a rough rectangle with blobs for hardscape and scribbles for plant groups. This five-minute exercise forces decisions: where's the focal point? How tall is the background? How much open foreground do you keep? The guide to planning an aquascape walks through turning that sketch into a real shopping list so you arrive at the store — or check out online — with a plan instead of a whim.
Your plant list should come from the same sketch. Aim for 8–12 species maximum for a 10–20 gallon tank. More varieties than that look cluttered, cost more, and multiply your maintenance. A balanced beginner list: one carpet or foreground species, two or three midground plants, three or four background stems, and one or two accents (a red plant or a moss-covered piece of wood). Buying in groups of three or more pots per species gives each planting real visual weight — single lonely stems never look good.
Step 4: Hardscape First — Rocks, Wood, and Substrate
With the tank empty and dry, place your hardscape before anything else. This is the skeleton of your aquascape, and getting it right here means everything you add later looks intentional. The hardscape-first method exists for exactly this reason: commit to your rocks and driftwood, photograph them from several angles, live with them for a day, and only then move on.
A few hard-won rules: use one type of rock and one type of wood per tank — mixing textures screams "assembled from leftovers." Bury the base of each piece deeper than feels right; exposed bottoms look fake once water is in. Tilt pieces slightly forward or to one side rather than planting them dead vertical — nature is rarely plumb. And remember the scale rule: if the tallest hardscape element is less than half the tank's height, the layout will feel timid; aim for roughly two-thirds.
Substrate goes in around and under the hardscape. For a planted layout, nutrient-rich aquasoil in the planting zones with a decorative sand cap in the foreground is the beginner gold standard. Sloping your substrate — 2–3 inches deep in back, shallow up front — adds enormous depth and keeps nutrients where the roots are. On a tight budget, the budget aquascaping guide covers cheaper substrate strategies that still grow healthy plants.
A forgiving aquasoil flatters first-timer mistakes: Fluval Stratum.
Step 5: Choose Forgiving Plants
Plant selection makes or breaks a first aquascape. Forget the exotic species on the contest tanks — your job right now is to pick plants that survive learning. Easy species share traits: they grow in low to medium light, don't demand injected CO2, tolerate inconsistent fertilizing, and bounce back from rough trimming.
Reliable beginner picks by zone:
- Foreground: Cryptocoryne parva or dwarf hairgrass (Eleocharis parvula). Both carpet slowly without CO2 and forgive uneven light.
- Midground: Anubias nana, Java fern, and Cryptocoryne wendtii. Attach the first two to hardscape rather than burying them — buried rhizomes rot.
- Background: Rotala rotundifolia, Ludwigia repens, and Hygrophila corymbosa. Fast stems that fill in quickly and give you trimming practice.
- Accents: a small red like Alternanthera reineckii mini, or Christmas moss on driftwood for texture contrast.
Buy tissue-culture cups when you can — they're pest- and algae-free, and they transition to submerged growth reliably. If you want a carpet without investing in CO2, the no-CO2 carpeting guide covers the plants and methods that actually work in low-tech setups. And for small tanks, the nano tank plant list narrows choices to species that stay in proportion.
Step 6: Plant Methodically
Plant in zones, back to front, one species at a time. Start with the background stems: trim them to staggered heights (tallest at the very back), push each stem about an inch into the substrate with tweezers, and leave a finger's width between them so light reaches the lower leaves. Then the midground: plant crypts and sword types in groups of three to five, tuck anubias and ferns into hardscape crevices with thread or glue, and let moss attach itself over a week or two.
The foreground goes last, because you'll be leaning over everything else. Plant carpet species in small clumps of five to ten blades every inch or so — this feels sparse, but it spreads into a dense mat far faster than a few big plugs. Mist everything with a spray bottle as you work so the leaves don't dry out; emergent-looking wilted leaves are the number-one reason beginners think their plants "died" on day one. For a full breakdown of the technique, the dry start method guide shows how to grow the carpet emersed before flooding — many beginners find it easier than planting underwater.
If you want to experiment outside the tank first, a wabi-kusa bowl is the perfect low-stakes practice: same planting skills, no filter, no water column to manage, and it teaches you how plants behave before you commit to a full scape.
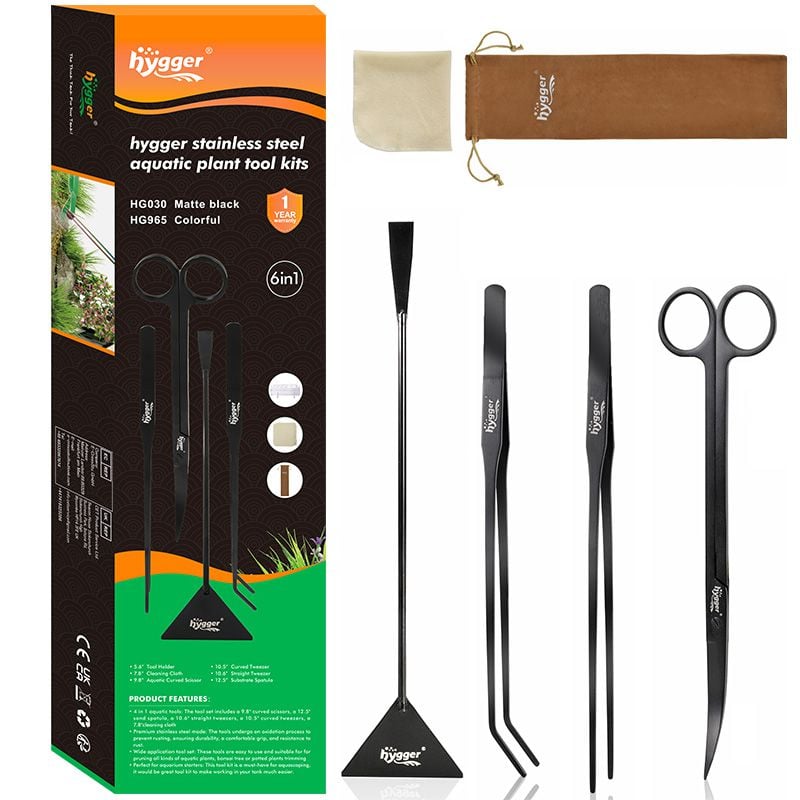
Long tweezers make planting precise instead of frustrating: aquascaping tweezers.
 ★4.6
hygger 6-in-1 Long Aquarium Aquascaping Tools Kit
Check Price on Amazon ★4.6Step 7: Fill, Cycle, and Start Your Routine
Flooding a freshly planted tank is where careful work gets wrecked by rushing. Place a plate, plastic bag, or your hand over the substrate and pour water slowly onto it — this keeps the stream from blasting your planting loose or stirring up a cloudy mess. Fill to the top, start the filter, and resist touching anything for a few days while sediment settles and plants orient themselves to the light.
Then cycle the tank before adding livestock. A planted tank with aquasoil often cycles faster than a bare one, but you still need to verify: dose a small amount of ammonia or use the fishless cycling method, and don't add fish or shrimp until ammonia and nitrite read zero for several consecutive days. The dark start method takes this further — cycling the tank with hardscape and substrate but no plants or light for several weeks — which eliminates the early algae bloom that demoralizes so many beginners.
Once cycled, your weekly routine is simple: 30–50% water change, trim anything reaching the surface, dose an all-in-one liquid fertilizer per the label, and wipe the glass. Total time: under an hour. That rhythm is what turns a freshly planted tank into a mature aquascape over the next two to three months — most layouts need eight to twelve weeks to truly fill in, so patience is genuinely part of the technique.
Aquascaping for Beginners: Common First-Layout Pitfalls
- Overstocking plants: more species ≠ better scape. Restraint reads as confidence. The 11 beginner mistakes guide covers this and ten other traps in detail.
- Light too strong, too long: eight hours of moderate light beats twelve hours of blast. Algae loves excess light more than plants do.
- No focal point: if your eye doesn't land anywhere, the layout feels restless. One hero rock or one hero wood piece, placed on the thirds line, fixes it.
- Ignoring water changes: aquasoil releases ammonia early on; weekly changes dilute it before algae capitalizes.
- Rescaping in week two: every uprooted plant restarts its adaptation clock. Commit to your layout for at least two months.
- Adding fish too early: an uncycled tank kills livestock and teaches nothing. Test your water first, always.
Frequently Asked Questions
How much does a first aquascape cost?
A quality 10-gallon starter setup — tank, light, filter, heater, aquasoil, hardscape, plants, and test kit — typically lands between $200 and $400 depending on what you already own. You can absolutely spend less by buying used equipment and choosing budget-friendly plants, and the budget aquascaping guide shows how to build a beautiful tank for under $100. Skip the premium gear until your second layout; the first one is about learning, not equipment.
Do I need CO2 for my first planted layout?
No. Most beginner-friendly plants — anubias, Java fern, crypts, most stem plants — grow perfectly well without injected CO2. CO2 speeds growth and unlocks demanding carpet species, but it adds complexity, cost, and a learning curve of its own. Master the basics in a low-tech tank first; many aquascapers never add CO2 and produce gorgeous layouts. If you want a lush carpet without the gear, read the no-CO2 carpeting guide before choosing your foreground plant.
How long until my aquascape looks good?
Expect your layout to look its best around the 8–12 week mark. The first month can look sparse or scruffy as plants transition from emersed (grown above water at the farm) to submerged growth — old leaves melt while new underwater leaves emerge. This is normal and not a failure. Resist rescaping during this phase; the plants are doing exactly what they're supposed to do, and your tank is maturing exactly on schedule.
Can I aquascape a tank that already has fish?
Yes, with care. Work slowly, keep the filter running, and do a large water change afterward to clear disturbed debris. It's easier to add hardscape and a few plants around existing livestock than to do a full rescape — major overhauls stress fish. If you're planning a total redesign, temporarily housing the fish in a bucket with the old filter running for a few hours is the safest approach. Many keepers practice new techniques on a spare bowl or a wabi-kusa first, so their main tank stays stable.
What light should I buy for a planted tank?
Choose a full-spectrum LED rated for planted tanks, sized to your tank length. For a first layout, medium intensity (roughly 30–50 PAR at substrate level) run for 7–8 hours daily is the sweet spot — enough to grow easy plants, not enough to fuel algae outbreaks. Adjustable or dimmable lights are worth the small premium because they let you start low and increase intensity as plants establish. If algae appears, reduce duration before you touch anything else.
How do I keep algae from taking over?
Balance: moderate light, consistent circulation, regular fertilizing, and weekly water changes. New tanks are most vulnerable in the first month, so add a small cleanup crew — a few nerite snails or Amano shrimp — once the cycle completes. Spot-treat early algae immediately instead of hoping it fades; a toothbrush-twirl for hair algae and a peroxide spot-dose for BBA keep problems small. The single biggest lever is light discipline — most algae issues trace back to too much light for too long.
Your First Scape Starts Now
Aquascaping rewards the patient, not the wealthy. Pick one layout style, sketch it, buy forgiving plants, hardscape before you plant, flood gently, and then — hardest of all — give it time. Three months from now, that empty glass box will be a living landscape you built with your own hands, and every layout after it gets easier. For visual inspiration, check the Tropica inspiration gallery, which showcases hundreds of real planted layouts you can borrow ideas from, and the Aquatic Gardeners Association showcase, where hobbyists document their aquascapes and the techniques behind them. Welcome to the hobby — your first layout is going to surprise you.