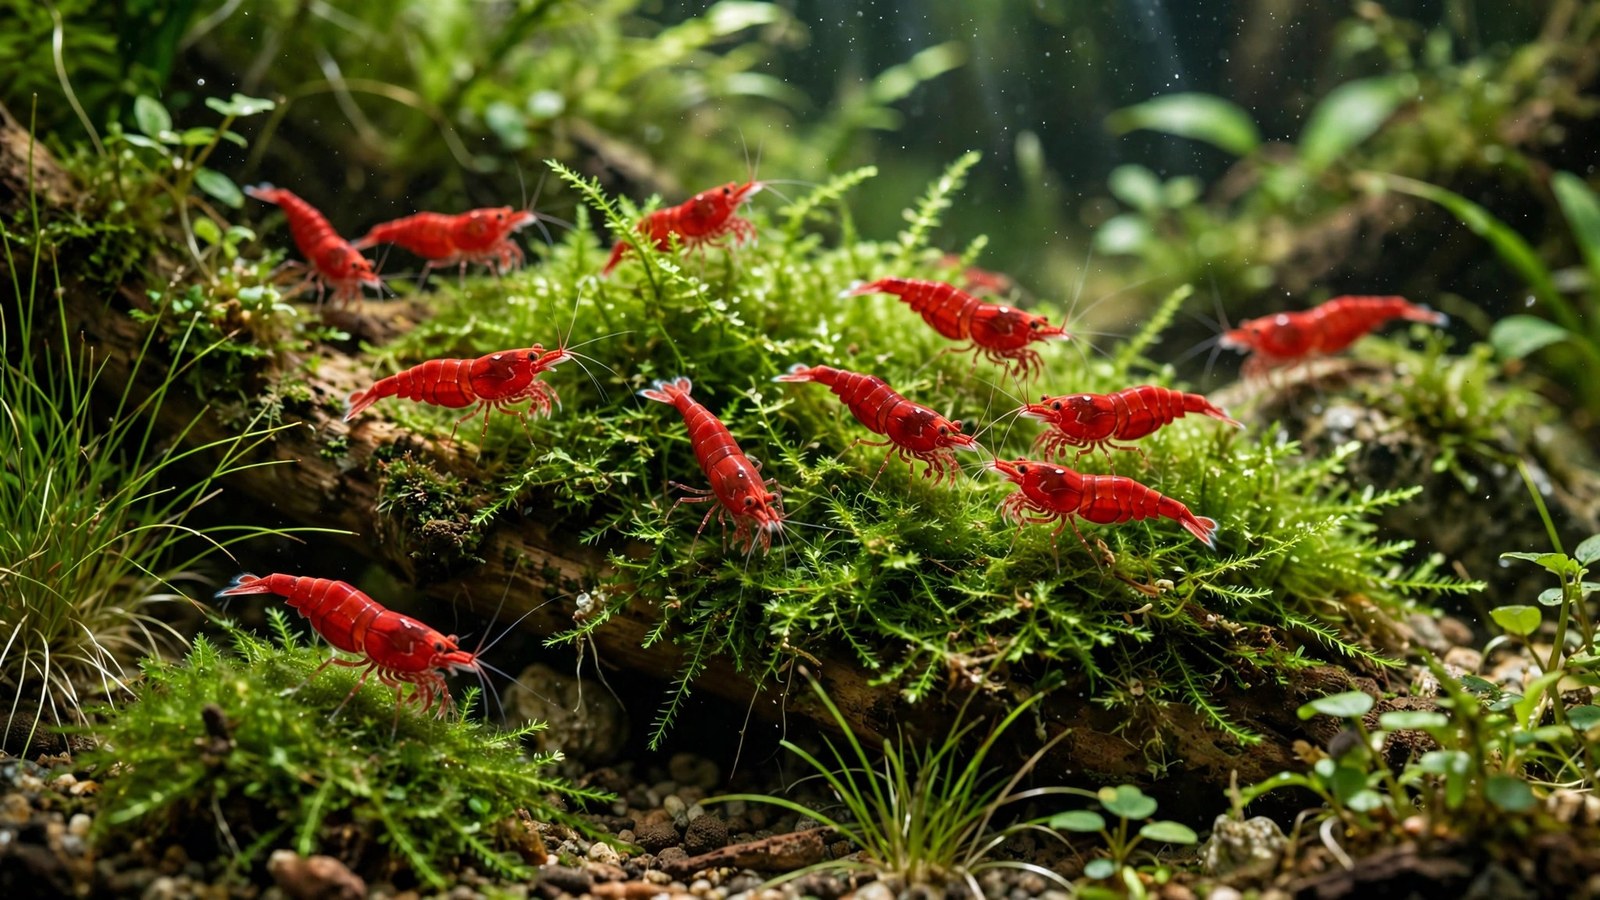
Learning to breed cherry shrimp is one of the most satisfying projects in the freshwater hobby. These tiny red jewels do most of the work themselves — your job is simply to give them a planted tank that stays stable, well-fed, and safe for newborn shrimplets. A densely planted setup acts as nursery, cafeteria, and hideout all at once, which is exactly why breeding cherry shrimp succeeds best in a tank full of living plants rather than a bare glass box.
In this colony guide, you'll learn how to set up the tank, dial in water parameters, choose the right plants, feed for growth and color, and manage your colony over time — from the first berried female to a self-sustaining colony of hundreds. New to the setup itself? Start with our complete build guide — Planted Shrimp Tank Setup: The Complete Build — then return here for the colony-management and breeding companion.
Why Cherry Shrimp Are Ideal for Beginners
Cherry shrimp (Neocaridina davidi) are the forgiving workhorse of the dwarf shrimp world. Unlike their fussier cousins in the Caridina genus, they breed readily in ordinary tap water conditions and tolerate a wide range of parameters. For a broader overview of the species itself, UF/IFAS Extension's cherry shrimp species profile covers taxonomy, life cycle, and natural distribution.
They are also entirely peaceful, bioload-light, and constant grazers. A colony will polish algae off leaves, sift detritus from the substrate, and add constant micro-movement to your aquascape. For a planted tank, there is no better livestock partner: they fertilize plants gently, never damage healthy leaves, and their bright red color pops against green foliage.
Setting Up a Tank Built for Breeding
A breeding colony does not need a large aquarium. A 10-gallon tank is the sweet spot for most hobbyists — big enough for stable water chemistry, small enough to keep food density high for shrimplets. Five-gallon tanks work too, but parameters swing faster, so beginners do better with ten gallons or more.
Cycling Before Shrimp Arrive
Never add cherry shrimp to an uncycled tank. Cycle the aquarium fully — ammonia and nitrite reading zero, nitrates present — which usually takes four to six weeks with a fishless cycle. Plants help: fast-growing stems and floaters absorb ammonia directly, smoothing out the cycle. Most hobbyists consider a tank mature only when it has run for at least two to three months, because the biofilm that baby shrimp feed on needs time to develop on every surface.
Filtration and Shrimp Safety
A sponge filter is the classic shrimp-tank choice: gentle flow, no intake to trap babies, and the sponge surface itself grows biofilm that shrimplets graze. If you use a hang-on-back or canister filter, fit a pre-filter sponge over the intake — newborn shrimplets are under 2 mm long and will be sucked into unguarded intakes. Keep flow moderate; cherry shrimp dislike strong currents and spend their time picking over plants rather than fighting flow.
Substrate and Hardscape
Inert substrates like sand or gravel suit Neocaridina perfectly, since they prefer neutral-to-alkaline water and don't need buffering soils. A dark substrate makes red coloration pop and encourages confidence. Add driftwood and leaf litter (Indian almond or oak leaves): both grow biofilm, and decomposing leaves feed infusoria that newborn shrimp eat in their first days.
Water Parameters for Breeding Cherry Shrimp
Stability matters more than hitting exact numbers. Cherry shrimp breed happily across a broad range, but sudden swings — especially in TDS and temperature — stress females and can halt breeding. Match the new tank's parameters to the breeder's water as closely as possible when introducing shrimp, and drip-acclimate for at least an hour.
| Parameter | Breeding target | Acceptable range |
|---|---|---|
| Temperature | 70–74 °F (21–23 °C) | 65–80 °F (18–27 °C) |
| pH | 7.0–7.6 | 6.5–8.0 |
| GH (general hardness) | 6–8 dGH | 4–10 dGH |
| KH (carbonate hardness) | 2–4 dKH | 1–6 dKH |
| TDS | 150–250 ppm | 120–300 ppm |
| Ammonia / nitrite | 0 ppm | 0 ppm (always) |
| Nitrate | < 20 ppm | < 40 ppm |
Warmer water speeds up the breeding cycle — females berry faster and eggs hatch sooner near 76–78 °F — but it also shortens shrimp lifespan and lowers dissolved oxygen. Most hobbyists aiming for a long-lived, self-sustaining colony keep the tank at 70–74 °F and accept a slightly slower pace. Avoid copper-based medications and many fertilizers containing copper; even trace copper is toxic to invertebrates.
Because plants pull double duty here, choosing plants that absorb nitrates actively helps hold nitrate under that 20 ppm breeding target between water changes. Fast growers like hornwort and water sprite are quiet workhorses in shrimp tanks — our roundup of fast-growing aquarium plants for new tanks lists the best picks.
Choosing the Best Plants for a Shrimp Breeding Tank
The best shrimp plants share three traits: fine structure babies can hide in, large surface area for biofilm, and hardiness in low-tech conditions. You don't need CO2 injection or high light to run a great breeding tank — in fact, simple setups are easier to keep stable. Our roundup of the easiest aquarium plants that need no CO2 is a perfect shopping list for this project.
Mosses: The Shrimplet Nursery
Java moss, Christmas moss, and flame moss are the backbone of any breeding tank. Their dense branching creates a three-dimensional maze where newborn shrimp hide from adults and fish, and the surface area grows a thick layer of biofilm — the first food of every shrimplet. Tie moss to driftwood or rocks and let it fill in; a fist-sized clump can shelter hundreds of babies. Our comparison of the best aquarium mosses ranks which species establish fastest.
Carpeting and Foreground Plants
A low carpet gives grazing shrimp constant foraging ground and makes it easy to spot newborns against the substrate. Foreground carpeting plants for beginners like dwarf sagittaria and Monte Carlo (in low-tech setups, Marsilea hirsuta is more forgiving) form dense mats that shrimplets weave through safely.
Stems and Background Plants
Tall background stems provide cover for berried females, who prefer to carry their eggs in quieter, shaded zones. Background plants for tall tanks such as water wisteria and bacopa grow fast, soak up excess nutrients, and give the scape vertical structure. Red varieties double as a color echo of the shrimp themselves — see our red stem plants color guide for low-tech options that stay red without CO2.
Floating Plants
Frogbit, red root floaters, and salvinia dim the light slightly, which makes shrimp bolder and more active. Their dangling roots are prime grazing real estate and a favorite hangout for berried females.
The Breeding Cycle: What to Expect
Cherry shrimp breeding needs no triggers, no special foods, and no separate breeding tank. When conditions are stable and food is plentiful, it simply happens. Understanding the cycle helps you read your colony's health at a glance.
- Courtship: A freshly molted female releases pheromones; males swim frantically around the tank searching for her. This "mating dance" is your first sign breeding is underway.
- Berried female: After mating, the female carries 20–40 yellow-green eggs under her tail, fanning them constantly for 3–4 weeks. A visible saddle (yellow ovaries behind the head) means another clutch is already forming.
- Hatching: Eggs hatch into fully formed miniature shrimp — no larval stage. Newborns are about 2 mm, nearly transparent, and immediately independent.
- Growth: Shrimplets graze biofilm and powdered foods, molting every few days. They reach breeding size in about 3–4 months at typical colony temperatures. Peer-reviewed research on red cherry shrimp post-hatching development documents their growth and molting stages under laboratory conditions.
One caution: never release extra shrimp or plants into local waterways. Aquarium species can become ecological problems — read why you should never release aquarium plants into the wild, and extend the same ethic to livestock. Rehome surplus shrimp through local clubs or fellow hobbyists instead.
Feeding a Breeding Colony
Adults are unfussy omnivores, but a breeding colony needs consistent, varied nutrition to produce strong clutches and deep color. Feed small amounts daily — only what disappears within a couple of hours — and let biofilm and algae do the rest.
- Staple: a quality shrimp pellet or algae wafer, 3–4 times per week. Look for formulas with calcium for healthy molts.
- Vegetables: blanched spinach, zucchini, or mulberry leaves once or twice a week. Remove uneaten portions after 24 hours.
- Protein: occasional frozen daphnia or a pinch of high-quality fish food supports egg production in berried females.
- Powdered foods: bacter-based powders or finely crushed flakes, 2–3 times weekly in tiny doses, feed newborn shrimplets that can't yet reach pellets.
- Minerals: if your water is very soft (GH below 5), a mineral supplement helps molting; most hobbyists with moderate tap water never need one.
Overfeeding is the single most common beginner mistake. Uneaten food rots, spikes ammonia, and fuels planaria and hydra — both of which prey on shrimplets. A hungry colony is a breeding colony; err on the side of less.
Grading, Culling, and Keeping Color Strong
"Cherry shrimp" is the entry grade of a color ladder that runs from pale Sakura through Fire Red to Painted Fire Red. Without selection, colonies drift back toward wild-type brown over generations as lower-grade genes resurface. Most hobbyists who want a vivid red colony practice gentle culling: removing the palest shrimp and rehoming them to a separate "cull tank" or giving them away.
| Grade | Appearance | Colony role |
|---|---|---|
| Cherry (standard) | Translucent red, patchy coverage | Starter stock; hardy and affordable |
| Sakura | Solid red on body, legs mostly clear | Good breeding baseline for color |
| Fire Red | Full opaque red, legs tinted red | Show-quality colony target |
| Painted Fire Red | Deep opaque red, red legs and shell | Top grade; commands best prices |
| Rili / wild-type | Clear patches or brown-green | Cull candidates for rehoming |
Culling sounds harsh, but in practice it means moving lower-grade shrimp to their own tank where they live perfectly happy lives — many hobbyists run a second "skittles" tank just for culls. Start with the highest grade you can afford (Fire Red or better), cull lightly every few months, and your colony's color will hold or even improve. Avoid mixing red cherries with other Neocaridina color morphs (blue dream, yellow, orange) in a breeding tank — they interbreed freely and the offspring revert to brown wild-type within a generation or two.
Colony Management and Common Problems
A healthy colony mostly manages itself, but a few routine habits keep it thriving for years.
- Water changes: 10–20% weekly with temperature- and parameter-matched water. Large, sudden changes trigger failed molts; small and consistent wins.
- Top-offs: Evaporation concentrates minerals — top off with remineralized or distilled water, not more tap water, or TDS creeps upward over months.
- Molting: Finding empty white molts is a good sign — it means shrimp are growing. Leave molts in the tank; shrimp eat them to reclaim minerals.
- Population control: Colonies self-limit around available food and space. If numbers explode, sell or trade shrimp locally — a 10-gallon tank comfortably holds 100–200 cherries.
- Predators: Even "shrimp-safe" fish eat newborns. For maximum breeding, keep the tank shrimp-only, or limit tankmates to otocinclus and small snails.
The dreaded "white ring of death" — a molt line that splits around the body instead of the back — usually traces to GH/TDS mismatch rather than disease. If molts start failing, test your parameters before reaching for products; most hobbyists fix it with steadier water changes and, if needed, a modest mineral supplement.
For a deeper dive into plant choices that maximize shrimplet survival, see our guide to aquarium plants for shrimp tanks.
Frequently Asked Questions
How many cherry shrimp do I need to start a breeding colony?
Start with 10–15 shrimp, ideally a mix of males and females from a single breeder so they share genetics and water history. Females are larger and more deeply colored; males are smaller and paler. A starter group this size gives you genetic diversity and near-certain breeding within the first month, assuming the tank is cycled and mature. Smaller groups can work but establish more slowly and are vulnerable to skewed sex ratios.
How long does it take for cherry shrimp eggs to hatch?
Berried females carry their eggs for roughly 3–4 weeks, fanning them constantly to keep them oxygenated. Warmer water (76–78 °F) shortens the wait toward three weeks; cooler water (70–72 °F) extends it toward four or five. Eggs change color as they develop, and you may see tiny black eyespots just before hatching. The female typically re-berries within days of releasing a clutch, so a healthy colony always has several females carrying at once.
Do cherry shrimp eat their babies?
Adult cherry shrimp do not hunt their young the way fish do, and a well-fed colony is generally safe for shrimplets. That said, dense moss and fine-leaved plants are still essential — newborns are only 2 mm long and vulnerable to being accidentally swept into filters or picked off by any tankmates. This is why shrimp-only, heavily planted tanks produce dramatically more surviving babies than community setups.
Why did my cherry shrimp stop breeding?
The most common causes are unstable parameters, recent large water changes, temperatures consistently above 78 °F, or a new tank without enough biofilm. Check GH, KH, and TDS first — swings here stress females and pause breeding. Also confirm you actually have both sexes; an all-male or all-female group obviously won't reproduce. Most hobbyists find breeding resumes within a few weeks once water stabilizes and the tank matures.
Can I breed cherry shrimp in a tank with fish?
You can, but survival rates drop sharply. Even small, peaceful fish like guppies, tetras, and bettas will eat newborn shrimplets, and most hobbyists report colonies that merely hold steady rather than grow in community tanks. If your goal is a thriving, expanding colony, run a shrimp-only planted tank. If you just want a few shrimp as cleanup crew alongside fish, provide maximum moss cover and accept lower reproduction.
How do I keep my cherry shrimp bright red?
Color comes from genetics first, diet and environment second. Start with Fire Red grade or better stock, feed carotenoid-rich foods like algae wafers and blanched vegetables, and keep a dark substrate with dimmer lighting — shrimp color up against dark backgrounds. Regular gentle culling of the palest individuals prevents the colony from drifting back toward brown wild-type coloration over generations. Avoid crossing red cherries with other Neocaridina color morphs.
Your First Year as a Shrimp Breeder
Breeding cherry shrimp in a planted tank rewards patience more than equipment. Give your starter group a cycled, moss-thick, stable home; feed lightly and consistently; and let the colony find its rhythm. Within three months you'll likely see your first berried females, within six a visible population boom, and within a year a self-sustaining colony that supplies shrimp for your other tanks and fellow hobbyists.
Tissue-culture plants are the exception — they’re grown in sterile gel and adapt with minimal melting, which is part of what you’re paying for. Plants bought submersed from another hobbyist’s tank also transition with little melt, since they’re already in the right form.
Which Plants Melt Most (and Least)
Heavy melters (expect significant leaf loss)
- Cryptocorynes — infamous for “crypt melt,” sometimes dropping every leaf after any disturbance. They almost always recover from the roots within weeks.
- Stem plants grown emersed — rotala, ludwigia, and hygrophila often shed lower emersed leaves while the growing tips transition.
- Amazon swords — emersed-grown swords typically lose their broad oval aerial leaves and replace them with longer submersed ribbon leaves.
Light melters
- Anubias, java fern, bucephalandra — slow-growing rhizome plants transition gradually; occasional old-leaf melt but rarely dramatic.
- Vallisneria — usually transitions well, though it dislikes the move itself and may sulk for a week.
- Floating plants — minimal melt since their leaves were already at the air-water interface.
The Acclimation Protocol
Step 1: Quarantine or dip first
Before acclimating to your tank’s conditions, make sure you’re not acclimating pests along with the plant. Run new arrivals through our quarantine and dip protocol — it adds days upfront but prevents months of regret.
Step 2: Float to temperature-match (30 minutes)
Float the bag or container in your tank for 20–30 minutes to equalize temperature. Plants are less temperature-sensitive than fish, but a 10°F shock on top of transplant stress is an avoidable insult.
Step 3: Trim before planting
Remove any leaves that are already damaged, yellowing, or heavily algae-covered — they won’t recover and they’ll rot in your tank, feeding algae. For stem plants, trim off the bottom inch and any emersed leaves that look unlikely to adapt; the plant wastes energy maintaining leaves it’s going to shed anyway. Keep the healthy growing tips — that’s where recovery starts.
Step 4: Plant correctly the first time
Follow our planting guide — right depth, crown exposed on rosettes, rhizomes unburied on epiphytes. Every uprooting and replanting restarts the acclimation clock, so get placement right on the first attempt. Decide where each plant goes before it goes in the water.
Step 5: Run a gentle first week
For the first 7 days after planting:
- Moderate light — run your normal photoperiod but consider dropping intensity 20–30% if your light is dimmable. Blast-level light on a melting plant grows algae on the dying leaves, not recovery.
- Stable CO2 — if you inject CO2, keep it consistent. Fluctuating CO2 during acclimation is a melt accelerator. If you’re low-tech, this doesn’t apply — see growing without CO2.
- Half-strength fertilizer — new plants with damaged leaves can’t use full dosing, and the excess feeds algae. Ramp to full strength over 2–3 weeks per our fertilizer schedule.
- No disturbance — don’t move, trim, or “check on” new plants for at least two weeks. Every touch resets root establishment. This is especially critical for crypts.
Step 6: Remove melt, keep the base
As emersed leaves melt, remove the mushy material promptly — decaying leaves release ammonia and grow fungus that can spread to healthy tissue. But never discard the plant while the crown, rhizome, or roots are firm and alive. A crypt that’s lost every leaf but has firm roots is a plant that’s about to recover, not a dead plant. Give it 3–4 weeks before judging.
Telling Normal Melt From Real Problems
Normal transition melt:
- Affects oldest/emersed leaves first, newest growth last
- New submersed leaves emerge even as old ones dissolve
- Roots and crown stay firm and white/green
- Timeline: 1–4 weeks, then obvious new growth
Concerning melt (see our full melting diagnosis guide):
- New growth also melts or emerges deformed
- Rhizome or crown turns mushy and brown — this is rot, not transition
- Entire plant dissolves within days with no new growth after 4+ weeks
- Melting spreads to established plants that weren’t recently moved
Buying Tips to Minimize Melt
- Buy submersed-grown when available — hobbyist-grown cuttings transition with almost no melt.
- Choose tissue culture for sensitive species — crypts and delicate stems establish far more reliably from sterile cups.
- Avoid plants already melting in the store tank — some melt is normal, but a plant that’s mostly mush at purchase has less energy for recovery.
- Transport carefully — keep plants damp and out of direct sun/heat. A plant that dries out or cooks in a hot car melts far worse than one transported properly.
The First-Month Timeline: What to Expect Week by Week
Knowing what’s normal when removes most acclimation anxiety. Here’s the typical timeline for a healthy plant adapting to a new tank:
Week 1: The quiet week
Almost nothing visible happens. The plant is growing roots you can’t see and assessing its new environment. Some species (vallisneria, stem plants) may start shedding their lowest leaves. This is normal. Resist the urge to “help” — no moving, no extra fertilizer, no light changes. The most common beginner mistake is intervening during a week when the correct action is nothing.
Week 2: Melt peaks
This is when emersed leaves give up in earnest. Crypts may drop everything; swords shed their broad aerial leaves; stem plants lose lower foliage. It looks catastrophic and it’s usually fine. Keep removing mushy material, keep conditions stable, and watch the crown and growing tips — if those are firm and green, recovery is already underway.
Week 3: The turn
New submersed-adapted leaves emerge — smaller, thinner, often a slightly different shade of green than the emersed foliage. Stem plant tips start growing visibly; crypts push tiny curled leaves from the crown; swords unfurl narrow ribbon leaves. This is the moment most beginners exhale for the first time.
Week 4+: Established
New growth outpaces melt, and the plant is functionally yours. You can resume full-strength fertilizer, normal trimming, and stop treating it as fragile. Some slow growers (anubias, bucephalandra) take 6–8 weeks to show obvious progress — that’s their normal speed, not a problem.
Acclimating Different Plant Formats
Tissue-culture cups
Sterile, pest-free, and already adapted to high-humidity (not emersed) growth — tissue cultures melt the least of any format. Rinse the agar gel off gently (leftover gel rots and feeds fungus), split the portion into small plantlets, and plant per our planting guide. They establish slowly for the first two weeks, then accelerate. No dip needed, minimal acclimation stress — this is the premium experience you’re paying for.
Potted plants
Remove the pot and strip away the rockwool completely — leftover rockwool traps debris and rots. Tease the root mass apart gently; if it’s a dense mat, splitting it into 2–3 smaller portions actually establishes faster than planting one big clump (more growing points, better water flow around roots). Potted plants are usually emersed-grown, so expect the standard 2–4 week melt cycle.
Bare-root / bunched stems
Typically sold as weighted bunches. Remove any bands, foam, or weights, strip the lower leaves, and plant stems individually or in small groups. Bunched stems from the store are often already transitioning — check for new submersed growth at the tips, which tells you the plant is mid-adaptation and will settle quickly.
Hobbyist cuttings
Already submersed-grown and the fastest to establish — often showing new growth within days. The main acclimation factor is water-parameter difference between the two tanks. Float to temperature-match, plant promptly, and they’ll usually take off with minimal melt. This is why experienced hobbyists prefer trading cuttings over buying potted plants.
Frequently Asked Questions
Should I use a “plant starter” or transplant fertilizer?
Products marketed for transplant shock are mostly B-vitamins and mild hormones. They don’t hurt, but there’s no strong evidence they help aquarium plants specifically. Stable conditions and patience outperform any bottle. Save the money for more plants.
My new plant melted completely — bare crown, no leaves. Is it dead?
Probably not, if the crown or rhizome is firm. Crypts and swords routinely lose 100% of their leaves and regrow from the base within a month. The test is firmness: firm and pale/green means alive; mushy and brown/black means rot. Give firm-but-leafless plants a full 4 weeks before declaring them dead.
Can I speed up acclimation with extra light or CO2?
No — and trying usually backfires. A melting plant can’t use extra light; the excess just grows algae on its dying leaves. Keep light moderate and CO2 stable (not boosted) during acclimation. Growth speed comes from the plant’s own adaptation timeline, which you can’t rush, only avoid delaying.
Should new plants go straight into my main display tank?
After quarantine/dipping, yes — there’s no benefit to a separate “growing-in” tank for most plants. They acclimate to your water fastest in the tank they’ll live in. The exception is very delicate species going into a tank with boisterous fish; give those a few weeks in a calm corner or breeder box first.
The Patience Rule
The single most important acclimation skill is restraint: plant it right, set gentle conditions, remove decay, and then leave it alone for a month. The hobbyists with the best plant growth aren’t doing something clever in week one — they’re simply not interfering in weeks two through four while the plants do what they’ve evolved to do. Melt looks like failure and feels like failure, but in most cases it’s the visible part of a plant successfully becoming yours.