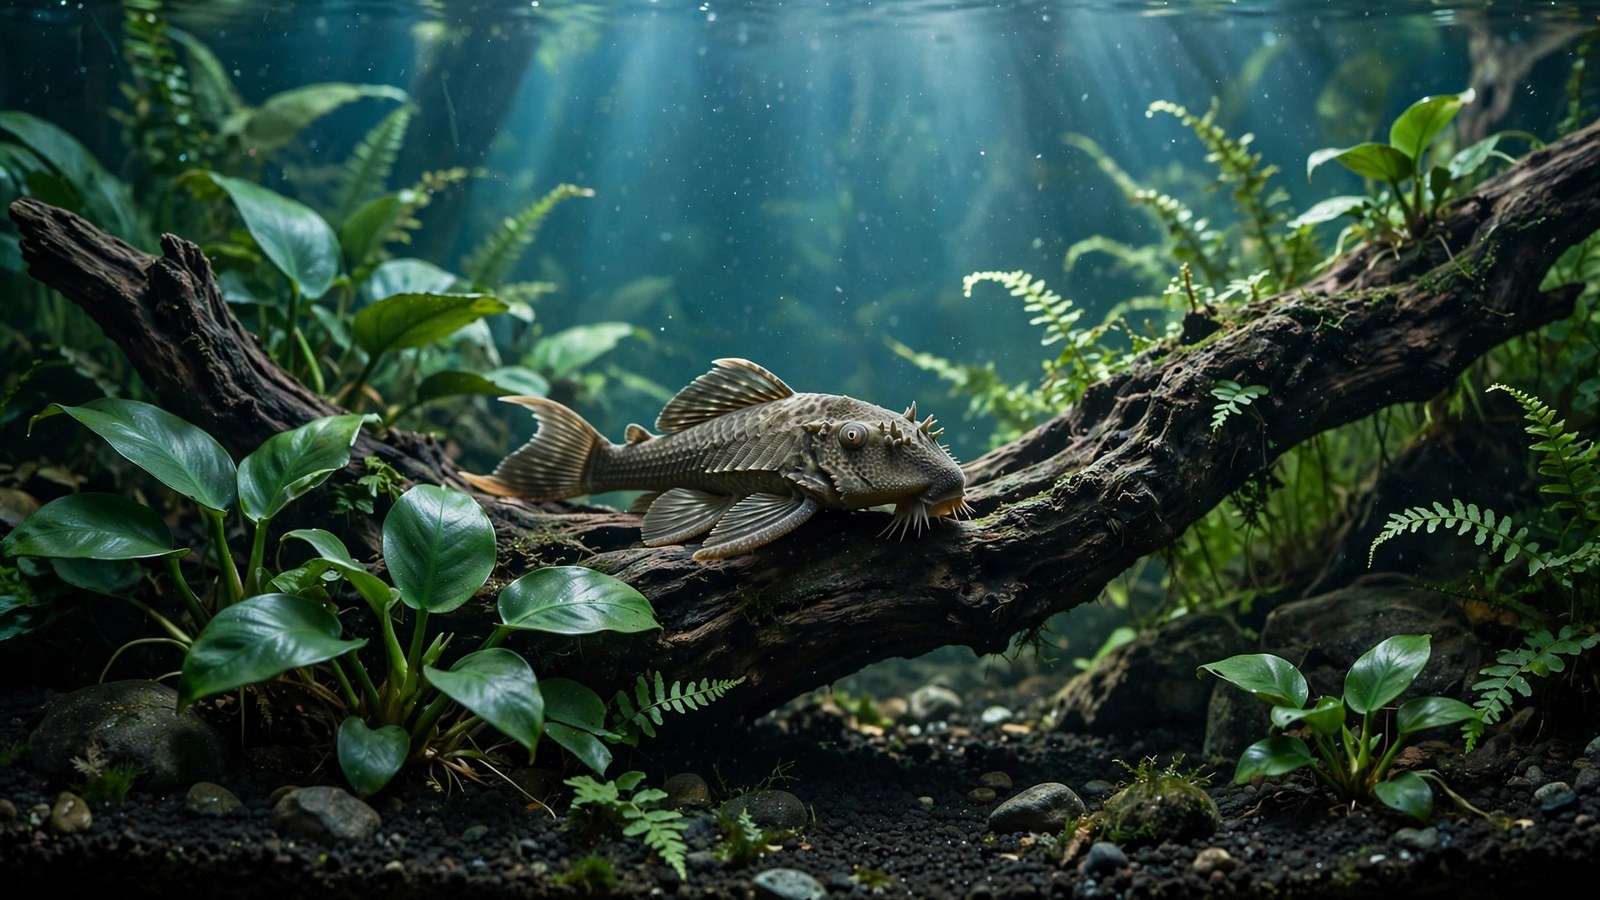
If you keep a pleco in your tank, you have probably watched it "mow" your plants overnight — a crisp row of stems reduced to stumps, a carpet uprooted like a tiny bulldozer drove through it, or whole leaves stripped clean along the edges. The good news is that planting with plecos is absolutely possible; you just can't plant like you would for tetras or guppies. The secret to choosing aquarium plants for pleco tanks is picking tough, leathery species and attaching them to hardscape instead of burying delicate stems in the substrate. Here are the seven plants that actually survive.
Why Plecos Destroy Plants
Understanding the damage is half the battle. Plecos ruin plants in three distinct ways, and each one rules out a different category of greenery:
- Rasping mouths: A pleco's mouth is a suction disc lined with tiny teeth. It scrapes algae and biofilm off every surface — including plant leaves. Soft leaves get shredded by this rasping; tough, waxy leaves shrug it off.
- Bulldozing: Common plecos grow to 12–24 inches (30–60 cm) and are clumsy, powerful swimmers. They uproot lightly anchored stems simply by barging through them, and they rearrange the substrate, unearthing anything that isn't deeply rooted.
- Digging: Many plecos, including bristlenoses, excavate shallow hollows under driftwood and rocks. Plants growing in the line of their construction work get buried or pushed aside.
Most failures come from planting soft-stemmed plants (rotala, ludwigia, cabomba) the normal way — buried in the substrate — and expecting them to hold up. They won't. The plants below succeed because they are either physically tough enough to ignore the rasping, attached to hardscape where nothing can uproot them, or rooted so deeply that bulldozing can't dislodge them.
The Strategy: Attach, Don't Bury
The single most important rule for pleco-proof planting: epiphyte plants attached to wood or rock beat substrate plants every time. An anubias glued to a chunk of driftwood cannot be uprooted, because it was never in the substrate to begin with. A pleco can swim into it, rasp across it, and sleep on it — and it stays put.
For rhizome plants (anubias, java fern, bolbitis, bucephalandra), the rule is absolute: the rhizome must stay unburied and exposed to the water column. Bury a rhizome and it rots. Attach it to hardscape with:
- Cyanoacrylate gel super glue — aquarium-safe once cured (seconds), apply to the rhizome, press onto wood or rock, hold 30 seconds.
- Fishing line — invisible and permanent; tie the rhizome firmly to the hardscape.
- Cotton thread — dissolves on its own over weeks, by which time the plant's rootlets have gripped the surface.
For a full walkthrough, see our guide on how to attach aquarium plants to driftwood the right way.
The 7 Plants That Survive Plecos
1. Anubias (A. barteri, A. nana, A. nana 'Petite')
Anubias is the undisputed king of pleco tanks. Its leaves are thick, waxy, and tough — plecos genuinely cannot rasp through them. Keepers report anubias surviving years in tanks with big common plecos that destroyed everything else. Growth is slow (a few leaves a month), but so is the damage rate, which is exactly the tradeoff you want. Barteri makes a bold centerpiece; nana and nana 'Petite' work for smaller tanks and nano pleco setups. Attach to hardscape with glue or line, keep the rhizome exposed, and give it low to medium light — bright light just grows algae on its slow leaves. Because it's so hardy, anubias is also one of the easiest aquarium plants that need no CO2.
2. Java Fern (Microsorum pterotoides)
Java fern earns its spot through a combination of toughness and taste. Its leaves are leathery, and plecos generally find them unpalatable — this is the plant you reach for when anubias alone feels repetitive. Like anubias it grows from a rhizome that must stay exposed, attached to wood or rock. It tolerates low light, hard water, and neglect, propagating itself via plantlets that form on older leaf tips. Java fern's toughness is shared with the whole family of epiphyte aquarium plants, and it's the workhorse most pleco keepers start with.
3. Bolbitis heudelotii (African Water Fern)
Bolbitis is the more dramatic cousin of java fern — darker green, with finely textured, almost lacy fronds, and a thick creeping rhizome that grips wood tenaciously. It's tougher than java fern and handles being jostled by large fish without tearing. It prefers low to medium light with good water flow, and grows slowly but steadily once established. Position it on driftwood in the midground — one of the toughest midground aquarium plants — and it will form an elegant, pleco-proof clump over a few months.
4. Bucephalandra
Bucephalandra ("buce") is the nano-scale answer to anubias: small, leathery leaves on a sturdy rhizome, available in dozens of varieties with subtly iridescent color. It's ideal for nano pleco tanks (clown plecos, otocinclus companions, dwarf species) where a full anubias barteri would be oversized. Same care as anubias — glue or tie to hardscape, rhizome exposed, low to medium light. Slow growing, but essentially indestructible once settled.
5. Java Moss (Taxiphyllum barbieri)
Here's a different kind of pleco-proofing: plecos can't uproot a plant that has no roots in the substrate. Java moss, draped and tied over driftwood or pressed between rocks, just forms a dense mat that plecos can walk across without doing anything to it. A big pleco might graze algae off the moss — which is actually what you want it to do. Tie it on with cotton thread or fishing line; it will anchor itself in a few weeks. Moss does best in low to medium light, and shaded patches stay cleaner than sunlit ones.
6. Crinum (Crinum calamistratum / C. thaianum)
Crinum — the onion or strap plant — survives by a different mechanism: tough, leathery strap leaves emerging from a large, heavy bulb anchored deep in the substrate. Plecos find the long, crinkled leaves unappealing, and the bulb is far too big and deep for bulldozing to dislodge once established. Give it a few months to anchor, keep the bulb's top slightly exposed, and it becomes a permanent fixture. It prefers medium light and appreciates root tabs. Crinum's sheer toughness is why it also does well in the most disruptive planted tanks of all — see our list of aquarium plants for African cichlid tanks.
7. Amazon Sword (Echinodorus bleheri)
An established, large Amazon sword can hold its own against bristlenose and smaller plecos: its massive root system goes inches deep into the substrate, and mature leaves are tough enough to survive routine rasping. This is the one plant on this list that genuinely gets planted in the substrate — plant it deep, let it establish for months before adding the pleco, and feed it root tabs. But be honest with yourself: a full-grown common pleco will still rasp tender new sword leaves and can uproot a young plant. If you keep a common, treat swords as a "usually survives" rather than a "guaranteed" pick, and consider it a bonus alongside the bulletproof epiphytes above. For substrate options that hold deep roots, our guide to aquarium plants that grow in gravel covers the planting basics.
| Plant | Toughness vs. plecos | Light needs | How to plant |
|---|---|---|---|
| Anubias | ★★★★★ | Low–medium | Attach rhizome to wood/rock |
| Java fern | ★★★★☆ | Low–medium | Attach rhizome to wood/rock |
| Bolbitis heudelotii | ★★★★☆ | Low–medium | Attach rhizome to wood/rock |
| Bucephalandra | ★★★★☆ | Low–medium | Glue/tie to hardscape |
| Java moss | ★★★★☆ | Low–medium | Tie over hardscape |
| Crinum | ★★★★☆ | Medium | Deep bulb in substrate |
| Amazon sword | ★★★☆☆ | Medium | Deep roots, established plants |
Bonus: Floating Plants — The Untouchable Nutrient Sponges
Plecos are bottom-dwellers; they cannot reach the surface. Frogbit and red root floaters live entirely at the waterline, where no pleco can uproot or rasp them. As a bonus, fast-growing floaters are excellent plants that absorb nitrates, soaking up the waste a big pleco produces and shading the tank, which slows algae. Keep a floating ring or airline-tube corral to stop them being pushed under the filter outflow, and thin them weekly so they don't block all the light from the epiphytes below. Our floating aquarium plants for beginners guide covers the best surface species for this job.
Plants to AVOID With Plecos
Knowing what to skip saves money and frustration:
- Soft-stemmed plants (rotala, ludwigia, cabomba, hornwort): rasped to shreds within days, and uprooted the first time a big pleco swims through.
- Delicate carpets (dwarf baby tears, Monte Carlo): carpeting species need weeks of undisturbed growth to root; pleco digging destroys them on night one.
- Fine-leaved plants (guppy grass, water sprite): leaves are thin enough for plecos to chew through incidentally while grazing biofilm.
- Newly planted swords or crypts: fine once established, but a fresh transplant gets uprooted before its roots anchor — let them root for months first, ideally in a separate grow-out tank.
Bristlenose vs. Common Pleco: Setting Honest Expectations
Your success rate depends heavily on which pleco you keep. Bristlenose plecos (4–6 inches) are the planted-tank-friendly option: they're small, relatively gentle, and the seven plants above will thrive alongside them. Common plecos (12–24 inches) are a different story — they're among the toughest tank-mate challenges along with goldfish and turtles, needing tanks of 125+ gallons as adults. With a common, stick to anubias, java fern, bolbitis, and moss attached to heavy hardscape, and accept that even Amazon swords may take damage. A big common in a small tank will destroy any plant setup, no matter how tough — that's a tank-size problem, not a plant problem.
That said, pleco-proof planting skills transfer: the same tough-attachment strategy works for aquarium plants for turtle tanks and other destructive tank mates.
Feed the Pleco So It Doesn't Turn to Plants
One underrated piece of the puzzle: a hungry pleco attacks plants more aggressively. Plecos rasp soft leaves partly out of hunger for vegetable matter. Keep sinking algae wafers, blanched zucchini or cucumber slices, and occasional wood (for species that rasp it) available. A well-fed pleco mostly ignores your plants; a starving one eats them. Combine good feeding with the tough plants above, let fast growers do the natural algae-control work, and your aquascape finally stands a chance.
Quick-Start Layout for a Pleco Tank
If you're starting from scratch, here's a layout that works:
- Back wall / tall driftwood: Anubias barteri and bolbitis attached at different heights.
- Midground wood: Java fern clusters and bucephalandra for texture contrast.
- Foreground rocks: Java moss draped between stones.
- Substrate: One established Amazon sword or a crinum in a back corner, planted deep.
- Surface: A patch of frogbit corralled away from the filter outflow.
Frequently Asked Questions
Will plecos eat anubias?
Almost never. Anubias leaves are thick, waxy, and genuinely unpleasant to chew, so plecos leave them alone even while rasping algae off the same leaf surface. This is the plant most experienced keepers recommend first for pleco tanks, and colonies of anubias have survived for years alongside large common plecos. If a pleco is genuinely eating anubias, it's usually starving — check that you're providing enough sinking food.
Can I plant Java fern in the substrate with a pleco?
No — and this rule has nothing to do with the pleco. Java fern grows from a rhizome that rots if buried in substrate, regardless of what's in the tank. Always attach java fern (and anubias, bolbitis, and bucephalandra) to wood or rock with glue, fishing line, or cotton thread. As a bonus, hardscape-attached plants can't be uprooted by a bulldozing pleco.
Why does my pleco keep uprooting my plants?
Usually it's one of three things: the plants are newly planted and haven't rooted yet, the species is too lightly anchored for a strong fish (soft stems, fine carpets), or you have a large common pleco in a tank too small for it. Fix it by switching to hardscape-attached epiphytes, letting substrate plants establish for months before adding the pleco, and making sure your tank size matches the adult size of your pleco species.
Do plecos eat floating plants?
Plecos are bottom feeders and essentially never reach the water surface, so frogbit, red root floaters, and water lettuce are effectively untouchable. Floating plants are ideal companions for pleco tanks because they absorb the heavy nitrate load plecos produce. Just corral them with a floating ring so they don't drift into the filter outflow and get shredded.
Which pleco is best for a planted tank?
Bristlenose plecos are the best choice — they stay small (4–6 inches), are effective algae cleaners, and rarely damage plants. Clown plecos and other dwarf species are similarly plant-safe. Common plecos are the worst choice for planted tanks: they grow to 12–24 inches, bulldoze relentlessly, and need 125+ gallon tanks as adults. Match the pleco species to your tank before choosing your plants.
Planting with plecos isn't about finding magic indestructible species — it's about strategy. Tough epiphytes on hardscape, deep-rooted rosettes planted well, floaters up top, and a well-fed pleco: that combination has kept thousands of planted pleco tanks thriving for years. Start with anubias and java fern, add complexity from there, and stop mourning your stem plants — they were never meant for this fight.
Tissue-culture plants are the exception — they’re grown in sterile gel and adapt with minimal melting, which is part of what you’re paying for. Plants bought submersed from another hobbyist’s tank also transition with little melt, since they’re already in the right form.
Which Plants Melt Most (and Least)
Heavy melters (expect significant leaf loss)
- Cryptocorynes — infamous for “crypt melt,” sometimes dropping every leaf after any disturbance. They almost always recover from the roots within weeks.
- Stem plants grown emersed — rotala, ludwigia, and hygrophila often shed lower emersed leaves while the growing tips transition.
- Amazon swords — emersed-grown swords typically lose their broad oval aerial leaves and replace them with longer submersed ribbon leaves.
Light melters
- Anubias, java fern, bucephalandra — slow-growing rhizome plants transition gradually; occasional old-leaf melt but rarely dramatic.
- Vallisneria — usually transitions well, though it dislikes the move itself and may sulk for a week.
- Floating plants — minimal melt since their leaves were already at the air-water interface.
The Acclimation Protocol
Step 1: Quarantine or dip first
Before acclimating to your tank’s conditions, make sure you’re not acclimating pests along with the plant. Run new arrivals through our quarantine and dip protocol — it adds days upfront but prevents months of regret.
Step 2: Float to temperature-match (30 minutes)
Float the bag or container in your tank for 20–30 minutes to equalize temperature. Plants are less temperature-sensitive than fish, but a 10°F shock on top of transplant stress is an avoidable insult.
Step 3: Trim before planting
Remove any leaves that are already damaged, yellowing, or heavily algae-covered — they won’t recover and they’ll rot in your tank, feeding algae. For stem plants, trim off the bottom inch and any emersed leaves that look unlikely to adapt; the plant wastes energy maintaining leaves it’s going to shed anyway. Keep the healthy growing tips — that’s where recovery starts.
Step 4: Plant correctly the first time
Follow our planting guide — right depth, crown exposed on rosettes, rhizomes unburied on epiphytes. Every uprooting and replanting restarts the acclimation clock, so get placement right on the first attempt. Decide where each plant goes before it goes in the water.
Step 5: Run a gentle first week
For the first 7 days after planting:
- Moderate light — run your normal photoperiod but consider dropping intensity 20–30% if your light is dimmable. Blast-level light on a melting plant grows algae on the dying leaves, not recovery.
- Stable CO2 — if you inject CO2, keep it consistent. Fluctuating CO2 during acclimation is a melt accelerator. If you’re low-tech, this doesn’t apply — see growing without CO2.
- Half-strength fertilizer — new plants with damaged leaves can’t use full dosing, and the excess feeds algae. Ramp to full strength over 2–3 weeks per our fertilizer schedule.
- No disturbance — don’t move, trim, or “check on” new plants for at least two weeks. Every touch resets root establishment. This is especially critical for crypts.
Step 6: Remove melt, keep the base
As emersed leaves melt, remove the mushy material promptly — decaying leaves release ammonia and grow fungus that can spread to healthy tissue. But never discard the plant while the crown, rhizome, or roots are firm and alive. A crypt that’s lost every leaf but has firm roots is a plant that’s about to recover, not a dead plant. Give it 3–4 weeks before judging.
Telling Normal Melt From Real Problems
Normal transition melt:
- Affects oldest/emersed leaves first, newest growth last
- New submersed leaves emerge even as old ones dissolve
- Roots and crown stay firm and white/green
- Timeline: 1–4 weeks, then obvious new growth
Concerning melt (see our full melting diagnosis guide):
- New growth also melts or emerges deformed
- Rhizome or crown turns mushy and brown — this is rot, not transition
- Entire plant dissolves within days with no new growth after 4+ weeks
- Melting spreads to established plants that weren’t recently moved
Buying Tips to Minimize Melt
- Buy submersed-grown when available — hobbyist-grown cuttings transition with almost no melt.
- Choose tissue culture for sensitive species — crypts and delicate stems establish far more reliably from sterile cups.
- Avoid plants already melting in the store tank — some melt is normal, but a plant that’s mostly mush at purchase has less energy for recovery.
- Transport carefully — keep plants damp and out of direct sun/heat. A plant that dries out or cooks in a hot car melts far worse than one transported properly.
The First-Month Timeline: What to Expect Week by Week
Knowing what’s normal when removes most acclimation anxiety. Here’s the typical timeline for a healthy plant adapting to a new tank:
Week 1: The quiet week
Almost nothing visible happens. The plant is growing roots you can’t see and assessing its new environment. Some species (vallisneria, stem plants) may start shedding their lowest leaves. This is normal. Resist the urge to “help” — no moving, no extra fertilizer, no light changes. The most common beginner mistake is intervening during a week when the correct action is nothing.
Week 2: Melt peaks
This is when emersed leaves give up in earnest. Crypts may drop everything; swords shed their broad aerial leaves; stem plants lose lower foliage. It looks catastrophic and it’s usually fine. Keep removing mushy material, keep conditions stable, and watch the crown and growing tips — if those are firm and green, recovery is already underway.
Week 3: The turn
New submersed-adapted leaves emerge — smaller, thinner, often a slightly different shade of green than the emersed foliage. Stem plant tips start growing visibly; crypts push tiny curled leaves from the crown; swords unfurl narrow ribbon leaves. This is the moment most beginners exhale for the first time.
Week 4+: Established
New growth outpaces melt, and the plant is functionally yours. You can resume full-strength fertilizer, normal trimming, and stop treating it as fragile. Some slow growers (anubias, bucephalandra) take 6–8 weeks to show obvious progress — that’s their normal speed, not a problem.
Acclimating Different Plant Formats
Tissue-culture cups
Sterile, pest-free, and already adapted to high-humidity (not emersed) growth — tissue cultures melt the least of any format. Rinse the agar gel off gently (leftover gel rots and feeds fungus), split the portion into small plantlets, and plant per our planting guide. They establish slowly for the first two weeks, then accelerate. No dip needed, minimal acclimation stress — this is the premium experience you’re paying for.
Potted plants
Remove the pot and strip away the rockwool completely — leftover rockwool traps debris and rots. Tease the root mass apart gently; if it’s a dense mat, splitting it into 2–3 smaller portions actually establishes faster than planting one big clump (more growing points, better water flow around roots). Potted plants are usually emersed-grown, so expect the standard 2–4 week melt cycle.
Bare-root / bunched stems
Typically sold as weighted bunches. Remove any bands, foam, or weights, strip the lower leaves, and plant stems individually or in small groups. Bunched stems from the store are often already transitioning — check for new submersed growth at the tips, which tells you the plant is mid-adaptation and will settle quickly.
Hobbyist cuttings
Already submersed-grown and the fastest to establish — often showing new growth within days. The main acclimation factor is water-parameter difference between the two tanks. Float to temperature-match, plant promptly, and they’ll usually take off with minimal melt. This is why experienced hobbyists prefer trading cuttings over buying potted plants.
Frequently Asked Questions
Should I use a “plant starter” or transplant fertilizer?
Products marketed for transplant shock are mostly B-vitamins and mild hormones. They don’t hurt, but there’s no strong evidence they help aquarium plants specifically. Stable conditions and patience outperform any bottle. Save the money for more plants.
My new plant melted completely — bare crown, no leaves. Is it dead?
Probably not, if the crown or rhizome is firm. Crypts and swords routinely lose 100% of their leaves and regrow from the base within a month. The test is firmness: firm and pale/green means alive; mushy and brown/black means rot. Give firm-but-leafless plants a full 4 weeks before declaring them dead.
Can I speed up acclimation with extra light or CO2?
No — and trying usually backfires. A melting plant can’t use extra light; the excess just grows algae on its dying leaves. Keep light moderate and CO2 stable (not boosted) during acclimation. Growth speed comes from the plant’s own adaptation timeline, which you can’t rush, only avoid delaying.
Should new plants go straight into my main display tank?
After quarantine/dipping, yes — there’s no benefit to a separate “growing-in” tank for most plants. They acclimate to your water fastest in the tank they’ll live in. The exception is very delicate species going into a tank with boisterous fish; give those a few weeks in a calm corner or breeder box first.
The Patience Rule
The single most important acclimation skill is restraint: plant it right, set gentle conditions, remove decay, and then leave it alone for a month. The hobbyists with the best plant growth aren’t doing something clever in week one — they’re simply not interfering in weeks two through four while the plants do what they’ve evolved to do. Melt looks like failure and feels like failure, but in most cases it’s the visible part of a plant successfully becoming yours.