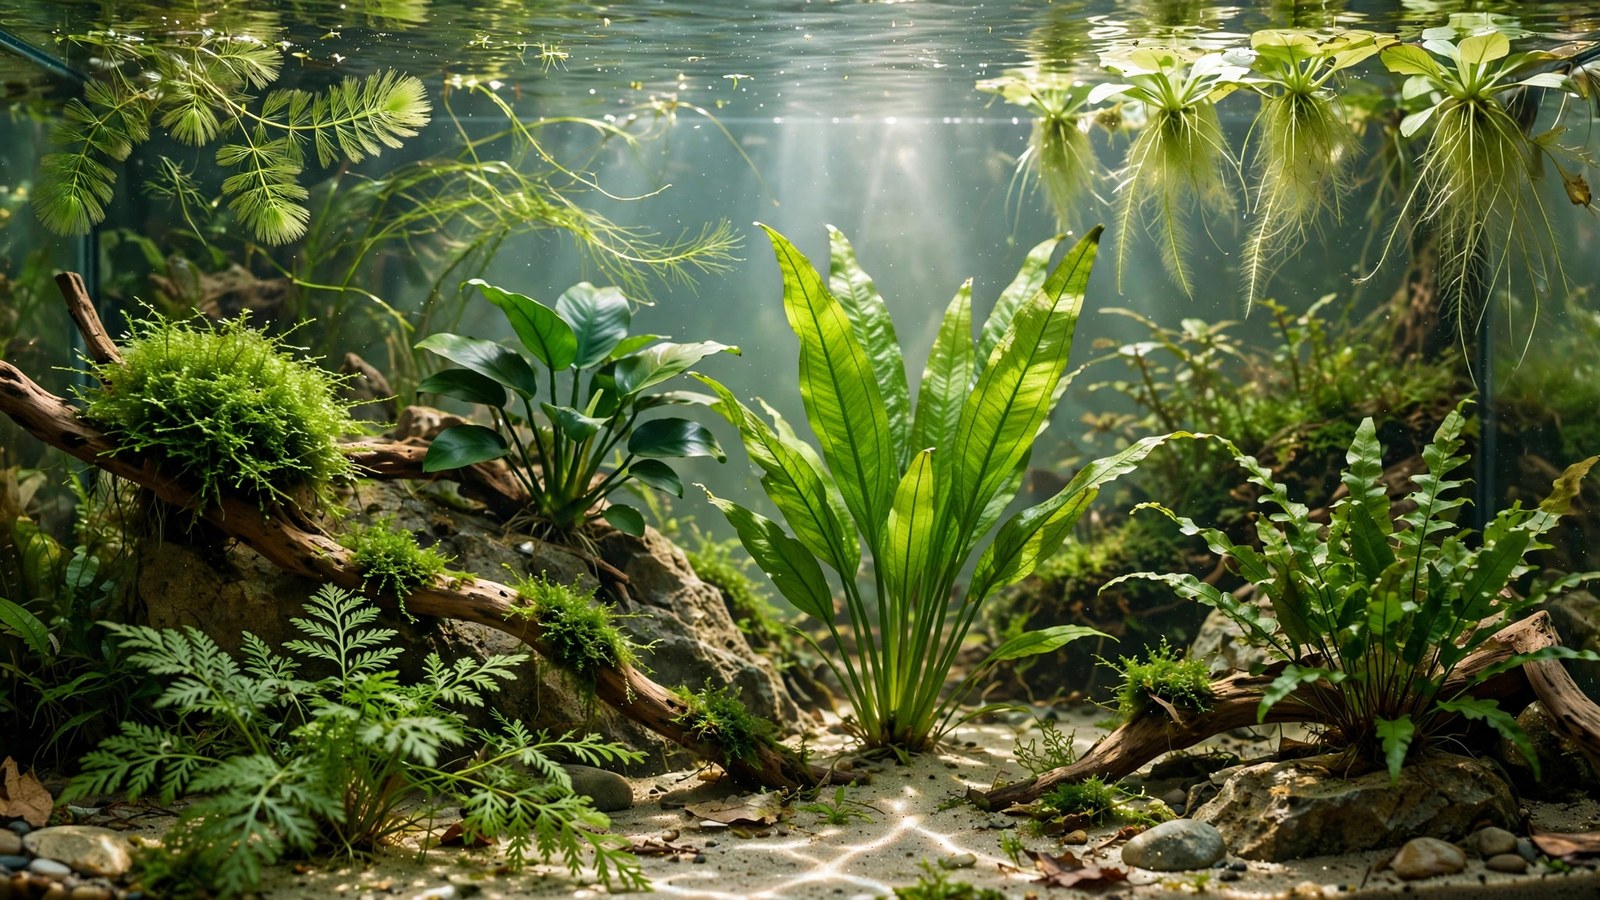
Turtles and aquarium plants have a complicated relationship — turtles eat plants, uproot plants, and bask under lights hot enough to cook delicate species. But a turtle tank without plants is a barren box, and the right plants survive even determined chelonians while improving water quality enormously. These 7 plants are the toughest, most turtle-compatible species: either too tough to eat, too fast to finish, or too cheap to mourn.
Why Plant a Turtle Tank?
Turtles are messy — high bioload, big appetites, constant waste. Plants absorb the resulting nitrates, compete with algae under the intense basking lights, and provide enrichment: turtles graze, hide among, and interact with vegetation. A planted turtle tank is healthier, better-looking, and more interesting for the turtle. The trick is choosing plants that survive the turtle, not just the water.
The Turtle-Plant Survival Rules
Rule 1: Tough beats tasty
Turtles sample everything. Plants with tough, bitter, or leathery leaves (anubias, java fern) get tasted once and ignored. Soft salad-like plants (duckweed, anacharis) get devoured — which is fine if you treat them as renewable turtle food rather than decoration.
Rule 2: Anchor everything
Turtles bulldoze. Anything lightly planted gets uprooted within days. Either plant deeply in heavy substrate, attach epiphytes firmly to heavy hardscape the turtle can't move, or grow plants in pots/containers the turtle can't tip. Weights, glue, and rocks are your friends.
Rule 3: Sacrificial vs structural
Divide your planting into two categories: structural plants (tough species that form the permanent aquascape) and sacrificial plants (fast cheap growers you toss in knowing the turtle will eat them). Both have value — sacrificial plants are excellent nutrition and enrichment. Just don't expect them to decorate.
Rule 4: Mind the basking heat
Basking lamps create intense heat and light in one corner. Don't plant delicate species directly under the basking spot — they'll cook. Tough epiphytes handle it; everything else goes in the cooler zones.
The 7 Best Turtle-Tank Plants
1. Anubias barteri (all varieties) — the untouchable
The number one turtle-tank plant. Anubias leaves are thick, leathery, and bitter — turtles taste them and move on. Glue large anubias barteri to heavy driftwood or rocks too big for the turtle to shift, and you have permanent, indestructible decoration. It tolerates the warm water, strong light, and hard knocks of turtle tanks without complaint. Our epiphyte guide covers attachment. Check Tropica's plant database for the full anubias variety range when shopping.
2. Java Fern — the other untouchable
Same story: tough, bitter, ignored by turtles. Java fern's leathery leaves survive tasting, and its rhizome grips wood firmly once established. Use the large standard variety for turtle tanks — small variants get lost in big setups. Attach with superglue gel to heavy hardscape; don't plant it (turtles will dig up anything in substrate).
3. Anacharis (Egeria densa) — the sacrificial salad
Turtles love eating anacharis, and that's the point. It's dirt cheap, grows explosively, and provides excellent fiber and enrichment as a food source. Toss in big bunches weighted down; the turtle grazes them over days while the plants absorb nitrates in the meantime. Think of it as a renewable vegetable garden, not decoration. Buy in bulk — you'll need it.
4. Hornwort — the floating filter
Hornwort floats, grows fast, absorbs massive amounts of nitrate, and turtles graze it lightly without destroying it (it's prickly and not very tasty). A floating hornwort mass also diffuses the intense basking light, reducing algae on the tank floor, and gives hatchlings shelter. It sheds needles when stressed — net them out, it's harmless.
5. Water Lettuce / Duckweed — the surface salad bar
Floating plants are turtle candy — nutritious, natural, and endlessly renewable if you keep a separate grow-out container. Duckweed doubles in days; water lettuce grows big rosettes turtles push around like toys. Keep a bucket or spare tank growing replacements, harvest handfuls into the turtle tank, and let the turtle feast. They'll never last as decoration, and they're not supposed to.
6. Vallisneria — the background that might survive
In tanks with less destructive turtles (many musk and mud turtles ignore plants), vallisneria forms a tough background curtain with deep roots that resist casual uprooting. With dedicated plant-eaters like sliders, treat it as semi-sacrificial — it grows fast enough to outpace moderate grazing. Plant in deep substrate pockets between heavy rocks for maximum anchoring.
7. Marimo Moss Balls — the turtle toy
Turtles push moss balls around like toys, occasionally nibble them, and generally can't destroy them — the dense algae ball just keeps rolling. They're more enrichment than filtration, but they're charming, nearly indestructible, and turtles seem to enjoy them. Rinse and roll them during water changes to keep them round and green.
Setting Up a Planted Turtle Tank
Hardscape first, plants second
Build the aquascape from heavy rocks and driftwood the turtle cannot move — this is the skeleton everything attaches to. Then attach anubias and java fern to the hardscape, plant vallisneria in protected substrate pockets, and float the sacrificial species. The hardscape does the visual heavy lifting; plants soften it.
Filtration still matters
Plants help enormously with nitrates but don't replace filtration in turtle tanks — the bioload is immense. Run a canister filter rated for 2–3x the tank volume, and let plants handle the dissolved organics and nitrates the filter leaves behind. Fast growers like hornwort and anacharis are your nitrate workhorses; see our nitrate-absorbing plants guide for the science. Turtles share many plant challenges with goldfish — see our tough plants for goldfish tanks for more destruction-proof species — and since most turtle-tank plants don't need substrate at all, our no-substrate planting guide covers the attachment techniques in depth.
Lighting
Turtle tanks already have intense basking lights — supplement with a full-spectrum LED on a timer for the plants (6–8 hours). The basking lamp alone creates a harsh spotlight; even ambient coverage grows plants better and reduces algae hotspots.
Plants to Avoid
Skip delicate, expensive, or slow-growing plants — red stems, HC Cuba carpets, bucephalandra. They'll be eaten or uprooted before they establish, and you'll resent the turtle for it. Also avoid anything treated with pesticides (many pond plants) and double-check toxicity: most common aquarium plants are safe, but avoid dieffenbachia, philodendron, and other toxic houseplants sometimes suggested for turtle basking areas.
Feeding Your Turtle From the Tank
Once you accept sacrificial plants as food, optimize for it: keep a dedicated 10-gallon grow-out tub (a bucket with a cheap light works) producing anacharis, duckweed, and water lettuce on a continuous harvest cycle. Feed the turtle fresh vegetation daily — it's closer to their natural diet than pellets alone and provides enrichment as they hunt and graze. Dark leafy aquarium plants are rich in fiber and carotenoids that support shell and skin health. Rotate what's in the main tank so the turtle always has something to investigate, and you'll notice more active, engaged behavior. The planted turtle tank isn't just decoration or filtration — it's a foraging environment, and foraging turtles are healthier turtles.
Frequently Asked Questions
Will plants really survive a red-eared slider?
Sliders are the most destructive common turtle — expect them to eat or uproot anything soft. But anubias and java fern glued to immovable hardscape survive even sliders, and sacrificial anacharis/hornwort provide food value while lasting days to weeks. Adjust expectations: with sliders, think "enrichment and filtration," not "aquascape."
Are aquarium plants safe for turtles to eat?
The common aquarium plants (anacharis, hornwort, duckweed, water lettuce, vallisneria) are all safe and nutritious. Avoid plants treated with pesticides or copper-based algaecides, and never feed houseplants unless you've verified they're non-toxic. When in doubt, stick to species sold for aquarium or pond use.
How do I stop my turtle uprooting everything?
Stop planting in open substrate — it's a losing battle. Switch to epiphytes glued to heavy hardscape (turtle can't uproot what isn't planted), plant in heavy pots topped with large pebbles the turtle can't dig through, and use plant weights on sacrificial bunches. Work with the bulldozer, not against it.
Can plants replace water changes in a turtle tank?
No — turtle bioload overwhelms even heavy planting. Plants significantly reduce nitrates between changes and improve water quality, letting you extend intervals modestly, but weekly partial water changes remain essential. Think of plants as a powerful supplement to maintenance, not a replacement.
My turtle eats the anubias too — now what?
A turtle determined enough to eat anubias will eat anything. Lean fully into the sacrificial strategy: keep the tank bare of decoration plants and run a separate cheap grow-out tub of anacharis, duckweed, and water lettuce as a constant food supply. The turtle gets enrichment and nutrition; you stop losing money on decoration.
Do I need CO2 or fertilizer in a turtle tank?
Neither — turtle waste is the fertilizer, and then some. The challenge in turtle tanks is excess nutrients, not deficiency. Fast-growing sacrificial plants thrive on the waste stream; structural epiphytes need nothing. Save your fertilizer money for more anacharis.
Plant for the Turtle You Have
The planted turtle tank isn't about the aquascape — it's about giving a messy, destructive, wonderful animal a richer environment while letting plants do quiet filtration work. Anchor anubias to rocks the turtle can't move, keep a bucket of anacharis growing for salads, and enjoy watching your turtle interact with living things instead of bare glass. That's the whole goal, and these seven plants achieve it.
Tissue-culture plants are the exception — they’re grown in sterile gel and adapt with minimal melting, which is part of what you’re paying for. Plants bought submersed from another hobbyist’s tank also transition with little melt, since they’re already in the right form.
Which Plants Melt Most (and Least)
Heavy melters (expect significant leaf loss)
- Cryptocorynes — infamous for “crypt melt,” sometimes dropping every leaf after any disturbance. They almost always recover from the roots within weeks.
- Stem plants grown emersed — rotala, ludwigia, and hygrophila often shed lower emersed leaves while the growing tips transition.
- Amazon swords — emersed-grown swords typically lose their broad oval aerial leaves and replace them with longer submersed ribbon leaves.
Light melters
- Anubias, java fern, bucephalandra — slow-growing rhizome plants transition gradually; occasional old-leaf melt but rarely dramatic.
- Vallisneria — usually transitions well, though it dislikes the move itself and may sulk for a week.
- Floating plants — minimal melt since their leaves were already at the air-water interface.
The Acclimation Protocol
Step 1: Quarantine or dip first
Before acclimating to your tank’s conditions, make sure you’re not acclimating pests along with the plant. Run new arrivals through our quarantine and dip protocol — it adds days upfront but prevents months of regret.
Step 2: Float to temperature-match (30 minutes)
Float the bag or container in your tank for 20–30 minutes to equalize temperature. Plants are less temperature-sensitive than fish, but a 10°F shock on top of transplant stress is an avoidable insult.
Step 3: Trim before planting
Remove any leaves that are already damaged, yellowing, or heavily algae-covered — they won’t recover and they’ll rot in your tank, feeding algae. For stem plants, trim off the bottom inch and any emersed leaves that look unlikely to adapt; the plant wastes energy maintaining leaves it’s going to shed anyway. Keep the healthy growing tips — that’s where recovery starts.
Step 4: Plant correctly the first time
Follow our planting guide — right depth, crown exposed on rosettes, rhizomes unburied on epiphytes. Every uprooting and replanting restarts the acclimation clock, so get placement right on the first attempt. Decide where each plant goes before it goes in the water.
Step 5: Run a gentle first week
For the first 7 days after planting:
- Moderate light — run your normal photoperiod but consider dropping intensity 20–30% if your light is dimmable. Blast-level light on a melting plant grows algae on the dying leaves, not recovery.
- Stable CO2 — if you inject CO2, keep it consistent. Fluctuating CO2 during acclimation is a melt accelerator. If you’re low-tech, this doesn’t apply — see growing without CO2.
- Half-strength fertilizer — new plants with damaged leaves can’t use full dosing, and the excess feeds algae. Ramp to full strength over 2–3 weeks per our fertilizer schedule.
- No disturbance — don’t move, trim, or “check on” new plants for at least two weeks. Every touch resets root establishment. This is especially critical for crypts.
Step 6: Remove melt, keep the base
As emersed leaves melt, remove the mushy material promptly — decaying leaves release ammonia and grow fungus that can spread to healthy tissue. But never discard the plant while the crown, rhizome, or roots are firm and alive. A crypt that’s lost every leaf but has firm roots is a plant that’s about to recover, not a dead plant. Give it 3–4 weeks before judging.
Telling Normal Melt From Real Problems
Normal transition melt:
- Affects oldest/emersed leaves first, newest growth last
- New submersed leaves emerge even as old ones dissolve
- Roots and crown stay firm and white/green
- Timeline: 1–4 weeks, then obvious new growth
Concerning melt (see our full melting diagnosis guide):
- New growth also melts or emerges deformed
- Rhizome or crown turns mushy and brown — this is rot, not transition
- Entire plant dissolves within days with no new growth after 4+ weeks
- Melting spreads to established plants that weren’t recently moved
Buying Tips to Minimize Melt
- Buy submersed-grown when available — hobbyist-grown cuttings transition with almost no melt.
- Choose tissue culture for sensitive species — crypts and delicate stems establish far more reliably from sterile cups.
- Avoid plants already melting in the store tank — some melt is normal, but a plant that’s mostly mush at purchase has less energy for recovery.
- Transport carefully — keep plants damp and out of direct sun/heat. A plant that dries out or cooks in a hot car melts far worse than one transported properly.
The First-Month Timeline: What to Expect Week by Week
Knowing what’s normal when removes most acclimation anxiety. Here’s the typical timeline for a healthy plant adapting to a new tank:
Week 1: The quiet week
Almost nothing visible happens. The plant is growing roots you can’t see and assessing its new environment. Some species (vallisneria, stem plants) may start shedding their lowest leaves. This is normal. Resist the urge to “help” — no moving, no extra fertilizer, no light changes. The most common beginner mistake is intervening during a week when the correct action is nothing.
Week 2: Melt peaks
This is when emersed leaves give up in earnest. Crypts may drop everything; swords shed their broad aerial leaves; stem plants lose lower foliage. It looks catastrophic and it’s usually fine. Keep removing mushy material, keep conditions stable, and watch the crown and growing tips — if those are firm and green, recovery is already underway.
Week 3: The turn
New submersed-adapted leaves emerge — smaller, thinner, often a slightly different shade of green than the emersed foliage. Stem plant tips start growing visibly; crypts push tiny curled leaves from the crown; swords unfurl narrow ribbon leaves. This is the moment most beginners exhale for the first time.
Week 4+: Established
New growth outpaces melt, and the plant is functionally yours. You can resume full-strength fertilizer, normal trimming, and stop treating it as fragile. Some slow growers (anubias, bucephalandra) take 6–8 weeks to show obvious progress — that’s their normal speed, not a problem.
Acclimating Different Plant Formats
Tissue-culture cups
Sterile, pest-free, and already adapted to high-humidity (not emersed) growth — tissue cultures melt the least of any format. Rinse the agar gel off gently (leftover gel rots and feeds fungus), split the portion into small plantlets, and plant per our planting guide. They establish slowly for the first two weeks, then accelerate. No dip needed, minimal acclimation stress — this is the premium experience you’re paying for.
Potted plants
Remove the pot and strip away the rockwool completely — leftover rockwool traps debris and rots. Tease the root mass apart gently; if it’s a dense mat, splitting it into 2–3 smaller portions actually establishes faster than planting one big clump (more growing points, better water flow around roots). Potted plants are usually emersed-grown, so expect the standard 2–4 week melt cycle.
Bare-root / bunched stems
Typically sold as weighted bunches. Remove any bands, foam, or weights, strip the lower leaves, and plant stems individually or in small groups. Bunched stems from the store are often already transitioning — check for new submersed growth at the tips, which tells you the plant is mid-adaptation and will settle quickly.
Hobbyist cuttings
Already submersed-grown and the fastest to establish — often showing new growth within days. The main acclimation factor is water-parameter difference between the two tanks. Float to temperature-match, plant promptly, and they’ll usually take off with minimal melt. This is why experienced hobbyists prefer trading cuttings over buying potted plants.
Frequently Asked Questions
Should I use a “plant starter” or transplant fertilizer?
Products marketed for transplant shock are mostly B-vitamins and mild hormones. They don’t hurt, but there’s no strong evidence they help aquarium plants specifically. Stable conditions and patience outperform any bottle. Save the money for more plants.
My new plant melted completely — bare crown, no leaves. Is it dead?
Probably not, if the crown or rhizome is firm. Crypts and swords routinely lose 100% of their leaves and regrow from the base within a month. The test is firmness: firm and pale/green means alive; mushy and brown/black means rot. Give firm-but-leafless plants a full 4 weeks before declaring them dead.
Can I speed up acclimation with extra light or CO2?
No — and trying usually backfires. A melting plant can’t use extra light; the excess just grows algae on its dying leaves. Keep light moderate and CO2 stable (not boosted) during acclimation. Growth speed comes from the plant’s own adaptation timeline, which you can’t rush, only avoid delaying.
Should new plants go straight into my main display tank?
After quarantine/dipping, yes — there’s no benefit to a separate “growing-in” tank for most plants. They acclimate to your water fastest in the tank they’ll live in. The exception is very delicate species going into a tank with boisterous fish; give those a few weeks in a calm corner or breeder box first.
The Patience Rule
The single most important acclimation skill is restraint: plant it right, set gentle conditions, remove decay, and then leave it alone for a month. The hobbyists with the best plant growth aren’t doing something clever in week one — they’re simply not interfering in weeks two through four while the plants do what they’ve evolved to do. Melt looks like failure and feels like failure, but in most cases it’s the visible part of a plant successfully becoming yours.