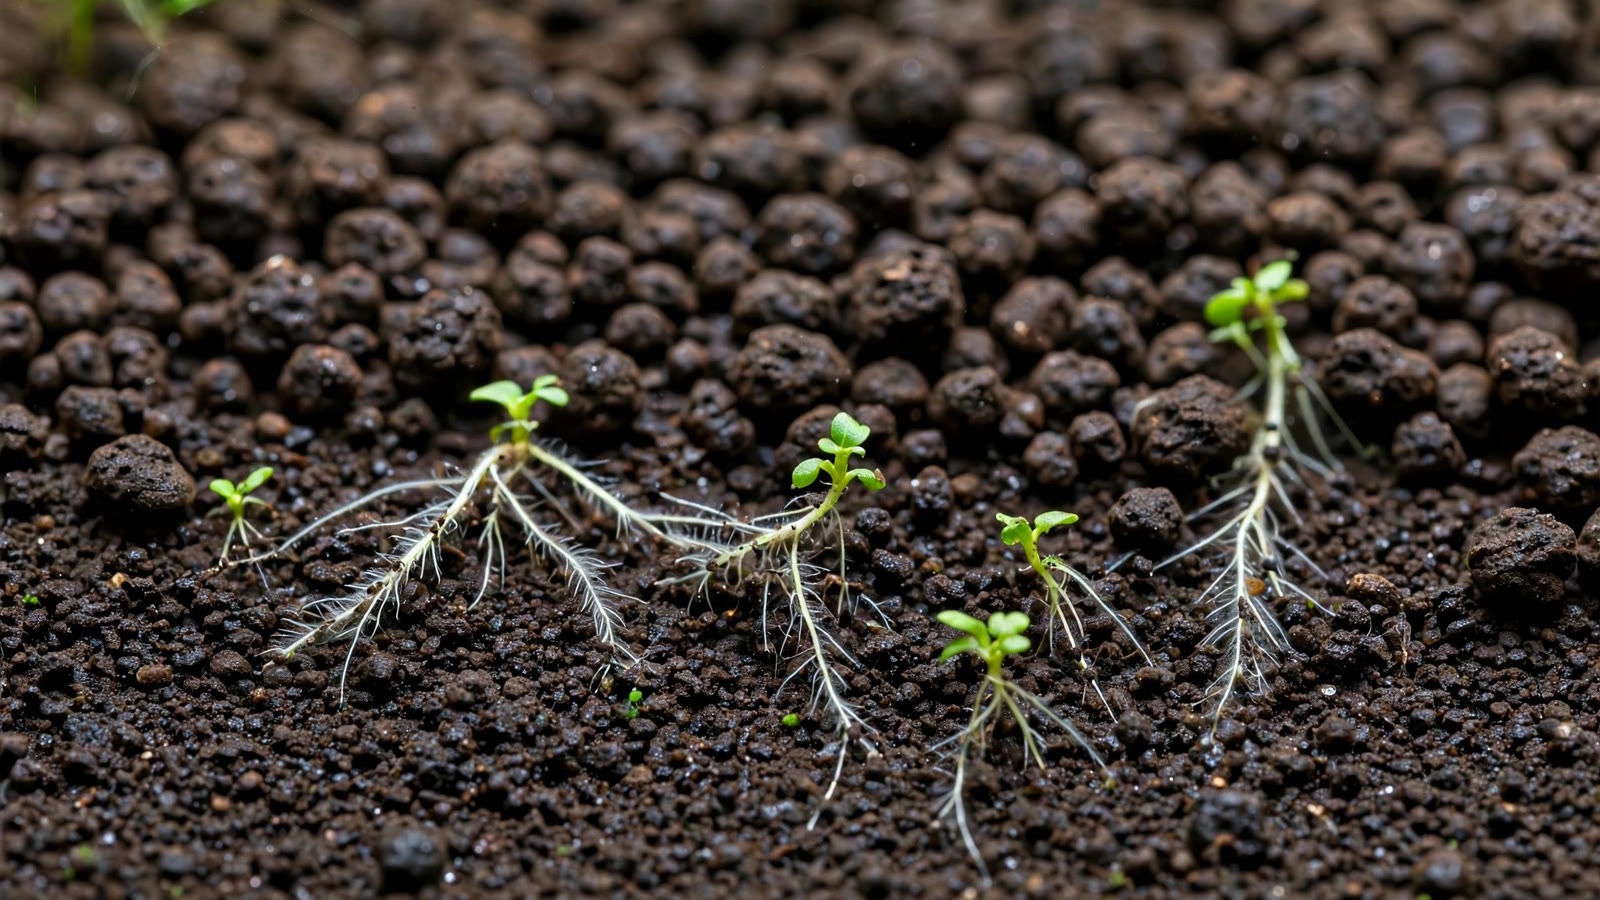
When you open your first bag of aquasoil and see that there is a powder version and a normal version, the question powder vs normal aquasoil feels like one of those small decisions that should not matter much. It matters more than most beginners expect. Grain size changes how roots grip, how tiny carpet sprigs stay put, how a nano tank reads at arm's length, and even how long the substrate keeps breathing before it compacts. Both types buffer water chemistry the same way, so the choice is not about chemistry — it is about physics, plants, and what kind of scape you are building.
Short version: normal-type aquasoil (~3 mm grains) is the forgiving all-rounder for most tanks. Powder-type aquasoil (~1 mm) is the specialist for nano tanks, carpeting plants, and delicate tissue-culture plantlets. And the move many experienced scapers actually make is neither extreme — a normal base with a thin powder cap in the planting zones gives you both worlds.
What Grain Size Actually Changes
Aquasoil looks like a single product, but the difference between 1 mm and 3 mm grains reshapes almost every interaction between your plants, your tools, and the bed itself. Understanding these five changes will make the rest of the decision obvious.
Root penetration and grip
Roots only care about what they can hold. The hair-fine roots of carpeting plants weave between 1 mm grains and anchor in days; in 3 mm grains the same sprigs often lift at the slightest flow. Chunky roots of swords, crypts, and stems prefer coarser grains to push against.
Planting ease with tweezers
Planting tiny carpet sprigs is one of the fiddliest jobs in the hobby. In powder, you slide a node of HC or Monte Carlo in and it stays — grains collapse back around the stem. In normal grains, the sprig often pops out when you release the tweezers, since the gap left behind is bigger than the plant.
Visual scale in nano tanks
In a 20-litre nano, 3 mm grains read like pebbles next to a 2 cm carpet sprig — the substrate draws the eye and shrinks the scape. Powder keeps the texture fine enough that a nano reads as a landscape, not a diorama.
Slope stability
Fine grains interlock tightly, so powder holds steep slopes and sculpted foregrounds far better than normal type. Coarse grains roll and slump under their own weight — fine for natural grades, frustrating for precise compositions.
Water circulation through the bed
Here the physics flips. Coarse grains leave bigger voids, so water flows through, oxygenating roots and flushing waste. Fine grains pack tightly, and the spaces shrink further over months. An all-powder bed can slowly develop compaction and anaerobic pockets — dark, smelly zones that stunt roots. Normal type is far more forgiving.
Powder vs Normal Aquasoil: The Comparison
| Factor | Powder type (~1 mm) | Normal type (~3 mm) |
|---|---|---|
| Grain size | ~1 mm fine granules | ~3 mm regular granules |
| Best uses | Nano tanks, carpets (HC, Glossostigma, Eleocharis), tissue-culture plantlets, iwagumi foregrounds | General planted tanks, stem plants, large rooted plants, community scapes |
| Planting ease for carpets | Excellent — tiny sprigs stay put immediately | Good but fiddly — sprigs often lift back out |
| Compaction risk | Higher — can develop anaerobic pockets over time | Low — open pore structure keeps the bed oxygenated |
| Cost per litre | Higher — premium pricing, sold in smaller bags | Lower — the economical standard |
| Slope holding | Excellent for steep contours | Best for gentle natural grades |
| Beginner-friendliness | Needs gentle maintenance habits | Very forgiving — the safe default |
| Visual scale | Fine texture, ideal for nano layouts | Reads slightly coarse in tanks under ~30 litres |
When Powder Wins
Powder earns its premium price in a few specific situations — and if your tank matches one of them, nothing else quite does the job.
- Carpeting plants. HC, Glossostigma, Monte Carlo, and dwarf hairgrass grip far faster in powder — their roots are fractions of a millimetre, and fine grains give them something to hold. If a carpet is the hero of your scape, powder (or a powder cap) is close to mandatory.
- Nano tanks. Under about 30 litres, normal grains look disproportionately chunky. Powder keeps proportions believable and lets tiny foreground details read correctly.
- Iwagumi foregrounds. Powder lets you plant right up against the rock bases and grade slopes without gaps where detritus collects.
- Tissue-culture plantlets. In-vitro plantlets are delicate with near-invisible roots. Powder is the kindest landing pad — they anchor first try instead of bobbing to the surface.
When Normal Wins
For everything else, normal type is the smarter buy — which is why it remains the best-selling aquasoil format overall.
- Stem plants. Species like Rotala, Ludwigia, and Limnophila push out thick root systems that prefer open, coarse grains — and they get replanted constantly during trimming, which normal grains survive far better.
- Large rooted plants. Swords, large crypts, and lotus need a deep, breathable root zone. In powder they sit too tight and damp; in normal type they spread freely.
- Budget builds. Powder costs more per litre and comes in smaller bags. An all-powder bed on a 200-litre tank would be expensive and pointless — the fine texture disappears at that scale anyway.
- Beginner-proofing and low maintenance. Normal grains are heavier, harder to disturb during water changes, compact less, and tolerate clumsy siphoning. If this is your first aquasoil tank, or you do not want to think about substrate, start here.
The Hybrid Method: Normal Base With a Powder Cap
The practice most professional scapers actually use is neither all-powder nor all-normal: a normal base layer with roughly 1 cm of powder on top in the planting zones. The two types share identical chemistry, so there is no mismatch. If you are choosing the best aquasoil for your planted tank, this hybrid approach works with almost any premium soil sold in both grain sizes.
Step by step
- Lay the normal base first. Build full depth in normal type — 4–6 cm in back, sloping down toward the front. This structural layer should be the majority of the bed.
- Mark carpet and foreground zones. The powder cap only needs to cover these areas, not the whole tank.
- Cap with about 1 cm of powder. Thick enough to plant into, thin enough that compaction risk stays low.
- Respect the boundary. Keep the cap in the planting zones; stems and heavy root feeders go straight into normal. Over time the fine grains sift downward through the coarse ones — gravity, not a flaw — so the boundary softens naturally.
One shared rule for both grain types: never rinse aquasoil. Rinsing dissolves granules into mud and washes away the nutrients you paid for. Fill the tank gently — a plate over the substrate during the first fill stops grains blasting around — and accept some initial cloudiness.
The Downsides, Honestly
Powder has real disadvantages that sellers rarely lead with.
- Cost per litre is higher. Powder bags are priced above normal type and sold in smaller sizes. Buy it only where its grain size earns it — caps and nano tanks, not whole large tanks.
- Compaction over time. An all-powder bed deeper than 5 cm gets denser month by month and can develop anaerobic pockets. Trumpet snails help aerate it, but the tendency never fully goes away.
- Sifting. In hybrid setups the powder cap gradually migrates down through the normal layer. It takes a year or more and is cosmetic more than harmful.
- Needs gentle siphoning. A gravel vac waved too close to powder will suck up grains with the detritus. Hover just above the surface instead; coarse grains tolerate rougher handling.
None of this disqualifies powder — it defines its job description. Used as a cap or in nano tanks, these downsides stay minor. Used as a deep all-powder bed in a big tank, they become the story of your substrate's life.
Planting Tools, Dry-Start, and Rescapes
How tweezers behave with each type
With powder, fine-tipped tweezers glide in and the grains seal behind them. With normal type, you want slightly blunter tips, and you will develop the habit of giving each sprig a wiggle-check after release — a few escapees after the first water change are normal.
Dry-start method
Dry-start — growing the carpet emersed in a humid, unfilled tank — pairs beautifully with powder: fine grains wick moisture evenly and hold tiny sprigs firmly while they root. Normal grains work too, but sprigs sit looser and dry unevenly between mistings. Either way, get your substrate depth right for aquarium plants before flooding, and remember aquasoil leaches ammonia at startup — a full cycle before stocking is essential with both types.
Rescapes and replanting
This is where normal type wins its biggest practical victory. Pulling a stem plant out of powder drags a cloud of fine grains up with the roots; pulling it from normal grains is clean — the bed barely notices. If your style involves constant replanting, normal type saves real frustration.
Buying Math: How Many Litres Do You Need?
Aquasoil is sold in 3-litre and 9-litre bags. The formula: length (cm) × width (cm) × target depth (cm) ÷ 1000 = litres, plus ~10% for sloping.
- 30 cm cube (nano, 5 cm depth): 4.5 L — one 3 L normal plus one 3 L powder for a cap, or two 3 L normal.
- 60 × 30 cm (60P, 6 cm depth): ~11 L — 9 L normal plus 3 L powder for the hybrid cap.
- 90 × 45 cm (90P, 6 cm depth): ~24 L — three 9 L normal, or two normal plus one powder for a deep powder foreground.
- 120 × 45 cm (120P, 7 cm depth): ~38 L — four 9 L normal; powder only where a foreground cap is needed.
Notice the pattern: the bigger the tank, the less powder matters. Powder is a finishing material — spend it where the eye and the plants land. If you are comparing brands too, our Fluval Stratum vs ADA Amazonia breakdown covers how the big names differ beyond grain size, and our aquasoil exhaustion guide shows how to tell when soil is spent.
Chemistry: The Same Underneath
What does not change between powder and normal type is chemistry. Both buffer pH and hardness downward, both leach ammonia in the first weeks, and both need the same cycle before livestock goes in. Treat grain size as a separate decision from nutrition: the grains change mechanics, not feeding. If you are comparing aquarium soil vs gravel or weighing root tabs vs aquasoil, the same logic applies. Some scapers also cap aquarium soil with sand for aesthetic reasons — a different technique entirely.
Frequently Asked Questions
Can I mix powder and normal aquasoil together in one layer?
You can, but it defeats the purpose — the fine grains settle between the coarse ones, so a mixed bed behaves like normal type at a higher price. Layering (normal base, powder cap in planting zones) keeps each grain size doing its own job.
Does powder aquasoil leach more ammonia than normal type?
No. The chemistry is identical — same pH buffering, same hardness reduction, same early ammonia spike. Powder may cloud water slightly more at first fill, but the ammonia curve and the need for a full fishless cycle are exactly the same.
Is powder aquasoil safe for bottom-dwellers like corydoras and loaches?
Yes — smooth, fine grains will not damage barbels, unlike coarse gravel. The caution is behavioural: digging species churn a powder cap and mix it into the base faster. In heavy-digging tanks, normal type or a shallower cap holds up better.
How long does a powder cap last before it compacts?
A thin 1 cm cap in a planted foreground usually stays healthy 2–3 years, partly because carpet roots and trumpet snails aerate it. Problems appear mainly in deep all-powder beds (5 cm plus), which can develop anaerobic pockets within a year or two — a rotten-egg smell during rescaping is the warning sign.
Can I use powder type in a low-tech tank without CO2?
Absolutely — grain size has nothing to do with CO2 demand. Powder suits low-tech nanos growing slow carpets like Monte Carlo or dwarf hairgrass. With slower growth the roots aerate the bed less, so keep the powder layer modest and avoid deep all-powder beds in low-energy setups.
Is powder worth it if I only keep stem plants?
Honestly, no. Stem plants root thickly, get replanted often, and prefer the open structure of normal grains. Powder adds cost, compaction risk, and messier replanting for no benefit in a stem-only tank.
The Bottom Line
Powder vs normal aquasoil is not a question of which is better — it is which job the substrate has to do. Carpets, nano tanks, iwagumi foregrounds, and tissue-culture plantlets justify powder. Stems, big rooted plants, budgets, and low-maintenance setups justify normal. And the hybrid method — a normal base with a 1 cm powder cap in the planting zones — gives most scapers the best of both. Whichever you choose, do not rinse it, cycle the tank before stocking, and let the plants confirm the choice: rooted fast and spreading means the grains did their job.
For further reading, the UKAPS guide to substrates by George Farmer covers the chemistry and behaviour of aquarium soils in depth, and ADA's official substrate pages describe the grain structure of their Amazonia line including the Powder type.
Tissue-culture plants are the exception — they’re grown in sterile gel and adapt with minimal melting, which is part of what you’re paying for. Plants bought submersed from another hobbyist’s tank also transition with little melt, since they’re already in the right form.
Which Plants Melt Most (and Least)
Heavy melters (expect significant leaf loss)
- Cryptocorynes — infamous for “crypt melt,” sometimes dropping every leaf after any disturbance. They almost always recover from the roots within weeks.
- Stem plants grown emersed — rotala, ludwigia, and hygrophila often shed lower emersed leaves while the growing tips transition.
- Amazon swords — emersed-grown swords typically lose their broad oval aerial leaves and replace them with longer submersed ribbon leaves.
Light melters
- Anubias, java fern, bucephalandra — slow-growing rhizome plants transition gradually; occasional old-leaf melt but rarely dramatic.
- Vallisneria — usually transitions well, though it dislikes the move itself and may sulk for a week.
- Floating plants — minimal melt since their leaves were already at the air-water interface.
The Acclimation Protocol
Step 1: Quarantine or dip first
Before acclimating to your tank’s conditions, make sure you’re not acclimating pests along with the plant. Run new arrivals through our quarantine and dip protocol — it adds days upfront but prevents months of regret.
Step 2: Float to temperature-match (30 minutes)
Float the bag or container in your tank for 20–30 minutes to equalize temperature. Plants are less temperature-sensitive than fish, but a 10°F shock on top of transplant stress is an avoidable insult.
Step 3: Trim before planting
Remove any leaves that are already damaged, yellowing, or heavily algae-covered — they won’t recover and they’ll rot in your tank, feeding algae. For stem plants, trim off the bottom inch and any emersed leaves that look unlikely to adapt; the plant wastes energy maintaining leaves it’s going to shed anyway. Keep the healthy growing tips — that’s where recovery starts.
Step 4: Plant correctly the first time
Follow our planting guide — right depth, crown exposed on rosettes, rhizomes unburied on epiphytes. Every uprooting and replanting restarts the acclimation clock, so get placement right on the first attempt. Decide where each plant goes before it goes in the water.
Step 5: Run a gentle first week
For the first 7 days after planting:
- Moderate light — run your normal photoperiod but consider dropping intensity 20–30% if your light is dimmable. Blast-level light on a melting plant grows algae on the dying leaves, not recovery.
- Stable CO2 — if you inject CO2, keep it consistent. Fluctuating CO2 during acclimation is a melt accelerator. If you’re low-tech, this doesn’t apply — see growing without CO2.
- Half-strength fertilizer — new plants with damaged leaves can’t use full dosing, and the excess feeds algae. Ramp to full strength over 2–3 weeks per our fertilizer schedule.
- No disturbance — don’t move, trim, or “check on” new plants for at least two weeks. Every touch resets root establishment. This is especially critical for crypts.
Step 6: Remove melt, keep the base
As emersed leaves melt, remove the mushy material promptly — decaying leaves release ammonia and grow fungus that can spread to healthy tissue. But never discard the plant while the crown, rhizome, or roots are firm and alive. A crypt that’s lost every leaf but has firm roots is a plant that’s about to recover, not a dead plant. Give it 3–4 weeks before judging.
Telling Normal Melt From Real Problems
Normal transition melt:
- Affects oldest/emersed leaves first, newest growth last
- New submersed leaves emerge even as old ones dissolve
- Roots and crown stay firm and white/green
- Timeline: 1–4 weeks, then obvious new growth
Concerning melt (see our full melting diagnosis guide):
- New growth also melts or emerges deformed
- Rhizome or crown turns mushy and brown — this is rot, not transition
- Entire plant dissolves within days with no new growth after 4+ weeks
- Melting spreads to established plants that weren’t recently moved
Buying Tips to Minimize Melt
- Buy submersed-grown when available — hobbyist-grown cuttings transition with almost no melt.
- Choose tissue culture for sensitive species — crypts and delicate stems establish far more reliably from sterile cups.
- Avoid plants already melting in the store tank — some melt is normal, but a plant that’s mostly mush at purchase has less energy for recovery.
- Transport carefully — keep plants damp and out of direct sun/heat. A plant that dries out or cooks in a hot car melts far worse than one transported properly.
The First-Month Timeline: What to Expect Week by Week
Knowing what’s normal when removes most acclimation anxiety. Here’s the typical timeline for a healthy plant adapting to a new tank:
Week 1: The quiet week
Almost nothing visible happens. The plant is growing roots you can’t see and assessing its new environment. Some species (vallisneria, stem plants) may start shedding their lowest leaves. This is normal. Resist the urge to “help” — no moving, no extra fertilizer, no light changes. The most common beginner mistake is intervening during a week when the correct action is nothing.
Week 2: Melt peaks
This is when emersed leaves give up in earnest. Crypts may drop everything; swords shed their broad aerial leaves; stem plants lose lower foliage. It looks catastrophic and it’s usually fine. Keep removing mushy material, keep conditions stable, and watch the crown and growing tips — if those are firm and green, recovery is already underway.
Week 3: The turn
New submersed-adapted leaves emerge — smaller, thinner, often a slightly different shade of green than the emersed foliage. Stem plant tips start growing visibly; crypts push tiny curled leaves from the crown; swords unfurl narrow ribbon leaves. This is the moment most beginners exhale for the first time.
Week 4+: Established
New growth outpaces melt, and the plant is functionally yours. You can resume full-strength fertilizer, normal trimming, and stop treating it as fragile. Some slow growers (anubias, bucephalandra) take 6–8 weeks to show obvious progress — that’s their normal speed, not a problem.
Acclimating Different Plant Formats
Tissue-culture cups
Sterile, pest-free, and already adapted to high-humidity (not emersed) growth — tissue cultures melt the least of any format. Rinse the agar gel off gently (leftover gel rots and feeds fungus), split the portion into small plantlets, and plant per our planting guide. They establish slowly for the first two weeks, then accelerate. No dip needed, minimal acclimation stress — this is the premium experience you’re paying for.
Potted plants
Remove the pot and strip away the rockwool completely — leftover rockwool traps debris and rots. Tease the root mass apart gently; if it’s a dense mat, splitting it into 2–3 smaller portions actually establishes faster than planting one big clump (more growing points, better water flow around roots). Potted plants are usually emersed-grown, so expect the standard 2–4 week melt cycle.
Bare-root / bunched stems
Typically sold as weighted bunches. Remove any bands, foam, or weights, strip the lower leaves, and plant stems individually or in small groups. Bunched stems from the store are often already transitioning — check for new submersed growth at the tips, which tells you the plant is mid-adaptation and will settle quickly.
Hobbyist cuttings
Already submersed-grown and the fastest to establish — often showing new growth within days. The main acclimation factor is water-parameter difference between the two tanks. Float to temperature-match, plant promptly, and they’ll usually take off with minimal melt. This is why experienced hobbyists prefer trading cuttings over buying potted plants.
Frequently Asked Questions
Should I use a “plant starter” or transplant fertilizer?
Products marketed for transplant shock are mostly B-vitamins and mild hormones. They don’t hurt, but there’s no strong evidence they help aquarium plants specifically. Stable conditions and patience outperform any bottle. Save the money for more plants.
My new plant melted completely — bare crown, no leaves. Is it dead?
Probably not, if the crown or rhizome is firm. Crypts and swords routinely lose 100% of their leaves and regrow from the base within a month. The test is firmness: firm and pale/green means alive; mushy and brown/black means rot. Give firm-but-leafless plants a full 4 weeks before declaring them dead.
Can I speed up acclimation with extra light or CO2?
No — and trying usually backfires. A melting plant can’t use extra light; the excess just grows algae on its dying leaves. Keep light moderate and CO2 stable (not boosted) during acclimation. Growth speed comes from the plant’s own adaptation timeline, which you can’t rush, only avoid delaying.
Should new plants go straight into my main display tank?
After quarantine/dipping, yes — there’s no benefit to a separate “growing-in” tank for most plants. They acclimate to your water fastest in the tank they’ll live in. The exception is very delicate species going into a tank with boisterous fish; give those a few weeks in a calm corner or breeder box first.
The Patience Rule
The single most important acclimation skill is restraint: plant it right, set gentle conditions, remove decay, and then leave it alone for a month. The hobbyists with the best plant growth aren’t doing something clever in week one — they’re simply not interfering in weeks two through four while the plants do what they’ve evolved to do. Melt looks like failure and feels like failure, but in most cases it’s the visible part of a plant successfully becoming yours.