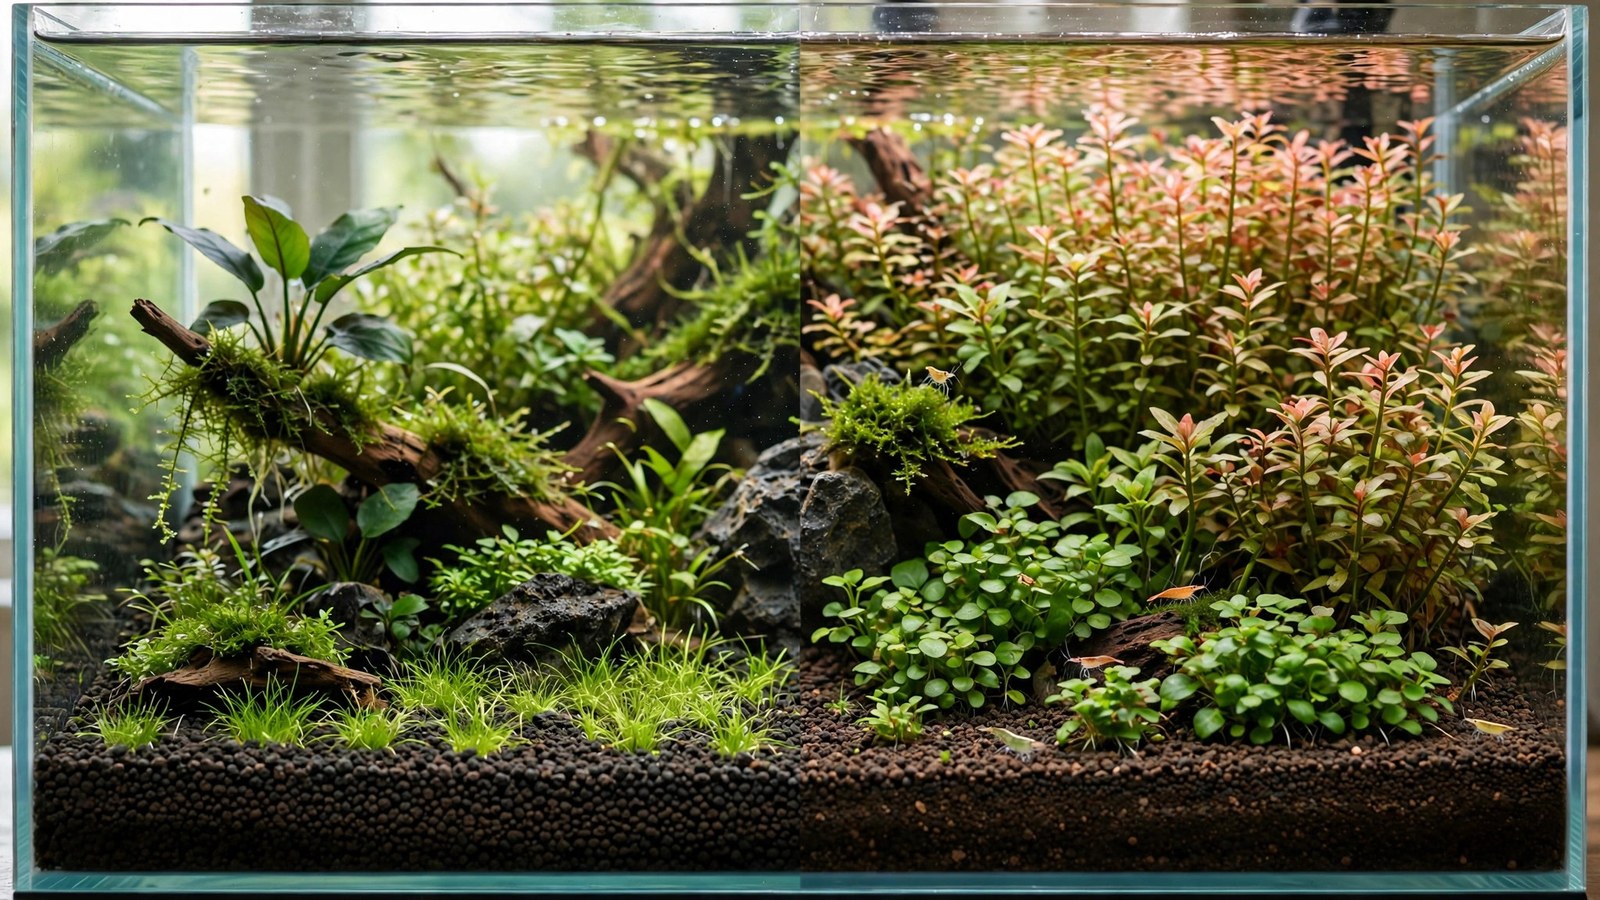
Choosing between Fluval Stratum and ADA Amazonia is the classic planted-tank fork in the road, and it's not really about which one is "better" — it's about which one matches the kind of aquarist you are. Both are volcanic-soil aquasoils that feed plants, buffer pH down, and support serious planted tanks. But they differ in nutrient load, texture, ammonia leaching, longevity, and price, and picking the wrong one for your setup creates months of frustration that the right one would have avoided.
This is an honest comparison drawn from years of running both in real tanks — not marketing copy from either brand. Here's where each one shines, where each one stumbles, and how to choose for your tank, your plants, and your patience level.
Quick Comparison Table
| Feature | ADA Amazonia (Ver. 1 / II) | Fluval Stratum |
|---|---|---|
| Nutrient load | Very rich — among the richest aquasoils made | Moderate — lighter than Amazonia |
| Ammonia leach on startup | Heavy (weeks of daily water changes) | Light to moderate |
| Buffering strength | Strong — holds pH ~6.0–6.8, KH near zero | Moderate — softens water less aggressively |
| Grain size | 2–5 mm granules, uniform | 2–4 mm granules, slightly rounder |
| Dust / water clarity | Initial cloudiness; clears with water changes | Very clean; minimal dust |
| Breakdown rate | 1–3 years before granules soften | 1–2 years; granules hold shape well |
| Nutrient exhaustion | ~1–2 years of heavy feeding | ~6–12 months; leaner from the start |
| Price per liter | Premium (roughly 2–3× Fluval) | Mid-range, widely available |
What Both Products Actually Are
Both are baked volcanic soil granules — natural andosol-type soil that's been heat-treated into porous pellets that hold their shape underwater. The porosity matters: it gives beneficial bacteria enormous surface area and lets roots penetrate easily while water flows through the substrate bed. This is the same technology family as all major aquasoils, and our best aquasoil roundup compares the wider field.
Where they diverge is formulation. ADA Amazonia is built around a rich organic nutrient package designed for the "ADA system" — high light, CO2 injection, and lean water-column dosing, with the substrate doing the heavy nutritional lifting. Fluval Stratum is a more generalist product: moderate nutrients, gentler buffering, and cleaner handling, aimed at planted tanks of all levels including shrimp tanks (it's marketed heavily toward shrimp keepers for its soft-water properties).
Nutrient Content: Amazonia Feeds Harder
There's no contest here. ADA Amazonia is one of the most nutrient-dense substrates on the market — rich in nitrogen, phosphorus, and trace elements. In a new Amazonia setup, you typically need no water-column fertilizer at all for the first 2–3 months; the soil is feeding everything. Heavy root feeders like Cryptocoryne and sword plants explode in it, and carpeting plants establish fast.
Fluval Stratum has meaningful nutrients but noticeably less. Most keepers find they need to start supplementing with root tabs or liquid fertilizer within a few months, sometimes sooner in demanding tanks. This isn't a flaw — it makes Stratum more forgiving in low-tech tanks where Amazonia's richness can fuel algae if plant mass is low. But if you're running high light and CO2 with demanding stems, Amazonia's nutrient reserve is a real growth advantage for the first year.
The Ammonia Leach: Amazonia's Famous Startup
The single biggest practical difference between these two is what happens in the first month. ADA Amazonia leaches a large amount of ammonia as its organic fraction breaks down — enough to register several ppm on a test kit for weeks. This is deliberate: it kickstarts the nitrogen cycle aggressively and feeds early plant growth. But it means the standard Amazonia startup protocol is large daily water changes (50%+) for the first 1–2 weeks, tapering to every few days — the classic "dark start" or fishless cycle. Our aquasoil ammonia leach guide walks through the whole cycling protocol in detail.
Fluval Stratum leaches some ammonia too, but far less — most users report a mild, brief spike that's manageable with normal cycling. If you want to add livestock sooner, or you don't want to commit to weeks of daily water changes, Stratum's gentler startup is a genuine quality-of-life advantage. It's one reason Stratum is popular for shrimp tanks, where keepers want stable, clean water fast.
Buffering: How They Treat Your Water
Both substrates are buffering soils — they pull carbonate hardness (KH) out of the water and drive pH down into the soft, acidic range that most tropical plants and many fish prefer. But the strength differs.
Amazonia buffers hard: in most tap water it will hold pH around 6.0–6.8 and strip KH to near zero for a year or more. This is ideal for soft-water species and caridina shrimp, but it means your water chemistry is being actively managed by the substrate — when the buffering exhausts, pH can swing. See our buffering substrates guide for how long buffering lasts and how to monitor it.
Fluval Stratum buffers more gently. It lowers pH into the mid-6s and reduces KH, but with less authority — in hard tap water, it may struggle to hold acidic pH long-term. For moderately soft tap water or shrimp tanks, this gentle touch is perfect. For very hard tap water where you need serious buffering to keep caridina shrimp, Amazonia (or a dedicated shrimp soil) has the edge.
Texture, Dust, and Day-One Handling
Here's where Fluval Stratum quietly wins for many hobbyists. It's remarkably clean out of the bag — very little dust, and the granules are slightly rounded. You can pour it in, fill carefully, and get clear water quickly. Amazonia, especially the original Version 1, is dustier: the first fill is cloudy, and the standard advice is to fill slowly and run the filter while doing those heavy early water changes. Amazonia II improved on this, but Stratum still wins on clean handling.
Grain size is similar (both in the 2–5 mm range), which matters for substrate depth and planting ease. Both hold slopes well enough for aquascaping, though neither is a true "slope specialist" — for dramatic hills, most scapers still use substrate supports underneath.
One practical note: Stratum granules are lighter than Amazonia's. This is nice for planting (stems push in easily) but means very fine carpeting plants and some stem cuttings uproot more easily before roots establish. Planting tweezers at an angle and a patient first week solve most of it.
Longevity: How Long Each Lasts
All aquasoils break down eventually — the granules soften, crumble into mud, and the bed compacts. Amazonia typically holds its granule structure for 1–3 years depending on how much you disturb it; its nutrient reserve feeds heavily for the first 12–18 months. Fluval Stratum holds its physical shape well (often 2+ years) but its lighter nutrient load exhausts sooner — many keepers start supplementing around the 6-month mark. Our aquasoil exhaustion guide covers how to recognize a spent substrate and what to do about it.
When comparing "cost per year of service," the price gap narrows a bit: Amazonia costs more upfront but feeds longer without supplements. Still, over a typical 2–3 year scape life, Stratum remains the cheaper total package for most setups.
Which One Should You Buy?
Choose ADA Amazonia if…
- You're running CO2 injection with medium-high light and want maximum plant growth from day one
- You grow demanding stems, carpets, or heavy root feeders and want the substrate to do the nutritional heavy lifting
- You keep caridina shrimp or soft-water fish and want strong, long-lasting buffering
- You don't mind (or enjoy) the intensive startup routine — daily water changes for a couple of weeks
- Budget allows the premium price
Choose Fluval Stratum if…
- This is your first aquasoil tank — the gentler startup is far more forgiving
- You're running low-tech (no CO2) — Amazonia's richness can outpace plant uptake and feed algae without CO2-driven growth
- You want a shrimp or betta tank with clean handling and quick clear water
- You'd rather supplement with root tabs and liquid ferts on your own schedule than manage a rich soil's startup
- Budget matters — Stratum delivers 80% of the experience at half the price
The honest middle ground
Many experienced keepers use both: Amazonia in the high-energy display tank where they're chasing growth, Stratum in breeding tanks, quarantine setups, and low-tech projects. They're tools, not tribes. If you're still deciding between soil and inert options entirely, our aquarium soil vs gravel comparison lays out the full landscape.
Setup Tips for Each
Amazonia setup essentials
- Don't rinse it — you'll destroy the nutrient coating and make mud. Pour dry into the dry tank.
- Slope and shape your layout before adding water.
- Fill very slowly (pour onto a plate or plastic bag) to minimize dust storms.
- Run the filter immediately and start 50% daily water changes for week 1, every other day for week 2, then twice weekly until ammonia reads zero.
- Plant heavily from day one — fast growers like stem plants soak up the leached ammonia.
- Hold off on water-column fertilizer for the first 6–8 weeks; the soil has it covered.
Stratum setup essentials
- Also don't rinse — it's clean enough already, and rinsing wastes the nutrient content.
- Fill carefully; you'll get clear water much faster than with Amazonia.
- Cycle normally — expect a mild ammonia bump, not a flood. A standard fishless cycle works.
- Start light liquid fertilization within the first month; add root tabs under heavy root feeders by month 2–3.
- Be gentle when planting fine carpets — the light granules shift until roots lock in.
Frequently Asked Questions
Can I mix Fluval Stratum and ADA Amazonia in one tank?
You can, and some scapers do — typically Amazonia as the main bed with Stratum in areas where they want gentler conditions, or Stratum as a cap. But mixing complicates the startup: the tank behaves like Amazonia (heavy ammonia leach) while gaining little of Stratum's clean handling. For most keepers, picking one and committing is simpler and more predictable.
Is ADA Amazonia worth the price over Fluval Stratum?
For high-tech, CO2-injected tanks with demanding plants, yes — the nutrient reserve and buffering strength translate into visibly faster, lusher growth in the first year, which is when most scapes are photographed and judged. For low-tech tanks, shrimp tanks, or first aquasoils, Stratum's value is better and the growth difference is marginal.
Which is better for a betta or shrimp tank?
Fluval Stratum, in most cases. Its gentle ammonia leach, clean handling, and moderate buffering suit small tanks and sensitive livestock. The exception is caridina shrimp (crystal reds, Taiwan bees) in hard tap water, where Amazonia's stronger buffering holds the low pH these shrimp need.
Do I need to replace either substrate, or can it last forever?
Neither lasts forever. The nutrient content exhausts in 6 months (Stratum) to 2 years (Amazonia), and the granules physically break down over 1–3 years. You can extend useful life with root tabs and liquid fertilizer, but eventually the bed compacts and a full replacement gives dramatically better results. Our exhaustion guide covers the signs and the replacement process.
Can I use these substrates without CO2?
Yes, both work in low-tech tanks. Stratum is the easier pick without CO2 because its moderate nutrients match slower growth rates. Amazonia works too, but you must plant heavily from day one and be disciplined about water changes, or the rich leachate feeds algae faster than your plants can use it.
The Bottom Line
ADA Amazonia is the performance option: richer, stronger-buffering, and more demanding — it rewards experienced hands with exceptional growth and asks for an intensive startup in return. Fluval Stratum is the friendly option: cleaner, gentler, cheaper, and more forgiving, at the cost of a lighter nutrient reserve you'll supplement sooner. Match the soil to your setup's energy level and your own patience, and either one will grow you a beautiful planted tank.
Tissue-culture plants are the exception — they’re grown in sterile gel and adapt with minimal melting, which is part of what you’re paying for. Plants bought submersed from another hobbyist’s tank also transition with little melt, since they’re already in the right form.
Which Plants Melt Most (and Least)
Heavy melters (expect significant leaf loss)
- Cryptocorynes — infamous for “crypt melt,” sometimes dropping every leaf after any disturbance. They almost always recover from the roots within weeks.
- Stem plants grown emersed — rotala, ludwigia, and hygrophila often shed lower emersed leaves while the growing tips transition.
- Amazon swords — emersed-grown swords typically lose their broad oval aerial leaves and replace them with longer submersed ribbon leaves.
Light melters
- Anubias, java fern, bucephalandra — slow-growing rhizome plants transition gradually; occasional old-leaf melt but rarely dramatic.
- Vallisneria — usually transitions well, though it dislikes the move itself and may sulk for a week.
- Floating plants — minimal melt since their leaves were already at the air-water interface.
The Acclimation Protocol
Step 1: Quarantine or dip first
Before acclimating to your tank’s conditions, make sure you’re not acclimating pests along with the plant. Run new arrivals through our quarantine and dip protocol — it adds days upfront but prevents months of regret.
Step 2: Float to temperature-match (30 minutes)
Float the bag or container in your tank for 20–30 minutes to equalize temperature. Plants are less temperature-sensitive than fish, but a 10°F shock on top of transplant stress is an avoidable insult.
Step 3: Trim before planting
Remove any leaves that are already damaged, yellowing, or heavily algae-covered — they won’t recover and they’ll rot in your tank, feeding algae. For stem plants, trim off the bottom inch and any emersed leaves that look unlikely to adapt; the plant wastes energy maintaining leaves it’s going to shed anyway. Keep the healthy growing tips — that’s where recovery starts.
Step 4: Plant correctly the first time
Follow our planting guide — right depth, crown exposed on rosettes, rhizomes unburied on epiphytes. Every uprooting and replanting restarts the acclimation clock, so get placement right on the first attempt. Decide where each plant goes before it goes in the water.
Step 5: Run a gentle first week
For the first 7 days after planting:
- Moderate light — run your normal photoperiod but consider dropping intensity 20–30% if your light is dimmable. Blast-level light on a melting plant grows algae on the dying leaves, not recovery.
- Stable CO2 — if you inject CO2, keep it consistent. Fluctuating CO2 during acclimation is a melt accelerator. If you’re low-tech, this doesn’t apply — see growing without CO2.
- Half-strength fertilizer — new plants with damaged leaves can’t use full dosing, and the excess feeds algae. Ramp to full strength over 2–3 weeks per our fertilizer schedule.
- No disturbance — don’t move, trim, or “check on” new plants for at least two weeks. Every touch resets root establishment. This is especially critical for crypts.
Step 6: Remove melt, keep the base
As emersed leaves melt, remove the mushy material promptly — decaying leaves release ammonia and grow fungus that can spread to healthy tissue. But never discard the plant while the crown, rhizome, or roots are firm and alive. A crypt that’s lost every leaf but has firm roots is a plant that’s about to recover, not a dead plant. Give it 3–4 weeks before judging.
Telling Normal Melt From Real Problems
Normal transition melt:
- Affects oldest/emersed leaves first, newest growth last
- New submersed leaves emerge even as old ones dissolve
- Roots and crown stay firm and white/green
- Timeline: 1–4 weeks, then obvious new growth
Concerning melt (see our full melting diagnosis guide):
- New growth also melts or emerges deformed
- Rhizome or crown turns mushy and brown — this is rot, not transition
- Entire plant dissolves within days with no new growth after 4+ weeks
- Melting spreads to established plants that weren’t recently moved
Buying Tips to Minimize Melt
- Buy submersed-grown when available — hobbyist-grown cuttings transition with almost no melt.
- Choose tissue culture for sensitive species — crypts and delicate stems establish far more reliably from sterile cups.
- Avoid plants already melting in the store tank — some melt is normal, but a plant that’s mostly mush at purchase has less energy for recovery.
- Transport carefully — keep plants damp and out of direct sun/heat. A plant that dries out or cooks in a hot car melts far worse than one transported properly.
The First-Month Timeline: What to Expect Week by Week
Knowing what’s normal when removes most acclimation anxiety. Here’s the typical timeline for a healthy plant adapting to a new tank:
Week 1: The quiet week
Almost nothing visible happens. The plant is growing roots you can’t see and assessing its new environment. Some species (vallisneria, stem plants) may start shedding their lowest leaves. This is normal. Resist the urge to “help” — no moving, no extra fertilizer, no light changes. The most common beginner mistake is intervening during a week when the correct action is nothing.
Week 2: Melt peaks
This is when emersed leaves give up in earnest. Crypts may drop everything; swords shed their broad aerial leaves; stem plants lose lower foliage. It looks catastrophic and it’s usually fine. Keep removing mushy material, keep conditions stable, and watch the crown and growing tips — if those are firm and green, recovery is already underway.
Week 3: The turn
New submersed-adapted leaves emerge — smaller, thinner, often a slightly different shade of green than the emersed foliage. Stem plant tips start growing visibly; crypts push tiny curled leaves from the crown; swords unfurl narrow ribbon leaves. This is the moment most beginners exhale for the first time.
Week 4+: Established
New growth outpaces melt, and the plant is functionally yours. You can resume full-strength fertilizer, normal trimming, and stop treating it as fragile. Some slow growers (anubias, bucephalandra) take 6–8 weeks to show obvious progress — that’s their normal speed, not a problem.
Acclimating Different Plant Formats
Tissue-culture cups
Sterile, pest-free, and already adapted to high-humidity (not emersed) growth — tissue cultures melt the least of any format. Rinse the agar gel off gently (leftover gel rots and feeds fungus), split the portion into small plantlets, and plant per our planting guide. They establish slowly for the first two weeks, then accelerate. No dip needed, minimal acclimation stress — this is the premium experience you’re paying for.
Potted plants
Remove the pot and strip away the rockwool completely — leftover rockwool traps debris and rots. Tease the root mass apart gently; if it’s a dense mat, splitting it into 2–3 smaller portions actually establishes faster than planting one big clump (more growing points, better water flow around roots). Potted plants are usually emersed-grown, so expect the standard 2–4 week melt cycle.
Bare-root / bunched stems
Typically sold as weighted bunches. Remove any bands, foam, or weights, strip the lower leaves, and plant stems individually or in small groups. Bunched stems from the store are often already transitioning — check for new submersed growth at the tips, which tells you the plant is mid-adaptation and will settle quickly.
Hobbyist cuttings
Already submersed-grown and the fastest to establish — often showing new growth within days. The main acclimation factor is water-parameter difference between the two tanks. Float to temperature-match, plant promptly, and they’ll usually take off with minimal melt. This is why experienced hobbyists prefer trading cuttings over buying potted plants.
Frequently Asked Questions
Should I use a “plant starter” or transplant fertilizer?
Products marketed for transplant shock are mostly B-vitamins and mild hormones. They don’t hurt, but there’s no strong evidence they help aquarium plants specifically. Stable conditions and patience outperform any bottle. Save the money for more plants.
My new plant melted completely — bare crown, no leaves. Is it dead?
Probably not, if the crown or rhizome is firm. Crypts and swords routinely lose 100% of their leaves and regrow from the base within a month. The test is firmness: firm and pale/green means alive; mushy and brown/black means rot. Give firm-but-leafless plants a full 4 weeks before declaring them dead.
Can I speed up acclimation with extra light or CO2?
No — and trying usually backfires. A melting plant can’t use extra light; the excess just grows algae on its dying leaves. Keep light moderate and CO2 stable (not boosted) during acclimation. Growth speed comes from the plant’s own adaptation timeline, which you can’t rush, only avoid delaying.
Should new plants go straight into my main display tank?
After quarantine/dipping, yes — there’s no benefit to a separate “growing-in” tank for most plants. They acclimate to your water fastest in the tank they’ll live in. The exception is very delicate species going into a tank with boisterous fish; give those a few weeks in a calm corner or breeder box first.
The Patience Rule
The single most important acclimation skill is restraint: plant it right, set gentle conditions, remove decay, and then leave it alone for a month. The hobbyists with the best plant growth aren’t doing something clever in week one — they’re simply not interfering in weeks two through four while the plants do what they’ve evolved to do. Melt looks like failure and feels like failure, but in most cases it’s the visible part of a plant successfully becoming yours.