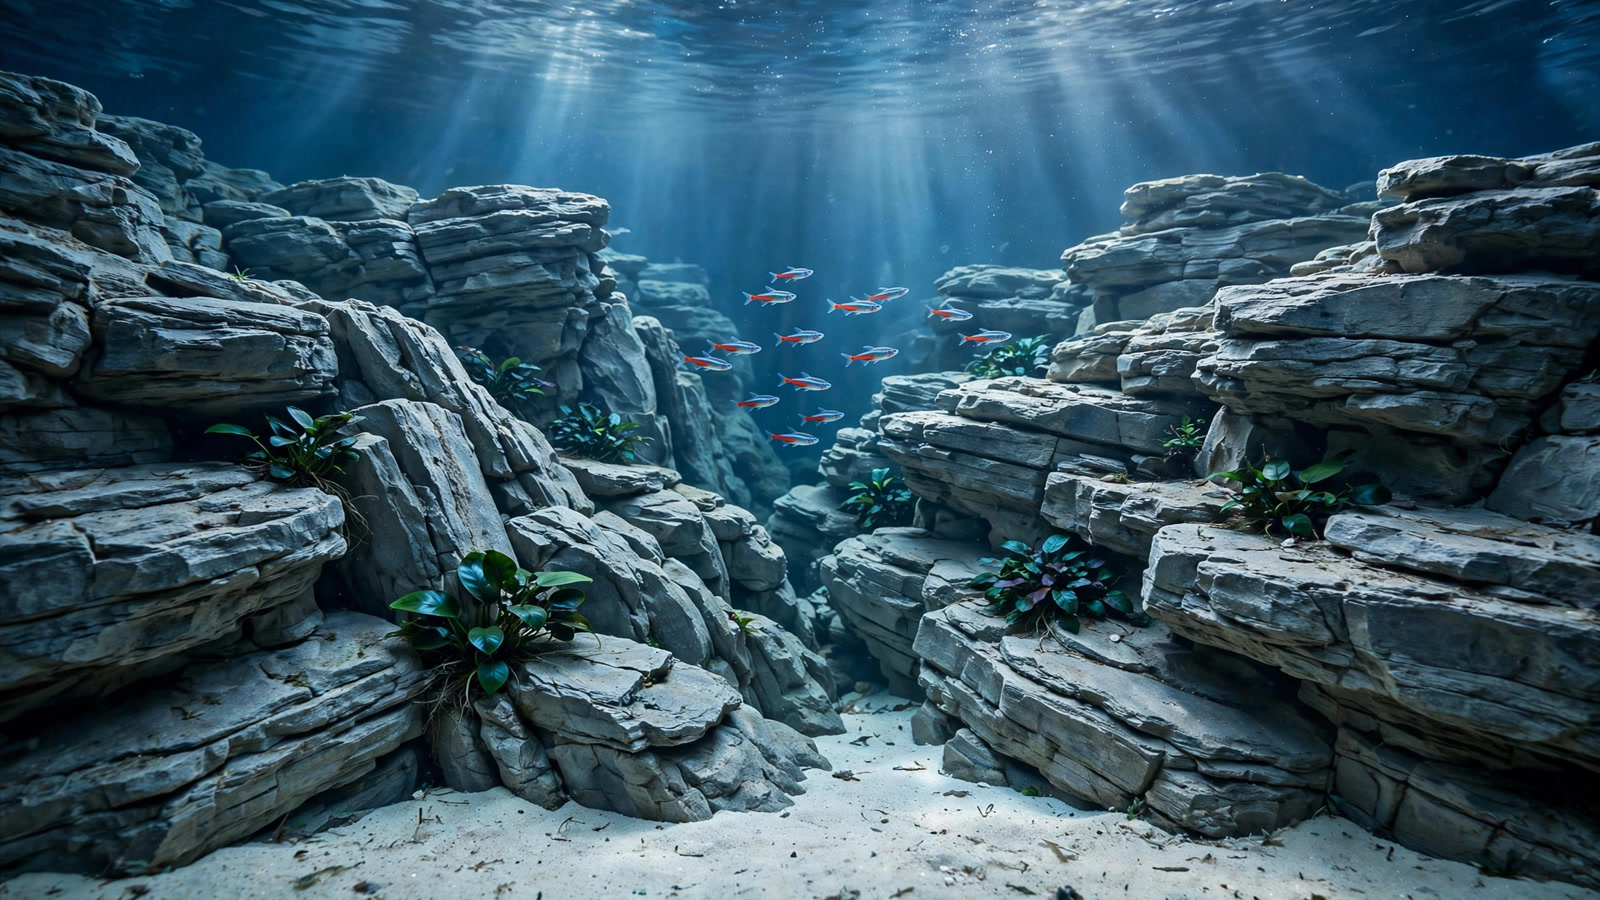
After dragon stone and seiryu stone became the default answers to every hardscape question, a third option quietly took over contest tanks: frodo stone. With grey-brown layered strata and sharp sedimentary edges, a frodo stone aquascape delivers the dramatic mountain-range look that made seiryu famous — but with a more natural, eroded-rock character that photographs beautifully and stacks into ridges and canyon walls other stones struggle to form. This guide covers what frodo stone is, how to spot fakes, the carbonate test for water-chemistry safety, safe stacking for this brittle stone, and starter layouts for three tank sizes.
What Is Frodo Stone?
Frodo stone (also sold as manten stone or pagoda stone) is a sedimentary rock distinguished by visible horizontal layering — thin, sharply defined strata that run across each piece like contour lines on a topographic map. The base color is a muted grey-brown, with individual layers shifting lighter or darker. Freshly broken faces look slightly rough and grainy, never glassy smooth.
Aquascapers love it for two reasons. First, the strata read as scale: stacked properly, a handful of stones suggests cliffs, ridges, and geological time in a way rounded rocks cannot. Second, it is neutral enough to work with almost any palette — unlike dragon stone's warm gold or seiryu's blue-grey, frodo's restrained grey-brown lets green plants and red stems do the color talking.
One nuance: "frodo stone" is a trade name, not a geological term. Different quarries produce stone sold under the name, so pieces vary in color and hardness. That variability is exactly why the sourcing and testing sections below matter.
Frodo Stone vs Dragon Stone, Seiryu, and Ohko
If you know the two classic hardscape stones, this comparison places frodo quickly. (Dragon stone and ohko are the same stone — "ohko" is the Japanese trade name.) See our dragon stone vs seiryu stone comparison for the full treatment of the classics.
| Property | Frodo Stone | Dragon Stone (Ohko) | Seiryu Stone |
|---|---|---|---|
| Rock type | Layered sedimentary | Clay-based, weathered | Limestone (karst) |
| Color | Grey-brown, muted | Warm gold / reddish brown | Blue-grey with white veining |
| Surface | Stratified edges, grainy faces | Pitted, hole-riddled | Sharp, jagged, calcite veins |
| Best layouts | Ridges, canyon walls, cliffs | Caves, valleys, bonsai bases | Mountains, Iwagumi |
| Brittleness | Brittle — edges chip | Moderately soft, crumbly | Hard, heavy, durable |
| Water chemistry | Slightly reactive (test each batch) | Inert — no pH effect | Raises pH and hardness |
The takeaway: frodo sits between the classics. It has seiryu's drama without the heavy carbonate content, and dragon stone's plant-friendliness without the sometimes-dominant warm look. Our dragon stone (ohko) guide covers the warm alternative, and the seiryu stone guide covers its pH effects if you are choosing between them for a soft-water tank.
Sourcing Frodo Stone: How to Spot Fakes
Genuine frodo stone has tells that fakes rarely replicate:
- Visible strata: real frodo shows clear horizontal layering with hairline seams. Uniform-colored "frodo" with no layering is almost certainly another rock with a trade-name label.
- Broken, not cut faces: the best pieces show natural fracture planes along the strata. Perfectly sawn or tumbled-smooth pieces were processed for landscaping, not selected for aquascaping.
- Moderate weight: it should feel solid but not exceptionally dense. Suspiciously heavy grey rocks may be ordinary limestone or cast imitations.
- Color with variation: expect grey-brown with subtle banding. Stark white veining is seiryu's signature; bright orange tones are a red flag.
Buy from aquarium-specialty vendors rather than landscaping yards — landscaping stone is sold by weight for bulk, while aquarium suppliers grade for shape, strata interest, and batch consistency. Ask whether the batch has been carbonate-tested (next section); reputable sellers know their batches. Always buy 30–50% more than your layout needs: you will reject pieces that do not fit the composition. For a broader survey of materials, our best rocks for aquascaping roundup compares the mainstream options.
The Carbonate Test: Vinegar and pH
Because frodo is a trade name covering variable quarry rock, always test a batch before it goes in your tank — some batches contain enough carbonate to nudge pH and hardness upward, milder than seiryu but real. Two tests, ten minutes total.
The vinegar (acid) test
Put a few drops of white vinegar on a freshly exposed surface (chip off a small corner — weathered outer faces mislead). Vigorous fizzing means significant carbonate content; faint slow fizz means mild reactivity; no reaction means effectively inert. This reliably sorts batches into "safe," "watch it," and "treat like seiryu." Our guide to whether aquarium rocks raise pH explains the chemistry in more detail.
The bucket pH test
Submerge a few representative pieces in a bucket of tap water and measure pH and KH on day one and after 48 hours. A rise over 0.2 pH points or any measurable KH increase means the stone will buffer tank water over time. In a high-tech CO2 tank with active aquasoil, mild reactivity is a non-issue — the soil's buffering absorbs it. In a soft-water shrimp or discus tank targeting pH below 6.5, even mild carbonates warrant a different batch.
Cleaning and Preparing Frodo Stone
Frodo arrives dusty with quarry fines packed into its strata seams. Preparation is simple:
- Dry brush first. Use a stiff nylon brush on all faces, working along the strata lines to pull dust from the seams. Avoid wire brushes — they polish the surface unnaturally.
- Rinse under pressure. A hose or shower head blasts out what the brush loosened; you will be surprised how much silt hides in "clean-looking" rock.
- Soak and inspect. Submerge for 24 hours. Oily film, chemical smell, or discolored water means another scrub and soak — quarry stone occasionally carries cutting oils.
- Chip to shape. Frodo cleaves along its strata, so you can create fresh natural faces with a cold chisel and hammer. Wear eye protection. Cleave along the layering for thin slabs, across it for chunky blocks.
Skip bleach soaks and boiling. Bleach lodges in porous seams and is hard to rinse fully, and boiling can crack layered stone along its strata from thermal stress. Brush, rinse, soak — that is the whole protocol.
Stacking Safely: Frodo Stone Is Brittle
Frodo's main handling caveat: it chips and shears more easily than seiryu. Dropped pieces lose corners, and tall stacks can settle if contact points are small. Contest scapers stack towering frodo ridges routinely — with the right technique.
The shimming technique
Never balance a stone on a single point. Shim each joint: wedge small flat stone chips into gaps so every piece rests on at least three contact points. Three-point contact cannot rock, and it spreads load across the brittle strata instead of concentrating it on one edge. Press each piece firmly from multiple angles — if it wobbles, re-shim.
Structural rules
- Biggest pieces on the bottom. A heavy base stone anchors everything and looks right for a ridge.
- Keep the center of gravity low and inward. Cantilevered slabs look dramatic but shear corners first. Support overhanging tips with hidden shim stones.
- Use stone dust as mortar. Pack cleaving chips and dust into joints — wet, they settle like grout and lock shims. A dab of aquarium-safe cyanoacrylate gel between shims makes bonds permanent.
- Build dry, then flood slowly. Assemble the full hardscape in the empty tank, photograph it, then pile substrate against the bases — substrate adds lateral stability dry stacking cannot provide.
Frodo Stone Aquascape Layouts for Ridge and Canyon Styles
Frodo rewards layouts that treat it as geology, not decoration. Two compositions play to its strengths.
Mountain ridges
Line up 5–9 pieces in a receding diagonal, tallest near the back third, each leaning slightly into the next like a mountain range in profile. Keep the layering parallel across pieces — rotating one piece 90 degrees breaks the "geology." Slope substrate up toward the ridge base for forced perspective, and leave open sand in front as the valley floor.
Canyon walls
Place two facing walls of stacked slabs with a gap between them, wider at the front and narrowing toward the back. Frodo's brittleness becomes an asset here: cleaved slabs have flat, parallel faces that stack into convincing walls. Plant wall tops with moss and the canyon floor with carpet plants, and run gentle current through the gap so it reads as a streambed. A single shimmed hero piece leaning across the top makes a natural bridge.
What to avoid: scattering individual frodo pebbles randomly. The stone's power is in mass and layering — one pebble alone just looks like a grey rock. Commit to a formation, or choose a different stone for scattered accents.
Planting Epiphytes in the Crevices
Frodo's seams and ledges are natural planting pockets, and epiphytes — plants that grow attached to hardscape — were made for them. Anubias nana petite suits small seams, barteri suits ledges; Bucephalandra and mosses (java, Christmas, weeping) anchor readily into strata gaps.
Tuck a small portion of rhizome into a seam with the growing tip outward, then secure with a dot of cyanoacrylate gel or dark cotton thread, which rots away once roots grip the stone. Work with the layering: a horizontal seam wants a horizontal row of buce; a vertical crack wants a moss tuft stuffed in from the top. Within weeks the plants knit the stones together, softening hard edges while emphasizing strata lines — the aged, natural look judges reward.
Three Starter Layouts by Tank Size
Nano (20–40 L): The Ridge Fragment
Three pieces: one main stone about one-third of tank height, two fragments angled into it. Place the composition off-center at the back with strata horizontal. Foreground: a low carpet (Monte Carlo or dwarf hairgrass). One anubias nana petite in the main stone's best seam. Under 2 kg of stone total — the cheapest way to learn frodo's character.
Mid-size (60–120 L): The Canyon
Seven to ten pieces forming the two-wall canyon above, in a standard 60 cm tank. Canyon floor in fine sand, wall tops mossed, background stems (rotala or ludwigia) rising behind the walls. Budget 8–12 kg and expect to reject a third of what you buy — selection matters more than quantity. CO2 is recommended to establish carpet and moss before algae finds the bright canyon floor.
Large (180 L+): The Range
Twelve to twenty pieces building a full ridgeline across a 90–120 cm tank, with a smaller secondary ridge in front for depth. From the front glass it reads as an entire mountain valley. Carpet the valley floor, dot ridge bases with buce colonies, and keep the background open — the ridge is the background. Dry-stack the whole composition and live with it a day before flooding; moving a 15 kg ridge after planting is nobody's idea of fun.
If you like frodo's porous, plant-gripping seams but want a cheaper practice stone, lava rock in planted tanks offers similar crevice-planting at a fraction of the price — good training before investing in a full frodo layout.
Frequently Asked Questions
Does frodo stone raise pH or hardness?
It can, mildly, depending on the batch — frodo is a trade name covering variable quarry stone, and some batches contain carbonates. Run the vinegar test and a 48-hour bucket pH test before adding it to a soft-water or shrimp tank. In most community and high-tech setups with active aquasoil the effect is negligible, but low-pH specialty tanks deserve a tested-inert batch.
How can I tell real frodo stone from fakes?
Look for clear horizontal strata, natural broken (not sawn) faces, muted grey-brown color without stark white veining, and moderate weight. Uniform-colored, suspiciously heavy, or perfectly smooth "frodo" is likely another rock wearing the trade name. Buy from aquarium-specialty vendors who know their batches, and purchase extra so you can select the best pieces.
Why does my frodo stone keep chipping?
Frodo is genuinely brittle along its strata — the trade-off for its layering. Handle pieces by their mass rather than thin edges, cleave deliberately with a chisel instead of forcing breaks, and stabilize stacks with shimming: three contact points per stone, joints packed with stone dust. Chipped corners can be re-faced with a chisel to look intentional.
Can I glue frodo stone pieces together?
Yes. Aquarium-safe cyanoacrylate gel bonds frodo well, especially combined with shimming — glue the shims, not just the main faces, for the strongest joints. For a natural look, dust wet glue with crushed stone powder from your own cleaving; it cures to a nearly invisible seam matching the rock's color and texture.
What plants grow best on frodo stone?
Epiphytes are the natural match: Anubias nana petite in small seams, Bucephalandra along ledges, and mosses (java, Christmas, weeping) in cracks and on wall tops. The strata create ready-made planting pockets, so you can build a fully planted look with almost no substrate planting. Pair with carpeting plants on the open floor for the classic ridge-and-valley composition.
How much frodo stone do I need?
Budget 1–2 kg per 10 liters for ridge and canyon layouts, plus 30–50% extra for selection — you will reject pieces that do not fit. A nano ridge needs under 2 kg, a 60 cm canyon 8–12 kg, and a full 120 cm ridgeline 15–25 kg. Leftover pieces become future nano scapes.
Bringing It All Together
Frodo stone earned its "third stone" status by filling a real gap: seiryu's drama without the heavy carbonate baggage, dragon stone's plant-friendliness without the warm color cast, and layered geology neither classic can imitate. Test your batch, respect its brittleness with proper shimming, and build it the way it wants to be built — ridges, canyons, and cliff faces that let the strata tell their story. Do that, and a frodo stone aquascape looks less like a decorated fish tank and more like a landscape that happens to be underwater.
Tissue-culture plants are the exception — they’re grown in sterile gel and adapt with minimal melting, which is part of what you’re paying for. Plants bought submersed from another hobbyist’s tank also transition with little melt, since they’re already in the right form.
Which Plants Melt Most (and Least)
Heavy melters (expect significant leaf loss)
- Cryptocorynes — infamous for “crypt melt,” sometimes dropping every leaf after any disturbance. They almost always recover from the roots within weeks.
- Stem plants grown emersed — rotala, ludwigia, and hygrophila often shed lower emersed leaves while the growing tips transition.
- Amazon swords — emersed-grown swords typically lose their broad oval aerial leaves and replace them with longer submersed ribbon leaves.
Light melters
- Anubias, java fern, bucephalandra — slow-growing rhizome plants transition gradually; occasional old-leaf melt but rarely dramatic.
- Vallisneria — usually transitions well, though it dislikes the move itself and may sulk for a week.
- Floating plants — minimal melt since their leaves were already at the air-water interface.
The Acclimation Protocol
Step 1: Quarantine or dip first
Before acclimating to your tank’s conditions, make sure you’re not acclimating pests along with the plant. Run new arrivals through our quarantine and dip protocol — it adds days upfront but prevents months of regret.
Step 2: Float to temperature-match (30 minutes)
Float the bag or container in your tank for 20–30 minutes to equalize temperature. Plants are less temperature-sensitive than fish, but a 10°F shock on top of transplant stress is an avoidable insult.
Step 3: Trim before planting
Remove any leaves that are already damaged, yellowing, or heavily algae-covered — they won’t recover and they’ll rot in your tank, feeding algae. For stem plants, trim off the bottom inch and any emersed leaves that look unlikely to adapt; the plant wastes energy maintaining leaves it’s going to shed anyway. Keep the healthy growing tips — that’s where recovery starts.
Step 4: Plant correctly the first time
Follow our planting guide — right depth, crown exposed on rosettes, rhizomes unburied on epiphytes. Every uprooting and replanting restarts the acclimation clock, so get placement right on the first attempt. Decide where each plant goes before it goes in the water.
Step 5: Run a gentle first week
For the first 7 days after planting:
- Moderate light — run your normal photoperiod but consider dropping intensity 20–30% if your light is dimmable. Blast-level light on a melting plant grows algae on the dying leaves, not recovery.
- Stable CO2 — if you inject CO2, keep it consistent. Fluctuating CO2 during acclimation is a melt accelerator. If you’re low-tech, this doesn’t apply — see growing without CO2.
- Half-strength fertilizer — new plants with damaged leaves can’t use full dosing, and the excess feeds algae. Ramp to full strength over 2–3 weeks per our fertilizer schedule.
- No disturbance — don’t move, trim, or “check on” new plants for at least two weeks. Every touch resets root establishment. This is especially critical for crypts.
Step 6: Remove melt, keep the base
As emersed leaves melt, remove the mushy material promptly — decaying leaves release ammonia and grow fungus that can spread to healthy tissue. But never discard the plant while the crown, rhizome, or roots are firm and alive. A crypt that’s lost every leaf but has firm roots is a plant that’s about to recover, not a dead plant. Give it 3–4 weeks before judging.
Telling Normal Melt From Real Problems
Normal transition melt:
- Affects oldest/emersed leaves first, newest growth last
- New submersed leaves emerge even as old ones dissolve
- Roots and crown stay firm and white/green
- Timeline: 1–4 weeks, then obvious new growth
Concerning melt (see our full melting diagnosis guide):
- New growth also melts or emerges deformed
- Rhizome or crown turns mushy and brown — this is rot, not transition
- Entire plant dissolves within days with no new growth after 4+ weeks
- Melting spreads to established plants that weren’t recently moved
Buying Tips to Minimize Melt
- Buy submersed-grown when available — hobbyist-grown cuttings transition with almost no melt.
- Choose tissue culture for sensitive species — crypts and delicate stems establish far more reliably from sterile cups.
- Avoid plants already melting in the store tank — some melt is normal, but a plant that’s mostly mush at purchase has less energy for recovery.
- Transport carefully — keep plants damp and out of direct sun/heat. A plant that dries out or cooks in a hot car melts far worse than one transported properly.
The First-Month Timeline: What to Expect Week by Week
Knowing what’s normal when removes most acclimation anxiety. Here’s the typical timeline for a healthy plant adapting to a new tank:
Week 1: The quiet week
Almost nothing visible happens. The plant is growing roots you can’t see and assessing its new environment. Some species (vallisneria, stem plants) may start shedding their lowest leaves. This is normal. Resist the urge to “help” — no moving, no extra fertilizer, no light changes. The most common beginner mistake is intervening during a week when the correct action is nothing.
Week 2: Melt peaks
This is when emersed leaves give up in earnest. Crypts may drop everything; swords shed their broad aerial leaves; stem plants lose lower foliage. It looks catastrophic and it’s usually fine. Keep removing mushy material, keep conditions stable, and watch the crown and growing tips — if those are firm and green, recovery is already underway.
Week 3: The turn
New submersed-adapted leaves emerge — smaller, thinner, often a slightly different shade of green than the emersed foliage. Stem plant tips start growing visibly; crypts push tiny curled leaves from the crown; swords unfurl narrow ribbon leaves. This is the moment most beginners exhale for the first time.
Week 4+: Established
New growth outpaces melt, and the plant is functionally yours. You can resume full-strength fertilizer, normal trimming, and stop treating it as fragile. Some slow growers (anubias, bucephalandra) take 6–8 weeks to show obvious progress — that’s their normal speed, not a problem.
Acclimating Different Plant Formats
Tissue-culture cups
Sterile, pest-free, and already adapted to high-humidity (not emersed) growth — tissue cultures melt the least of any format. Rinse the agar gel off gently (leftover gel rots and feeds fungus), split the portion into small plantlets, and plant per our planting guide. They establish slowly for the first two weeks, then accelerate. No dip needed, minimal acclimation stress — this is the premium experience you’re paying for.
Potted plants
Remove the pot and strip away the rockwool completely — leftover rockwool traps debris and rots. Tease the root mass apart gently; if it’s a dense mat, splitting it into 2–3 smaller portions actually establishes faster than planting one big clump (more growing points, better water flow around roots). Potted plants are usually emersed-grown, so expect the standard 2–4 week melt cycle.
Bare-root / bunched stems
Typically sold as weighted bunches. Remove any bands, foam, or weights, strip the lower leaves, and plant stems individually or in small groups. Bunched stems from the store are often already transitioning — check for new submersed growth at the tips, which tells you the plant is mid-adaptation and will settle quickly.
Hobbyist cuttings
Already submersed-grown and the fastest to establish — often showing new growth within days. The main acclimation factor is water-parameter difference between the two tanks. Float to temperature-match, plant promptly, and they’ll usually take off with minimal melt. This is why experienced hobbyists prefer trading cuttings over buying potted plants.
Frequently Asked Questions
Should I use a “plant starter” or transplant fertilizer?
Products marketed for transplant shock are mostly B-vitamins and mild hormones. They don’t hurt, but there’s no strong evidence they help aquarium plants specifically. Stable conditions and patience outperform any bottle. Save the money for more plants.
My new plant melted completely — bare crown, no leaves. Is it dead?
Probably not, if the crown or rhizome is firm. Crypts and swords routinely lose 100% of their leaves and regrow from the base within a month. The test is firmness: firm and pale/green means alive; mushy and brown/black means rot. Give firm-but-leafless plants a full 4 weeks before declaring them dead.
Can I speed up acclimation with extra light or CO2?
No — and trying usually backfires. A melting plant can’t use extra light; the excess just grows algae on its dying leaves. Keep light moderate and CO2 stable (not boosted) during acclimation. Growth speed comes from the plant’s own adaptation timeline, which you can’t rush, only avoid delaying.
Should new plants go straight into my main display tank?
After quarantine/dipping, yes — there’s no benefit to a separate “growing-in” tank for most plants. They acclimate to your water fastest in the tank they’ll live in. The exception is very delicate species going into a tank with boisterous fish; give those a few weeks in a calm corner or breeder box first.
The Patience Rule
The single most important acclimation skill is restraint: plant it right, set gentle conditions, remove decay, and then leave it alone for a month. The hobbyists with the best plant growth aren’t doing something clever in week one — they’re simply not interfering in weeks two through four while the plants do what they’ve evolved to do. Melt looks like failure and feels like failure, but in most cases it’s the visible part of a plant successfully becoming yours.