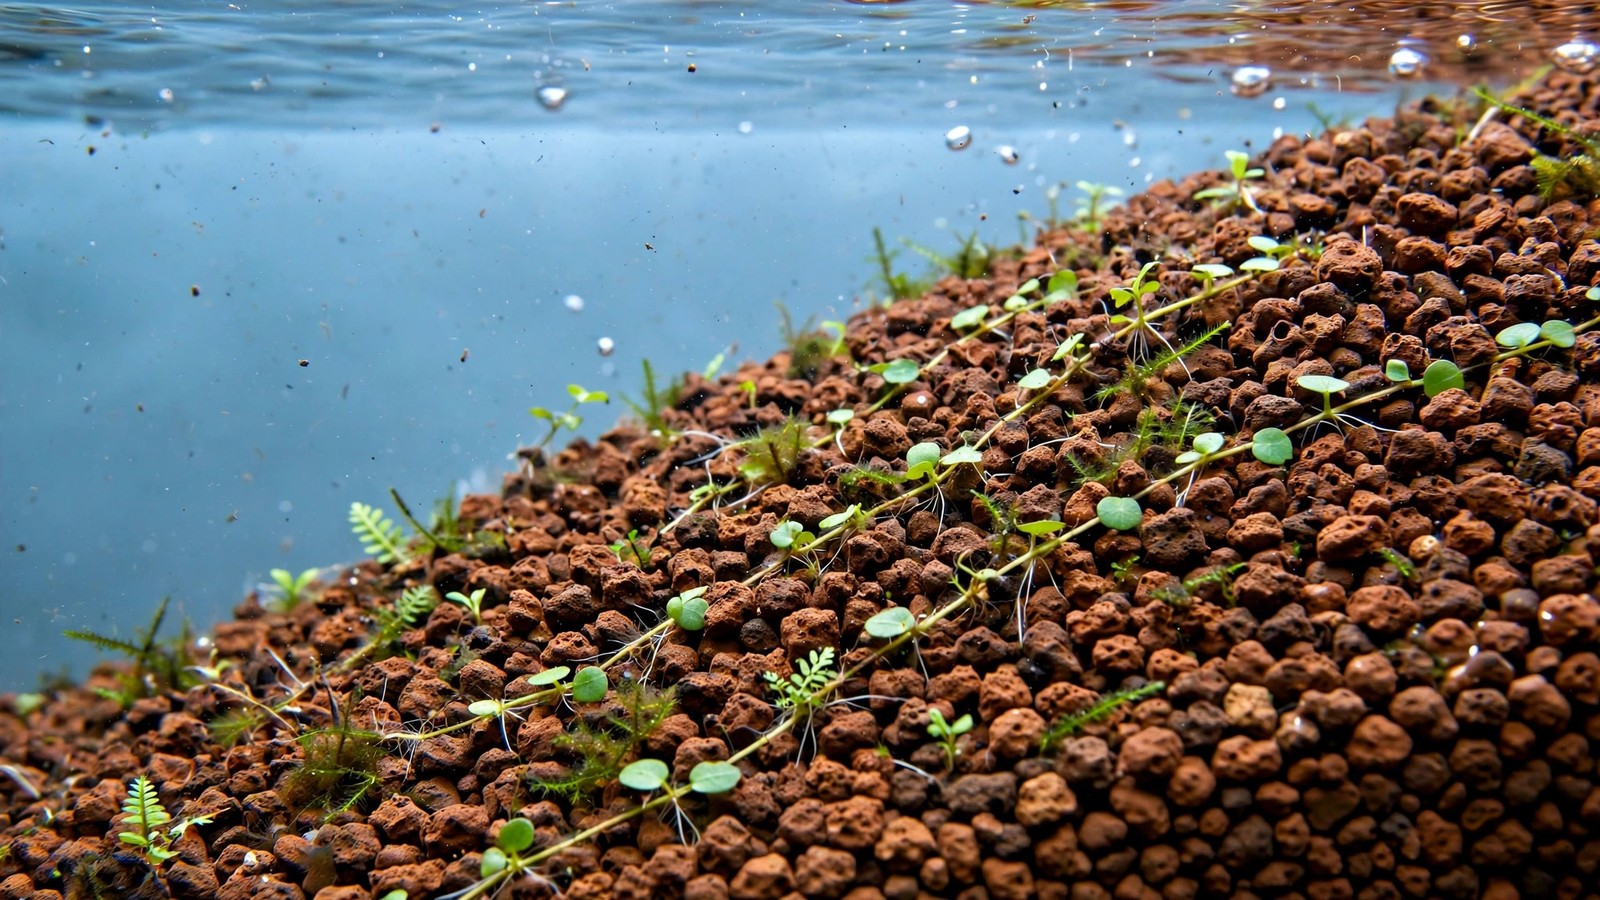
If you have been pricing aquasoils lately, you have probably asked yourself whether there is a cheaper way to get that dark, granular, plant-friendly substrate. For a growing number of aquascapers, the answer comes from an unexpected corner: the bonsai shelf. Using akadama aquarium substrate — a volcanic clay granule sold for bonsai trees — is a legitimate, long-lived alternative to commercial aquasoils. It is not a perfect substitute, and it demands a different fertilizing approach, but once you understand how it behaves, it can grow stunning planted tanks for a fraction of the cost.
What Exactly Is Akadama?
Akadama is a naturally occurring granular clay mined from volcanic soils in Japan. It is produced in grades for the bonsai trade, where its reputation rests on two qualities: it drains and breathes while holding moisture, and it slowly softens over years of use. When we talk about akadama as an aquarium substrate, we are simply taking that same bagged bonsai soil — typically sold in 10–14 liter bags — and putting it in a fish tank instead of under a tree.
Each grain is a small, porous lump of fired-by-nature volcanic clay, usually reddish-brown to tan. Under water, akadama behaves a lot like a lightweight aquasoil pellet: water moves through it, roots penetrate it easily, and its enormous internal surface area becomes prime real estate for beneficial bacteria. It is completely inert — meaning it contains no added nitrogen, phosphorus, or potassium — which is the single most important thing to grasp before you buy a bag.
Grain Types: Normal, Hard, and Double Red
Bonsai suppliers grade akadama by firmness and grain size, and those grades matter in an aquarium too:
- Normal (standard) akadama: the softest and cheapest. It breaks down fastest — expect it to soften noticeably within 12–18 months and gradually turn to mud over a few years. Fine for a first experimental tank, but expect a shorter substrate lifespan.
- Hard akadama: kiln-firmed for extra durability. This is the grade most aquarists choose. It resists crumbling for several years and is the closest analog to a commercial baked aquasoil in longevity.
- Double red line (hard, screened): the premium grade — harder fired, dust-screened, and more uniform in grain size. It clouds the least on initial setup and holds its structure longest. It costs more, but still undercuts premium aquasoils.
Grain size runs from fine (1–3 mm) to medium (3–6 mm) to coarse. For planted tanks, small to medium grain is the sweet spot: fine enough for small foreground plants to root, coarse enough to resist compacting into an anaerobic slab.
Cation Exchange Capacity: Akadama's Secret Weapon
The reason akadama works at all in aquariums is cation exchange capacity (CEC) — the ability of a substrate to grab dissolved nutrients (calcium, magnesium, potassium, iron, ammonium) out of the water column and hold them at the root zone, releasing them back to plants as needed. Akadama's CEC is genuinely high, in the same ballpark as many commercial aquasoils.
That high CEC has two visible consequences. First, like aquasoils, akadama softens water chemistry: it absorbs carbonate hardness (KH) and gently pulls pH down, typically into the 6.0–6.8 range in new setups. This makes it a natural fit for soft-water plants and livestock — the same audience that shops for ADA-style soils. Second, it acts as a nutrient bank: fertilizers you dose into the water column get captured in the grains and released near roots, which is why the fertilizing strategy below works so well with it.
One caveat: the water-softening effect fades over time. After roughly 6–12 months, the exchange sites fill up and the substrate stops pulling pH down, stabilizing wherever your source water keeps it.
Akadama vs. Commercial Aquasoils: The Honest Comparison
Akadama is often described as "just like aquasoil," which is half true. Here is where the two diverge:
| Feature | Akadama (hard grade) | Premium aquasoils (e.g., ADA Amazonia, Fluval Stratum) |
|---|---|---|
| Added nutrients | None — fully inert | Rich in ammonia, NPK, and trace elements at startup |
| Ammonia leach | None — safe to stock sooner | Strong ammonia release for 2–6 weeks; needs a careful cycling period |
| CEC / water softening | High CEC; lowers pH/KH similarly | High CEC; lowers pH/KH similarly |
| Longevity | 3–5+ years before significant breakdown (hard grade) | 2–4 years; eventually softens and compacts |
| Color | Light reddish-brown/tan | Dark brown to black |
| Price | Roughly 30–50% cheaper per liter than premium brands | Premium pricing, especially ADA |
| Fertilizing demand | Heavy — you supply everything | Moderate early on; increases as soil depletes |
| Availability | Bonsai shops, online; not an aquarium product | Every aquarium retailer |
The tradeoff is clear. Aquasoils like the ones in our best aquasoils for planted tanks guide arrive pre-loaded with nutrients — at the cost of an ammonia spike and a higher price. Akadama gives you granular structure, CEC, and water softening with zero ammonia and a gentler price — but the nutrients are entirely your job from day one.
If you are weighing inert options more broadly, our aquarium soil vs. gravel comparison frames the same fundamental choice: nutrient-rich convenience versus inert control.
Preparing Akadama Aquarium Substrate Before It Goes in the Tank
Akadama arrives dusty. Skip preparation and your tank will look like weak tea for a week. Do this instead:
- Screen it: pour the bag through a coarse kitchen sieve or mesh strainer outdoors. Discard the dust and broken fines — they are the main source of clouding. Keep the fines for potted plants; they are useless underwater.
- Rinse gently: rinse the screened grains in a bucket until the runoff is mostly clear. Do not scrub or agitate aggressively — you want to wash dust off, not crush grains.
- Wet-fill slowly: add the substrate to the tank dry, slope it (see below), then fill the tank by pouring water over a plate, a plastic bag, or your hand. Slow filling prevents the dust storm.
Aim for a 4–6 cm (1.5–2.5 inch) bed across the tank, sloping deeper toward the back — up to 8–10 cm in the rear third. The slope does three things: it gives background stems more root room, creates visual depth, and lets you plant foreground species in a thinner, easier-to-maintain layer. Because akadama is inert, depth is about rooting space, not nutrient volume, so do not pile it excessively hoping for more fertility.
Fertilizing Your Akadama Aquarium Substrate
This is the part most people get wrong. With aquasoil, you can coast on the soil's built-in nutrients for the first couple of months. With akadama, the substrate contributes nothing — every milligram of nitrogen, potassium, iron, and trace elements must come from you. The upside is total control: no ammonia spike, no guessing what the soil is releasing this week.
A proven starting regime for a moderately planted tank:
- Root tabs from day one: press a root tab under every heavy root feeder (swords, cryptocorynes, vallisneria) at planting, and refresh every 2–3 months. In inert akadama, root tabs are not optional — they are the substrate's nutrient engine.
- Water column dosing, started low: begin with an all-in-one liquid fertilizer at roughly one-third to one-half the label dose, dosed after each water change. The akadama's CEC will bank some of it at the roots. Increase gradually over 4–6 weeks as plants establish, watching for deficiency signs (pale new growth, pinholes, stunting) rather than dosing by the calendar.
- Iron separately if needed: red plants and heavy stem feeders may want supplemental iron; add it only after you see actual deficiency, not preemptively.
The "start low, observe, adjust" approach matters because inert substrates make over-dosing visible quickly — excess nutrients have no soil buffer absorbing your mistakes, so algae responds fast. Lean and steady beats rich and chaotic in an akadama tank.
Which Plants Thrive on Akadama?
Akadama suits almost any plant provided you fertilize. Standouts include:
- Heavy root feeders: Amazon swords, cryptocorynes, aponogetons, and vallisneria love the porous grains plus root tabs. This is akadama's happiest use case.
- Carpeting plants: dwarf hairgrass, Monte Carlo, and pearl weed root easily into small-grain akadama and spread well once nutrition is dialed in.
- Stems: rotala, ludwigia, and bacopa do fine with consistent water-column dosing — the CEC bank smooths out dosing gaps.
- Soft-water specialists: plants like toninas and eriocaulons, which demand low KH, appreciate the pH/KH pull during the substrate's active months.
What struggles? Nothing, really, as long as you feed it. The classic failure mode is not the substrate — it is the aquarist who plants heavily, doses nothing, and blames the brown grains when everything melts. If you are unsure how inert substrates differ from loaded ones, the root tabs vs. aquasoil guide is worth a read.
To Cap or Not to Cap?
Most aquasoil users cap with sand partly to lock in nutrients. With akadama there is nothing to lock in, so capping is purely aesthetic — and mostly unnecessary. The grains look good on their own, and an open granular surface lets you replant and rescape without unearthing a sand layer.
That said, a sand cap makes sense in two situations: bottom-dwelling fish (corydoras, loaches) that would stir dust out of bare akadama, or a specific visual goal like a pale foreground. If you cap, keep the sand layer thin (1–2 cm) so roots still reach the akadama below, and read our sand cap over aquasoil guide — the mechanics of capping granular substrates are identical.
One hard rule: never cap with a nutrient-rich soil underneath expecting synergy. A layer of ADA Amazonia under akadama just recreates the ammonia spike you chose akadama to avoid.
The Downsides, Honestly Stated
Akadama is not for everyone. Know the compromises before you commit:
- The color: light reddish-brown reads "garden" to some eyes, and it will not give you the dramatic dark backdrop of black aquasoil. It does darken slightly once colonized by biofilm.
- Dust and clouding: rough handling, aggressive gravel vacuuming, or digging fish will release fines. Treat it gently — hover the siphon just above the surface instead of plunging it in.
- It is not an aquarium product: no aquarium retailer stocks it; you will buy from bonsai suppliers. Grades and screening quality vary by importer, so buy from a reputable bonsai source, not the cheapest listing.
- You are the fertilizer: if you want a set-and-forget substrate, buy aquasoil. Akadama rewards engaged hobbyists and punishes neglect.
- Grain-size confusion: bonsai grades are labeled for trees, not tanks. Stick to small/medium hard grades; fine and powder grades compact underwater.
Grain size choice also matters for aquasoils — our powder vs. normal aquasoil comparison covers the same rooting-depth logic in the aquasoil world.
Step-by-Step: Setting Up an Akadama Planted Tank
- Plan the layout dry. Position hardscape first; akadama is easy to slope around wood and stone once rinsed.
- Screen and rinse the akadama as described above. Let it drain in the bucket — do not add it soaking wet and muddy.
- Lay the bed: 4–6 cm front, sloping to 8–10 cm at the back. Mist it with a spray bottle to keep dust down while you work.
- Plant before filling. With the substrate damp, push stems and rosettes into the grains; place root tabs under heavy feeders as you go.
- Fill slowly over a plate or bag. Expect slight haze — a hang-on-back or canister filter with fine floss clears it within hours, not days.
- Start fertilizing immediately at the conservative doses above. There is no nutrient reserve to coast on.
- Cycle normally. With no ammonia leach, a standard fishless cycle (or a careful cycling approach) moves faster than with nutrient-loaded soils — but the filter still needs its weeks. Stock lightly, test, and build up.
- Maintain gently. Hover-siphon debris, replant carefully, and top up root tabs on schedule. Expect the water-softening effect to taper over the first year.
Frequently Asked Questions
Is akadama safe for fish and shrimp?
Yes — once rinsed, akadama is chemically inert and contains no added fertilizers, pesticides, or ammonia, so it is safe for fish, shrimp, and snails. The one caution is dust: unrinsed fines can irritate gills and clog shrimp filters, which is why screening and rinsing are non-negotiable. Buy horticultural-grade akadama from a bonsai supplier, not soil mixed with fertilizers meant for potted plants.
How long does akadama last in an aquarium?
Hard-grade akadama typically holds its structure for 3–5 years or more, often outlasting commercial aquasoils, which tend to soften within 2–4 years. The water-softening (pH/KH-lowering) effect fades sooner, usually within 6–12 months, as the exchange sites saturate. Standard (non-hard) akadama breaks down noticeably faster — often within 12–18 months — so choose hard or double-red grades for longevity.
Can I use akadama without CO2 injection?
Absolutely. Akadama is substrate, not a CO2 system, and it works perfectly in low-tech tanks. In fact, it pairs well with low-tech setups because the absence of an ammonia spike makes the slow, gentle cycling of a no-CO2 tank easier. Just match your plants to low-tech species, keep lighting moderate, and fertilize conservatively — the substrate rewards patience in any tech level.
Does akadama lower pH like aquasoil?
Yes, initially. Its high cation exchange capacity absorbs carbonate hardness (KH), which typically pulls pH down into the 6.0–6.8 range for the first several months — very similar to how aquasoils behave. The effect gradually weakens as the exchange sites fill, stabilizing around 6–12 months. After that, your tank's pH is governed by your source water and CO2, just like any inert substrate.
Do I need root tabs if I dose liquid fertilizer?
For heavy root feeders — swords, cryptocorynes, vallisneria, aponogetons — yes, root tabs are strongly recommended even with liquid dosing. Akadama's CEC captures some water-column nutrients at the roots, but dedicated root feeders perform dramatically better with tabs placed directly beneath them. Think of it as a two-track system: liquids feed the water column and stems, tabs feed the roots, and akadama's CEC bridges the two.
Why is my akadama turning to mud?
Soft, non-hard akadama grades break down within a year or two — that is normal for the grade, not a defect. Accelerated breakdown also comes from rough handling, aggressive gravel vacuuming, or very acidic water (below pH 6.0 for long periods). If your bed is sludging, switch to hard or double-red grade akadama next rescape, siphon gently, and avoid crushing grains during planting.
The Bottom Line
Akadama is not a cheat code or a drop-in aquasoil replacement — it is a different philosophy. Aquasoils hand you fertility with strings attached: an ammonia spike, a premium price, and a slow decay. Akadama hands you structure, CEC, and soft water — and asks you to become the fertilizer. If you enjoy dialing in a dosing routine and want a substrate that can outlast your scape, a bag of hard-grade bonsai clay might be the smartest substrate purchase you make this year.
Tissue-culture plants are the exception — they’re grown in sterile gel and adapt with minimal melting, which is part of what you’re paying for. Plants bought submersed from another hobbyist’s tank also transition with little melt, since they’re already in the right form.
Which Plants Melt Most (and Least)
Heavy melters (expect significant leaf loss)
- Cryptocorynes — infamous for “crypt melt,” sometimes dropping every leaf after any disturbance. They almost always recover from the roots within weeks.
- Stem plants grown emersed — rotala, ludwigia, and hygrophila often shed lower emersed leaves while the growing tips transition.
- Amazon swords — emersed-grown swords typically lose their broad oval aerial leaves and replace them with longer submersed ribbon leaves.
Light melters
- Anubias, java fern, bucephalandra — slow-growing rhizome plants transition gradually; occasional old-leaf melt but rarely dramatic.
- Vallisneria — usually transitions well, though it dislikes the move itself and may sulk for a week.
- Floating plants — minimal melt since their leaves were already at the air-water interface.
The Acclimation Protocol
Step 1: Quarantine or dip first
Before acclimating to your tank’s conditions, make sure you’re not acclimating pests along with the plant. Run new arrivals through our quarantine and dip protocol — it adds days upfront but prevents months of regret.
Step 2: Float to temperature-match (30 minutes)
Float the bag or container in your tank for 20–30 minutes to equalize temperature. Plants are less temperature-sensitive than fish, but a 10°F shock on top of transplant stress is an avoidable insult.
Step 3: Trim before planting
Remove any leaves that are already damaged, yellowing, or heavily algae-covered — they won’t recover and they’ll rot in your tank, feeding algae. For stem plants, trim off the bottom inch and any emersed leaves that look unlikely to adapt; the plant wastes energy maintaining leaves it’s going to shed anyway. Keep the healthy growing tips — that’s where recovery starts.
Step 4: Plant correctly the first time
Follow our planting guide — right depth, crown exposed on rosettes, rhizomes unburied on epiphytes. Every uprooting and replanting restarts the acclimation clock, so get placement right on the first attempt. Decide where each plant goes before it goes in the water.
Step 5: Run a gentle first week
For the first 7 days after planting:
- Moderate light — run your normal photoperiod but consider dropping intensity 20–30% if your light is dimmable. Blast-level light on a melting plant grows algae on the dying leaves, not recovery.
- Stable CO2 — if you inject CO2, keep it consistent. Fluctuating CO2 during acclimation is a melt accelerator. If you’re low-tech, this doesn’t apply — see growing without CO2.
- Half-strength fertilizer — new plants with damaged leaves can’t use full dosing, and the excess feeds algae. Ramp to full strength over 2–3 weeks per our fertilizer schedule.
- No disturbance — don’t move, trim, or “check on” new plants for at least two weeks. Every touch resets root establishment. This is especially critical for crypts.
Step 6: Remove melt, keep the base
As emersed leaves melt, remove the mushy material promptly — decaying leaves release ammonia and grow fungus that can spread to healthy tissue. But never discard the plant while the crown, rhizome, or roots are firm and alive. A crypt that’s lost every leaf but has firm roots is a plant that’s about to recover, not a dead plant. Give it 3–4 weeks before judging.
Telling Normal Melt From Real Problems
Normal transition melt:
- Affects oldest/emersed leaves first, newest growth last
- New submersed leaves emerge even as old ones dissolve
- Roots and crown stay firm and white/green
- Timeline: 1–4 weeks, then obvious new growth
Concerning melt (see our full melting diagnosis guide):
- New growth also melts or emerges deformed
- Rhizome or crown turns mushy and brown — this is rot, not transition
- Entire plant dissolves within days with no new growth after 4+ weeks
- Melting spreads to established plants that weren’t recently moved
Buying Tips to Minimize Melt
- Buy submersed-grown when available — hobbyist-grown cuttings transition with almost no melt.
- Choose tissue culture for sensitive species — crypts and delicate stems establish far more reliably from sterile cups.
- Avoid plants already melting in the store tank — some melt is normal, but a plant that’s mostly mush at purchase has less energy for recovery.
- Transport carefully — keep plants damp and out of direct sun/heat. A plant that dries out or cooks in a hot car melts far worse than one transported properly.
The First-Month Timeline: What to Expect Week by Week
Knowing what’s normal when removes most acclimation anxiety. Here’s the typical timeline for a healthy plant adapting to a new tank:
Week 1: The quiet week
Almost nothing visible happens. The plant is growing roots you can’t see and assessing its new environment. Some species (vallisneria, stem plants) may start shedding their lowest leaves. This is normal. Resist the urge to “help” — no moving, no extra fertilizer, no light changes. The most common beginner mistake is intervening during a week when the correct action is nothing.
Week 2: Melt peaks
This is when emersed leaves give up in earnest. Crypts may drop everything; swords shed their broad aerial leaves; stem plants lose lower foliage. It looks catastrophic and it’s usually fine. Keep removing mushy material, keep conditions stable, and watch the crown and growing tips — if those are firm and green, recovery is already underway.
Week 3: The turn
New submersed-adapted leaves emerge — smaller, thinner, often a slightly different shade of green than the emersed foliage. Stem plant tips start growing visibly; crypts push tiny curled leaves from the crown; swords unfurl narrow ribbon leaves. This is the moment most beginners exhale for the first time.
Week 4+: Established
New growth outpaces melt, and the plant is functionally yours. You can resume full-strength fertilizer, normal trimming, and stop treating it as fragile. Some slow growers (anubias, bucephalandra) take 6–8 weeks to show obvious progress — that’s their normal speed, not a problem.
Acclimating Different Plant Formats
Tissue-culture cups
Sterile, pest-free, and already adapted to high-humidity (not emersed) growth — tissue cultures melt the least of any format. Rinse the agar gel off gently (leftover gel rots and feeds fungus), split the portion into small plantlets, and plant per our planting guide. They establish slowly for the first two weeks, then accelerate. No dip needed, minimal acclimation stress — this is the premium experience you’re paying for.
Potted plants
Remove the pot and strip away the rockwool completely — leftover rockwool traps debris and rots. Tease the root mass apart gently; if it’s a dense mat, splitting it into 2–3 smaller portions actually establishes faster than planting one big clump (more growing points, better water flow around roots). Potted plants are usually emersed-grown, so expect the standard 2–4 week melt cycle.
Bare-root / bunched stems
Typically sold as weighted bunches. Remove any bands, foam, or weights, strip the lower leaves, and plant stems individually or in small groups. Bunched stems from the store are often already transitioning — check for new submersed growth at the tips, which tells you the plant is mid-adaptation and will settle quickly.
Hobbyist cuttings
Already submersed-grown and the fastest to establish — often showing new growth within days. The main acclimation factor is water-parameter difference between the two tanks. Float to temperature-match, plant promptly, and they’ll usually take off with minimal melt. This is why experienced hobbyists prefer trading cuttings over buying potted plants.
Frequently Asked Questions
Should I use a “plant starter” or transplant fertilizer?
Products marketed for transplant shock are mostly B-vitamins and mild hormones. They don’t hurt, but there’s no strong evidence they help aquarium plants specifically. Stable conditions and patience outperform any bottle. Save the money for more plants.
My new plant melted completely — bare crown, no leaves. Is it dead?
Probably not, if the crown or rhizome is firm. Crypts and swords routinely lose 100% of their leaves and regrow from the base within a month. The test is firmness: firm and pale/green means alive; mushy and brown/black means rot. Give firm-but-leafless plants a full 4 weeks before declaring them dead.
Can I speed up acclimation with extra light or CO2?
No — and trying usually backfires. A melting plant can’t use extra light; the excess just grows algae on its dying leaves. Keep light moderate and CO2 stable (not boosted) during acclimation. Growth speed comes from the plant’s own adaptation timeline, which you can’t rush, only avoid delaying.
Should new plants go straight into my main display tank?
After quarantine/dipping, yes — there’s no benefit to a separate “growing-in” tank for most plants. They acclimate to your water fastest in the tank they’ll live in. The exception is very delicate species going into a tank with boisterous fish; give those a few weeks in a calm corner or breeder box first.
The Patience Rule
The single most important acclimation skill is restraint: plant it right, set gentle conditions, remove decay, and then leave it alone for a month. The hobbyists with the best plant growth aren’t doing something clever in week one — they’re simply not interfering in weeks two through four while the plants do what they’ve evolved to do. Melt looks like failure and feels like failure, but in most cases it’s the visible part of a plant successfully becoming yours.