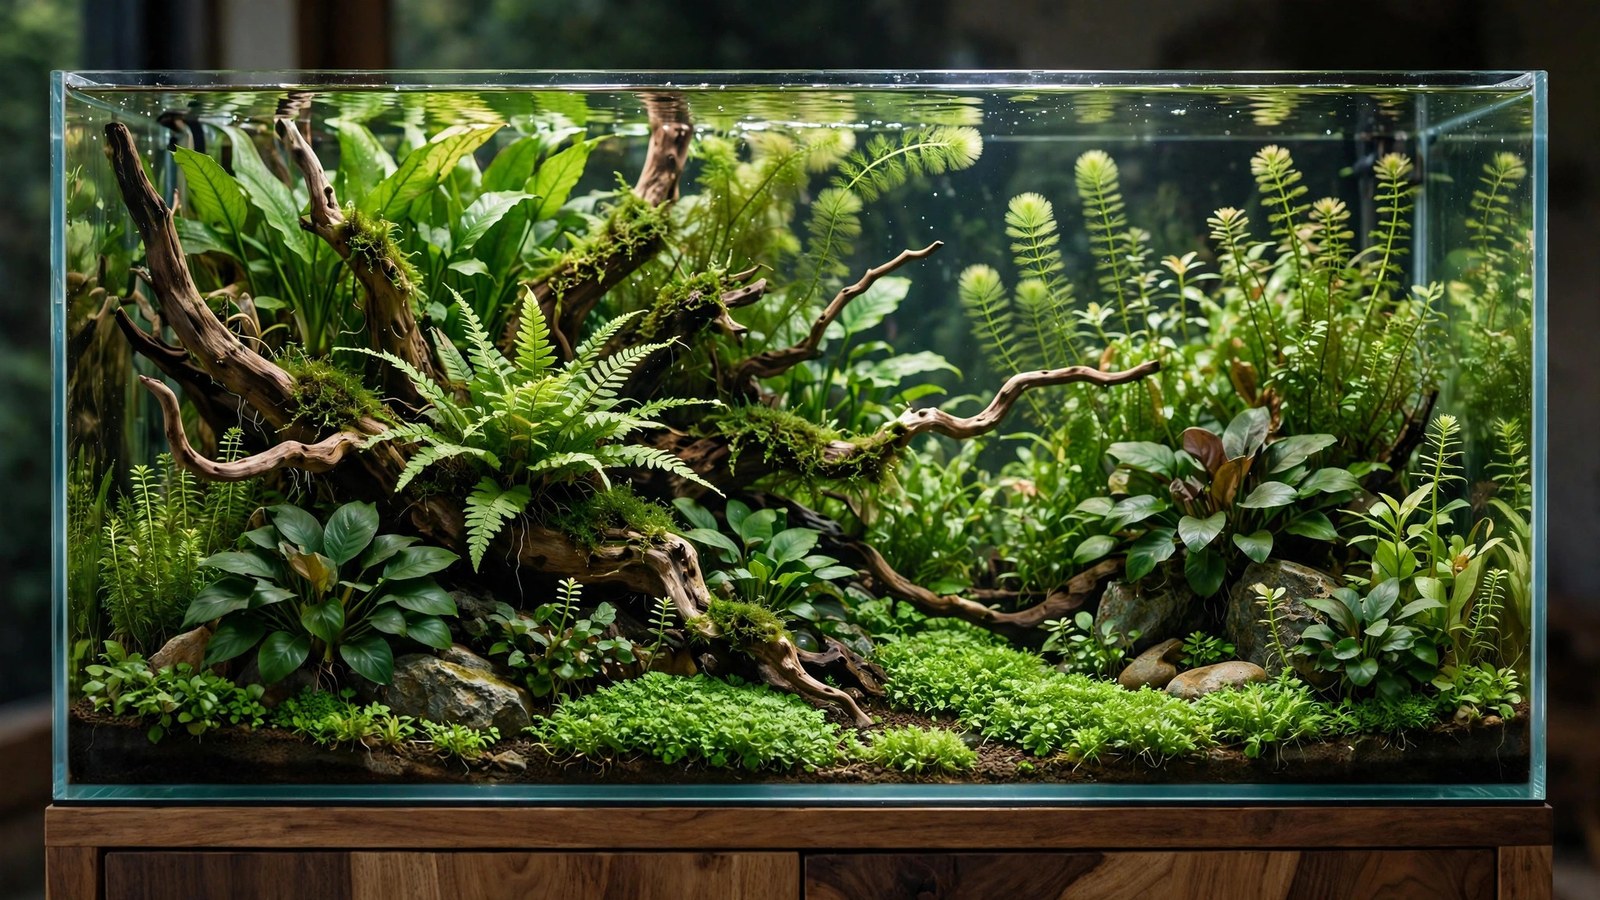
The 75-gallon (48" x 18" x 21") is where aquariums become furniture — a four-foot planted display that anchors a room. It's also where builds get serious: the plant quantities, equipment costs, and water-change volumes all scale up, but so do the rewards. A 75-gallon planted tank done well is a living landscape you can lose yourself in. This is the big build, start to finish.
Planning the Big Build: Budget and Logistics
Before anything else, the honest math. A proper 75-gallon planted setup costs several times a 20-gallon — not just the tank, but the stand (a filled 75-gallon weighs 600+ lbs; the stand must be aquarium-rated, level, and on a load-bearing floor), the lighting (48 inches of quality LED), filtration, substrate (three 9L bags of aquasoil), CO2 system, and 60–100 plant portions. Budget for all of it upfront — a half-equipped 75-gallon is a very expensive disappointment.
Logistics: position the tank before filling (you will not move it after), verify floor loading (ground floor or against a load-bearing wall), plan water changes (a Python-style tap-connected changer is mandatory — buckets are not viable at 25 gallons per change), and ensure electrical capacity for lights, filters, heaters, and CO2 on a drip loop.
Equipment: The Full Specification
- Tank + stand: 75-gallon with manufactured aquarium stand. Level it with shims; an unlevel 75-gallon stresses seams dangerously.
- Lighting: 48-inch high-output planted LED (or two 24-inch fixtures for better spread and dawn/dusk zoning), on a timer. At 21 inches deep, you need real penetration — budget fixtures leave the substrate dim.
- Filtration: large canister (rated 75–150 gallons) or dual canisters for redundancy. Turnover 4–6x hourly with spray-bar distribution.
- Heaters: two 200W heaters (one each end) on separate thermostats — redundancy matters when 75 gallons of livestock depends on it.
- CO2: pressurized system with 5–10 lb cylinder, inline diffuser or reactor. At this scale, CO2 is the difference between good and spectacular — see our high-tech planted tank setup.
- Substrate: three 9L bags aquasoil (2–2.5 inches, sloped), or 75+ lbs of sand/gravel with heavy root-tab supplementation.
- Water changer, large nets, long aquascaping tools, step stool — the big-tank toolkit.
Aquascaping Four Feet: Composition at Scale
Large tanks punish timidity. The classic big-tank mistakes: hardscape too small (a 12-inch wood piece vanishes in 48 inches), plants in timid dots (lost in the volume), and centered compositions (static at scale). The fixes:
- Hardscape with presence: 24–36 inch driftwood centerpieces, or 7–11 stone arrangements with a genuine oyaishi. Buy hardscape for the 75 — pieces that looked huge in the store look right at home here.
- Golden-ratio focal point at ~30 inches from one end; secondary interest at the opposite third.
- Layered depth: the 18-inch front-to-back gives real layering — foreground, midground, two background tiers.
- Plant in masses: 10–20 stems per group, not 3–5. Groups must read from six feet away — the primary viewing distance for a 75.
- Negative space at scale: leave a genuine open area (a third of the tank); in big tanks, emptiness is a design material.
Styles that shine at 75 gallons: Dutch streetscapes (our Dutch walkthrough), jungle (our jungle build guide), and large nature-aquarium compositions. Iwagumi at 75 gallons is possible but demands enormous stones.
The 75-Gallon Plant List
Think in masses and specimen plants:
Background (tall, massed)
- Vallisneria (jungle val) curtains — back corners; 21 inches of height grows real curtains
- Rotala / ludwigia hedges — 15–20 stem groups, trimmable architecture
- Amazon sword specimens — 2–3 large swords as anchors; the scale suits them
- Giant hygrophila / temple plant — fast fill while the scape matures
Midground (the composition's body)
- Cryptocoryne balansae / usteriana drifts — tall crypt masses; spectacular at scale
- Anubias barteri colonies on wood — large-form epiphytes for large wood
- Java fern forests — Windeløv stands on hardscape
- Red tiger lotus (2–3) — color anchors distributed through the midground
- Bucephalandra groupings — proper colonies, not accents
Foreground
- Monte Carlo / dwarf hairgrass carpets — with CO2; the premium foregrounds the scale deserves
- Dwarf sagittaria meadow — the low-tech alternative that still looks intentional
- Staurogyne repens terraces — foreground architecture
Floating
- Frogbit / red root floater zones — partial coverage; see our floating plant guide.
Initial planting: 60–100 portions for real density. This is the single biggest line item after equipment — buy heavy. Our planting quantity guide sets baselines; at 75 gallons, round up aggressively.
Stocking: Schools With Presence
Big tanks need fish scaled to the volume — a dozen neons vanish in 75 gallons. Stock for the viewing distance:
- Large schools: 25–30 cardinal/rummy-nose tetras, 15–20 larger tetras (diamond, lemon, Congo) — schools must read from across the room. Our schooling fish guide details options.
- Centerpiece groups: 6–8 angelfish (our planted angelfish setup), 6–8 discus (our planted discus setup), or 10–12 large rainbowfish (our rainbowfish setup).
- Bottom crew at scale: 10–12 corydoras, 2–3 bristlenose plecos.
- Cleanup army: 10+ otocinclus, 15+ amano shrimp — algae control must scale with the glass area.
Stock in waves over 4–6 weeks: cleanup crew and hardy schools first, centerpiece fish last. Each wave is a bioload step; the maturing system absorbs them sequentially.
The Build Sequence
- Position and level the stand and tank. Verify level in both directions. This is forever — get it right.
- Install background (paint/film) before the tank is against the wall.
- Hardscape dry — arrange wood and stone with the tank empty; photograph, adjust, live with it for days.
- Substrate — slope 2 inches front to 4+ back; three bags, terraced with hidden supports.
- Plant densely — back to front, tallest first. Budget a full day; enlist help for the stem grids.
- Fill slowly over plastic sheeting; start filtration and CO2 immediately.
- Cycle 3–4 weeks plant-assisted (our faster cycling guide), heavy water changes early.
- Stock in waves — cleanup crew week 4, schools weeks 5–6, centerpiece week 7+.
CO2 and Fertilization at Scale
At 75 gallons, CO2 via inline diffuser or reactor on the canister outflow distributes best — in-tank diffusers can't cover four feet evenly. Target 30 ppm (drop checker green), on 1–2 hours before lights, off 1 hour before lights-out. A 5 lb cylinder lasts 2–4 months at this scale; keep a spare.
Fertilize to the plant mass: full EI-style dosing or PPS-Pro, plus root tabs quarterly under the heavy feeders. Big tanks show deficiencies as big problems — dose consistently, watch new growth (not old leaves) for the early signals.
Maintenance: The Big-Tank Routine
- 30–40% weekly water change — 22–30 gallons; the Python changer makes this 30 minutes.
- Trim on rotation — one zone per week (background this week, midground next); the whole tank never needs simultaneous work.
- Glass cleaning weekly — 48 inches of glass shows everything; magnetic cleaner for touch-ups.
- Filter maintenance monthly — alternate canisters if running dual; never all media at once.
- CO2 check weekly — cylinder pressure, bubble rate, drop checker color.
- Prune lotus runners, thin floaters, weed invaders — monthly structural session.
Total: 1.5–2.5 hours weekly. The 75-gallon is a commitment — honest accounting before building prevents resentful neglect later.
Frequently Asked Questions
How much does a 75-gallon planted tank really cost?
Realistically: the tank and stand, quality 48-inch lighting, large canister filtration, pressurized CO2, three bags of aquasoil, and 60–100 plant portions add up to a serious investment — several times the cost of a 20-gallon setup. The exact figure varies by choices, but budget honestly for every line item before starting; the most expensive tank is the half-finished one.
Can I do a 75-gallon planted tank low-tech?
Yes — and many beautiful 75s run without CO2. Choose the undemanding palette (swords, vals, crypts, anubias, ferns, jungle-style), accept slower growth, and enjoy lower maintenance. Our low-tech guide scales up directly. CO2 is the upgrade that unlocks reds and carpets, not a requirement.
How do I do water changes on a 75-gallon without buckets?
A tap-connected water changer (Python or equivalent) is mandatory equipment — it siphons to the sink and refills from the tap, with dechlorinator dosed to the tank before refilling. At 25+ gallons per change, buckets are a non-starter. Set it up before the tank is stocked; you'll use it weekly for years.
Will my floor support a 75-gallon tank?
A filled 75-gallon with stand weighs 600–700 lbs. Ground floors (concrete slab) handle it anywhere; upper floors need placement against a load-bearing wall, perpendicular to floor joists — and renters should check their lease and consider renter's insurance. When in doubt, consult a contractor. A 75-gallon flood is a life-altering event; placement diligence is cheap insurance.
How long does a 75-gallon take to look mature?
Three to six months from planting to genuinely impressive, assuming dense initial planting. Big tanks fill slower (more volume to vegetate) but the wait produces the most dramatic before/after in the hobby. The first two months test patience; month four onward is the payoff.
One big filter or two smaller ones?
Two canisters (or canister + large HOB) beat one giant filter: redundancy (if one fails, the tank survives), better circulation (intake/output at opposite ends), and staggered maintenance (clean one per month, never both). The extra cost buys the two things big tanks need most: reliability and even flow.
The Big Build Payoff
A mature 75-gallon planted tank is the hobby's grand statement — four feet of living landscape, schools moving through it like weather, the room's undeniable centerpiece. It demands the most of everything: money, space, time, patience. But nothing else in freshwater delivers this scale of immersion. Plan honestly, build patiently, maintain consistently — and you'll own the tank everyone stops to stare at.
For the plant science behind scaling up CO2 and fertilization, see the 2Hr Aquarist aquarium plant care guides.
Tissue-culture plants are the exception — they’re grown in sterile gel and adapt with minimal melting, which is part of what you’re paying for. Plants bought submersed from another hobbyist’s tank also transition with little melt, since they’re already in the right form.
Which Plants Melt Most (and Least)
Heavy melters (expect significant leaf loss)
- Cryptocorynes — infamous for “crypt melt,” sometimes dropping every leaf after any disturbance. They almost always recover from the roots within weeks.
- Stem plants grown emersed — rotala, ludwigia, and hygrophila often shed lower emersed leaves while the growing tips transition.
- Amazon swords — emersed-grown swords typically lose their broad oval aerial leaves and replace them with longer submersed ribbon leaves.
Light melters
- Anubias, java fern, bucephalandra — slow-growing rhizome plants transition gradually; occasional old-leaf melt but rarely dramatic.
- Vallisneria — usually transitions well, though it dislikes the move itself and may sulk for a week.
- Floating plants — minimal melt since their leaves were already at the air-water interface.
The Acclimation Protocol
Step 1: Quarantine or dip first
Before acclimating to your tank’s conditions, make sure you’re not acclimating pests along with the plant. Run new arrivals through our quarantine and dip protocol — it adds days upfront but prevents months of regret.
Step 2: Float to temperature-match (30 minutes)
Float the bag or container in your tank for 20–30 minutes to equalize temperature. Plants are less temperature-sensitive than fish, but a 10°F shock on top of transplant stress is an avoidable insult.
Step 3: Trim before planting
Remove any leaves that are already damaged, yellowing, or heavily algae-covered — they won’t recover and they’ll rot in your tank, feeding algae. For stem plants, trim off the bottom inch and any emersed leaves that look unlikely to adapt; the plant wastes energy maintaining leaves it’s going to shed anyway. Keep the healthy growing tips — that’s where recovery starts.
Step 4: Plant correctly the first time
Follow our planting guide — right depth, crown exposed on rosettes, rhizomes unburied on epiphytes. Every uprooting and replanting restarts the acclimation clock, so get placement right on the first attempt. Decide where each plant goes before it goes in the water.
Step 5: Run a gentle first week
For the first 7 days after planting:
- Moderate light — run your normal photoperiod but consider dropping intensity 20–30% if your light is dimmable. Blast-level light on a melting plant grows algae on the dying leaves, not recovery.
- Stable CO2 — if you inject CO2, keep it consistent. Fluctuating CO2 during acclimation is a melt accelerator. If you’re low-tech, this doesn’t apply — see growing without CO2.
- Half-strength fertilizer — new plants with damaged leaves can’t use full dosing, and the excess feeds algae. Ramp to full strength over 2–3 weeks per our fertilizer schedule.
- No disturbance — don’t move, trim, or “check on” new plants for at least two weeks. Every touch resets root establishment. This is especially critical for crypts.
Step 6: Remove melt, keep the base
As emersed leaves melt, remove the mushy material promptly — decaying leaves release ammonia and grow fungus that can spread to healthy tissue. But never discard the plant while the crown, rhizome, or roots are firm and alive. A crypt that’s lost every leaf but has firm roots is a plant that’s about to recover, not a dead plant. Give it 3–4 weeks before judging.
Telling Normal Melt From Real Problems
Normal transition melt:
- Affects oldest/emersed leaves first, newest growth last
- New submersed leaves emerge even as old ones dissolve
- Roots and crown stay firm and white/green
- Timeline: 1–4 weeks, then obvious new growth
Concerning melt (see our full melting diagnosis guide):
- New growth also melts or emerges deformed
- Rhizome or crown turns mushy and brown — this is rot, not transition
- Entire plant dissolves within days with no new growth after 4+ weeks
- Melting spreads to established plants that weren’t recently moved
Buying Tips to Minimize Melt
- Buy submersed-grown when available — hobbyist-grown cuttings transition with almost no melt.
- Choose tissue culture for sensitive species — crypts and delicate stems establish far more reliably from sterile cups.
- Avoid plants already melting in the store tank — some melt is normal, but a plant that’s mostly mush at purchase has less energy for recovery.
- Transport carefully — keep plants damp and out of direct sun/heat. A plant that dries out or cooks in a hot car melts far worse than one transported properly.
The First-Month Timeline: What to Expect Week by Week
Knowing what’s normal when removes most acclimation anxiety. Here’s the typical timeline for a healthy plant adapting to a new tank:
Week 1: The quiet week
Almost nothing visible happens. The plant is growing roots you can’t see and assessing its new environment. Some species (vallisneria, stem plants) may start shedding their lowest leaves. This is normal. Resist the urge to “help” — no moving, no extra fertilizer, no light changes. The most common beginner mistake is intervening during a week when the correct action is nothing.
Week 2: Melt peaks
This is when emersed leaves give up in earnest. Crypts may drop everything; swords shed their broad aerial leaves; stem plants lose lower foliage. It looks catastrophic and it’s usually fine. Keep removing mushy material, keep conditions stable, and watch the crown and growing tips — if those are firm and green, recovery is already underway.
Week 3: The turn
New submersed-adapted leaves emerge — smaller, thinner, often a slightly different shade of green than the emersed foliage. Stem plant tips start growing visibly; crypts push tiny curled leaves from the crown; swords unfurl narrow ribbon leaves. This is the moment most beginners exhale for the first time.
Week 4+: Established
New growth outpaces melt, and the plant is functionally yours. You can resume full-strength fertilizer, normal trimming, and stop treating it as fragile. Some slow growers (anubias, bucephalandra) take 6–8 weeks to show obvious progress — that’s their normal speed, not a problem.
Acclimating Different Plant Formats
Tissue-culture cups
Sterile, pest-free, and already adapted to high-humidity (not emersed) growth — tissue cultures melt the least of any format. Rinse the agar gel off gently (leftover gel rots and feeds fungus), split the portion into small plantlets, and plant per our planting guide. They establish slowly for the first two weeks, then accelerate. No dip needed, minimal acclimation stress — this is the premium experience you’re paying for.
Potted plants
Remove the pot and strip away the rockwool completely — leftover rockwool traps debris and rots. Tease the root mass apart gently; if it’s a dense mat, splitting it into 2–3 smaller portions actually establishes faster than planting one big clump (more growing points, better water flow around roots). Potted plants are usually emersed-grown, so expect the standard 2–4 week melt cycle.
Bare-root / bunched stems
Typically sold as weighted bunches. Remove any bands, foam, or weights, strip the lower leaves, and plant stems individually or in small groups. Bunched stems from the store are often already transitioning — check for new submersed growth at the tips, which tells you the plant is mid-adaptation and will settle quickly.
Hobbyist cuttings
Already submersed-grown and the fastest to establish — often showing new growth within days. The main acclimation factor is water-parameter difference between the two tanks. Float to temperature-match, plant promptly, and they’ll usually take off with minimal melt. This is why experienced hobbyists prefer trading cuttings over buying potted plants.
Frequently Asked Questions
Should I use a “plant starter” or transplant fertilizer?
Products marketed for transplant shock are mostly B-vitamins and mild hormones. They don’t hurt, but there’s no strong evidence they help aquarium plants specifically. Stable conditions and patience outperform any bottle. Save the money for more plants.
My new plant melted completely — bare crown, no leaves. Is it dead?
Probably not, if the crown or rhizome is firm. Crypts and swords routinely lose 100% of their leaves and regrow from the base within a month. The test is firmness: firm and pale/green means alive; mushy and brown/black means rot. Give firm-but-leafless plants a full 4 weeks before declaring them dead.
Can I speed up acclimation with extra light or CO2?
No — and trying usually backfires. A melting plant can’t use extra light; the excess just grows algae on its dying leaves. Keep light moderate and CO2 stable (not boosted) during acclimation. Growth speed comes from the plant’s own adaptation timeline, which you can’t rush, only avoid delaying.
Should new plants go straight into my main display tank?
After quarantine/dipping, yes — there’s no benefit to a separate “growing-in” tank for most plants. They acclimate to your water fastest in the tank they’ll live in. The exception is very delicate species going into a tank with boisterous fish; give those a few weeks in a calm corner or breeder box first.
The Patience Rule
The single most important acclimation skill is restraint: plant it right, set gentle conditions, remove decay, and then leave it alone for a month. The hobbyists with the best plant growth aren’t doing something clever in week one — they’re simply not interfering in weeks two through four while the plants do what they’ve evolved to do. Melt looks like failure and feels like failure, but in most cases it’s the visible part of a plant successfully becoming yours.