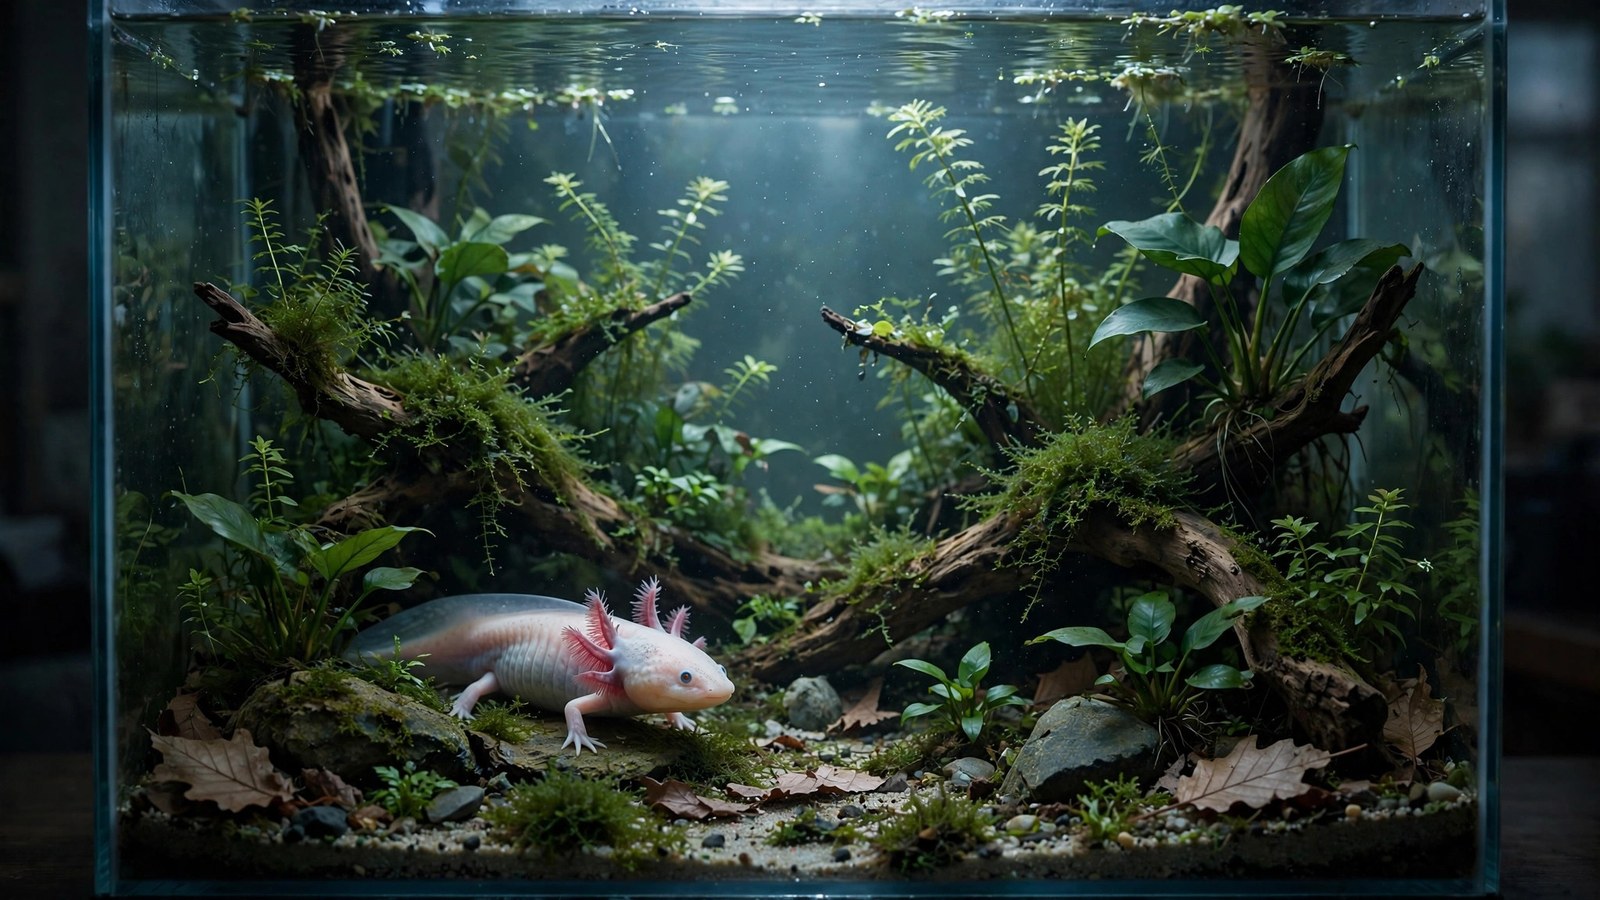
Axolotls — smiling salamanders with feathery gills — are unlike any other animal in the aquarium hobby, and their planted tank breaks nearly every tropical rule. Cold water, dim light, no strong flow, and tankmates that are mostly the axolotl's lunch: the planted axolotl tank is a specialty build for a cold-water amphibian that happens to look spectacular among the right plants.
The Axolotl Constraint Set
Everything in this build flows from axolotl biology:
- Cold: 60–64°F ideal, never above 68°F sustained — heat kills axolotls
- Dim: axolotls have no eyelids and dislike bright light
- Still: strong flow stresses them; their feathery gills are delicate
- Big: adults reach 9–12 inches and produce serious waste
- Predatory: anything that fits in the mouth gets eaten, including small fish and shrimp
- Delicate skin: sharp substrate and rough decor injure them
The good news: cold, dim, low-flow water with minimal fertilization grows a specific set of plants beautifully — and axolotls, being bottom-dwelling ambush animals, genuinely use plant cover. This isn't decoration; it's habitat.
Tank Size: Floor Space Rules
Axolotls live on the bottom — prioritize footprint over height:
- Single adult: 20-gallon long minimum
- Pair: 40-gallon breeder — the recommended build
- Rule: 10 gallons per axolotl is the floor, not the target; bigger is always better
Keep the water level a few inches below the rim and use a tight lid — axolotls can and do climb out. Our 40-gallon breeder planted tank setup covers the equipment side of the ideal axolotl footprint.
Water Parameters: Cold and Clean
| Parameter | Target range |
|---|---|
| Temperature | 60–64°F (16–18°C); lethal above ~75°F |
| pH | 6.5–8.0 (wide tolerance; stability matters) |
| GH / KH | Moderate; avoid extremes |
| Ammonia / nitrite | 0 ppm — axolotls are extremely ammonia-sensitive |
| Nitrate | Under 20 ppm |
Temperature control is the central engineering challenge. In most homes, a tank without a heater sits at 68–72°F — too warm. Solutions in order of effectiveness: keep the tank in the coolest room, run surface fans for evaporative cooling, and for warm climates, buy an aquarium chiller — the definitive answer. Monitor with a thermometer you actually look at; axolotls decline slowly in warm water, and keepers often don't notice until it's serious.
Our planted tank water parameters guide covers the chemistry; the temperature column is where axolotl keeping lives or dies.
Substrate: Sand or Bare — Nothing Else
This is a safety rule, not a preference: no gravel, ever. Axolotls vacuum food off the bottom and swallow gravel, causing fatal impactions — the number-one killer of pet axolotls. Acceptable options:
- Fine sand — passes through if swallowed; natural look; plants root in it
- Bare bottom — maximum hygiene, easiest cleaning; less natural but completely safe
- Large slate tiles — too big to swallow; an elegant middle ground
Depth: 1 inch of sand maximum. Axolotls bulldoze substrate; deep beds become debris traps. Juveniles under 5 inches should be on bare bottom only — even sand is a risk for small axolotls.
Plants for Cold, Dim, Still Water
The axolotl plant list is the cool-water hall of fame — all of these thrive at 60–64°F in low light:
- Anubias (all varieties) — the axolotl plant. Tough, cold-tolerant, low-light, unpalatable. Tie to wood and rocks; axolotls rest against the broad leaves.
- Java fern — thrives cold; attach to hardscape. The broad varieties give axolotls shady overhangs.
- Java moss / Christmas moss — cold-water champion; carpets wood and rocks in dim tanks. Axolotls lay eggs in moss — it's also the breeding substrate.
- Marimo moss balls — nearly indestructible in cold water; axolotls push them around like toys. Genuinely enriching.
- Elodea / anacharis — cold-water native that grows in near-darkness; excellent nitrate absorber. Float it or weight it down.
- Hornwort — same story: cold-tolerant, fast, dim-light capable. Float bunches for shade.
- Water sprite — planted or floating; creates the dappled shade axolotls prefer.
- Cryptocoryne wendtii — tolerates cool water and low light; fills the midground.
Attach epiphytes to hardscape and let the stem plants float or sit weighted — axolotls uproot substrate plantings casually. This is a low-tech build by necessity: our low-tech planted tank setup principles apply, minus the warm-water assumptions.
Hardscape: Smooth and Stable
Every hardscape piece must pass two tests: smooth enough not to scratch delicate skin, and stable enough that a 10-inch salamander can't topple it. Use smooth driftwood (sand any sharp points), rounded river stones, and PVC pipe caves or ceramic hides — axolotls need at least one dark hide per animal.
Stack stones directly on the tank bottom, not on substrate — axolotls dig under unstable piles. A toppled rock on an axolotl is a veterinary emergency. When in doubt, silicone structures together.
Filtration: Gentle but Strong
Axolotls produce heavy bioloads but hate flow — the classic filtration puzzle. Solutions:
- Large sponge filter(s) — the axolotl standard: excellent biological filtration, near-zero flow, impossible to injure the animal. Run two in a 40-gallon.
- Canister with spray bar — for larger tanks; diffuse output along the back glass so the tank circulates without current.
- Hang-on-back, baffled — acceptable if the output is thoroughly diffused.
Filtration rated 2x tank volume minimum — axolotl waste is substantial. But the output should barely ripple the surface; if your axolotl's gills are streaming sideways, the flow is too strong. Cover all intakes with fine sponges — axolotl gill filaments snag.
Lighting: Dim by Design
Axolotls have no eyelids and actively avoid bright light. Run low-intensity lighting 6–8 hours daily — just enough for the low-light plant list — and provide shaded zones with floating plants, overhanging wood, and hides. If your axolotl only comes out when the lights are off, the lights are too bright.
Albino and leucistic axolotls are especially light-sensitive. For these morphs, keep lighting minimal and hides abundant — they're the most common pet morphs and the most photophobic.
Feeding: Earthworms Are the Answer
The ideal axolotl diet is simple: earthworms (nightcrawlers) as the staple — nutritionally complete, eagerly accepted, cheap. Supplement with:
- Axolotl/sinking carnivore pellets — good backup staple
- Frozen bloodworms — fine for juveniles; adults need bigger food
- Blackworms — excellent for juveniles
Feed juveniles daily, adults every 2–3 days — as much as they eat in a few minutes. Remove uneaten food promptly; rotting worms foul cold water fast. A healthy axolotl's body should be about as wide as its head — thinner means underfed, much wider means obese (yes, axolotls get fat).
Tankmates: Almost None
The honest list: axolotls eat fish, fish nip axolotl gills, and almost nothing shares their cold still water. Workable options are few:
- Another axolotl — same size, well-fed, with hides; the standard companion
- White cloud mountain minnows — sometimes work in large tanks; may become snacks
- Cherry shrimp — expensive snacks, but they clean while they last
- Nerite snails — usually ignored; help with algae
Fish that nip gills (most tetras, barbs, danios) are out. Small fish become food. The planted axolotl tank is fundamentally a species tank — and axolotls are interesting enough to carry it.
Cycling and Introduction
Cycle fishless, mature 4–6 weeks, verify zero ammonia/nitrite for two straight weeks — axolotls are among the most ammonia-sensitive animals in the hobby, and "fish-in cycling" with an axolotl is animal cruelty. Our plant-assisted cycling guide covers the plant-assisted method.
Acclimate slowly by drip over 1–2 hours — axolotls stress easily from parameter swings. Keep lights off for the first day. Don't handle them unless necessary; their skin absorbs everything on your hands (rinse hands thoroughly, no lotions).
Maintenance
- 25–30% weekly water change with temperature-matched dechlorinated water — cold water holds more dissolved gas; let replacement water sit to avoid gas bubble issues.
- Spot-clean waste daily — a turkey baster removes axolotl waste in seconds; daily spot-cleaning beats weekly crises.
- Trim plants monthly — cold-water growth is slow; maintenance is light.
- Check temperature daily — the single most important daily habit in axolotl keeping.
- Rinse pre-filter sponges weekly — axolotl waste clogs mechanical filtration fast.
Frequently Asked Questions
Can axolotls live in a tropical community tank?
No. Tropical temperatures (76°F+) are lethal to axolotls over time — their metabolism, immune function, and stress hormones all fail in warm water. And tropical fish nip their gills. Axolotls need their own cold, calm, species-appropriate tank. There is no compromise version of this.
Why is my axolotl floating?
Occasional floating is normal — axolotls gulp air and bob around. Persistent floating, especially tail-up, signals constipation, impaction (gravel!), or water-quality problems. Check parameters first, review diet and substrate, and if it persists beyond a day or two with a bloated appearance, consult an exotic vet.
Do axolotls need light?
They need a day/night cycle but minimal light intensity — ambient room light is often enough, supplemented by a dim tank light for the plants. They have no eyelids and find bright light stressful. Design the lighting for the plants' minimum needs, not for viewing; use hides and shaded zones so the axolotl can always escape it.
Can I keep plants with an axolotl, or will it destroy them?
Axolotls don't eat plants — they uproot them by blundering through. The solution is the epiphyte-heavy approach in this guide: anubias, ferns, and moss attached to immovable hardscape. Substrate-planted stems get bulldozed; wood-mounted epiphytes survive indefinitely.
How do I cool an axolotl tank in summer?
Surface fans provide 2–4°F of evaporative cooling and suffice in mild climates. For sustained heat, an aquarium chiller is the reliable answer — sized to the tank, it's set-and-forget. Emergency measures (frozen bottles, ice) cause temperature swings that stress axolotls; use them only as a bridge to a real solution.
My axolotl's gills are curled forward. Is that bad?
Forward-curled gills signal stress — usually water quality (test ammonia/nitrite immediately), excessive flow, or temperatures creeping too high. Healthy relaxed gills trail back smoothly. Curled gills are one of the earliest visible stress indicators; treat them as an alarm, not a quirk.
The Axolotl Tank Payoff
A planted axolotl tank is unlike anything else in the hobby: a cold, dim, mossy world with a smiling amphibian drifting through it like something from a fairy tale. It asks for specific things — cold water, gentle filtration, earthworms, patience — and gives back an animal with genuine personality that recognizes its keeper and lives 10–15 years. Build it cold, plant it tough, keep it dim, and you'll have the most conversation-starting tank on the block.
For a second opinion on axolotl husbandry, see Practical Fishkeeping’s complete guide to caring for axolotls.
Tissue-culture plants are the exception — they’re grown in sterile gel and adapt with minimal melting, which is part of what you’re paying for. Plants bought submersed from another hobbyist’s tank also transition with little melt, since they’re already in the right form.
Which Plants Melt Most (and Least)
Heavy melters (expect significant leaf loss)
- Cryptocorynes — infamous for “crypt melt,” sometimes dropping every leaf after any disturbance. They almost always recover from the roots within weeks.
- Stem plants grown emersed — rotala, ludwigia, and hygrophila often shed lower emersed leaves while the growing tips transition.
- Amazon swords — emersed-grown swords typically lose their broad oval aerial leaves and replace them with longer submersed ribbon leaves.
Light melters
- Anubias, java fern, bucephalandra — slow-growing rhizome plants transition gradually; occasional old-leaf melt but rarely dramatic.
- Vallisneria — usually transitions well, though it dislikes the move itself and may sulk for a week.
- Floating plants — minimal melt since their leaves were already at the air-water interface.
The Acclimation Protocol
Step 1: Quarantine or dip first
Before acclimating to your tank’s conditions, make sure you’re not acclimating pests along with the plant. Run new arrivals through our quarantine and dip protocol — it adds days upfront but prevents months of regret.
Step 2: Float to temperature-match (30 minutes)
Float the bag or container in your tank for 20–30 minutes to equalize temperature. Plants are less temperature-sensitive than fish, but a 10°F shock on top of transplant stress is an avoidable insult.
Step 3: Trim before planting
Remove any leaves that are already damaged, yellowing, or heavily algae-covered — they won’t recover and they’ll rot in your tank, feeding algae. For stem plants, trim off the bottom inch and any emersed leaves that look unlikely to adapt; the plant wastes energy maintaining leaves it’s going to shed anyway. Keep the healthy growing tips — that’s where recovery starts.
Step 4: Plant correctly the first time
Follow our planting guide — right depth, crown exposed on rosettes, rhizomes unburied on epiphytes. Every uprooting and replanting restarts the acclimation clock, so get placement right on the first attempt. Decide where each plant goes before it goes in the water.
Step 5: Run a gentle first week
For the first 7 days after planting:
- Moderate light — run your normal photoperiod but consider dropping intensity 20–30% if your light is dimmable. Blast-level light on a melting plant grows algae on the dying leaves, not recovery.
- Stable CO2 — if you inject CO2, keep it consistent. Fluctuating CO2 during acclimation is a melt accelerator. If you’re low-tech, this doesn’t apply — see growing without CO2.
- Half-strength fertilizer — new plants with damaged leaves can’t use full dosing, and the excess feeds algae. Ramp to full strength over 2–3 weeks per our fertilizer schedule.
- No disturbance — don’t move, trim, or “check on” new plants for at least two weeks. Every touch resets root establishment. This is especially critical for crypts.
Step 6: Remove melt, keep the base
As emersed leaves melt, remove the mushy material promptly — decaying leaves release ammonia and grow fungus that can spread to healthy tissue. But never discard the plant while the crown, rhizome, or roots are firm and alive. A crypt that’s lost every leaf but has firm roots is a plant that’s about to recover, not a dead plant. Give it 3–4 weeks before judging.
Telling Normal Melt From Real Problems
Normal transition melt:
- Affects oldest/emersed leaves first, newest growth last
- New submersed leaves emerge even as old ones dissolve
- Roots and crown stay firm and white/green
- Timeline: 1–4 weeks, then obvious new growth
Concerning melt (see our full melting diagnosis guide):
- New growth also melts or emerges deformed
- Rhizome or crown turns mushy and brown — this is rot, not transition
- Entire plant dissolves within days with no new growth after 4+ weeks
- Melting spreads to established plants that weren’t recently moved
Buying Tips to Minimize Melt
- Buy submersed-grown when available — hobbyist-grown cuttings transition with almost no melt.
- Choose tissue culture for sensitive species — crypts and delicate stems establish far more reliably from sterile cups.
- Avoid plants already melting in the store tank — some melt is normal, but a plant that’s mostly mush at purchase has less energy for recovery.
- Transport carefully — keep plants damp and out of direct sun/heat. A plant that dries out or cooks in a hot car melts far worse than one transported properly.
The First-Month Timeline: What to Expect Week by Week
Knowing what’s normal when removes most acclimation anxiety. Here’s the typical timeline for a healthy plant adapting to a new tank:
Week 1: The quiet week
Almost nothing visible happens. The plant is growing roots you can’t see and assessing its new environment. Some species (vallisneria, stem plants) may start shedding their lowest leaves. This is normal. Resist the urge to “help” — no moving, no extra fertilizer, no light changes. The most common beginner mistake is intervening during a week when the correct action is nothing.
Week 2: Melt peaks
This is when emersed leaves give up in earnest. Crypts may drop everything; swords shed their broad aerial leaves; stem plants lose lower foliage. It looks catastrophic and it’s usually fine. Keep removing mushy material, keep conditions stable, and watch the crown and growing tips — if those are firm and green, recovery is already underway.
Week 3: The turn
New submersed-adapted leaves emerge — smaller, thinner, often a slightly different shade of green than the emersed foliage. Stem plant tips start growing visibly; crypts push tiny curled leaves from the crown; swords unfurl narrow ribbon leaves. This is the moment most beginners exhale for the first time.
Week 4+: Established
New growth outpaces melt, and the plant is functionally yours. You can resume full-strength fertilizer, normal trimming, and stop treating it as fragile. Some slow growers (anubias, bucephalandra) take 6–8 weeks to show obvious progress — that’s their normal speed, not a problem.
Acclimating Different Plant Formats
Tissue-culture cups
Sterile, pest-free, and already adapted to high-humidity (not emersed) growth — tissue cultures melt the least of any format. Rinse the agar gel off gently (leftover gel rots and feeds fungus), split the portion into small plantlets, and plant per our planting guide. They establish slowly for the first two weeks, then accelerate. No dip needed, minimal acclimation stress — this is the premium experience you’re paying for.
Potted plants
Remove the pot and strip away the rockwool completely — leftover rockwool traps debris and rots. Tease the root mass apart gently; if it’s a dense mat, splitting it into 2–3 smaller portions actually establishes faster than planting one big clump (more growing points, better water flow around roots). Potted plants are usually emersed-grown, so expect the standard 2–4 week melt cycle.
Bare-root / bunched stems
Typically sold as weighted bunches. Remove any bands, foam, or weights, strip the lower leaves, and plant stems individually or in small groups. Bunched stems from the store are often already transitioning — check for new submersed growth at the tips, which tells you the plant is mid-adaptation and will settle quickly.
Hobbyist cuttings
Already submersed-grown and the fastest to establish — often showing new growth within days. The main acclimation factor is water-parameter difference between the two tanks. Float to temperature-match, plant promptly, and they’ll usually take off with minimal melt. This is why experienced hobbyists prefer trading cuttings over buying potted plants.
Frequently Asked Questions
Should I use a “plant starter” or transplant fertilizer?
Products marketed for transplant shock are mostly B-vitamins and mild hormones. They don’t hurt, but there’s no strong evidence they help aquarium plants specifically. Stable conditions and patience outperform any bottle. Save the money for more plants.
My new plant melted completely — bare crown, no leaves. Is it dead?
Probably not, if the crown or rhizome is firm. Crypts and swords routinely lose 100% of their leaves and regrow from the base within a month. The test is firmness: firm and pale/green means alive; mushy and brown/black means rot. Give firm-but-leafless plants a full 4 weeks before declaring them dead.
Can I speed up acclimation with extra light or CO2?
No — and trying usually backfires. A melting plant can’t use extra light; the excess just grows algae on its dying leaves. Keep light moderate and CO2 stable (not boosted) during acclimation. Growth speed comes from the plant’s own adaptation timeline, which you can’t rush, only avoid delaying.
Should new plants go straight into my main display tank?
After quarantine/dipping, yes — there’s no benefit to a separate “growing-in” tank for most plants. They acclimate to your water fastest in the tank they’ll live in. The exception is very delicate species going into a tank with boisterous fish; give those a few weeks in a calm corner or breeder box first.
The Patience Rule
The single most important acclimation skill is restraint: plant it right, set gentle conditions, remove decay, and then leave it alone for a month. The hobbyists with the best plant growth aren’t doing something clever in week one — they’re simply not interfering in weeks two through four while the plants do what they’ve evolved to do. Melt looks like failure and feels like failure, but in most cases it’s the visible part of a plant successfully becoming yours.