You planted them three weeks ago, they looked perfect, and now half the leaves are translucent mush. If you're searching for how to revive dying aquarium plants, take a breath first: in most cases, your plants aren't dead — they're adjusting. Knowing how to tell normal transition melting apart from a genuine problem is the single most useful skill a beginner can learn, and it saves countless healthy plants from being thrown away too early.
First, Don't Rip It Out: Why New Plants Look Like They're Dying
Almost every aquarium plant sold in a shop was grown emersed — with its leaves in humid air, like a greenhouse plant — because that's how nurseries produce them fastest. Submerged leaves, the kind a plant grows to live underwater, are a completely different structure. When you plant an emersed-grown plant in your tank, it discards the old leaf set and grows a new one. This is transition melt, and it looks alarming.
Melt typically starts in the first week or two. Old leaves yellow, turn translucent, and dissolve. The detail beginners miss: check the growing tip. If the stem tip, crown, or rhizome is firm and producing even tiny new leaves, the plant is mid-transition, not dying. New submerged growth often looks thinner and shaped differently than the shop foliage — that's normal. To understand why shop foliage can't survive underwater, read our guide to growing aquarium plants emersed; the Tropica plant database also shows photos of both leaf forms for most popular species.
What Transition Melt Looks Like, Plant by Plant
Stem plants like Rotala melt from the bottom up — the oldest, most shaded leaves go first. Carpet plants such as Monte Carlo thin out patchily while new runners spread underneath. Cryptocoryne can lose every leaf overnight ("crypt melt") yet the rhizome is almost always fine, pushing new leaves in two to four weeks. The common thread: melting old leaves plus any new growth equals a plant in transition, not a dying one.
The Triage Framework: Normal Adjustment vs. Real Trouble
Use this framework to tell the difference — because the fix for transition melt ("wait") is the opposite of the fix for a light or nutrient problem ("change something"):
| Symptom | Likely adjustment (wait) | Likely real problem (act) |
|---|---|---|
| Old leaves turn translucent and dissolve | First 2–4 weeks after planting; new growth visible at tips | No new growth past 6 weeks; stems mushy up to the tip |
| Yellowing leaves | Emersed leaves yellowing one at a time from the outside | New submerged leaves emerging pale — a nutrient or light gap |
| Leaves fall off when touched | Cryptocoryne in its first weeks — normal crypt melt | Rhizome or crown soft and dark — likely rot |
| Growth stalls completely | First 1–2 weeks while roots establish | No new growth after a month despite firm tissue — check light, nutrients, root zone |
| Holes or ragged edges | Old emersed leaves deteriorating during transition | New leaves developing pinholes — a classic deficiency pattern |
| Plant floats up | Newly planted stems with no roots yet — weight them down | Stem base rotted to mush — trim above the rot and replant |
Roughly two-thirds of "dying plant" panics in the first month are transition melt, and the plants that survive are overwhelmingly the ones that were left alone. Which brings us to the most important rule in this guide.
The "Don't Rip It Out Yet" Rule
Beginners kill more plants by impatience than by neglect. Every time you uproot a plant, you destroy the fine root hairs it spent weeks growing, and you reset its adjustment clock to zero. So here is the rule: once a plant is in the substrate, give it three full weeks before you touch it — unless rot is actively spreading toward healthy tissue or the whole plant is clearly decomposing. Trimming dead leaves is fine; uprooting to "check the roots" every few days is not. Plants grow on their own timeline, and most of what looks like dying in week two looks like thriving in week six.
How to Revive Dying Aquarium Plants: The Rescue Protocol
When the triage table says something is genuinely wrong — or a plant has finished its adjustment window and still looks miserable — work through this protocol in order.
Step 1: Trim Away Dead and Rotting Tissue
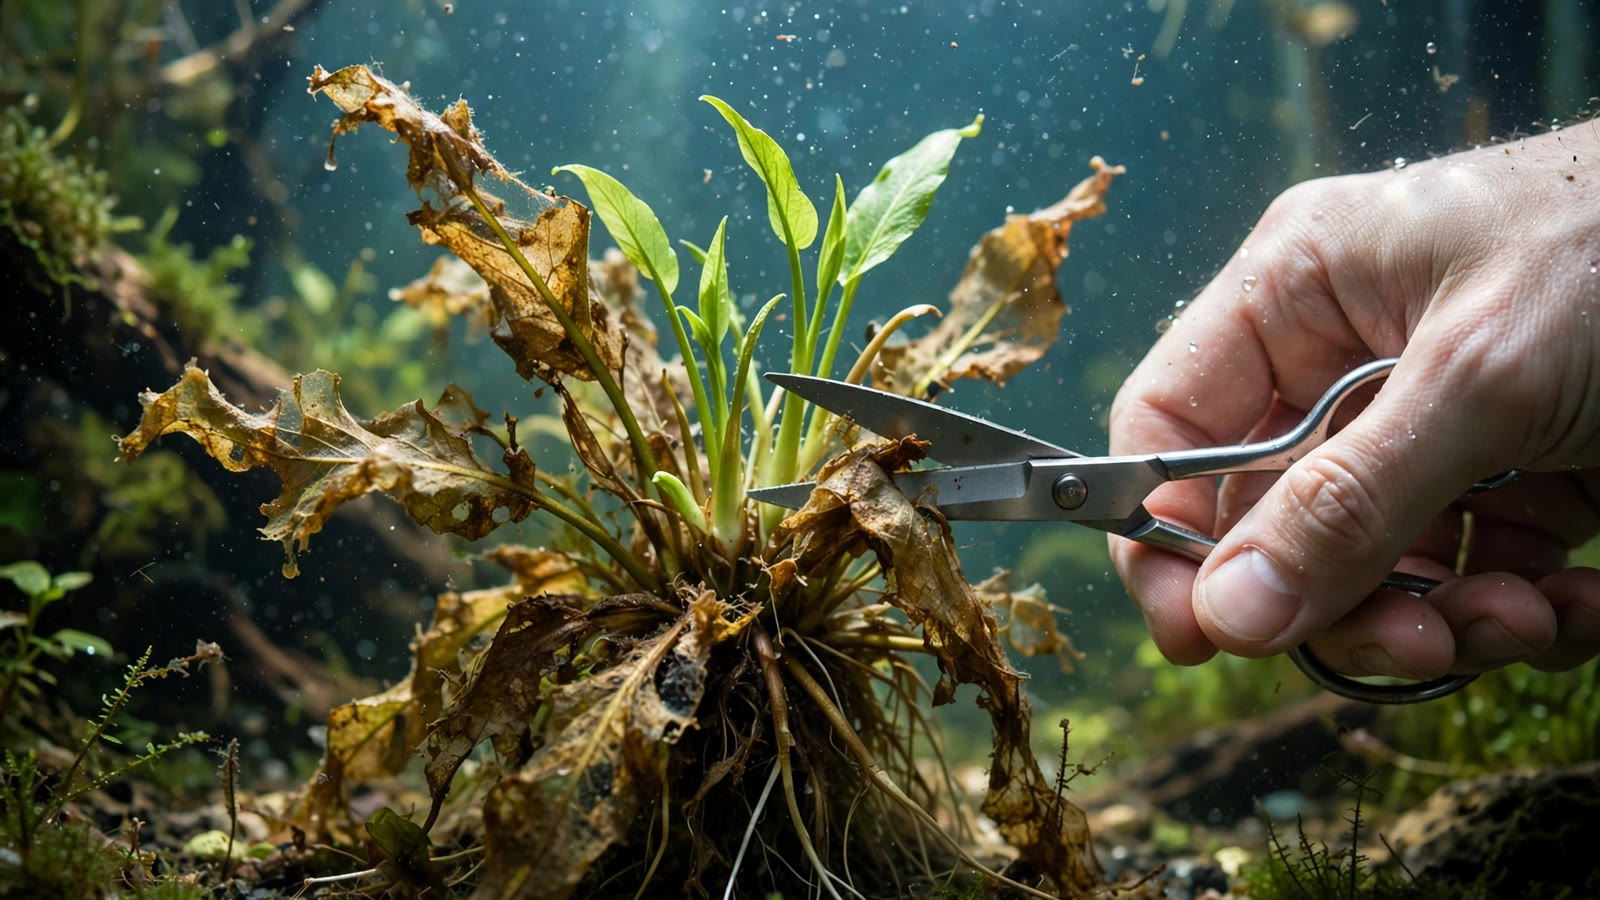
Dead leaves don't heal, and decomposing tissue feeds algae while leaching ammonia into the water. With clean, sharp scissors, cut away every leaf that is fully translucent, brown-mushy, or skeletonized, cutting back to firm green tissue. For stem plants, trim just above the lowest healthy node — the plant will branch from there. For rosette plants like Cryptocoryne or swords, remove dead leaves at the base where they meet the crown. For tool choice and where to cut on each growth type, see our guide on how to trim aquarium plants.
Step 2: Check the Rhizome, Roots, and Crown
Everything above the substrate can be regrown; everything at the base decides whether regrowth is possible. Inspect once, gently, then replant and leave it alone.
- Rhizome plants (Anubias, Java fern, Bolbitis): squeeze the rhizome. Firm is good; soft, mushy, and dark is rot. Trim back to firm tissue — even a small healthy section with a few leaves will recover.
- Rosette plants (Cryptocoryne, Amazon swords): the crown should be firm and pale inside. A dark, spongy crown is usually beyond saving, but one firm section can produce new plantlets.
- Stem plants: if the bottom inch is mush but the top is firm, cut off the rot and replant the healthy top — stems root readily from nodes.
- Roots: white, cream, or tan and threadlike is alive. Black, slimy, or disintegrating on touch is dead — trim it off before replanting.
Step 3: Fix One Variable at a Time
This is where most rescue attempts fail. Changing the light, the fertilizer, and the substrate in the same weekend makes it impossible to know what helped — or what caused the next problem. Plants respond to stable conditions, and stability is itself a variable worth protecting.
Pick the most likely culprit and change only that. Wait ten to fourteen days and watch the new growth — new leaves tell the truth, because old damaged leaves never repair themselves. If the new growth looks better, you found it; if not, move to the next candidate. In a tank under three months old, the usual order is: unstable conditions (the tank is simply new), insufficient light, nutrient gaps, then poor root-zone conditions. In a mature tank that suddenly declines, look first at what changed. Our first 90 days planted tank guide explains how new tanks stabilize over time.
Step 4: Hold the Patience Window
After trimming and your single fix, the hardest step is doing nothing. Plants need two to three weeks to show new growth in response — faster for stem plants, slower for Cryptocoryne and Anubias. Your only jobs during this window: keep the photoperiod consistent, keep up regular water changes, and remove newly dead tissue so it doesn't foul the water. If you're adjusting light or fertilizer, keep doses conservative at first and watch your livestock — stressed fish or invertebrates mean you've pushed a parameter too far, and animal welfare always outranks plant recovery.
Step 5: Reassess Honestly — Replant, Propagate, or Replace
After the patience window, look at the plant with clear eyes. Any new submerged growth — even a little — means it has turned the corner; keep the routine stable. If a stem plant's top is healthy but its base keeps rotting, cut the healthy tops and replant them — that's propagation, not failure. If the crown or rhizome is gone and there is zero new growth after six weeks of good conditions, the plant is compost. Replacing it with a species better suited to your tank's actual light is a smart decision, not a defeat.
The Four Usual Suspects: What Actually Kills Aquarium Plants
When transition melt is ruled out, almost every plant death traces back to one of four deficits. Know them, and you'll know which single variable to change in Step 3.
1. Light: Too Little (or Too Inconsistent)
Light is the most common genuine killer, and it presents as slow decline: new leaves emerge small and pale, lower leaves drop, stems stretch upward with wide gaps between nodes. The usual causes are a light too weak for the tank's depth, a photoperiod that's too short, or — very common — a schedule that changes constantly because the light is switched by hand. Plants run on a circadian rhythm; an erratic photoperiod stresses them as surely as dim light. The fix: put the light on a timer, set a consistent 6–8 hour photoperiod, and leave it alone for the full patience window.
2. Carbon: The Invisible Deficit
Carbon is the backbone of growth, and in a tank without injected CO2 it is often the limiting factor. The classic sign: plants look healthy for the first weeks — living off stored reserves — then stall, with new leaves staying small and melting at the edges. Circulation matters enormously: supplements can't help plants the water flow never reaches, and dead spots behind hardscape are plant graveyards. If you supplement, start low and watch livestock closely, especially at night when plants stop producing oxygen.
3. Nutrients: Gaps, Not More Fertilizer
Starving plants don't need "more fertilizer" — they need the specific nutrient that's missing, and dumping a full dose of everything into a struggling tank usually feeds algae first. Read the pattern: pale new growth with dark veins often points to iron; small holes in older leaves point to potassium; stunted, twisted new growth points to calcium or magnesium. Mobile nutrients are pulled from old leaves to feed new ones, so damage on old leaves signals a mobile-nutrient gap, while damage on new leaves signals an immobile one. Start with a conservative all-in-one dose and watch new growth for two weeks rather than chasing test-kit numbers on day one. Heavy root feeders like swords and Cryptocoryne feed from the substrate — if these decline while the water column is dosed, add root tabs near the crown. If you run inert sand, read our article on whether aquarium plants grow in sand.
4. The Root Zone: Buried Rhizomes, Tight Bunches, Rot
Roots are out of sight, so they get ignored until it's too late. The three classic mistakes: burying a rhizome (Anubias, Java fern, and Bolbitis rot when the rhizome sits under substrate — tie them to wood or rock instead), planting stem bunches so tightly that inner stems get no flow and rot from the base, and a substrate so compacted that anaerobic pockets form. Unbury rhizomes, spread stem plantings so water flows between stems, and trim rotting bases rather than hoping they recover — root-zone problems often respond within days.
When a Plant Is Actually Dead
It's important to know when to stop. A plant is genuinely dead when the rhizome or crown is soft and dark all the way through with no firm tissue, when a stem is mush from base to tip with no firm section to salvage, or when there has been zero new growth for six weeks under stable, adequate conditions. A skeleton with one firm node, one green leaf, or one white root tip is not dead — it's recovering, and plants have come back from far worse.
One more honesty check: in a mature tank that slowly declines over months despite stable care, the substrate may simply be exhausted. Aquasoils release their nutrient load over one to three years. Our guide to old tank syndrome in planted aquariums explains how aging tanks lose their plant-growing capacity and what to do about it.
Prevention: Setting Up Plants That Don't Need Rescuing
Most plant deaths are decided at planting time. Buy healthy stock — firm rhizomes, green growing tips, no slime — and plant the same day if possible. Space stems individually rather than as tight shop bunches, anchor epiphytes to hardscape instead of burying them, and run a consistent light schedule on a timer from day one.
Budget for the adjustment period mentally, too. A tank in its first month looks rough — melting leaves, sparse growth, algae testing the waters — and that roughness is the price of a tank that looks spectacular in month four.
Frequently Asked Questions
How long does it take for aquarium plants to adjust after planting?
Most plants show first submerged growth within two to four weeks, with full transition taking six to eight weeks for stem plants and up to three months for slow growers like Cryptocoryne and Anubias. Judge progress by the newest leaves, never the oldest.
Should I remove melting leaves or leave them on the plant?
Remove them. Fully melted leaves won't recover, and as they decompose they release ammonia and feed algae. Trim dead leaves back to firm tissue with clean scissors, but leave any leaf that is still partially green — the plant may be drawing nutrients from it.
Can I save a plant if the rhizome is soft?
Sometimes. Cut away all soft, dark tissue back to firm material, even if only a small section with one or two leaves remains. Sterilize scissors between cuts, attach the healthy piece to hardscape, and give it stable conditions — but if the entire rhizome is mush, the plant is gone.
Why are my new plants melting but my old plants are fine?
Your established plants already have submerged leaves and settled roots; your new plants are still converting from emersed nursery growth. This contrast is the clearest sign you're seeing transition melt, not a tank-wide problem — give the newcomers time, and judge progress only by the newest growth.
Should I increase fertilizer to save dying plants?
Not blindly. More fertilizer helps only if a specific nutrient is actually missing, and overdosing a struggling tank usually triggers algae. Start with a conservative all-in-one dose, watch new growth for two weeks, and fix one variable at a time.
Is it normal for Cryptocoryne to lose all its leaves after planting?
Yes — the famous "crypt melt" happens even in perfect water. Leaves may all dissolve within days, but the rhizome underneath is usually healthy. Leave the plant undisturbed; new leaves typically emerge within two to four weeks. Never discard a melted crypt before a full month.
Your Plants Are Probably Stronger Than You Think
Aquarium plants are tougher than their melting leaves suggest — they evolved to survive floods, droughts, and grazing. The rescue protocol works because it respects how plants actually recover: clean away what's dead, check the foundation, change one thing, and give it time. The most powerful tool in plant care isn't a fertilizer or a gadget — it's the discipline to wait and watch.
Tissue-culture plants are the exception — they’re grown in sterile gel and adapt with minimal melting, which is part of what you’re paying for. Plants bought submersed from another hobbyist’s tank also transition with little melt, since they’re already in the right form.
Which Plants Melt Most (and Least)
Heavy melters (expect significant leaf loss)
- Cryptocorynes — infamous for “crypt melt,” sometimes dropping every leaf after any disturbance. They almost always recover from the roots within weeks.
- Stem plants grown emersed — rotala, ludwigia, and hygrophila often shed lower emersed leaves while the growing tips transition.
- Amazon swords — emersed-grown swords typically lose their broad oval aerial leaves and replace them with longer submersed ribbon leaves.
Light melters
- Anubias, java fern, bucephalandra — slow-growing rhizome plants transition gradually; occasional old-leaf melt but rarely dramatic.
- Vallisneria — usually transitions well, though it dislikes the move itself and may sulk for a week.
- Floating plants — minimal melt since their leaves were already at the air-water interface.
The Acclimation Protocol
Step 1: Quarantine or dip first
Before acclimating to your tank’s conditions, make sure you’re not acclimating pests along with the plant. Run new arrivals through our quarantine and dip protocol — it adds days upfront but prevents months of regret.
Step 2: Float to temperature-match (30 minutes)
Float the bag or container in your tank for 20–30 minutes to equalize temperature. Plants are less temperature-sensitive than fish, but a 10°F shock on top of transplant stress is an avoidable insult.
Step 3: Trim before planting
Remove any leaves that are already damaged, yellowing, or heavily algae-covered — they won’t recover and they’ll rot in your tank, feeding algae. For stem plants, trim off the bottom inch and any emersed leaves that look unlikely to adapt; the plant wastes energy maintaining leaves it’s going to shed anyway. Keep the healthy growing tips — that’s where recovery starts.
Step 4: Plant correctly the first time
Follow our planting guide — right depth, crown exposed on rosettes, rhizomes unburied on epiphytes. Every uprooting and replanting restarts the acclimation clock, so get placement right on the first attempt. Decide where each plant goes before it goes in the water.
Step 5: Run a gentle first week
For the first 7 days after planting:
- Moderate light — run your normal photoperiod but consider dropping intensity 20–30% if your light is dimmable. Blast-level light on a melting plant grows algae on the dying leaves, not recovery.
- Stable CO2 — if you inject CO2, keep it consistent. Fluctuating CO2 during acclimation is a melt accelerator. If you’re low-tech, this doesn’t apply — see growing without CO2.
- Half-strength fertilizer — new plants with damaged leaves can’t use full dosing, and the excess feeds algae. Ramp to full strength over 2–3 weeks per our fertilizer schedule.
- No disturbance — don’t move, trim, or “check on” new plants for at least two weeks. Every touch resets root establishment. This is especially critical for crypts.
Step 6: Remove melt, keep the base
As emersed leaves melt, remove the mushy material promptly — decaying leaves release ammonia and grow fungus that can spread to healthy tissue. But never discard the plant while the crown, rhizome, or roots are firm and alive. A crypt that’s lost every leaf but has firm roots is a plant that’s about to recover, not a dead plant. Give it 3–4 weeks before judging.
Telling Normal Melt From Real Problems
Normal transition melt:
- Affects oldest/emersed leaves first, newest growth last
- New submersed leaves emerge even as old ones dissolve
- Roots and crown stay firm and white/green
- Timeline: 1–4 weeks, then obvious new growth
Concerning melt (see our full melting diagnosis guide):
- New growth also melts or emerges deformed
- Rhizome or crown turns mushy and brown — this is rot, not transition
- Entire plant dissolves within days with no new growth after 4+ weeks
- Melting spreads to established plants that weren’t recently moved
Buying Tips to Minimize Melt
- Buy submersed-grown when available — hobbyist-grown cuttings transition with almost no melt.
- Choose tissue culture for sensitive species — crypts and delicate stems establish far more reliably from sterile cups.
- Avoid plants already melting in the store tank — some melt is normal, but a plant that’s mostly mush at purchase has less energy for recovery.
- Transport carefully — keep plants damp and out of direct sun/heat. A plant that dries out or cooks in a hot car melts far worse than one transported properly.
The First-Month Timeline: What to Expect Week by Week
Knowing what’s normal when removes most acclimation anxiety. Here’s the typical timeline for a healthy plant adapting to a new tank:
Week 1: The quiet week
Almost nothing visible happens. The plant is growing roots you can’t see and assessing its new environment. Some species (vallisneria, stem plants) may start shedding their lowest leaves. This is normal. Resist the urge to “help” — no moving, no extra fertilizer, no light changes. The most common beginner mistake is intervening during a week when the correct action is nothing.
Week 2: Melt peaks
This is when emersed leaves give up in earnest. Crypts may drop everything; swords shed their broad aerial leaves; stem plants lose lower foliage. It looks catastrophic and it’s usually fine. Keep removing mushy material, keep conditions stable, and watch the crown and growing tips — if those are firm and green, recovery is already underway.
Week 3: The turn
New submersed-adapted leaves emerge — smaller, thinner, often a slightly different shade of green than the emersed foliage. Stem plant tips start growing visibly; crypts push tiny curled leaves from the crown; swords unfurl narrow ribbon leaves. This is the moment most beginners exhale for the first time.
Week 4+: Established
New growth outpaces melt, and the plant is functionally yours. You can resume full-strength fertilizer, normal trimming, and stop treating it as fragile. Some slow growers (anubias, bucephalandra) take 6–8 weeks to show obvious progress — that’s their normal speed, not a problem.
Acclimating Different Plant Formats
Tissue-culture cups
Sterile, pest-free, and already adapted to high-humidity (not emersed) growth — tissue cultures melt the least of any format. Rinse the agar gel off gently (leftover gel rots and feeds fungus), split the portion into small plantlets, and plant per our planting guide. They establish slowly for the first two weeks, then accelerate. No dip needed, minimal acclimation stress — this is the premium experience you’re paying for.
Potted plants
Remove the pot and strip away the rockwool completely — leftover rockwool traps debris and rots. Tease the root mass apart gently; if it’s a dense mat, splitting it into 2–3 smaller portions actually establishes faster than planting one big clump (more growing points, better water flow around roots). Potted plants are usually emersed-grown, so expect the standard 2–4 week melt cycle.
Bare-root / bunched stems
Typically sold as weighted bunches. Remove any bands, foam, or weights, strip the lower leaves, and plant stems individually or in small groups. Bunched stems from the store are often already transitioning — check for new submersed growth at the tips, which tells you the plant is mid-adaptation and will settle quickly.
Hobbyist cuttings
Already submersed-grown and the fastest to establish — often showing new growth within days. The main acclimation factor is water-parameter difference between the two tanks. Float to temperature-match, plant promptly, and they’ll usually take off with minimal melt. This is why experienced hobbyists prefer trading cuttings over buying potted plants.
Frequently Asked Questions
Should I use a “plant starter” or transplant fertilizer?
Products marketed for transplant shock are mostly B-vitamins and mild hormones. They don’t hurt, but there’s no strong evidence they help aquarium plants specifically. Stable conditions and patience outperform any bottle. Save the money for more plants.
My new plant melted completely — bare crown, no leaves. Is it dead?
Probably not, if the crown or rhizome is firm. Crypts and swords routinely lose 100% of their leaves and regrow from the base within a month. The test is firmness: firm and pale/green means alive; mushy and brown/black means rot. Give firm-but-leafless plants a full 4 weeks before declaring them dead.
Can I speed up acclimation with extra light or CO2?
No — and trying usually backfires. A melting plant can’t use extra light; the excess just grows algae on its dying leaves. Keep light moderate and CO2 stable (not boosted) during acclimation. Growth speed comes from the plant’s own adaptation timeline, which you can’t rush, only avoid delaying.
Should new plants go straight into my main display tank?
After quarantine/dipping, yes — there’s no benefit to a separate “growing-in” tank for most plants. They acclimate to your water fastest in the tank they’ll live in. The exception is very delicate species going into a tank with boisterous fish; give those a few weeks in a calm corner or breeder box first.
The Patience Rule
The single most important acclimation skill is restraint: plant it right, set gentle conditions, remove decay, and then leave it alone for a month. The hobbyists with the best plant growth aren’t doing something clever in week one — they’re simply not interfering in weeks two through four while the plants do what they’ve evolved to do. Melt looks like failure and feels like failure, but in most cases it’s the visible part of a plant successfully becoming yours.