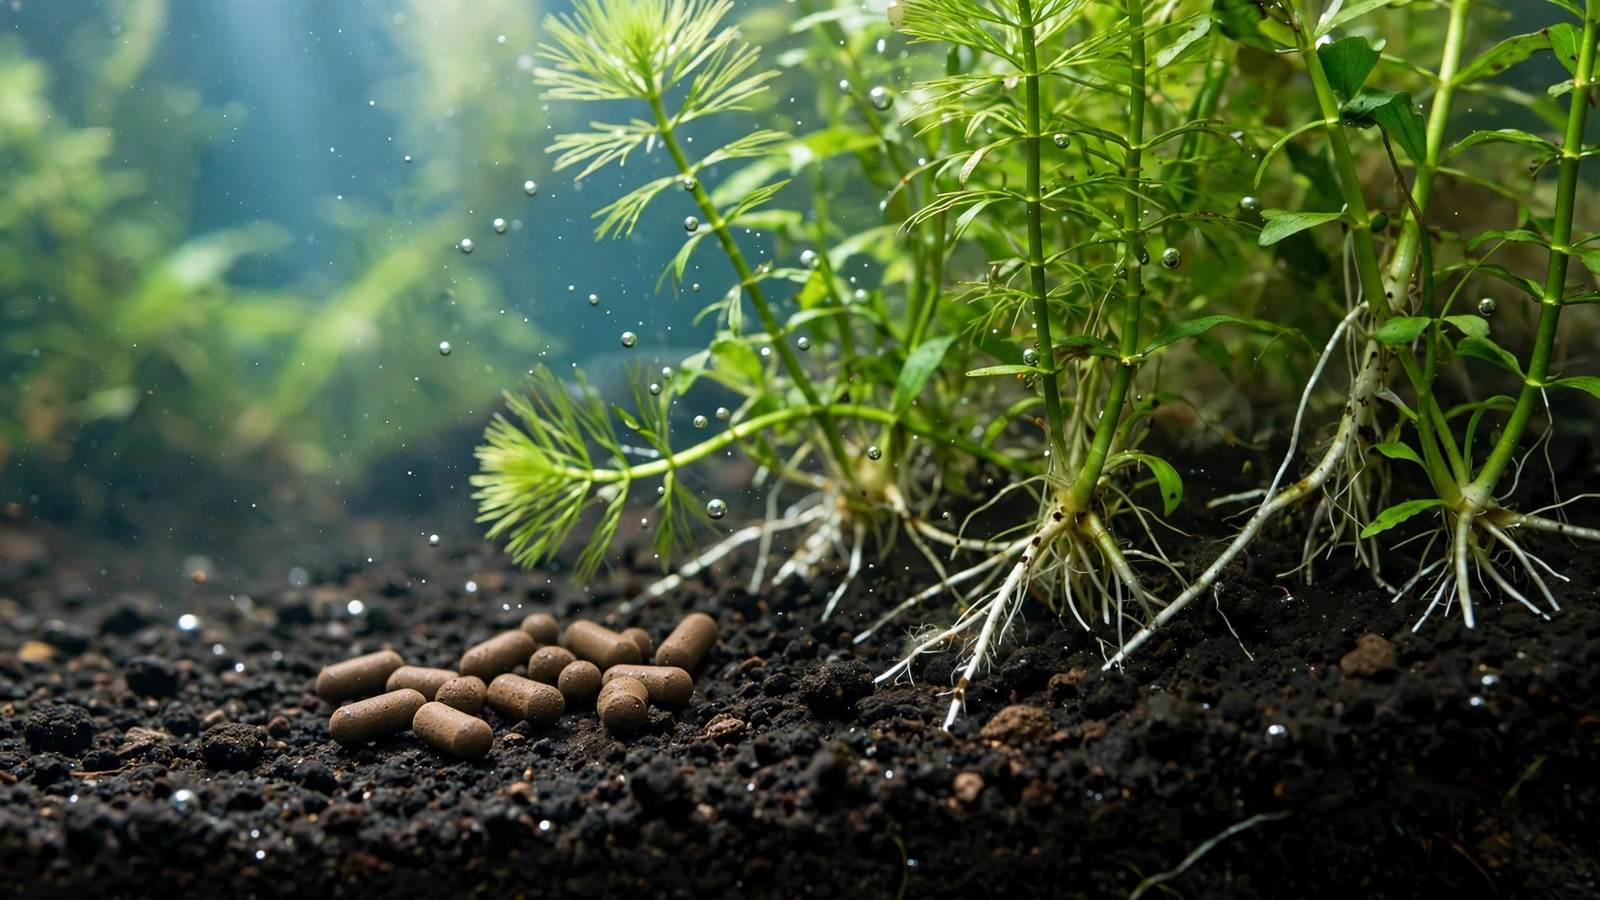
A bag of slow-release fertilizer granules, a pack of empty gel capsules, and about twenty minutes of your time: that is the entire distance between you and a year's worth of aquarium plant food. Once you learn how to make diy root tabs, the markup on commercial root tabs — often ten to twenty times the raw material cost — becomes very hard to unsee.
The method is simple and proven by thousands of planted-tank keepers: fill size-00 gel capsules with Osmocote-style slow-release granules and push them deep into the substrate near your heavy root feeders. This guide gives you the exact recipe, conservative dosing numbers, shrimp-safe handling rules, and a clay-based alternative — for roughly $0.02 per tab.
Why make your own diy root tabs?
Commercial root tabs work, but you pay mostly for packaging and brand. Most contain a slow-release granular fertilizer of the Osmocote family — NPK around 14-14-14 plus micronutrients. Repackaging those granules into gel capsules gives you control: a copper-free blend for the shrimp tank, half-strength for delicate livestock, full-strength for hungry Amazon swords.
One caution: more fertilizer is not better. A tab buried 5 cm deep feeds roots for months; a half-exposed tab leaches nutrients into the water column and feeds algae. Start at half strength, observe your livestock and plants for two weeks, then adjust upward — you can always add another tab, but you cannot take fertilizer out of a substrate.
What you will need
Two recipes follow. Recipe A — slow-release granules in gel capsules — is the one most people should make: fast, consistent, and the closest match to commercial tabs. Recipe B is the from-scratch clay-ball alternative.
Recipe A: granule capsules (recommended)
| Material | Amount | Notes |
|---|---|---|
| Slow-release fertilizer granules (Osmocote-style, 14-14-14 or 15-9-12, 3–4 month type) | ~36 g (about 2 tablespoons) per 30 tabs | Longevity rated at ~21°C; cooler tanks stretch it further |
| Empty size-00 gelatin or vegetarian capsules | 30 | Holds ~1.2 g of granules each |
| Small kitchen scale (0.1 g precision) | 1 | For the first few tabs; eyeballing comes later |
| Small funnel or folded paper cone | 1 | A cut pipette tip works too |
| Long planting tweezers (27 cm / 10.5 in) | 1 | For placing tabs deep without clouding the tank |
| Dry, airtight storage jar | 1 | Label with the fill date |
One bag of granules (1–3 kg, usually under $15) fills roughly 800–2,000 capsules. Confirm the label lists micronutrients (iron, manganese, zinc) alongside NPK — a published guaranteed analysis showing the full breakdown is what separates a complete blend from a plain NPK one. Shrimp keepers: verify the label lists no added copper sulfate.
Recipe B: clay-based DIY root balls (alternative)
The old-school method: nutrient powder bound in natural red clay (pure pottery-grade powder, never polymer craft clay), rolled into marble-sized balls and dried hard. Cheapest by far, but faster-releasing (1–2 months), and a crumbling ball dumps its load quickly.
| Material | Amount | Notes |
|---|---|---|
| Natural red clay powder, no additives | 100 g | Pottery suppliers; composition must be verifiable |
| Dry fertilizer powder (NPK + trace dry mix) | 5–10 g total | Use the low end if unsure — dry powders hit harder than granules |
| Dechlorinated water | ~30–40 ml | Just enough for a firm dough |
| Parchment paper + tray | 1 | For drying the finished balls |
Mix the dry clay and fertilizer powder thoroughly first — uneven mixing creates hot spots. Add water a teaspoon at a time until you have a firm dough, roll into 1.5 cm balls (~3–4 g each when dry), and dry in a warm, ventilated spot for 48–72 hours until rock hard. Discard any ball that cracks under finger pressure.
How to make diy root tabs, step by step
The granule-capsule method takes about twenty minutes for a batch of thirty. Work dry — moisture softens capsules — on a clean tray so you can sweep up spills.
- Weigh your reference tab. Open one size-00 capsule, fill the long half with granules through the funnel, close it, and weigh it. Target roughly 1.2 g of contents. This is your benchmark.
- Fill the long halves. Separate all capsules and fill each long half nearly to the brim, tapping gently to settle. Match your reference weight; ±0.2 g is fine.
- Cap them. Press the short halves on firmly — you should feel a small click. A loose cap separates in the substrate and spills granules at the surface.
- Discard rejects. Any cracked, half-filled, or loose capsule goes in the trash, not the tank. A cracked capsule is a surface leach waiting to happen.
- Label and store. Jar the finished tabs in a dry, airtight container and write the fill date and strength on the label.
For a half-strength shrimp-safe batch, fill the long half only halfway (~0.6 g) and close. You get the same placement precision with half the nutrient load.
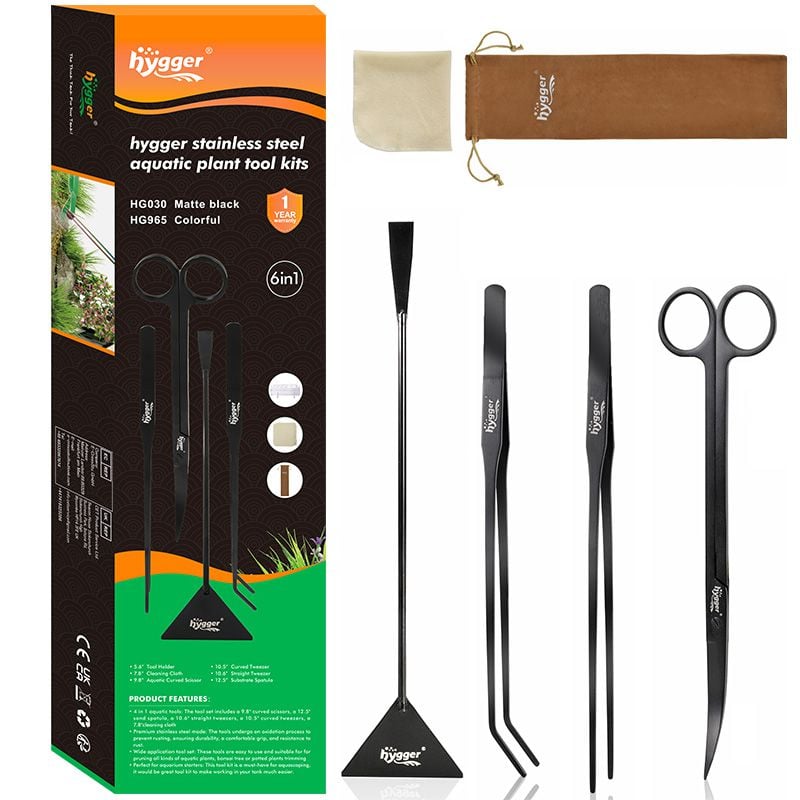
Long planting tweezers are the recommended deep-placement tool in the steps: long aquascaping tweezers from the hygger 6-in-1 kit.
 ★4.6
hygger 6-in-1 Long Aquarium Aquascaping Tools Kit
Check Price on Amazon ★4.6Placement: where each tab goes (and how deep)
Depth matters more than anything else. Push every tab 3–5 cm below the substrate surface with your tweezers, angled under the plant's crown — roots grow outward, and the tab feeds the expanding root zone.
Spacing depends on what you are feeding, not on tank size:
| Plant type (examples) | Tabs per plant or zone | Distance from crown | Notes |
|---|---|---|---|
| Heavy root feeders (Amazon sword, large crypts) | 2–3 per plant | 5–8 cm out from the crown | Ring the plant; its root zone spreads wide |
| Medium root feeders (Vallisneria, small crypts, dwarf sagittaria) | 1 per plant or 1 per 10–15 cm of row | 3–5 cm away | Start with one; add a second only if growth stays sluggish after 2–3 weeks |
| Carpeting plants (Monte Carlo, dwarf hairgrass) | 1 per 15 cm × 15 cm grid square | Centered in each square | Place before planting, or between established runners |
| Epiphytes and floaters (Anubias, Java fern, Bucephalandra) | None | — | These feed from the water column; tabs do nothing for them |
| Stem plants (Rotala, Ludwigia, Hygrophila) | 1 per 20 cm of row | Beneath the row | Optional — stems mostly drink from the water; pair with your regular all-in-one liquid dosing routine |
New tanks with fresh aquasoil need almost nothing extra for the first 2–3 months — the soil is already loaded. Check the guide to fertilizing a new aquasoil tank and the first-90-days planted tank plan before adding tabs to new substrate. Tabs belong in inert substrates and aquasoil past its nutrient peak, roughly 6–12 months in.
The placement and dosing routine applies to commercial tabs too — the section's method pairs with a ready-made tab: Seachem Flourish Tabs.
Dosage by tank size (conservative ranges)
Tabs are dosed by plant count and root zone, not by liters — but these conservative ranges give you a sanity ceiling, assuming full-strength 1.2 g tabs in an inert substrate. Shrimp keepers use half-strength tabs (0.6 g) and start at the bottom of the range.
| Tank size | Full-strength tabs per dose | Half-strength (shrimp/sensitive) | Re-dose interval |
|---|---|---|---|
| 20–40 L (5–10 gal) | 2–4 | 3–5 | 3–4 months |
| 50–110 L (12–29 gal) | 4–8 | 6–10 | 3–4 months |
| 120–200 L (30–53 gal) | 8–14 | 12–18 | 4–5 months |
| 200+ L (53+ gal) | 14–20 | 18–24 | 4–6 months |
Always start at the bottom of the range on the first application. Newly placed tabs release slightly faster in the first week as the capsule shell dissolves — this is when an over-dosed tank shows ammonia or nitrite bumps. Test your water 3–4 days after the first placement, and observe your livestock: normal behavior and steady appetite means you are clear. Pair root tabs with lean water-column dosing from your aquarium plant fertilizer schedule, not an aggressive one — and read how dry and liquid fertilizers compare before mixing methods.
Re-dose when the previous round fades, not on a rigid calendar: heavy root feeders show smaller new leaves and paler color around months 3–5 — that is your cue. Keep a simple log (date, number of tabs, where) and the second round is effortless.
Shrimp safety and the copper question
Shrimp keepers can use diy root tabs — with one non-negotiable rule: no added copper compounds such as copper sulfate in the granules, and every tab fully buried at 3–5 cm. Copper is acutely toxic to shrimp at levels far below what bothers fish, and a surfaced tab puts copper, ammonium, and phosphate straight into the water column.
- Read the granule label. Trace chelated copper is generally tolerated; copper sulfate or copper oxide as an added ingredient is not for shrimp tanks. If the label is vague, pick an explicitly copper-free product.
- Bury deep, every time. Tweezers in, 4–5 cm down, seal the hole on withdrawal. If a tab floats up during a water change, remove and re-place it.
- Dose half-strength. Half tabs (0.6 g) give shrimp tanks all the root nutrition they need with a fraction of the water-column risk.
- Watch for two weeks. Normal grazing and molting = good. Surface gathering, erratic swimming, or deaths within days = pull the nearest tabs and run an extra water change.
- Master capsules before clay. Powdered fertilizer in a clay ball is harder to dose precisely, and a crumbling ball dumps its load fast.
If you are new to shrimp in a planted tank, our guide to acclimating new aquarium plants covers the quarantine steps that matter even more when invertebrates are involved.
Cost comparison: DIY vs commercial
One-year cost for a single 60 L moderately planted tank (8 tabs every 4 months = 24 tabs per year):
| Option | Cost per tab | Yearly cost (24 tabs) | Notes |
|---|---|---|---|
| DIY granule capsules | ≈ $0.02 | ≈ $0.50 | Setup ~$15–20 covers years |
| DIY clay balls | ≈ $0.01 | ≈ $0.25 | Cheapest; more labor, faster release |
| Mid-range commercial tabs | $0.25–$0.40 | $6–$10 | Consistent and convenient |
| Premium commercial tabs | $0.50–$0.60 | $12–$14 | Brand formulations, extra micronutrients |
DIY wins by a factor of ten on unit cost with essentially no quality gap — many commercial tabs literally are slow-release granules in a capsule or clay binder. You pay commercially for consistency and saved labor; the placement and dosing guidance here applies to them just the same.
Direct price comparison against commercial tabs — ThriveCaps is the commercial benchmark in the section's cost table: commercial options like NilocG ThriveCaps ★4.3.
Storage, shelf life, and handling hygiene
Finished capsules keep 12+ months in a dry, airtight jar at room temperature — the granules are individually coated. Label the jar with fill date and strength: humidity softens capsules and welds them together. Wash your hands after handling, use dedicated tools (never food utensils), and store everything away from children and pets. Spilled surface granules? Vacuum them up with a gravel siphon.
Frequently Asked Questions
Are diy root tabs safe for shrimp and snails?
Yes, with two rules: choose granules without added copper sulfate, and bury every tab 3–5 cm deep. Shrimp toxicity comes from dissolved copper and ammonia at the surface, not from buried tabs. Use half-strength 0.6 g tabs in shrimp tanks, start at the minimum dose, and observe livestock for two weeks.
How long does one homemade root tab last?
Osmocote-style granules rated 3–4 months at 21°C last 3–5 months in a warm tropical tank (24–26°C) and up to 6 months in a cool tank (20–22°C), since the polymer coating releases faster in warmer water. Clay balls release faster — plan on 1–2 months. Re-dose when new leaves come in smaller or paler, not on a rigid calendar.
Can I use diy root tabs with aquasoil?
Fresh aquasoil (under 3 months old) does not need tabs — it already carries more nutrients than your plants can use. Start adding tabs when the soil's initial load fades, usually around 6–12 months in, placing them under heavy root feeders. In inert gravel or sand substrates, tabs help from day one.
What NPK ratio should my granules be?
Balanced ratios like 14-14-14 or 15-9-12 work well for general root feeding, and most commercial tabs sit in this range. Confirm the label also lists micronutrients (iron, manganese, zinc). In soft-water shrimp tanks, prefer the lower-nitrogen option or half-strength tabs, since water-column dosing likely already contributes nitrogen.
Why are my new tabs growing algae instead of plants?
The classic causes: tabs placed too shallow (under 3 cm), too many tabs on the first dose, or plants too new to absorb the load. Push every tab to 4–5 cm, halve your initial dose, and give new plantings 2–3 weeks to root first. Vacuum up any spilled surface granules with a gravel siphon.
Can I just pour loose granules under the substrate instead of capsules?
Capsules let you place an exact, measured dose deep in the substrate without granules scattering at the surface during placement. Loose granules are hard to dose precisely and easy to spill — and a spilled handful on the surface is an algae bomb. Stick with capsules for anything beyond experimentation.
Start small, watch, then scale
Making your own root tabs is one of those skills that pays off for the entire life of your tank: twenty minutes of capsule filling buys you a year of root-zone nutrition at pennies per tab, with dosing control no commercial product hands you. Respect the two core rules — bury every tab 3–5 cm deep, and start at the bottom of the dosage range before scaling up.
Your first batch does not have to be perfect. Fill ten capsules, place two under your hungriest sword, and watch what happens over three weeks. If new leaves come in bigger and greener with no algae bloom and no livestock stress, you have your recipe — and the next thirty will feel like second nature.