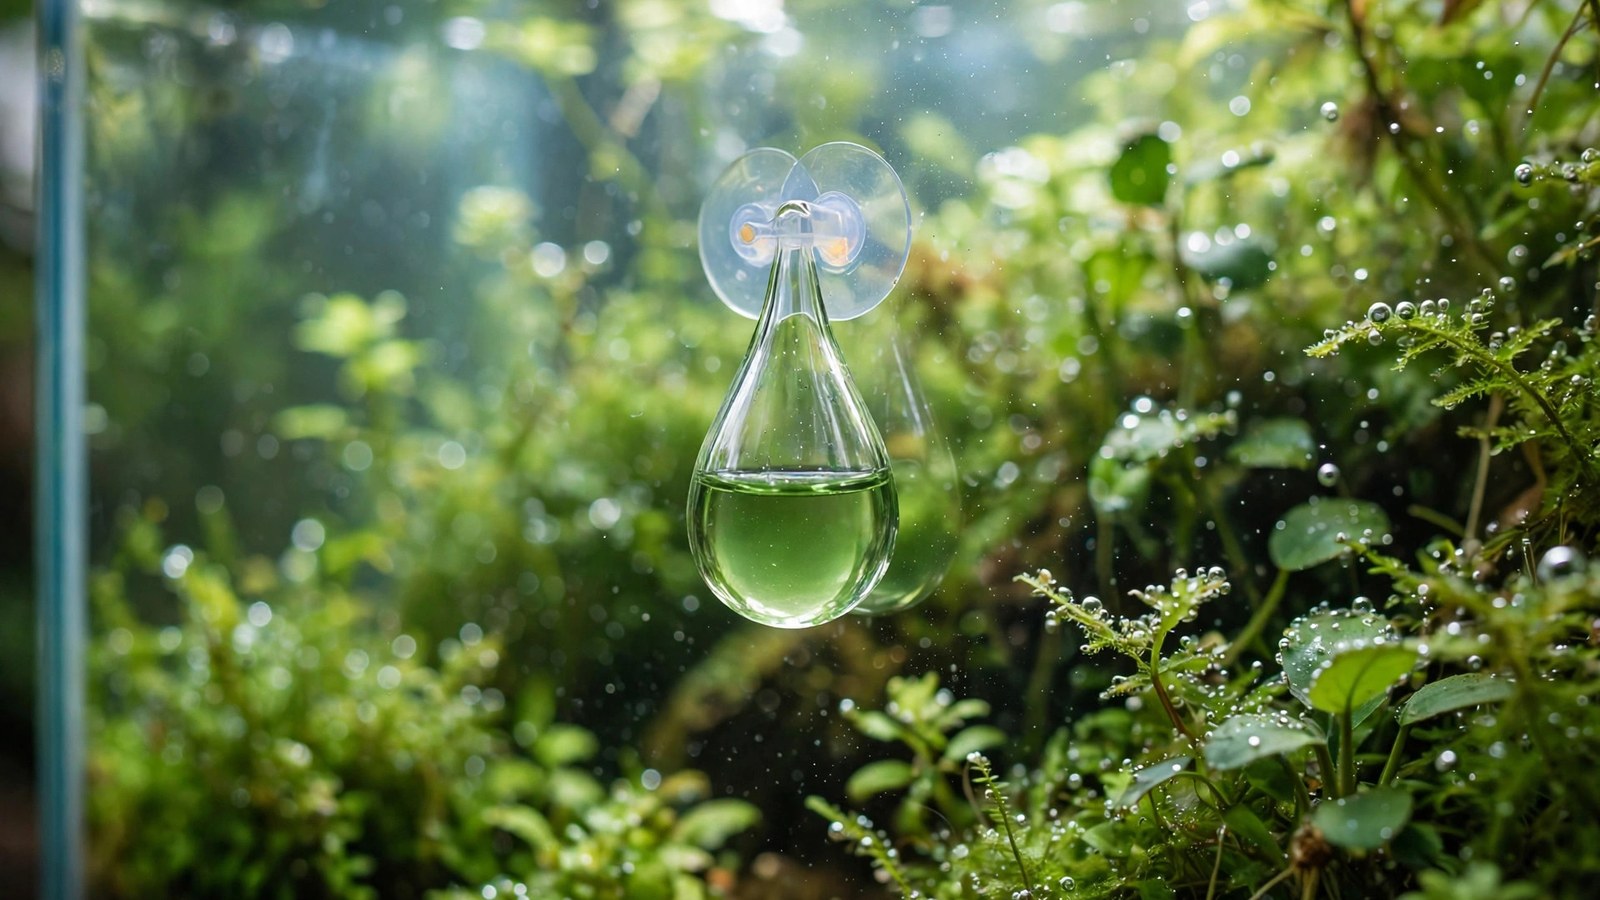
Here is a costly mistake I watched a friend make: he bought a gleaming hand-blown CO2 drop checker, filled it with water straight from his tank, and chased the color for three weeks. Green one day, yellow the next, fish gasping by week three — not because the checker was broken, but because the solution inside it was wrong. The glass is the cheapest part of the system. The liquid you put in it is everything.
That is exactly why "with 4dKH solution included" is the phrase that matters in this search. A drop checker is not actually a CO2 meter — it is a pH indicator sitting in a reference solution of known carbonate hardness (4 degrees, or 4dKH). CO2 from your tank diffuses through the air gap into that solution, nudging its pH, and the bromothymol blue dye answers with a color. Because the starting solution is fixed and known, the color means something: blue means too little CO2, green means you are in the target zone, yellow means your livestock is in danger. Fill it with tank water instead and none of that logic holds — tank water carries organic acids and buffers that scramble the pH, so the color tells you nothing reliable.
Short answer: The best CO2 drop checker kit with 4dKH solution included is one that ships the glass vessel, a suction cup, and the pre-mixed 4dKH indicator solution in the box — so you never have to guess at the most critical part. Solid options include the Pawfly Glass CO2 Drop Checker kit, the Fluval CO2 Indicator Set, and CO2Art's drop checker with premixed solution. Charge it with the included solution only (never tank water), mount it fully submerged opposite your diffuser with the opening facing down, and replace the solution every 30 days. Green means roughly 30 ppm CO2 at 4dKH — the target for most planted tanks.
Why the 4dKH solution matters more than the glass
Drop checkers look like the simplest tool in CO2 injection — a blob of glass and a few drops of liquid. But the chemistry only works when the liquid is a known reference. Here is the chain of logic:
1. CO2 dissolves in water and forms a weak acid, which lowers pH. 2. The size of that pH drop depends on the water's carbonate hardness (KH), which buffers it. 3. If KH is fixed and known — exactly 4dKH — then the pH, and therefore the dye color, depends on CO2 alone. One variable, one answer.
That is why experienced aquarists are blunt about it: as one long-running planted-tank forum discussion puts it, a checker filled with tank water only tells you about pH drift from unknown acids — run it with a 4dKH reference and you are at least "only trying to measure one variable," which is a lot better than measuring two. With 4dKH in the vessel, the familiar colors map cleanly: blue around pH 7.2 (too little CO2), green around pH 6.6 (~30 ppm, the target), yellow around pH 6.0 or below (too much).
Mixing your own 4dKH from distilled water and bicarbonate is possible, but getting it exactly right at home is fiddly — and forum veterans warn that an off-spec reference is the riskiest error you can make, because every reading downstream of it is wrong in the same direction. A kit that includes the pre-mixed solution removes that variable entirely. That is the whole point of buying "with 4dKH solution included."
What to look for in a drop checker kit
Not all kits are complete, and the missing piece is almost always the solution. Run any candidate through this checklist before you buy:
- Pre-mixed 4dKH indicator solution in the box. This is the non-negotiable. Some listings show a bottle of "solution" that is only the pH reagent (bromothymol blue) — you still have to supply the 4dKH reference water yourself. Read the "included components" line, not the headline.
- Glass vessel, not plastic. Glass is clearer, which makes the color easier to read, and it disappears against the tank. Cheap plastic yellows and scratches.
- A secure suction cup. A checker that drifts around the tank or floats to the surface is useless — the air gap has to stay trapped and the opening must face down.
- A sensible fill size. Checkers hold very little liquid (drops to a couple of milliliters). A 15 ml bottle of solution is plenty for months of monthly refills; a 60 ml bottle is a year's supply.
- Clear fill instructions. Good kits tell you exactly how much to add — for example, the Fluval CO2 Indicator Set's official instructions call for 15 drops with the sphere one-third full.
One thing not to chase: a built-in color chart. They look handy, but colors read differently under aquarium lighting than against a printed card, and experienced users judge by the liquid itself. Do not pay extra for one.
Best CO2 drop checker kits with 4dKH solution included, compared
Affiliate disclosure: AquaVerdia is reader-supported. When you buy through the link below, we may earn a small commission at no extra cost to you — it keeps the guides free and independent. We only link products we would put on our own tanks.
| Kit | What's in the box | Solution | Best for |
|---|---|---|---|
| Pawfly Glass CO2 Drop Checker | Glass vessel, 2 suction cups, reagent solution | 4dKH solution included | Best value complete kit |
| Fluval CO2 Indicator Set | Glass reservoir, suction cup, 15 ml indicator solution | Included (replace every 30 days) | Brand reliability, clear instructions |
| CO2Art Drop Checker Kit | Glass checker, 15 ml pre-mixed 4dKH solution | Included, no mixing needed | Zero-guesswork setup |
| JBL ProFlora CO2 Permanent Test | Robust plastic vessel, pH reagent | 4dKH water bought separately | Budget option if you source reference water |
The kit I would buy first: Pawfly Glass CO2 Drop Checker
The Pawfly Glass CO2 Drop Checker kit on Amazon ★4.4 checks every box on the checklist above: a thick glass teardrop vessel, two suction cups for secure mounting, and the reagent solution in the box so you are not hunting for 4dKH water separately. Setup is the standard routine — about 20 drops into the tubing, opening facing down, suctioned to the glass — and readings settle in after roughly two hours. Hundreds of planted-tank keepers have bought and rated this exact kit, and it was in stock when we last checked the listing.
If you prefer a big-brand box with official instructions, the Fluval CO2 Indicator Set is the safe pick: glass reservoir, suction cup, and 15 ml of indicator solution, with a printed manual that tells you to place it about 10 cm (4 inches) below the surface, away from the diffuser, and to swap the solution every 30 days. CO2Art's kit pairs their glass checker with a 15 ml pre-mixed 4dKH solution — open the bottle, fill the checker two-thirds full, invert, done — which is the simplest possible start if the idea of mixing anything puts you off.
Which one should you buy?
Match the kit to your tank, not to the fanciest glass:
- Nano tank under 10 gallons: pick the smallest, least obtrusive vessel you can find — a bulky checker dominates a nano scape visually. The Pawfly's slim teardrop profile suits small tanks well.
- First CO2 system: the Fluval set's printed instructions remove the "am I doing this right?" anxiety, and the 30-day replacement reminder is built into the manual.
- DIY yeast/sugar CO2: output swings as the mixture ferments, so the checker earns its keep — check it daily and treat green as a moving target. Any of the glass kits works; spend the savings on refill solution.
- Shrimp tank: shrimp are less forgiving of CO2 swings than fish, so pair the checker with a timer-driven solenoid and aim for a steady light-green rather than a deep green at the edge of yellow.
How to set up and read your drop checker correctly
Do this once, carefully, and the checker will quietly do its job for a month:
- Rinse the vessel with clean water to remove dust or manufacturing residue.
- Fill with the included 4dKH solution — follow your kit's amount (roughly 15–20 drops, or the vessel one-third to two-thirds full). Do not add tank water.
- Invert it carefully so an air pocket stays trapped at the top and no fluid spills.
- Mount it fully submerged with the opening facing down, on the glass opposite your diffuser, in an area with moderate circulation — not in a dead spot, and not directly in the diffuser's bubble stream. About 10 cm (4 inches) below the surface is the standard guidance.
- Wait 1–2 hours before trusting the first reading. The CO2 has to diffuse through the air gap and equilibrate with the solution.
- Read the color: blue = increase CO2 gradually; green = hold steady; yellow = reduce injection immediately and check livestock.
Two timing habits make the readings far more useful. First, run your CO2 on a timer so it starts about an hour before lights-on and stops about an hour before lights-off — plants only use CO2 while photosynthesizing, and the drop checker should be green a couple of hours into the photoperiod, not at dawn. Second, never adjust the bubble rate based on a single glance: change it slightly, wait two hours, look again. The lag is a feature of the physics, not a defect.
Frequently asked questions
Can I fill a drop checker with tank water instead of 4dKH solution?
No — this is the most dangerous shortcut in CO2 injection. Tank water contains organic acids, tannins, and other buffers that shift pH independently of CO2, so the color no longer maps to your CO2 level. Only a known 4dKH reference solution makes the reading trustworthy.
How often should I replace the 4dKH solution?
Every 30 days. The indicator dye degrades and the reference drifts, and manufacturers from Fluval to CO2Art all converge on the same monthly schedule. A 15 ml bottle covers many refills, so this costs almost nothing.
My drop checker stays blue even though I inject CO2. What's wrong?
Work through the usual suspects in order: wrong solution (tank water instead of 4dKH), bad placement (in a dead spot or right under the filter outflow), heavy surface agitation stripping CO2 before it dissolves, or simply too low a bubble rate. Change one thing, wait two hours, and re-check.
Can I use a drop checker with DIY yeast CO2?
Yes — and you arguably need it more than pressurized users do, because DIY output rises and falls as the mixture ferments. Check the color daily and adjust the mixture strength or the number of bottles rather than chasing a perfect green every hour.
Does a drop checker tell me my exact CO2 in ppm?
No. It is a delayed trend gauge, not a precision instrument. At 4dKH, green corresponds to roughly 30 ppm, which is the useful ballpark — treat the color as "too little / about right / too much" rather than a number.
Should the drop checker be green when the lights first come on?
Not necessarily. Because of the 1–2 hour lag, aim for green about two hours into the photoperiod. Starting CO2 an hour before lights-on (on a timer) gets you there without wasting gas overnight.