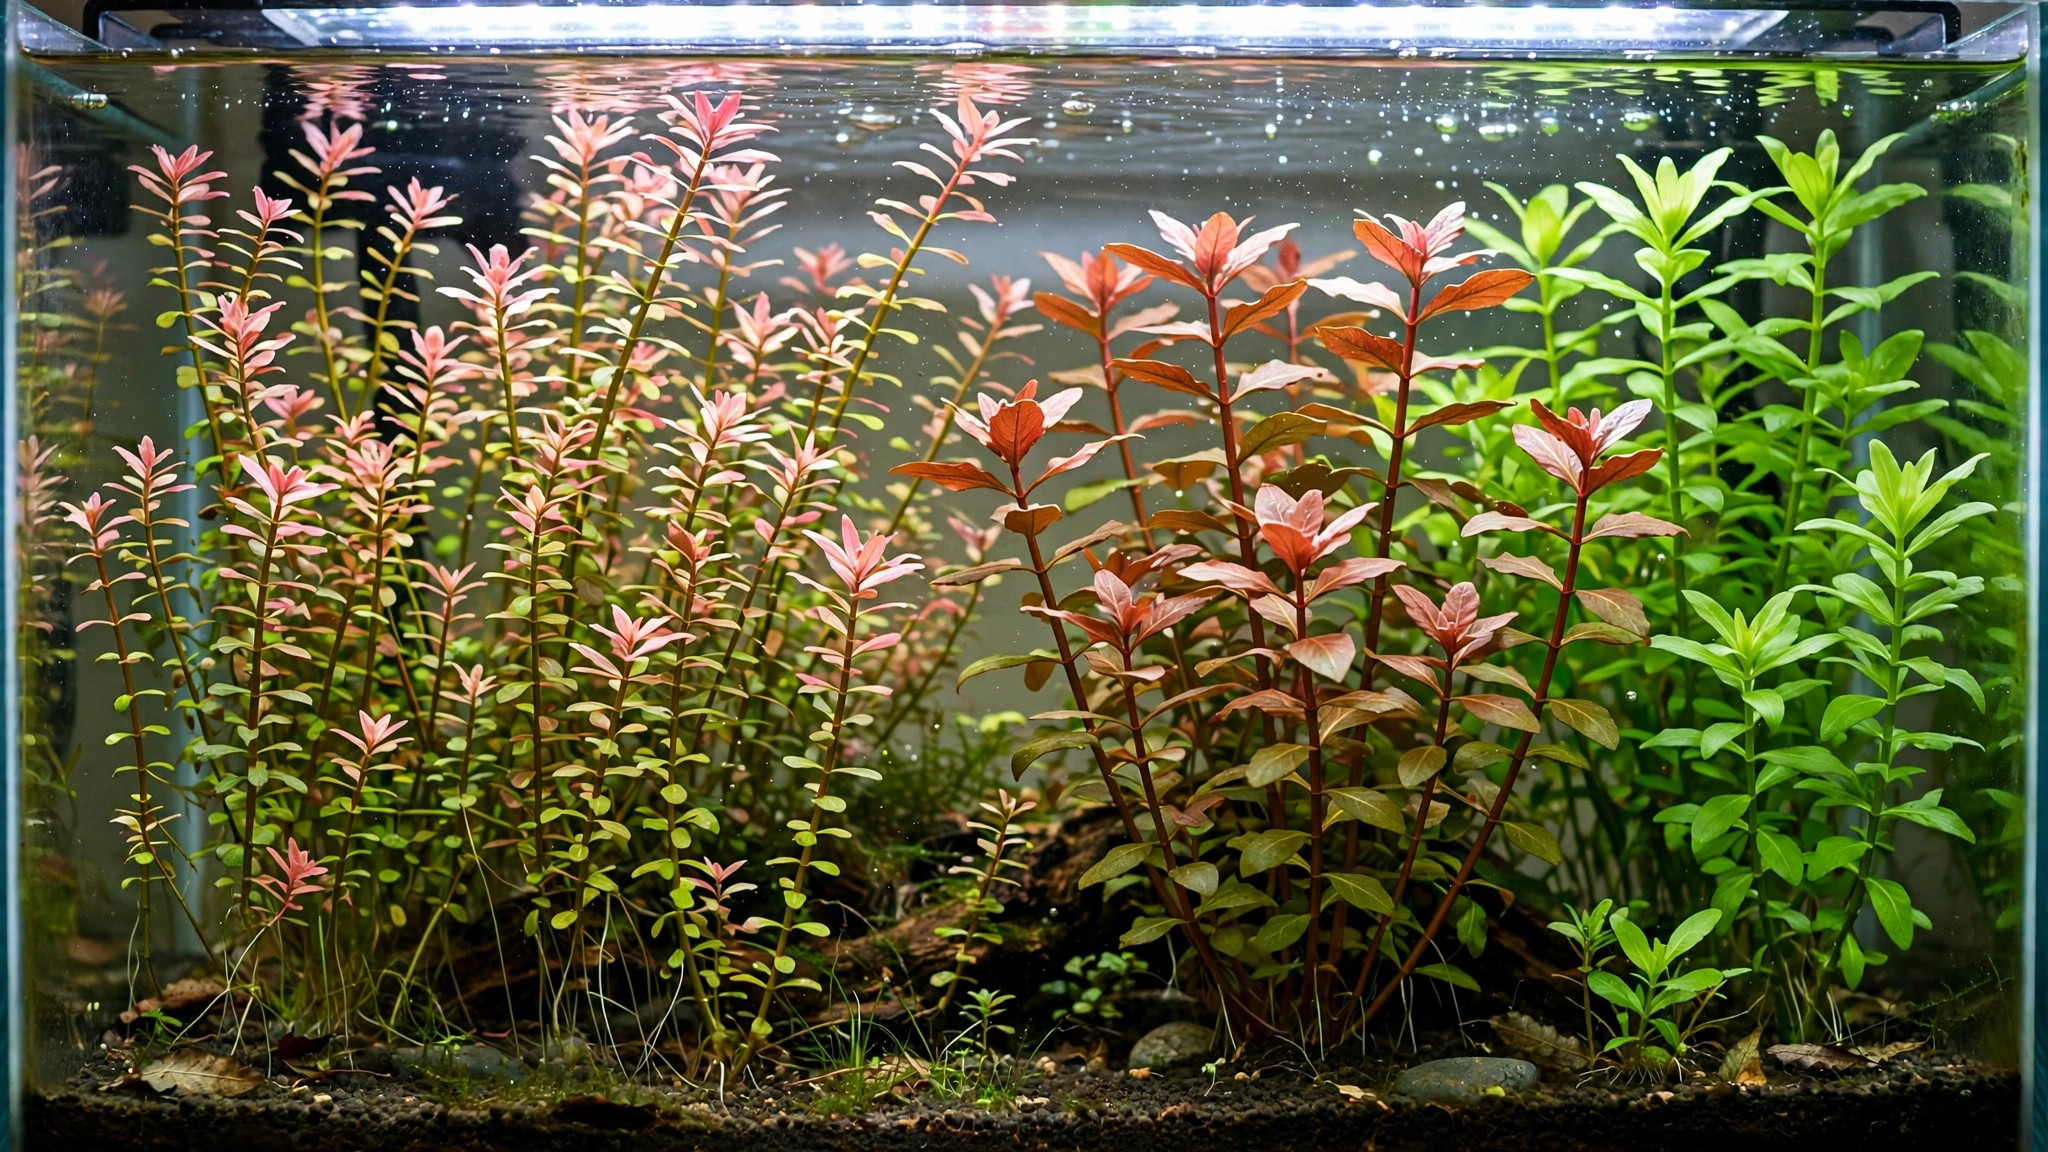
A brand-new aquarium is a biological paradox: the water looks pristine, yet it is the most dangerous your fish will ever face. Until the filter matures, ammonia from waste and decaying food has nowhere to go, and that window — usually the first two to six weeks — is when most algae blooms and new-tank disasters happen. The fastest fix is not a chemical; it is fast growing stem plants new tank owners can drop in on day one. These species grow so quickly they absorb ammonia and nitrates straight from the water column, starving algae of the nutrients it needs and buying your filter time to colonize.
Instead, you get a tactical plan: which genuinely fast species to buy, how many bunches per gallon to plant on setup day, how to prune them in the first month, and when to thin the forest back into a balanced scape.
Why Fast Growing Stem Plants New Tank Owners Plant on Day One
When a tank cycles, beneficial bacteria need weeks to build up enough population to convert toxic ammonia into nitrite, then nitrate. During that lag, two things compete for the excess nutrients: your plants, and algae. Algae wins every tie because it reproduces in hours and thrives on unstable conditions. Fast-growing stems tilt the contest because their metabolism is extraordinary — a healthy stand of Hygrophila or Rotala can double its biomass in a couple of weeks under decent light, and every gram of new leaf tissue is built from nitrogen and phosphate pulled directly from your water.
Practically speaking, hobbyists who plant heavily on day one report far fewer diatom and hair-algae outbreaks, and can stock fish sooner and more safely than the old fishless-cycle timeline suggests.
There is a trade-off worth stating honestly. This is a temporary arrangement. Once the tank matures and the bacterial filter takes over the heavy lifting, most of these aggressive growers will crowd the scape and shade slower plants. That is the plan, not a failure — you plant them thick, let them work, then thin and replace them as the tank settles. Think of them as a living, removable filter you plant in the substrate.
Day-One Planting Density: How Many Bunches Per Gallon
The single most common mistake is under-planting. A decorative cluster of five stems in a 20-gallon tank does almost nothing biologically. The nutrient-sponge effect only kicks in at high density — most experienced aquascapers aim to cover roughly 70 percent of the substrate with fast growers at setup.
Here is a practical rule of thumb for stem plants sold as bunches (typically 5–8 stems per bunch):
- 10-gallon tank: 6–8 bunches, roughly one bunch per 1.25–1.5 gallons
- 20-gallon tank: 12–16 bunches, about two-thirds to three-quarters of a bunch per gallon
- 40-gallon tank: 20–28 bunches, planted in drifts along the back and sides
Buy tissue-culture or bare-root stems where you can — they are pest-free and adapt fast — and plant each stem individually about 1–2 inches apart rather than cramming whole bunches in one hole. Individual planting gives every stem light and water flow, which dramatically increases total growth rate (and therefore nutrient uptake) compared with a dense clump that rots in the middle. For a full breakdown of how different plant categories compare at absorbing tank nutrients, see our guide to plants that absorb nitrates.
Layout matters too. Pack the fastest species along the back and sides of the tank where they form a living wall — this shades the substrate, stabilizes temperature, and intercepts nutrients from the water column before algae spores ever see them. Leave the front third open for hardscape and your eventual permanent plants. And do not fertilize for the first two weeks; the tap water, fish food, and fish waste in a new tank provide far more nitrogen than young stems need, and dosing into an uncycled system feeds algae, not plants.
Eight Fast Species for the Algae-Fighting Job
These eight were chosen for one thing: raw growth speed in a low-tech setup, without demanding CO2 injection or intense lighting. None of them appears in our general beginner's stem plant list, because this is a different shortlist — specialists for the new-tank window, each with honest notes on where it can cause trouble. If you want companion species for long-term balance once the tank matures, our natural algae control guide covers the permanent roster.
| Species | Growth speed | Light needs | Best role | Caution |
|---|---|---|---|---|
| Hygrophila polysperma | Extremely fast | Low–medium | Background nutrient sponge | Can be invasive; never release it outdoors |
| Pogostemon stellatus 'Octopus' | Very fast | Medium | Midground filler, big biomass fast | Grows tall quickly; prune often |
| Rotala 'H'ra' | Fast | Medium–high | Background color under good light | Leggy in dim tanks |
| Rotala macrandra | Fast | Medium–high | Striking red accent that eats nutrients | Fussy about water stability |
| Pearl weed (Hemianthus micranthemoides) | Fast | Medium | Midground carpet, huge surface area | Needs regular trimming or it mats |
| Hygrophila angustifolia | Very fast | Low–medium | Tall background wall in big tanks | Dwarfs foreground plants if neglected |
| Ludwigia arcuata | Fast | Medium | Orange-red stems for contrast | Colors fade under low light |
| Rotala wallichii | Fast | Medium–high | Feathery texture, rapid uptake | Delicate; sheds when stressed |
Hygrophila polysperma — the heavyweight workhorse
Polysperma is arguably the fastest common stem plant in the hobby, growing inches per week in almost any conditions, with broad leaves that maximize photosynthetic surface. The responsibility note is mandatory — it is classified as invasive in several US states, so never dump trimmings in drains or waterways; bag them and bin them. Check the species details on Tropica's plant database and read our full invasive aquarium plants guide before you buy it.
Pogostemon stellatus 'Octopus' — the biomass machine
Despite the cultivar name, 'Octopus' is valued for sheer volume: long, wavy leaves on stems that can reach the surface in under two weeks from a fresh planting. Each plant becomes a tall nutrient-absorbing column, and the relatively open foliage does not shade neighbors as aggressively as broader-leafed Hygrophila. Trim the tops and replant them — it roots from cuttings in days.
Rotala 'H'ra' — fast color that pulls its weight
An aquascaping favorite, 'H'ra' develops orange-pink tips under strong light while growing fast enough to qualify as a genuine nutrient sponge. It is bushier than classic rotalas, so it fills background space quickly. Give it at least medium light; in dim tanks it stretches and the internodes elongate, which looks ragged and slows its growth rate noticeably.
Rotala macrandra — the demanding sprinter
Macrandra grows fast and produces some of the most intense reds available without CO2, making it the species you plant when you want the algae-fighters to look spectacular. Caveat: it dislikes unstable water, and a brand-new tank is inherently unstable. Plant it on day one, but expect the first flush to be green — color and vigor arrive once parameters settle, usually around week three or four.
Pearl weed — the midground sprinter
Hemianthus micranthemoides grows fast horizontally as well as vertically, carpeting the midground while sending up shoots that increase total leaf surface in contact with the water. More leaf in the water column means more nutrient contact per hour. It tolerates being cut back brutally, which you will do weekly. For permanent low-tech options once the tank matures, see our easiest aquarium plants that need no CO2.
Hygrophila angustifolia — the tall background wall
A close relative of polysperma with long, willow-like leaves, angustifolia rockets to the surface and keeps going, folding across it. In a 20-gallon or larger tank, a back row of angustifolia acts as a biological wall: light-hungry, nutrient-hungry, and nearly impossible to kill. It offers most of polysperma's speed with none of the regulatory baggage.
Ludwigia arcuata — contrast that competes
Arcuata is a genuinely different plant from the ubiquitous Ludwigia repens — finer leaves, more orange than red, and a faster growth habit. It colonizes the upper water column where light is strongest, which is exactly where its growth rate (and therefore its ammonia uptake) peaks. Pair it with green species like polysperma for a background that looks intentional.
Rotala wallichii — feathery and ferocious
Wallichii's fine, pine-like foliage has an enormous surface-area-to-mass ratio, which makes it exceptionally efficient at stripping nutrients per inch of stem. It is the most delicate species on this list and will shed lower leaves if water parameters swing — which, again, new tanks do. Treat it as the canary: if your wallichii holds its foliage in week two, your planting strategy is working.
The First-Month Pruning Schedule
Fast stems in a new tank grow so quickly that pruning is not cosmetic — it is how you keep the nutrient machine running. Topped stems that reach the surface slow down, shade everything below, and stop absorbing at their peak rate. Keep them growing hard with this schedule:
- Days 1–10: hands off, except to replant any floaters. Let roots establish.
- Days 10–21: first trim when stems near the surface. Cut at half height, replant the tops. You are multiplying your workforce; by week three you should have noticeably more stems than you bought.
- Weeks 3–4: weekly trimming. Remove the bottom portions that have lost leaves and shed dead material, since rotting tissue releases the nutrients you are trying to remove. Export every trimming out of the tank — each bag of cuttings is nitrogen permanently removed from your system.
- Month two: this is where the strategy shifts from maximum biomass to intentional thinning (see below).
Run your lights 6–8 hours daily during the first month — enough for fast growth, short enough to deny algae long photoperiods. Floating plants like duckweed or frogbit make excellent partners here because they grow faster than anything submerged; treat them as the skirmishers ahead of your stem-plant army. And keep an eye on your cycle: once ammonia and nitrite read zero for a full week with fish in the tank, the bacterial filter has arrived and the stems' emergency role is winding down.
When to Thin Out and Transition
Somewhere between week six and week twelve, the tank tells you the algae-fighters have done their job: water tests stay clean, diatoms fade, and the stems start looking less like heroes and more like weeds crowding your hardscape. Time to thin.
Do it gradually, over two to three weeks. Removing half the biomass in one session can destabilize a young tank's nutrient balance and trigger the very algae bloom you avoided. Each week, pull 20–30 percent of the fastest growers — starting with the leggy, shaded specimens — and replace them with your permanent plants: slower rotalas, crypts, anubias, or reds from our red stem plant color guide. Keep a modest background stand of your favorites as the tank's permanent nutrient buffer.
The goal was never a permanent forest. A tank that started with an algae-fighting stem army transitions into a balanced scape where the permanent plants inherit a clean, algae-free, fully cycled environment. When shopping for the initial planting, tissue-culture versus potted plants is worth reading — sterile tissue-culture cups give you pest-free stems that adapt to new tanks faster than emersed-grown potted stock.
Frequently Asked Questions
Can fast-growing stems replace cycling my tank before adding fish?
They cannot fully replace cycling, but they dramatically soften the dangerous window. In a heavily planted new tank, fast stems absorb much of the ammonia that bacteria would otherwise need weeks to handle, which is why silent-cycle and heavily planted setups can safely add fish much earlier. Still add fish gradually, test water regularly in the first month, and feed lightly — plants are a buffer, not a substitute for a maturing filter.
How do fast stems actually fight algae?
They outcompete it. Algae and plants consume the same dissolved nitrogen, phosphate, and trace minerals, and fast-growing stems take them up far more quickly because they build new tissue every day. Dense growth also stabilizes the tank: it shades the substrate, consumes CO2, and keeps water chemistry steadier, all of which remove the instability that triggers algae blooms. Every trimmed stem you remove from the tank permanently exports the nutrients locked in its leaves.
Should I add fertilizer to a new tank full of stem plants?
Not for the first two to three weeks. A new tank already contains more nitrogen and phosphate from fish waste, food, and tap water than young stems can use, and dosing liquid fertilizer into an uncycled system mostly feeds algae. Start fertilizing only when you see clear deficiency signs — pale new growth, stunted tips — and even then, dose at half the bottle's recommended rate. Conservative dosing keeps both plants and livestock safe.
Will these fast growers take over my tank?
Yes — that is literally the job you hired them for. Species like Hygrophila polysperma can reach the surface in two weeks and will shade out slower plants if ignored. The remedy is the pruning schedule above: weekly trims keep them in their lane, and the thinning plan at week six to twelve retires most of them. Think of the takeover phase as proof the nutrient sponge is working at full power.
Can I use these stem plants in a tank with a soil substrate or the Walstad method?
Absolutely — they are among the best partners for soil-based setups. Soil leaches a surge of ammonia in the first weeks, and fast stems soak it up before it can fuel algae, which is why planted-soil tanks often skip the worst of the new-tank ugly phase. Just be aware that soil plus fast stems can grow explosively; the weekly pruning habit matters even more here, and heavy root feeders are unnecessary until the thinning phase.
What is the biggest mistake people make with this strategy?
Planting too little and pruning too rarely. Three bunches in a 20-gallon tank is decoration, not a strategy — the nutrient-sponge effect needs roughly 70 percent substrate coverage at setup. The second mistake is leaving trimmed material to rot in the tank, which returns every absorbed nutrient straight back into the water. Cut weekly, export every trimming, and thin gradually once the tank matures.
The Algae Fighters Earn Their Retirement
Six to twelve weeks after setup, you will look at your tank and see it: clear water, clean glass, a working filter, and a forest of stems that did exactly what you planted them to do. That is the moment to thin the army, keep your favorites as a permanent nutrient buffer, and plant the slower, prettier species you actually daydreamed about. The fast growers were never the destination — they were the escort that carried your new tank through its most vulnerable weeks, and no chemical product does that job as reliably.
Tissue-culture plants are the exception — they’re grown in sterile gel and adapt with minimal melting, which is part of what you’re paying for. Plants bought submersed from another hobbyist’s tank also transition with little melt, since they’re already in the right form.
Which Plants Melt Most (and Least)
Heavy melters (expect significant leaf loss)
- Cryptocorynes — infamous for “crypt melt,” sometimes dropping every leaf after any disturbance. They almost always recover from the roots within weeks.
- Stem plants grown emersed — rotala, ludwigia, and hygrophila often shed lower emersed leaves while the growing tips transition.
- Amazon swords — emersed-grown swords typically lose their broad oval aerial leaves and replace them with longer submersed ribbon leaves.
Light melters
- Anubias, java fern, bucephalandra — slow-growing rhizome plants transition gradually; occasional old-leaf melt but rarely dramatic.
- Vallisneria — usually transitions well, though it dislikes the move itself and may sulk for a week.
- Floating plants — minimal melt since their leaves were already at the air-water interface.
The Acclimation Protocol
Step 1: Quarantine or dip first
Before acclimating to your tank’s conditions, make sure you’re not acclimating pests along with the plant. Run new arrivals through our quarantine and dip protocol — it adds days upfront but prevents months of regret.
Step 2: Float to temperature-match (30 minutes)
Float the bag or container in your tank for 20–30 minutes to equalize temperature. Plants are less temperature-sensitive than fish, but a 10°F shock on top of transplant stress is an avoidable insult.
Step 3: Trim before planting
Remove any leaves that are already damaged, yellowing, or heavily algae-covered — they won’t recover and they’ll rot in your tank, feeding algae. For stem plants, trim off the bottom inch and any emersed leaves that look unlikely to adapt; the plant wastes energy maintaining leaves it’s going to shed anyway. Keep the healthy growing tips — that’s where recovery starts.
Step 4: Plant correctly the first time
Follow our planting guide — right depth, crown exposed on rosettes, rhizomes unburied on epiphytes. Every uprooting and replanting restarts the acclimation clock, so get placement right on the first attempt. Decide where each plant goes before it goes in the water.
Step 5: Run a gentle first week
For the first 7 days after planting:
- Moderate light — run your normal photoperiod but consider dropping intensity 20–30% if your light is dimmable. Blast-level light on a melting plant grows algae on the dying leaves, not recovery.
- Stable CO2 — if you inject CO2, keep it consistent. Fluctuating CO2 during acclimation is a melt accelerator. If you’re low-tech, this doesn’t apply — see growing without CO2.
- Half-strength fertilizer — new plants with damaged leaves can’t use full dosing, and the excess feeds algae. Ramp to full strength over 2–3 weeks per our fertilizer schedule.
- No disturbance — don’t move, trim, or “check on” new plants for at least two weeks. Every touch resets root establishment. This is especially critical for crypts.
Step 6: Remove melt, keep the base
As emersed leaves melt, remove the mushy material promptly — decaying leaves release ammonia and grow fungus that can spread to healthy tissue. But never discard the plant while the crown, rhizome, or roots are firm and alive. A crypt that’s lost every leaf but has firm roots is a plant that’s about to recover, not a dead plant. Give it 3–4 weeks before judging.
Telling Normal Melt From Real Problems
Normal transition melt:
- Affects oldest/emersed leaves first, newest growth last
- New submersed leaves emerge even as old ones dissolve
- Roots and crown stay firm and white/green
- Timeline: 1–4 weeks, then obvious new growth
Concerning melt (see our full melting diagnosis guide):
- New growth also melts or emerges deformed
- Rhizome or crown turns mushy and brown — this is rot, not transition
- Entire plant dissolves within days with no new growth after 4+ weeks
- Melting spreads to established plants that weren’t recently moved
Buying Tips to Minimize Melt
- Buy submersed-grown when available — hobbyist-grown cuttings transition with almost no melt.
- Choose tissue culture for sensitive species — crypts and delicate stems establish far more reliably from sterile cups.
- Avoid plants already melting in the store tank — some melt is normal, but a plant that’s mostly mush at purchase has less energy for recovery.
- Transport carefully — keep plants damp and out of direct sun/heat. A plant that dries out or cooks in a hot car melts far worse than one transported properly.
The First-Month Timeline: What to Expect Week by Week
Knowing what’s normal when removes most acclimation anxiety. Here’s the typical timeline for a healthy plant adapting to a new tank:
Week 1: The quiet week
Almost nothing visible happens. The plant is growing roots you can’t see and assessing its new environment. Some species (vallisneria, stem plants) may start shedding their lowest leaves. This is normal. Resist the urge to “help” — no moving, no extra fertilizer, no light changes. The most common beginner mistake is intervening during a week when the correct action is nothing.
Week 2: Melt peaks
This is when emersed leaves give up in earnest. Crypts may drop everything; swords shed their broad aerial leaves; stem plants lose lower foliage. It looks catastrophic and it’s usually fine. Keep removing mushy material, keep conditions stable, and watch the crown and growing tips — if those are firm and green, recovery is already underway.
Week 3: The turn
New submersed-adapted leaves emerge — smaller, thinner, often a slightly different shade of green than the emersed foliage. Stem plant tips start growing visibly; crypts push tiny curled leaves from the crown; swords unfurl narrow ribbon leaves. This is the moment most beginners exhale for the first time.
Week 4+: Established
New growth outpaces melt, and the plant is functionally yours. You can resume full-strength fertilizer, normal trimming, and stop treating it as fragile. Some slow growers (anubias, bucephalandra) take 6–8 weeks to show obvious progress — that’s their normal speed, not a problem.
Acclimating Different Plant Formats
Tissue-culture cups
Sterile, pest-free, and already adapted to high-humidity (not emersed) growth — tissue cultures melt the least of any format. Rinse the agar gel off gently (leftover gel rots and feeds fungus), split the portion into small plantlets, and plant per our planting guide. They establish slowly for the first two weeks, then accelerate. No dip needed, minimal acclimation stress — this is the premium experience you’re paying for.
Potted plants
Remove the pot and strip away the rockwool completely — leftover rockwool traps debris and rots. Tease the root mass apart gently; if it’s a dense mat, splitting it into 2–3 smaller portions actually establishes faster than planting one big clump (more growing points, better water flow around roots). Potted plants are usually emersed-grown, so expect the standard 2–4 week melt cycle.
Bare-root / bunched stems
Typically sold as weighted bunches. Remove any bands, foam, or weights, strip the lower leaves, and plant stems individually or in small groups. Bunched stems from the store are often already transitioning — check for new submersed growth at the tips, which tells you the plant is mid-adaptation and will settle quickly.
Hobbyist cuttings
Already submersed-grown and the fastest to establish — often showing new growth within days. The main acclimation factor is water-parameter difference between the two tanks. Float to temperature-match, plant promptly, and they’ll usually take off with minimal melt. This is why experienced hobbyists prefer trading cuttings over buying potted plants.
Frequently Asked Questions
Should I use a “plant starter” or transplant fertilizer?
Products marketed for transplant shock are mostly B-vitamins and mild hormones. They don’t hurt, but there’s no strong evidence they help aquarium plants specifically. Stable conditions and patience outperform any bottle. Save the money for more plants.
My new plant melted completely — bare crown, no leaves. Is it dead?
Probably not, if the crown or rhizome is firm. Crypts and swords routinely lose 100% of their leaves and regrow from the base within a month. The test is firmness: firm and pale/green means alive; mushy and brown/black means rot. Give firm-but-leafless plants a full 4 weeks before declaring them dead.
Can I speed up acclimation with extra light or CO2?
No — and trying usually backfires. A melting plant can’t use extra light; the excess just grows algae on its dying leaves. Keep light moderate and CO2 stable (not boosted) during acclimation. Growth speed comes from the plant’s own adaptation timeline, which you can’t rush, only avoid delaying.
Should new plants go straight into my main display tank?
After quarantine/dipping, yes — there’s no benefit to a separate “growing-in” tank for most plants. They acclimate to your water fastest in the tank they’ll live in. The exception is very delicate species going into a tank with boisterous fish; give those a few weeks in a calm corner or breeder box first.
The Patience Rule
The single most important acclimation skill is restraint: plant it right, set gentle conditions, remove decay, and then leave it alone for a month. The hobbyists with the best plant growth aren’t doing something clever in week one — they’re simply not interfering in weeks two through four while the plants do what they’ve evolved to do. Melt looks like failure and feels like failure, but in most cases it’s the visible part of a plant successfully becoming yours.