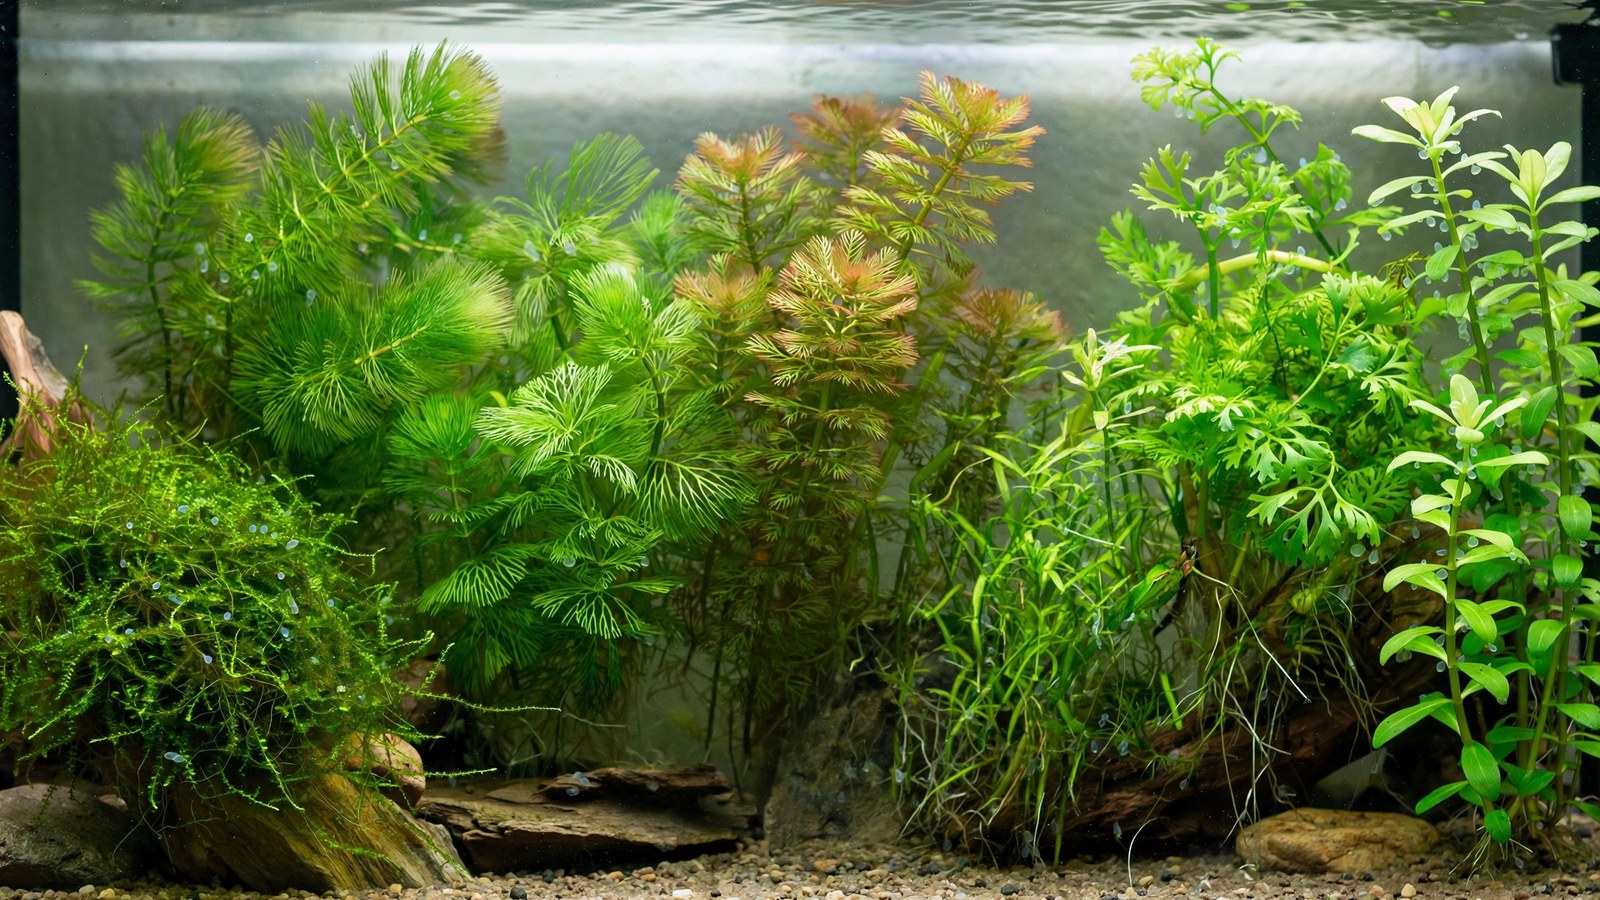
Egg-scattering fish — tetras, barbs, danios, rasboras, goldfish — don't build nests or guard their young. They release eggs into the water and hope. In a bare tank, "hope" means the parents eat every egg within minutes. Spawning plants change the equation: fine-leaved vegetation catches adhesive eggs, hides them from hungry mouths, and shelters the fry that hatch. These 7 plants are the best spawning media for egg-scatterers, from deliberate breeding setups to community tanks where you'd like a few fry to survive.
How Spawning Plants Work
Egg-scatterers produce small adhesive eggs that stick to whatever they touch. In nature that's vegetation; in your tank it should be too. Fine-leaved plants work best — eggs lodge among the fronds where parent fish (with their larger mouths and poorer maneuverability in dense foliage) can't easily reach them. The denser and finer the foliage, the higher the survival rate. After hatching, the same plants shelter fry and harbor the infusoria and biofilm that newborn fish eat first.
Two approaches: the breeding setup (a dedicated tank packed with spawning plants, parents added temporarily then removed) and the colony approach (a heavily planted community tank where a few fry survive naturally). The plants below serve both — density is the variable you control.
Setting Up a Spawning Tank
The classic spawning mop tank
A 10-gallon tank, a dense mass of spawning plants (java moss, hornwort, or guppy grass) filling half the volume, gentle filtration (sponge filter — fry-safe), and conditioned parent fish added in the evening. Spawning usually happens at dawn. Remove the parents once you see eggs (or after 48 hours), and the plants do the rest — eggs hidden in foliage, fry emerging into cover with infusoria waiting.
Water parameters
Match the species: soft acidic water for tetras and rasboras, harder water for livebearers and goldfish. Slightly warmer than normal maintenance temperature often triggers spawning. Keep it clean — eggs fungus easily in dirty water, and dense plants plus good maintenance prevent that.
Protecting the eggs
Even with plants, remove the parents promptly — no plant hides eggs from determined parents indefinitely. A mesh false bottom (eggs fall through, parents can't reach) combined with plants above is the professional belt-and-suspenders approach. Methylene blue at half dose prevents egg fungus in valuable spawns.
The 7 Best Spawning Plants
1. Java Moss — the universal spawning medium
The most-used breeding plant in the hobby. Java moss's dense, fine fronds catch eggs perfectly, hide them effectively, and harbor infusoria for first-feeding fry. It works for nearly every egg-scatterer — tetras, barbs, danios, goldfish, bettas. Pack it densely: a softball-sized mass per 10 gallons. Our moss comparison covers alternatives, but java moss is the default for a reason.
2. Hornwort — the floating egg trap
Hornwort's whorled needles catch eggs throughout the water column, and as a floater it creates a spawning zone at the surface where many species (danios, white clouds) naturally release eggs. It's also allelopathic, keeping the spawning tank's water clean. Use floating masses for surface spawners, weighted bunches for mid-water species.
3. Guppy Grass (Najas guadalupensis) — the fry fortress
Fine-leaved, dense, and fast-growing — guppy grass forms thickets that eggs lodge in and fry vanish into. It's the highest-survival-rate plant for colony breeding, where fry grow up alongside parents: the thicket is simply too dense for adults to hunt effectively. Nearly indestructible and propagates from fragments.
4. Water Sprite (floating) — the root-zone spawner
Floating water sprite's long, feathery root masses dangle into the water like a spawning mop designed by nature — eggs adhere to the roots, fry shelter among them, and infusoria colonize the root zone heavily. Many breeders consider it the single best floating spawning plant. Thin regularly; it grows fast.
5. Cabomba — the delicate egg catcher
Cabomba's feathery fan leaves are ideal egg-catching texture — fine enough to hide eggs, dense enough to block parents. It's the traditional spawning plant for goldfish and was the standard before java moss took over. Slightly more demanding than moss (wants moderate light, dislikes being moved), but superb in dedicated breeding setups.
6. Myriophyllum (Milfoil) — the feathery alternative
Milfoil's finely divided whorled leaves create the densest fine texture of any stem plant — eggs disappear into it completely. It grows fast, tolerates a wide range, and provides excellent fry cover. Slightly coarser than cabomba but tougher and more adaptable. A great spawning plant for harder-water species like barbs.
7. Spawning mops (synthetic) — the honorable mention
Not a plant, but the breeding standard: acrylic yarn mops, boiled and sunk or floated, provide perfect egg-catching texture with zero biological variables. Many professional breeders use mops exclusively — they're sterilizable, consistent, and eggs are easy to inspect and move. Use mops when you want maximum control; use plants when you want a natural ecosystem that also raises the fry.
Raising Fry in Planted Tanks
The plants that catch eggs also raise fry — this is the real payoff. Dense vegetation provides: cover (fry survival without it approaches zero in community tanks), first food (infusoria and biofilm colonize plant surfaces; newborn fry graze constantly), and water quality (fast growers absorb the waste of heavy fry feeding). A fry tank should be the most heavily planted tank you own — and our nitrate-absorbing plants keep up with the intense feeding fry require.
Conditioning Breeders With Plants
Spawning plants do more than catch eggs — they condition the parents. Egg-scatterers kept in planted tanks are calmer, better-colored, and more willing to spawn than those in bare tanks, because vegetation mimics the security of their natural habitat. For two weeks before a planned spawn, feed the breeders heavily on live and frozen foods while housing them in a well-planted conditioning tank — dense moss, floating plants, clean water. You'll see the females plump with eggs and the males color up and display. Well-conditioned parents produce more eggs, healthier eggs, and spawn more readily when moved to the breeding setup. The plants aren't just equipment; they're part of the reproductive trigger. Even the colony approach benefits — a permanently planted community tank with good feeding produces surprise spawns regularly, no intervention required.
Species-Specific Tips
| Fish | Best spawning plant | Method |
|---|---|---|
| Neon/cardinal tetras | Java moss, fine mops | Soft acidic water, dawn spawning, remove parents |
| Match plant texture to egg size: fine moss for tiny tetra eggs, coarser milfoil for larger barb eggs. Our floating plant guide covers surface spawners, fast growers fill breeding tanks quickly, and oxygenating plants keep fry water healthy. Species profiles: Tropica's plant database. | ||
| Zebra danios | Hornwort (floating), mops | Marbles or mesh bottom + plants |
| Cherry barbs | Java moss, milfoil | Planted breeding tank, parents out after 48h |
| Goldfish | Cabomba, hornwort, water sprite | Large plant masses; eggs on fine leaves |
| White cloud minnows | Guppy grass, hornwort | Colony breeding in planted tank works |
| Bettas (bubble-nesters) | Floating plants (frogbit, sprite) | Anchor for bubble nest + fry cover |
Frequently Asked Questions
Can I breed egg-scatterers in my community tank?
Some fry will survive in a densely planted community tank — white clouds, danios, and cherry barbs are the best candidates for colony breeding. But survival rates are low (single digits percent) versus a dedicated spawning setup (50%+). If you want meaningful numbers, use a breeding tank; if you want the occasional surprise fry, plant densely and let nature happen.
How do I know if eggs were laid in the plants?
Look closely: tiny clear or amber spheres (1mm) clinging to fine leaves and moss fronds, usually laid at dawn. A flashlight held at an angle makes them glint. If parents were chasing and quivering among plants at dawn, assume spawning happened. Remove parents and wait 24–72 hours for hatching (species-dependent).
Do eggs need light or darkness?
Most egg-scatterer eggs develop fine in normal tank lighting; some species (certain tetras) prefer dim conditions for eggs. The plants provide natural shading. Avoid direct intense light on egg masses — it encourages fungus. Normal aquarium lighting with plant cover is ideal.
What do newborn fry eat in a planted tank?
Infusoria and biofilm on plant surfaces — the microscopic ecosystem that dense plants cultivate. This is why planted fry tanks work: the food is already there. Supplement with powdered fry food, vinegar eels, or baby brine shrimp as they grow. The plants feed the fry before you even start feeding.
How dense should spawning plants be?
Denser than looks reasonable — fill half the breeding tank with plant mass. Sparse plants don't hide eggs effectively; parents will find and eat most of them. You want thickets, not decorations. It looks like too much; it's exactly enough.
Can I reuse spawning plants for multiple batches?
Yes — rinse them gently in old tank water between spawns to remove unhatched eggs and debris, inspect for pests, and reuse. Java moss and hornwort handle this indefinitely. Replace synthetic mops when they get ratty. Never move plants from a diseased tank to a breeding tank without sterilization.
Let Them Scatter
Egg-scatterers have been filling vegetated waters with fry for millions of years — your job is just to provide the vegetation. Pack a tank with java moss and hornwort, add conditioned parents, remove them at dawn, and watch the plants do what they've always done: catch the eggs, hide the fry, and grow the next generation. It's the oldest breeding technique in the hobby, and still the best.
Tissue-culture plants are the exception — they’re grown in sterile gel and adapt with minimal melting, which is part of what you’re paying for. Plants bought submersed from another hobbyist’s tank also transition with little melt, since they’re already in the right form.
Which Plants Melt Most (and Least)
Heavy melters (expect significant leaf loss)
- Cryptocorynes — infamous for “crypt melt,” sometimes dropping every leaf after any disturbance. They almost always recover from the roots within weeks.
- Stem plants grown emersed — rotala, ludwigia, and hygrophila often shed lower emersed leaves while the growing tips transition.
- Amazon swords — emersed-grown swords typically lose their broad oval aerial leaves and replace them with longer submersed ribbon leaves.
Light melters
- Anubias, java fern, bucephalandra — slow-growing rhizome plants transition gradually; occasional old-leaf melt but rarely dramatic.
- Vallisneria — usually transitions well, though it dislikes the move itself and may sulk for a week.
- Floating plants — minimal melt since their leaves were already at the air-water interface.
The Acclimation Protocol
Step 1: Quarantine or dip first
Before acclimating to your tank’s conditions, make sure you’re not acclimating pests along with the plant. Run new arrivals through our quarantine and dip protocol — it adds days upfront but prevents months of regret.
Step 2: Float to temperature-match (30 minutes)
Float the bag or container in your tank for 20–30 minutes to equalize temperature. Plants are less temperature-sensitive than fish, but a 10°F shock on top of transplant stress is an avoidable insult.
Step 3: Trim before planting
Remove any leaves that are already damaged, yellowing, or heavily algae-covered — they won’t recover and they’ll rot in your tank, feeding algae. For stem plants, trim off the bottom inch and any emersed leaves that look unlikely to adapt; the plant wastes energy maintaining leaves it’s going to shed anyway. Keep the healthy growing tips — that’s where recovery starts.
Step 4: Plant correctly the first time
Follow our planting guide — right depth, crown exposed on rosettes, rhizomes unburied on epiphytes. Every uprooting and replanting restarts the acclimation clock, so get placement right on the first attempt. Decide where each plant goes before it goes in the water.
Step 5: Run a gentle first week
For the first 7 days after planting:
- Moderate light — run your normal photoperiod but consider dropping intensity 20–30% if your light is dimmable. Blast-level light on a melting plant grows algae on the dying leaves, not recovery.
- Stable CO2 — if you inject CO2, keep it consistent. Fluctuating CO2 during acclimation is a melt accelerator. If you’re low-tech, this doesn’t apply — see growing without CO2.
- Half-strength fertilizer — new plants with damaged leaves can’t use full dosing, and the excess feeds algae. Ramp to full strength over 2–3 weeks per our fertilizer schedule.
- No disturbance — don’t move, trim, or “check on” new plants for at least two weeks. Every touch resets root establishment. This is especially critical for crypts.
Step 6: Remove melt, keep the base
As emersed leaves melt, remove the mushy material promptly — decaying leaves release ammonia and grow fungus that can spread to healthy tissue. But never discard the plant while the crown, rhizome, or roots are firm and alive. A crypt that’s lost every leaf but has firm roots is a plant that’s about to recover, not a dead plant. Give it 3–4 weeks before judging.
Telling Normal Melt From Real Problems
Normal transition melt:
- Affects oldest/emersed leaves first, newest growth last
- New submersed leaves emerge even as old ones dissolve
- Roots and crown stay firm and white/green
- Timeline: 1–4 weeks, then obvious new growth
Concerning melt (see our full melting diagnosis guide):
- New growth also melts or emerges deformed
- Rhizome or crown turns mushy and brown — this is rot, not transition
- Entire plant dissolves within days with no new growth after 4+ weeks
- Melting spreads to established plants that weren’t recently moved
Buying Tips to Minimize Melt
- Buy submersed-grown when available — hobbyist-grown cuttings transition with almost no melt.
- Choose tissue culture for sensitive species — crypts and delicate stems establish far more reliably from sterile cups.
- Avoid plants already melting in the store tank — some melt is normal, but a plant that’s mostly mush at purchase has less energy for recovery.
- Transport carefully — keep plants damp and out of direct sun/heat. A plant that dries out or cooks in a hot car melts far worse than one transported properly.
The First-Month Timeline: What to Expect Week by Week
Knowing what’s normal when removes most acclimation anxiety. Here’s the typical timeline for a healthy plant adapting to a new tank:
Week 1: The quiet week
Almost nothing visible happens. The plant is growing roots you can’t see and assessing its new environment. Some species (vallisneria, stem plants) may start shedding their lowest leaves. This is normal. Resist the urge to “help” — no moving, no extra fertilizer, no light changes. The most common beginner mistake is intervening during a week when the correct action is nothing.
Week 2: Melt peaks
This is when emersed leaves give up in earnest. Crypts may drop everything; swords shed their broad aerial leaves; stem plants lose lower foliage. It looks catastrophic and it’s usually fine. Keep removing mushy material, keep conditions stable, and watch the crown and growing tips — if those are firm and green, recovery is already underway.
Week 3: The turn
New submersed-adapted leaves emerge — smaller, thinner, often a slightly different shade of green than the emersed foliage. Stem plant tips start growing visibly; crypts push tiny curled leaves from the crown; swords unfurl narrow ribbon leaves. This is the moment most beginners exhale for the first time.
Week 4+: Established
New growth outpaces melt, and the plant is functionally yours. You can resume full-strength fertilizer, normal trimming, and stop treating it as fragile. Some slow growers (anubias, bucephalandra) take 6–8 weeks to show obvious progress — that’s their normal speed, not a problem.
Acclimating Different Plant Formats
Tissue-culture cups
Sterile, pest-free, and already adapted to high-humidity (not emersed) growth — tissue cultures melt the least of any format. Rinse the agar gel off gently (leftover gel rots and feeds fungus), split the portion into small plantlets, and plant per our planting guide. They establish slowly for the first two weeks, then accelerate. No dip needed, minimal acclimation stress — this is the premium experience you’re paying for.
Potted plants
Remove the pot and strip away the rockwool completely — leftover rockwool traps debris and rots. Tease the root mass apart gently; if it’s a dense mat, splitting it into 2–3 smaller portions actually establishes faster than planting one big clump (more growing points, better water flow around roots). Potted plants are usually emersed-grown, so expect the standard 2–4 week melt cycle.
Bare-root / bunched stems
Typically sold as weighted bunches. Remove any bands, foam, or weights, strip the lower leaves, and plant stems individually or in small groups. Bunched stems from the store are often already transitioning — check for new submersed growth at the tips, which tells you the plant is mid-adaptation and will settle quickly.
Hobbyist cuttings
Already submersed-grown and the fastest to establish — often showing new growth within days. The main acclimation factor is water-parameter difference between the two tanks. Float to temperature-match, plant promptly, and they’ll usually take off with minimal melt. This is why experienced hobbyists prefer trading cuttings over buying potted plants.
Frequently Asked Questions
Should I use a “plant starter” or transplant fertilizer?
Products marketed for transplant shock are mostly B-vitamins and mild hormones. They don’t hurt, but there’s no strong evidence they help aquarium plants specifically. Stable conditions and patience outperform any bottle. Save the money for more plants.
My new plant melted completely — bare crown, no leaves. Is it dead?
Probably not, if the crown or rhizome is firm. Crypts and swords routinely lose 100% of their leaves and regrow from the base within a month. The test is firmness: firm and pale/green means alive; mushy and brown/black means rot. Give firm-but-leafless plants a full 4 weeks before declaring them dead.
Can I speed up acclimation with extra light or CO2?
No — and trying usually backfires. A melting plant can’t use extra light; the excess just grows algae on its dying leaves. Keep light moderate and CO2 stable (not boosted) during acclimation. Growth speed comes from the plant’s own adaptation timeline, which you can’t rush, only avoid delaying.
Should new plants go straight into my main display tank?
After quarantine/dipping, yes — there’s no benefit to a separate “growing-in” tank for most plants. They acclimate to your water fastest in the tank they’ll live in. The exception is very delicate species going into a tank with boisterous fish; give those a few weeks in a calm corner or breeder box first.
The Patience Rule
The single most important acclimation skill is restraint: plant it right, set gentle conditions, remove decay, and then leave it alone for a month. The hobbyists with the best plant growth aren’t doing something clever in week one — they’re simply not interfering in weeks two through four while the plants do what they’ve evolved to do. Melt looks like failure and feels like failure, but in most cases it’s the visible part of a plant successfully becoming yours.