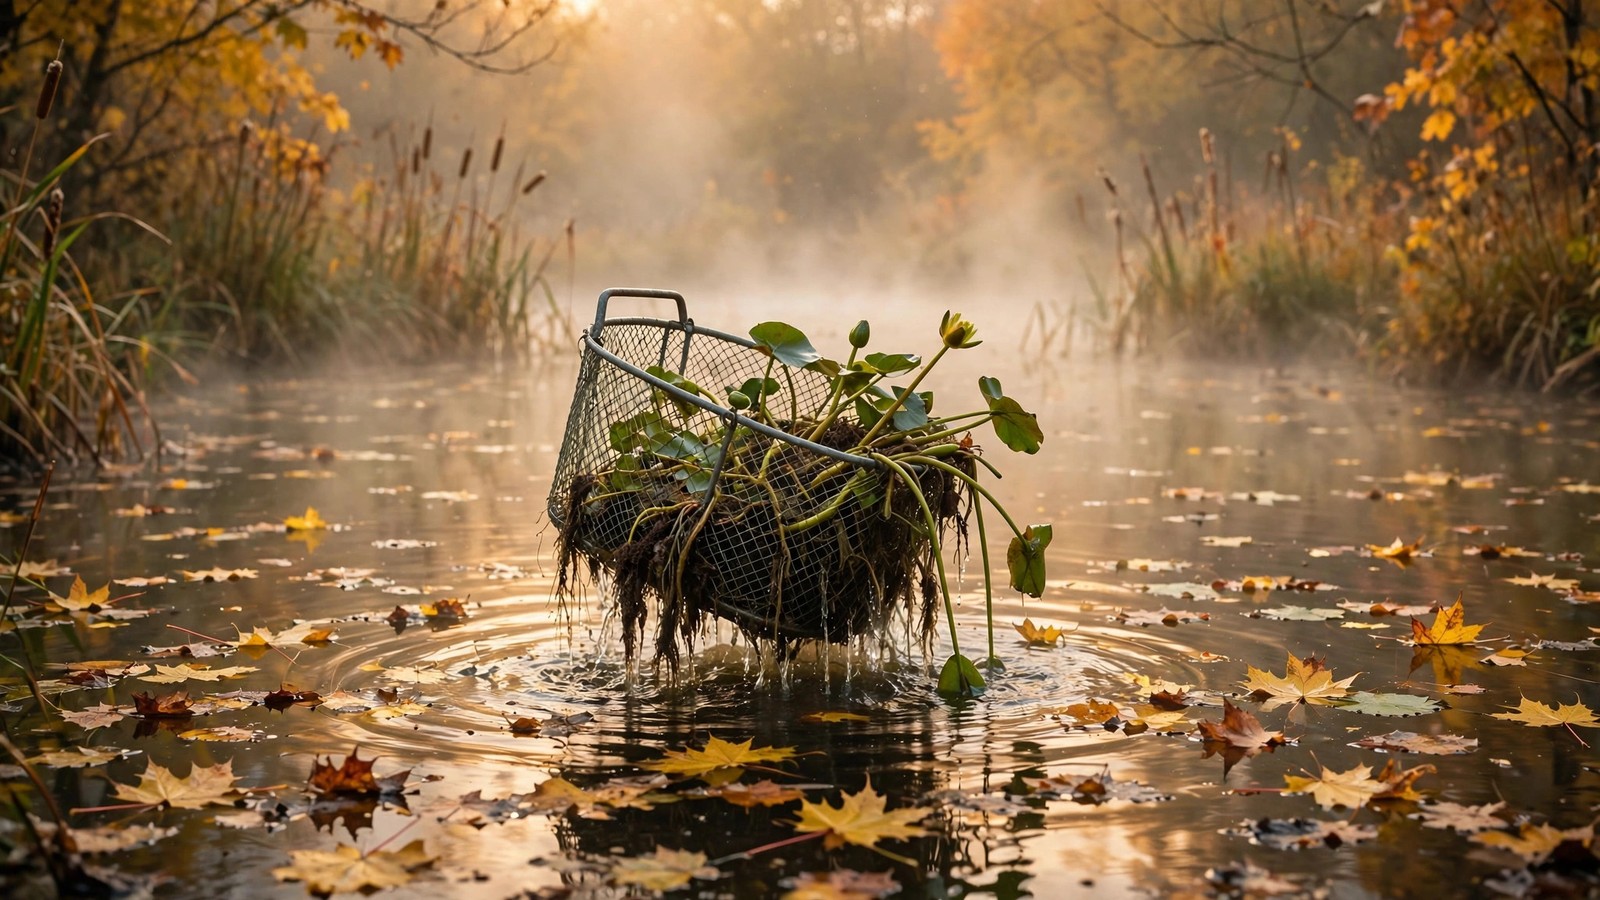
The nights are getting cooler, the maple leaves are starting to drift across the water, and your pond is about to remind you of one important truth: not everything in it can handle winter. If you've been overwintering pond plants indoors for years, you already know the drill. If this is your first fall with a water garden, don't panic — saving your tropical water plants is much easier than it sounds, as long as you know which plants truly need rescuing, when to bring them in, and which of the three proven overwintering methods fits each one.
Know Which Plants Actually Need Saving
The single biggest mistake beginners make is treating every pond plant the same. Some plants are built for cold; others are tropical sun-lovers that will die at the first hard frost. Sorting your collection into these two groups before you lift a single pot is the whole battle.
The tender plants that must come inside
Tropical plants are the reason this guide exists. Tropical water lilies are the classic example — unlike their hardy cousins, their tubers will rot if they freeze. Water hyacinth and water lettuce, the fast-spreading floating plants that shaded your pond all summer, die at the first frost and will never bounce back outdoors in cold climates. Taro (Colocasia), elephant ears, sensitive plant (Neptunia), and tropical cannas also belong on the indoor list. If you bought it labeled "tropical" or "zone 9+," assume it needs a winter home.
The hardy plants that can stay put
Good news: plenty of pond plants need nothing more from you than a trim. Hardy water lilies, cattails, pickerel rush, arrowhead, hardy water iris, and sweet flag are built to survive freezing — their roots just need to sit below the ice line, ideally 18 inches or deeper. Simply cut back yellowing foliage in late fall so decaying leaves don't foul the water, sink marginal pots to the deeper zone, and leave them alone. A seasonal checklist, like Aquascape's fall pond care tips, can help you time these chores alongside pump and filter winterization. If you're unsure whether a plant is hardy or tropical, check the variety name against a nursery catalog before the first frost; guessing wrong is how tubers get lost.
When to Start Overwintering Pond Plants Indoors
Timing matters more than technique. The trigger to watch is nighttime temperature: when nights are consistently dropping to around 50°F (10°C), it's time to act. Tropical floaters like hyacinth will start looking stressed at that point, and one surprise hard freeze — 32°F or below — can kill them outright.
For tropical water lilies, many growers recommend lifting tubers a touch earlier, when water temperatures slide below about 60°F and blooming stops, because the plant is already shifting into dormancy and handles the transition better. In most of the US, that puts your move window in late September through mid-October. Don't wait for leaves to look dramatic — by the time a tropical plant looks frostbitten, the damage is done. For a second opinion on seasonal timing, see Aquascape's guide to preparing pond plants for winter. If you're already growing aquarium plants in outdoor ponds for the summer, the same 50°F rule applies to tender species like tropical Rotala or Hygrophila you parked outside for the season.
Three Proven Ways to Overwinter Pond Plants Indoors
There's no single "right" method — the best choice depends on the plant, your space, and how much attention you want to give over winter. Here's the landscape:
| Method | Best for | Effort level | What it needs |
|---|---|---|---|
| Indoor tub or aquarium | Water hyacinth, water lettuce, taro, small tropical marginals | Medium — weekly checks | Sunny window or grow light, 60–70°F room |
| Dormant tuber storage | Tropical water lily tubers, some lotus | Low — check monthly | Damp sand or peat, cool dark spot at 50–60°F |
| Cool-garage slow rest | Papyrus, umbrella palm, hardy marginals in milder zones | Low | Faint light, soil kept barely moist |
Method 1: Keep them growing in an indoor tub or aquarium
This is the most popular approach for floating plants and tender marginals because it's simple: you just move the pond to a smaller container inside. A wide plastic storage tote, a spare aquarium, or even a sturdy bucket works — depth matters less than surface area for floaters. Fill it with dechlorinated tap water or pond water, set your hyacinth, water lettuce, or small potted taro in it, and place it in your brightest spot: a south-facing window or under a basic shop light or LED grow light on a 10–12 hour timer.
Keep the room at normal household temperatures, roughly 60–70°F. Top off evaporated water weekly and do a partial water change every couple of weeks to keep things fresh. Expect some sulking — older leaves may yellow as plants adjust to lower light. Pinch off dead foliage promptly so it doesn't rot and spike ammonia. Come spring, these plants won't be showroom-perfect, but they'll be alive, and floaters multiply so fast that a handful of survivors becomes a full cover by July. If you keep indoor aquariums too, this method pairs naturally with beginner-friendly floating aquarium plants — the care routine is nearly identical.
Method 2: Store tropical lily tubers dormant (step by step)
For tropical water lilies, the classic technique is to let the tuber sleep through winter instead of keeping the whole plant alive. It's space-efficient — a shoebox can hold a dozen tubers — and it works remarkably well when done right.
- Lift before the first hard frost. Pull the pot from the pond, trim off all leaves and roots, and gently wash the tuber clean in a bucket of water.
- Inspect and cull. Keep only firm, solid tubers. Anything soft, mushy, or foul-smelling goes in the compost — one rotten tuber can spoil the batch.
- Pack in damp — not wet — medium. Nestle tubers in slightly moist sand, peat moss, or vermiculite inside a plastic bag or lidded container. They should be buried but able to breathe; poke a few air holes if you seal the bag.
- Store cool and dark. Aim for 50–60°F: an unheated basement, crawl space, or the crisper drawer of a spare fridge all work. Freezing kills; warmth wakes them up too early.
- Check monthly. Open the bag, make sure the medium is still lightly damp (mist if it's bone dry), and discard anything that has softened.
- Wake them in spring. When water temperatures are reliably above 70°F, pot tubers in heavy loam, set them in warm shallow water, and watch for new leaves.
This dormant-storage trick is familiar to anyone who's kept aquarium plants grown from bulbs — the underlying biology is the same: a storage organ waiting out the bad season.
Method 3: The cool-garage slow rest
Some tropicals and semi-hardy marginals — papyrus, umbrella palm, dwarf canna — don't need to stay actively growing, but their roots can't dry out completely the way lily tubers can. For these, the garage or an unheated sunroom is the sweet spot. Cut the foliage back to a few inches, keep the pot's soil barely moist (water lightly every few weeks, never soggy), and give it whatever dim natural light the space offers. The plant essentially idles: no growth, minimal water use, just waiting for spring. It's the lowest-effort method on the list, which is why it's a favorite for bulky plants you'd rather not shoehorn under grow lights.
Setting Up Your Indoor Overwintering Station
Whichever method you choose, a few environmental basics decide whether your plants merely survive or actually thrive until spring.
Light
Light is the number-one limiting factor indoors. A sunny windowsill works for a small collection, but for anything bigger, a basic LED shop light or full-spectrum grow light on a timer for 10–12 hours a day is the reliable answer. You don't need horticultural-grade gear — the goal is maintenance, not explosive growth. If you're already running planted aquariums, you know the drill: more light than a north window, consistent hours, and no algae-friendly 24/7 lighting marathons. Keep lights a few inches above floaters and raise them as needed so leaves don't scorch.
Temperature
Most overwintering tropicals are comfortable at 60–70°F, which is simply normal room temperature. The enemies are extremes: don't park tubs against drafty windows or above radiators, and keep plants away from vents blasting hot, dry air. Stored tubers want it cooler (50–60°F) as described above — too warm and they'll sprout in January, too cold and they rot.
Water and fertilizer
Use dechlorinated tap water for indoor tubs, and keep it clean with light, regular water changes. Here's the counterintuitive part: ease off the fertilizer. Plants in low winter light can't use much nutrition, and dosing normally just feeds algae and stresses roots. A very light dose every 4–6 weeks — or none at all until growth resumes in spring — is the right pace for almost everything. Hardy cold-water plants that grow without a heater need even less: if they're just sitting dormant in a cool spot, water alone is enough.
Inspect for Pests Before You Bring Anything Inside
Your pond is an ecosystem, which means your plants are probably hosting aphids, pond snails, mosquito larvae, or algae — all of which will happily move into your house with them. A ten-minute inspection now saves months of indoor headaches.
- Rinse everything thoroughly. Blast leaves and roots with a garden hose, top and bottom, to knock off aphids and hitchhiking snails.
- Soak floaters. A 10-minute dip in a bucket of clean water lets hidden snails and larvae drop off before the plants go into their winter tub.
- Quarantine new arrivals. Keep freshly brought-in plants separate from your indoor aquariums for a week or two and watch for snail explosions or aphid colonies.
- Prune the ratty stuff. Cut away yellowing or algae-coated leaves — they won't recover indoors, and decaying foliage pollutes small containers fast.
Bringing Them Back Outside in Spring
Overwintering only counts as a success if the return trip goes well. Wait until nighttime temperatures are reliably above 50°F and pond water has warmed past about 60°F before moving anything back out — for most climates, that's late April to May. Reversing the fall process too early is the classic way to lose everything you saved.
Acclimate gradually, exactly as you would when introducing new fish. Set tubs or pots in a shaded, sheltered spot outdoors for a few days — a cold frame, covered patio, or the shady side of the house — so plants adjust to real sunlight, wind, and temperature swings. Floaters can go straight into the pond once nights are warm, since they'll bounce back fast. Repot lilies and marginals that have outgrown their containers, top-dress with fresh aquatic soil, and resume normal fertilizing only once you see active new growth. If your pond doubles as a summer home for easy low-tech aquarium plants, reintroduce them the same way: shade first, full sun later.
A Responsibility Note: Never Release Tropical Plants Into Waterways
This one isn't optional. Water hyacinth and water lettuce are among the most destructive aquatic invaders on the planet — they've choked waterways across the southern US and beyond, and many states prohibit possessing or releasing them. When you thin your indoor tubs over winter, bag the trimmings and throw them in the trash or compost far from any drain, ditch, or pond. Never "set them free" in a local lake, and never assume a plant that died back in your pond can't come back somewhere warmer. Read our full guide on invasive aquarium plants you should never release — the same rules apply to every tropical you overwinter.
Frequently Asked Questions
Can I overwinter water hyacinth indoors, or should I just buy new plants each spring?
You absolutely can overwinter water hyacinth indoors, and it's easy: a tote of dechlorinated water under a grow light or in a sunny window at room temperature will keep a starter colony alive all winter. Whether you should depends on your setup — hyacinth multiplies explosively, so even three or four healthy survivors become full pond coverage by midsummer. If you have the space, overwintering saves money and guarantees your favorite variety. Just never let trimmings reach local waterways.
What is the lowest temperature tropical pond plants can tolerate?
Most tropical aquatics start suffering when nights dip below 50°F (10°C), and a hard frost at 32°F will kill water hyacinth, water lettuce, and tropical lily foliage outright. Tropical lily tubers buried in pond mud can survive brief chills a bit longer, but they rot if they actually freeze. Treat 50°F nights as your action trigger and the first forecast frost as your hard deadline.
Do overwintered pond plants need fertilizer during winter?
Almost never. In low winter light, plants grow slowly or go dormant, so they can't use fertilizer — dosing normally just feeds algae and can burn roots in small containers. Hold off entirely for dormant tuber storage and garage-resting plants. For actively growing indoor tubs, a very light dose every 4–6 weeks is plenty. Resume your normal feeding schedule in spring once you see strong new growth.
My tropical water lily tuber feels soft after storage. Is it dead?
Probably, yes. A healthy dormant tuber is firm, like a small potato. Softness, mushiness, or a sour smell means rot has set in, and that tuber won't recover — discard it so it doesn't spread decay to the others in storage. This is why the monthly check matters. Next season, make sure your storage medium is only lightly damp rather than wet, and that storage temperatures stay in the 50–60°F range.
Can I keep my pond plants in my aquarium over the winter?
Yes, with a little caution. Floaters like water lettuce and small hyacinth do fine in aquariums, and potted marginals can sit on the substrate in a shallow tank. Just quarantine and rinse plants first so you don't import pond snails, aphids, or parasites to your fish, keep lighting moderate to avoid algae blooms, and don't overcrowd the tank — surface cover blocks light from submerged plants below. It's a great use of a spare tank.
Your Pond Gets a Second Spring
Overwintering pond plants indoors is one of those chores that feels like a big deal the first time and like old habit by the second fall. Sort the tender from the hardy, watch the thermometer, pick the method that fits your space, and give everything a good rinse before it crosses the threshold. Do that, and next May you'll set out mature, established plants while everyone else starts from nursery pots — your pond will be weeks ahead. For broader seasonal planning, our guide to aquarium plants for outdoor ponds covers which species earn a summer spot in the first place.
Tissue-culture plants are the exception — they’re grown in sterile gel and adapt with minimal melting, which is part of what you’re paying for. Plants bought submersed from another hobbyist’s tank also transition with little melt, since they’re already in the right form.
Which Plants Melt Most (and Least)
Heavy melters (expect significant leaf loss)
- Cryptocorynes — infamous for “crypt melt,” sometimes dropping every leaf after any disturbance. They almost always recover from the roots within weeks.
- Stem plants grown emersed — rotala, ludwigia, and hygrophila often shed lower emersed leaves while the growing tips transition.
- Amazon swords — emersed-grown swords typically lose their broad oval aerial leaves and replace them with longer submersed ribbon leaves.
Light melters
- Anubias, java fern, bucephalandra — slow-growing rhizome plants transition gradually; occasional old-leaf melt but rarely dramatic.
- Vallisneria — usually transitions well, though it dislikes the move itself and may sulk for a week.
- Floating plants — minimal melt since their leaves were already at the air-water interface.
The Acclimation Protocol
Step 1: Quarantine or dip first
Before acclimating to your tank’s conditions, make sure you’re not acclimating pests along with the plant. Run new arrivals through our quarantine and dip protocol — it adds days upfront but prevents months of regret.
Step 2: Float to temperature-match (30 minutes)
Float the bag or container in your tank for 20–30 minutes to equalize temperature. Plants are less temperature-sensitive than fish, but a 10°F shock on top of transplant stress is an avoidable insult.
Step 3: Trim before planting
Remove any leaves that are already damaged, yellowing, or heavily algae-covered — they won’t recover and they’ll rot in your tank, feeding algae. For stem plants, trim off the bottom inch and any emersed leaves that look unlikely to adapt; the plant wastes energy maintaining leaves it’s going to shed anyway. Keep the healthy growing tips — that’s where recovery starts.
Step 4: Plant correctly the first time
Follow our planting guide — right depth, crown exposed on rosettes, rhizomes unburied on epiphytes. Every uprooting and replanting restarts the acclimation clock, so get placement right on the first attempt. Decide where each plant goes before it goes in the water.
Step 5: Run a gentle first week
For the first 7 days after planting:
- Moderate light — run your normal photoperiod but consider dropping intensity 20–30% if your light is dimmable. Blast-level light on a melting plant grows algae on the dying leaves, not recovery.
- Stable CO2 — if you inject CO2, keep it consistent. Fluctuating CO2 during acclimation is a melt accelerator. If you’re low-tech, this doesn’t apply — see growing without CO2.
- Half-strength fertilizer — new plants with damaged leaves can’t use full dosing, and the excess feeds algae. Ramp to full strength over 2–3 weeks per our fertilizer schedule.
- No disturbance — don’t move, trim, or “check on” new plants for at least two weeks. Every touch resets root establishment. This is especially critical for crypts.
Step 6: Remove melt, keep the base
As emersed leaves melt, remove the mushy material promptly — decaying leaves release ammonia and grow fungus that can spread to healthy tissue. But never discard the plant while the crown, rhizome, or roots are firm and alive. A crypt that’s lost every leaf but has firm roots is a plant that’s about to recover, not a dead plant. Give it 3–4 weeks before judging.
Telling Normal Melt From Real Problems
Normal transition melt:
- Affects oldest/emersed leaves first, newest growth last
- New submersed leaves emerge even as old ones dissolve
- Roots and crown stay firm and white/green
- Timeline: 1–4 weeks, then obvious new growth
Concerning melt (see our full melting diagnosis guide):
- New growth also melts or emerges deformed
- Rhizome or crown turns mushy and brown — this is rot, not transition
- Entire plant dissolves within days with no new growth after 4+ weeks
- Melting spreads to established plants that weren’t recently moved
Buying Tips to Minimize Melt
- Buy submersed-grown when available — hobbyist-grown cuttings transition with almost no melt.
- Choose tissue culture for sensitive species — crypts and delicate stems establish far more reliably from sterile cups.
- Avoid plants already melting in the store tank — some melt is normal, but a plant that’s mostly mush at purchase has less energy for recovery.
- Transport carefully — keep plants damp and out of direct sun/heat. A plant that dries out or cooks in a hot car melts far worse than one transported properly.
The First-Month Timeline: What to Expect Week by Week
Knowing what’s normal when removes most acclimation anxiety. Here’s the typical timeline for a healthy plant adapting to a new tank:
Week 1: The quiet week
Almost nothing visible happens. The plant is growing roots you can’t see and assessing its new environment. Some species (vallisneria, stem plants) may start shedding their lowest leaves. This is normal. Resist the urge to “help” — no moving, no extra fertilizer, no light changes. The most common beginner mistake is intervening during a week when the correct action is nothing.
Week 2: Melt peaks
This is when emersed leaves give up in earnest. Crypts may drop everything; swords shed their broad aerial leaves; stem plants lose lower foliage. It looks catastrophic and it’s usually fine. Keep removing mushy material, keep conditions stable, and watch the crown and growing tips — if those are firm and green, recovery is already underway.
Week 3: The turn
New submersed-adapted leaves emerge — smaller, thinner, often a slightly different shade of green than the emersed foliage. Stem plant tips start growing visibly; crypts push tiny curled leaves from the crown; swords unfurl narrow ribbon leaves. This is the moment most beginners exhale for the first time.
Week 4+: Established
New growth outpaces melt, and the plant is functionally yours. You can resume full-strength fertilizer, normal trimming, and stop treating it as fragile. Some slow growers (anubias, bucephalandra) take 6–8 weeks to show obvious progress — that’s their normal speed, not a problem.
Acclimating Different Plant Formats
Tissue-culture cups
Sterile, pest-free, and already adapted to high-humidity (not emersed) growth — tissue cultures melt the least of any format. Rinse the agar gel off gently (leftover gel rots and feeds fungus), split the portion into small plantlets, and plant per our planting guide. They establish slowly for the first two weeks, then accelerate. No dip needed, minimal acclimation stress — this is the premium experience you’re paying for.
Potted plants
Remove the pot and strip away the rockwool completely — leftover rockwool traps debris and rots. Tease the root mass apart gently; if it’s a dense mat, splitting it into 2–3 smaller portions actually establishes faster than planting one big clump (more growing points, better water flow around roots). Potted plants are usually emersed-grown, so expect the standard 2–4 week melt cycle.
Bare-root / bunched stems
Typically sold as weighted bunches. Remove any bands, foam, or weights, strip the lower leaves, and plant stems individually or in small groups. Bunched stems from the store are often already transitioning — check for new submersed growth at the tips, which tells you the plant is mid-adaptation and will settle quickly.
Hobbyist cuttings
Already submersed-grown and the fastest to establish — often showing new growth within days. The main acclimation factor is water-parameter difference between the two tanks. Float to temperature-match, plant promptly, and they’ll usually take off with minimal melt. This is why experienced hobbyists prefer trading cuttings over buying potted plants.
Frequently Asked Questions
Should I use a “plant starter” or transplant fertilizer?
Products marketed for transplant shock are mostly B-vitamins and mild hormones. They don’t hurt, but there’s no strong evidence they help aquarium plants specifically. Stable conditions and patience outperform any bottle. Save the money for more plants.
My new plant melted completely — bare crown, no leaves. Is it dead?
Probably not, if the crown or rhizome is firm. Crypts and swords routinely lose 100% of their leaves and regrow from the base within a month. The test is firmness: firm and pale/green means alive; mushy and brown/black means rot. Give firm-but-leafless plants a full 4 weeks before declaring them dead.
Can I speed up acclimation with extra light or CO2?
No — and trying usually backfires. A melting plant can’t use extra light; the excess just grows algae on its dying leaves. Keep light moderate and CO2 stable (not boosted) during acclimation. Growth speed comes from the plant’s own adaptation timeline, which you can’t rush, only avoid delaying.
Should new plants go straight into my main display tank?
After quarantine/dipping, yes — there’s no benefit to a separate “growing-in” tank for most plants. They acclimate to your water fastest in the tank they’ll live in. The exception is very delicate species going into a tank with boisterous fish; give those a few weeks in a calm corner or breeder box first.
The Patience Rule
The single most important acclimation skill is restraint: plant it right, set gentle conditions, remove decay, and then leave it alone for a month. The hobbyists with the best plant growth aren’t doing something clever in week one — they’re simply not interfering in weeks two through four while the plants do what they’ve evolved to do. Melt looks like failure and feels like failure, but in most cases it’s the visible part of a plant successfully becoming yours.