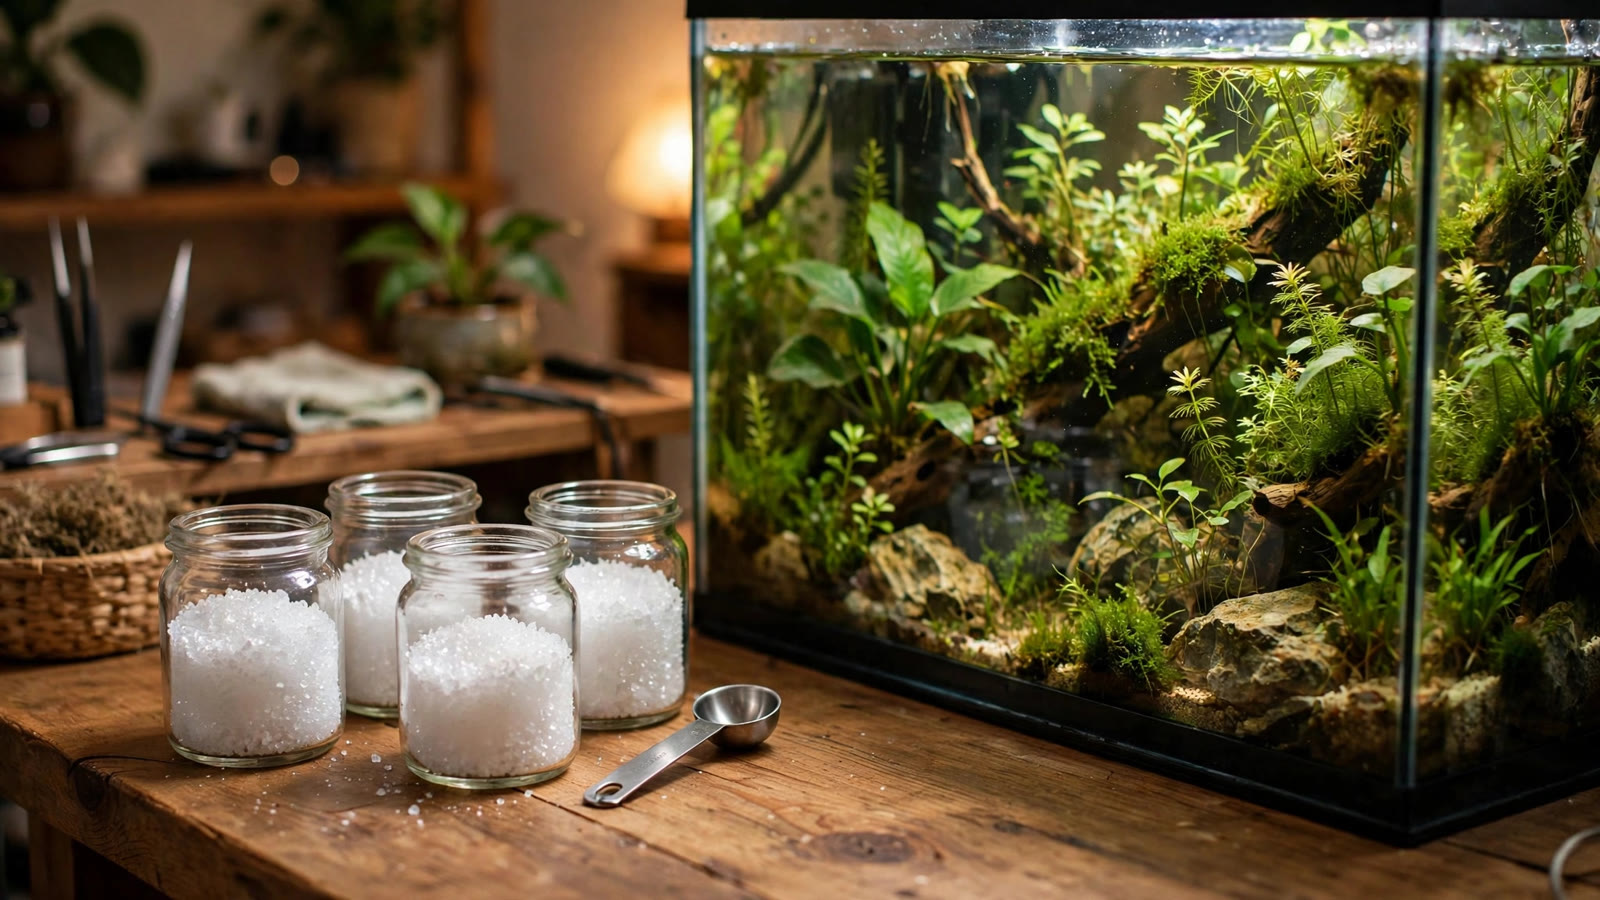
Learning how to make DIY aquarium plant fertilizer from dry salts is the single biggest money-saver in the planted-tank hobby. A bottle of all-in-one liquid fertilizer can cost fifteen to twenty dollars and last a month on a large tank — while a few pounds of the exact same raw salts can dose that same tank for several years. Premium bottled lines like Tropica's Specialised Nutrition all-in-one work beautifully, but you pay mostly for water, packaging, and branding rather than chemistry. The catch is that you need to know which salts to buy, how to mix them safely, and how much to dose so your plants thrive without triggering an algae farm. This guide walks through the two most proven dosing systems — Estimative Index (EI) and PPS-Pro — with concrete recipes, a mixing routine, and honest guidance on who should go the DIY route and who should stick with a bottle.
What Dry Salts Actually Are
Every bottled aquarium fertilizer is just a handful of inorganic salts dissolved in water. Buying those salts dry means you pay for the chemistry instead of the water, the plastic bottle, and the branding. The four core ingredients cover everything a planted tank needs.
- Potassium nitrate (KNO3) — supplies nitrogen (as nitrate) and potassium, the two macros plants consume fastest.
- Monopotassium phosphate (KH2PO4) — supplies phosphate, the macro that drives root and shoot growth.
- Potassium sulfate (K2SO4) — a pure potassium top-up, useful because plants can be potassium-limited even when nitrate is high.
- Trace mix (CSM+B or equivalent) — a chelated blend of iron, manganese, zinc, copper, boron, and molybdenum. This is your micronutrient backbone.
Optional additions include magnesium sulfate (Epsom salt, MgSO4) if your tap water is very soft, and DTPA-chelated iron if you run high light and notice pale new growth on fast stem plants. Calcium usually arrives via tap water and fish food, so most hobbyists never need to dose it separately.
DIY vs Bottled: The Real Cost Math
Let us put numbers to the decision, using a 50-gallon (190 L) moderately planted tank as the reference.
| Cost factor | Bottled all-in-one (premium brand) | DIY dry salts |
|---|---|---|
| Upfront cost | $16–$22 per 500 ml bottle | $35–$55 for a full starter kit of salts (1–2 lb bags) |
| How long it lasts on this tank | 3–6 weeks | 2–4 years |
| Yearly running cost | $180–$350 | $10–$25 |
| Customization | Fixed ratio | Fully adjustable macro-by-macro |
| Learning curve | Zero — squirt and go | Moderate — needs measuring and a dosing routine |
On small low-tech tanks the bottled route can be perfectly rational: a 10-gallon tank with a few easy aquarium plants that need no CO2 might take a year to finish one bottle. But once you pass roughly 40 gallons, or once you run high light with fast-growing aquarium plants for new tanks that drink nutrients aggressively, the DIY math becomes overwhelming. At these scales you are paying mostly for water.
Recipe 1: Estimative Index (EI) Dosing
Estimative Index, developed by Tom Barr, is the simplest philosophy: provide slightly more than plants can use, then reset everything with a large weekly water change. EI targets are intentionally generous — hobby measurements of actual weekly nutrient consumption in planted tanks show EI doses far exceed what plants use, which is precisely the point: levels never approach deficiency, so plants grow at full speed and algae never gets the unstable, starving conditions it exploits.
EI dosing amounts (standard dose)
The classic EI recipe for a 40–60 gallon tank, dosed three times per week on alternate days from traces:
- Macros (Mon/Wed/Fri): 1 tsp KNO3, 1/4 tsp KH2PO4, 1/2 tsp K2SO4 — each dose dissolves directly in the tank or in a small cup of tank water.
- Traces (Tue/Thu/Sat): 1/2 tsp trace mix (CSM+B or equivalent).
- Sunday: 50% water change, then no dosing that day.
For smaller tanks, scale proportionally: a 20-gallon tank takes roughly half, a 10-gallon takes a quarter. Accuracy within 20–30% is fine — EI is deliberately forgiving.
Making EI stock solutions
If you prefer liquid dosing (easier with a syringe or pump bottle), mix stock solutions in 500 ml bottles:
- Macro bottle: 500 ml distilled water + 60 g KNO3 + 15 g KH2PO4 + 40 g K2SO4. Dose 10 ml per 10 gallons, 3× per week.
- Trace bottle: 500 ml distilled water + 30 g trace mix. Dose 10 ml per 10 gallons, 3× per week on non-macro days.
Shake stock bottles before each use; the trace solution in particular settles over time.
Recipe 2: PPS-Pro Dosing
PPS-Pro (Perpetual Preservation System) takes the opposite approach: dose a precise, lean daily amount matched to what plants actually consume, so nothing accumulates and large water changes are not required. It suits low-tech and medium-light tanks, and tanks where a weekly 50% water change is impractical.
PPS-Pro dosing amounts
The standard PPS-Pro stock solutions, mixed in 1-liter bottles of distilled water:
- Macro solution: 59 g K2SO4 + 65 g KNO3 + 6 g KH2PO4 + 41 g MgSO4. Dose 1 ml per 10 gallons daily before lights on.
- Trace solution: 80 g trace mix (CSM+B or equivalent). Dose 1 ml per 10 gallons daily, ideally with the macros.
Unlike EI, you do not separate macro and trace days with PPS-Pro — both go in together each morning. And no massive water change is required; your normal maintenance routine applies.
Which System Should You Choose?
The decision hinges on your tank's energy level — light and CO2 drive nutrient demand.
| Tank style | Best fit | Why |
|---|---|---|
| High light + CO2, heavy planting | EI dosing | Maximum growth potential, deficiency-proof, water changes already weekly |
| Medium light, easy stems and rosettes | Either | PPS-Pro if you dislike big water changes; EI if you want simplicity |
| Low light, low-tech | PPS-Pro (lean) | Lean daily dosing matches slow growth; avoids excess nutrients sitting unused |
| Red plants you want to color up | EI, watch nitrate | Strong color needs stability; see our red stem plant color guide for the nitrate-light balance |
If you are just starting out with undemanding species, it also helps to know which plants will reward your new fertilizer routine. Our roundups of low-light aquarium plants for beginners and oxygenating aquarium plants are good places to pick species that respond visibly to better nutrition.
Mixing and Storage Safety
These salts are ordinary fertilizer ingredients, not exotic chemicals, but treat them with the respect any concentrated mineral deserves.
- Use distilled or RO water for stock solutions. Tap water with high phosphate or heavy chloramine can skew your recipe and encourage mold in the bottle.
- Label every bottle with contents and mix date. A clear bottle of white crystals looks identical whether it is KNO3 or K2SO4 — mislabeling is the most common DIY mistake.
- Keep salts dry and sealed. KNO3 and trace mixes clump badly with humidity, making measurement inaccurate.
- Never mix macro and trace concentrates in one bottle. Iron phosphate precipitates out as a cloudy mess, locking both nutrients away from plants.
- Store out of reach of children and pets. KNO3 is an oxidizer and should not sit next to flammable materials; the quantities in a hobby kit are small but worth respecting.
- Use solutions within 6–12 months. Trace solutions gradually lose potency; if yours smells off or grows visible mold, discard and remix.
Reading Your Plants: Signs You Need to Adjust
Your plants will tell you when the recipe needs tuning. Yellow older leaves with green veins point to nitrogen deficiency — increase KNO3 slightly. Stunted tips and dark, small leaves suggest phosphate shortage. Pinholes in older leaves are the classic potassium signal — bump K2SO4. Pale, nearly white new growth on red aquarium plants for beginners usually means iron or trace deficiency rather than a macro problem.
One caution: before increasing dosing, confirm the deficiency is real and not a CO2 or light problem, which mimic nutrient issues. If you are cycling a fresh setup, remember that plants that absorb nitrates will compete with your fertilizer schedule during the first weeks, so start at half dose until the tank settles.
Who Should Make DIY Aquarium Plant Fertilizer — and Who Should Buy the Bottle
Go DIY if: your tank is 40+ gallons, you run high light or CO2, you keep demanding species like flowering aquarium plants, you run multiple tanks, or you simply enjoy the hobby-chemistry side of the hobby. The savings and control are enormous.
Stick with bottled if: you have one small low-tech tank, you travel frequently and want a sitter-proof squirt bottle, or you tried mixing once and hated it. There is no shame in the bottle — a consistent bottled routine beats an abandoned DIY project every time. Some hobbyists also hybridize: DIY macros plus a premium chelated-iron bottle for demanding red plants, or bottled all-in-one while traveling and DIY at home.
Another free-fertilizer habit: when you siphon during a water change, the removed tank water is still rich in nitrates and trace nutrients, so many keepers save it instead of sending it down the drain.
Frequently Asked Questions
Is DIY aquarium plant fertilizer safe for fish and shrimp?
Yes, when dosed as directed. EI and PPS-Pro target nutrient ranges that decades of hobby use have shown to be safe for fish, shrimp, and snails. The key risk is gross measurement error — a tablespoon instead of a teaspoon of KNO3, for example. Use proper measuring spoons, and if you keep sensitive shrimp, start at half dose and observe for a week before going full strength.
Where do I buy KNO3, KH2PO4, and trace mix?
All four core salts are sold by aquarium fertilizer suppliers online, often as pre-weighed "EI starter kits" that take the guesswork out of sourcing. Agricultural-grade KNO3 and Epsom salt (MgSO4) are also available from garden suppliers, and trace mixes like CSM+B come from hydroponics vendors. Avoid anything with added urea, ammonia, or weed killers — check the label for purity.
Can I use regular garden fertilizer instead?
Not recommended. Garden fertilizers contain ammonia or urea nitrogen forms and copper levels that can harm shrimp and invertebrates, plus undisclosed filler ingredients. Aquarium-specific dry salts give you known, pure compounds in predictable ratios. The price difference versus a garden product is small, but the risk difference is large.
How long do mixed stock solutions last?
Macro solutions stay good for 6–12 months in a cool, dark place. Trace solutions degrade faster — plan on remixing every 3–6 months, and sooner if you see cloudiness, mold, or a metallic smell. Adding a tiny splash of glutaraldehyde-based liquid carbon or a few drops of Excel-style product can extend trace solution life, but plain remixing is simpler.
Do I need CO2 injection to use DIY fertilizers?
No. Fertilizers feed plants regardless of CO2, and low-tech tanks benefit from lean PPS-Pro dosing. What changes is the demand: without CO2, plants grow slower and need less, so start at half the published doses and increase only if deficiency signs appear. Excess dosing in a low-energy tank mostly feeds algae, not plants.
EI or PPS-Pro — which is better for a beginner?
PPS-Pro is usually the gentler introduction: one small daily dose, no mandatory 50% weekly water change, and leaner levels that are more forgiving of mistakes. EI is simpler conceptually (dose plenty, change water) but demands the weekly water-change discipline. Choose PPS-Pro if you dislike big water changes, EI if you run high light with CO2 and already change water weekly.
Mix Your First Batch This Weekend
DIY aquarium plant fertilizer looks intimidating until you realize the whole hobby runs on four bags of salt and two dosing philosophies. Pick the system that matches your tank — EI for high-energy setups, PPS-Pro for everything else — order a starter kit, label your bottles, and start at half dose for the first two weeks while you stock the tank with forgiving easy aquarium plants that need no CO2. Within a month, your plants will show you whether the recipe needs tuning, and your wallet will never look at a $20 bottle the same way again.
Tissue-culture plants are the exception — they’re grown in sterile gel and adapt with minimal melting, which is part of what you’re paying for. Plants bought submersed from another hobbyist’s tank also transition with little melt, since they’re already in the right form.
Which Plants Melt Most (and Least)
Heavy melters (expect significant leaf loss)
- Cryptocorynes — infamous for “crypt melt,” sometimes dropping every leaf after any disturbance. They almost always recover from the roots within weeks.
- Stem plants grown emersed — rotala, ludwigia, and hygrophila often shed lower emersed leaves while the growing tips transition.
- Amazon swords — emersed-grown swords typically lose their broad oval aerial leaves and replace them with longer submersed ribbon leaves.
Light melters
- Anubias, java fern, bucephalandra — slow-growing rhizome plants transition gradually; occasional old-leaf melt but rarely dramatic.
- Vallisneria — usually transitions well, though it dislikes the move itself and may sulk for a week.
- Floating plants — minimal melt since their leaves were already at the air-water interface.
The Acclimation Protocol
Step 1: Quarantine or dip first
Before acclimating to your tank’s conditions, make sure you’re not acclimating pests along with the plant. Run new arrivals through our quarantine and dip protocol — it adds days upfront but prevents months of regret.
Step 2: Float to temperature-match (30 minutes)
Float the bag or container in your tank for 20–30 minutes to equalize temperature. Plants are less temperature-sensitive than fish, but a 10°F shock on top of transplant stress is an avoidable insult.
Step 3: Trim before planting
Remove any leaves that are already damaged, yellowing, or heavily algae-covered — they won’t recover and they’ll rot in your tank, feeding algae. For stem plants, trim off the bottom inch and any emersed leaves that look unlikely to adapt; the plant wastes energy maintaining leaves it’s going to shed anyway. Keep the healthy growing tips — that’s where recovery starts.
Step 4: Plant correctly the first time
Follow our planting guide — right depth, crown exposed on rosettes, rhizomes unburied on epiphytes. Every uprooting and replanting restarts the acclimation clock, so get placement right on the first attempt. Decide where each plant goes before it goes in the water.
Step 5: Run a gentle first week
For the first 7 days after planting:
- Moderate light — run your normal photoperiod but consider dropping intensity 20–30% if your light is dimmable. Blast-level light on a melting plant grows algae on the dying leaves, not recovery.
- Stable CO2 — if you inject CO2, keep it consistent. Fluctuating CO2 during acclimation is a melt accelerator. If you’re low-tech, this doesn’t apply — see growing without CO2.
- Half-strength fertilizer — new plants with damaged leaves can’t use full dosing, and the excess feeds algae. Ramp to full strength over 2–3 weeks per our fertilizer schedule.
- No disturbance — don’t move, trim, or “check on” new plants for at least two weeks. Every touch resets root establishment. This is especially critical for crypts.
Step 6: Remove melt, keep the base
As emersed leaves melt, remove the mushy material promptly — decaying leaves release ammonia and grow fungus that can spread to healthy tissue. But never discard the plant while the crown, rhizome, or roots are firm and alive. A crypt that’s lost every leaf but has firm roots is a plant that’s about to recover, not a dead plant. Give it 3–4 weeks before judging.
Telling Normal Melt From Real Problems
Normal transition melt:
- Affects oldest/emersed leaves first, newest growth last
- New submersed leaves emerge even as old ones dissolve
- Roots and crown stay firm and white/green
- Timeline: 1–4 weeks, then obvious new growth
Concerning melt (see our full melting diagnosis guide):
- New growth also melts or emerges deformed
- Rhizome or crown turns mushy and brown — this is rot, not transition
- Entire plant dissolves within days with no new growth after 4+ weeks
- Melting spreads to established plants that weren’t recently moved
Buying Tips to Minimize Melt
- Buy submersed-grown when available — hobbyist-grown cuttings transition with almost no melt.
- Choose tissue culture for sensitive species — crypts and delicate stems establish far more reliably from sterile cups.
- Avoid plants already melting in the store tank — some melt is normal, but a plant that’s mostly mush at purchase has less energy for recovery.
- Transport carefully — keep plants damp and out of direct sun/heat. A plant that dries out or cooks in a hot car melts far worse than one transported properly.
The First-Month Timeline: What to Expect Week by Week
Knowing what’s normal when removes most acclimation anxiety. Here’s the typical timeline for a healthy plant adapting to a new tank:
Week 1: The quiet week
Almost nothing visible happens. The plant is growing roots you can’t see and assessing its new environment. Some species (vallisneria, stem plants) may start shedding their lowest leaves. This is normal. Resist the urge to “help” — no moving, no extra fertilizer, no light changes. The most common beginner mistake is intervening during a week when the correct action is nothing.
Week 2: Melt peaks
This is when emersed leaves give up in earnest. Crypts may drop everything; swords shed their broad aerial leaves; stem plants lose lower foliage. It looks catastrophic and it’s usually fine. Keep removing mushy material, keep conditions stable, and watch the crown and growing tips — if those are firm and green, recovery is already underway.
Week 3: The turn
New submersed-adapted leaves emerge — smaller, thinner, often a slightly different shade of green than the emersed foliage. Stem plant tips start growing visibly; crypts push tiny curled leaves from the crown; swords unfurl narrow ribbon leaves. This is the moment most beginners exhale for the first time.
Week 4+: Established
New growth outpaces melt, and the plant is functionally yours. You can resume full-strength fertilizer, normal trimming, and stop treating it as fragile. Some slow growers (anubias, bucephalandra) take 6–8 weeks to show obvious progress — that’s their normal speed, not a problem.
Acclimating Different Plant Formats
Tissue-culture cups
Sterile, pest-free, and already adapted to high-humidity (not emersed) growth — tissue cultures melt the least of any format. Rinse the agar gel off gently (leftover gel rots and feeds fungus), split the portion into small plantlets, and plant per our planting guide. They establish slowly for the first two weeks, then accelerate. No dip needed, minimal acclimation stress — this is the premium experience you’re paying for.
Potted plants
Remove the pot and strip away the rockwool completely — leftover rockwool traps debris and rots. Tease the root mass apart gently; if it’s a dense mat, splitting it into 2–3 smaller portions actually establishes faster than planting one big clump (more growing points, better water flow around roots). Potted plants are usually emersed-grown, so expect the standard 2–4 week melt cycle.
Bare-root / bunched stems
Typically sold as weighted bunches. Remove any bands, foam, or weights, strip the lower leaves, and plant stems individually or in small groups. Bunched stems from the store are often already transitioning — check for new submersed growth at the tips, which tells you the plant is mid-adaptation and will settle quickly.
Hobbyist cuttings
Already submersed-grown and the fastest to establish — often showing new growth within days. The main acclimation factor is water-parameter difference between the two tanks. Float to temperature-match, plant promptly, and they’ll usually take off with minimal melt. This is why experienced hobbyists prefer trading cuttings over buying potted plants.
Frequently Asked Questions
Should I use a “plant starter” or transplant fertilizer?
Products marketed for transplant shock are mostly B-vitamins and mild hormones. They don’t hurt, but there’s no strong evidence they help aquarium plants specifically. Stable conditions and patience outperform any bottle. Save the money for more plants.
My new plant melted completely — bare crown, no leaves. Is it dead?
Probably not, if the crown or rhizome is firm. Crypts and swords routinely lose 100% of their leaves and regrow from the base within a month. The test is firmness: firm and pale/green means alive; mushy and brown/black means rot. Give firm-but-leafless plants a full 4 weeks before declaring them dead.
Can I speed up acclimation with extra light or CO2?
No — and trying usually backfires. A melting plant can’t use extra light; the excess just grows algae on its dying leaves. Keep light moderate and CO2 stable (not boosted) during acclimation. Growth speed comes from the plant’s own adaptation timeline, which you can’t rush, only avoid delaying.
Should new plants go straight into my main display tank?
After quarantine/dipping, yes — there’s no benefit to a separate “growing-in” tank for most plants. They acclimate to your water fastest in the tank they’ll live in. The exception is very delicate species going into a tank with boisterous fish; give those a few weeks in a calm corner or breeder box first.
The Patience Rule
The single most important acclimation skill is restraint: plant it right, set gentle conditions, remove decay, and then leave it alone for a month. The hobbyists with the best plant growth aren’t doing something clever in week one — they’re simply not interfering in weeks two through four while the plants do what they’ve evolved to do. Melt looks like failure and feels like failure, but in most cases it’s the visible part of a plant successfully becoming yours.